In July this year, Microsoft released a beta of WebMatrix, a suite of tools intended to make web development accessible to people who don’t necessarily have much experience or technical skill. To further increase the incentive for beginners to get creative and functional, Microsoft has made WebMatrix Beta 2 available as a free download.As well as being a powerful website editor that’s easy to use and lightweight in the sense of not being overloaded with rarely used features, WebMatrix also integrates with a gallery of web apps to add some pretty impressive functionality to your website.The Windows Web App Gallery includes Blogs, CMS, Forums, Galleries, Tools, and Wikis, but today I want to focus on eCommerce apps, as this topic has been coming up a lot. Actually, so have all the other categories, but they can wait for another day. Today, I’m going to follow the money trail.And it’s true, electronic commerce is an area of ongoing, increasing interest among website owners, designers, and developers. Why not use emerging technology to cut out the middleman and sell direct through your own website?As Figure 1, “The WebMatrix Web App Gallery” shows, the Windows Web App Gallery has three options listed under eCommerce: nopCommerce, mojoPortal, and Kartris.
Figure 1. The WebMatrix Web App Gallery
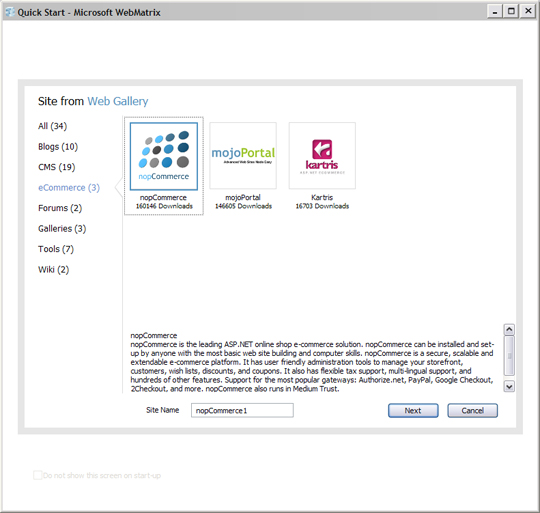 Today, I’m going to see what nopCommerce can do for me. The description provided seems to cover most of the points I’m looking for.Incidentally, all three of these apps are written in ASP.NET, and at least part of the point of the WebMatrix approach is to encourage more people to be comfortable with ASP.NET. It’s interesting that two of these apps — and many of the others — are open source, and several programming languages are represented.Nevertheless, if you want your nopCommerce store to go live, you’ll have to put it on a Windows server.
Installation
Before I get that far, though, I’m going to set things up on my local computer. First, I need to download nopCommerce. WebMatrix makes this easy, acting as a dependency manager, download manager, and installer. Note that you don’t have to use WebMatrix for this: you can also use Microsoft Web Platform Installer or download direct from the nopCommerce website. I’m exploring WebMatrix’s integrated approach, so I’ll select nopCommerce, enter a Site Name and click Next.You’ll see the End User License Agreement, a link to specific EULA terms and conditions for each component to be downloaded, and the total download file size. If you don’t have a version of SQL Server installed, you’ll find one included in the download list for nopCommerce. If you’re happy with the EULA, click I Accept.WebMatrix will then install nopCommerce for you, as shown in Figure 2, “WebMatrix installs nopCommerce”.
Figure 2. WebMatrix installs nopCommerce
 Click Finish, and WebMatrix will then lay out the screen in Figure 3, “The WebMatrix site administration screen”, which summarizes some site administration options.
Figure 3. The WebMatrix site administration screen
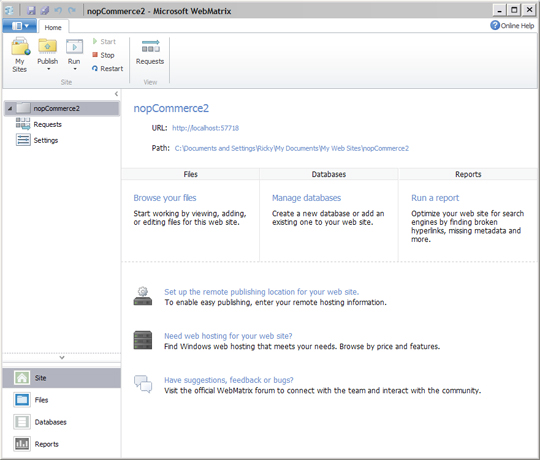 There’s plenty here to look at later, but right now we want to finish the nopCommerce installation.Right under the Site Name, you’ll see the URL for the local version of your website. Click on that URL.This will launch your default browser (or a new tab or window if you already have the browser open) and start the nopCommerce installation wizard illustrated in Figure 4, “nopCommerce Installation Screen 1”.
Figure 4. nopCommerce Installation Screen 1
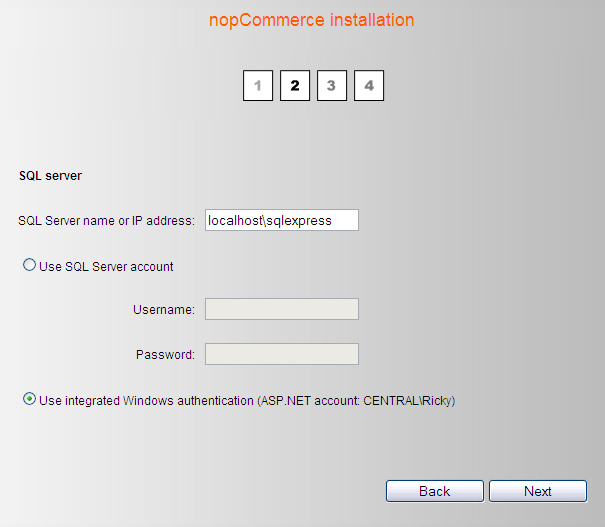
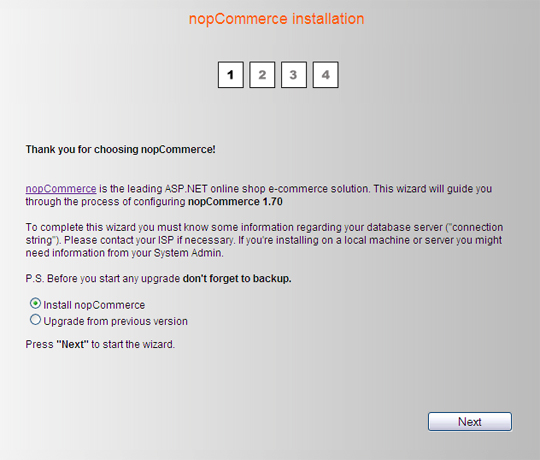 Click Next.On the following screen you can enter your server details, as shown in Figure 5, “nopCommerce Installation Screen 2”. We’re going to be working on a local copy of the site, so we’ll enter
 localhost/sqlexpress as the SQL Server name.The people behind nopCommerce make a point of recommending Windows Authentication for logging into the server. This allows the status of being logged into a Windows account to act as authorization for accessing the server.
Figure 5. nopCommerce Installation Screen 2
 Click Next.The third page of the nopCommerce installation process, shown in Figure 6, “nopCommerce Installation Screen 3”, lets you enter database information.
Figure 6. nopCommerce Installation Screen 3
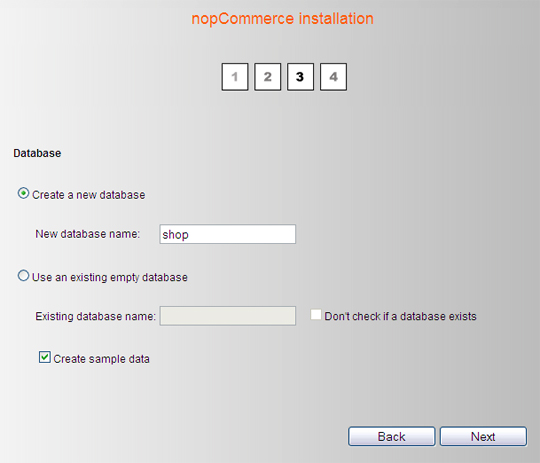 Create a database name, leave the Create sample data box checked and click Next.The last step of the installation wizard, shown in Figure 7, “nopCommerce Installation Screen 3”, lets you change the default admin email address and password to something of your own choosing, or you can accept the default options of admin@yourstore.com and admin for now.
Figure 7. nopCommerce Installation Screen 3
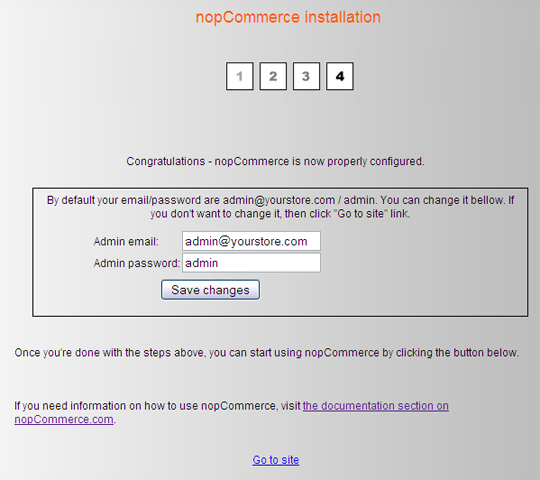 Click on the Go to Site link at the bottom of the screen.Now, you see that? That right there? That is the ecommerce website you just built. Figure 8, “The default nopCommerce front end” shows what I mean.
Figure 8. The default nopCommerce front end
 It’s a bit of a masterstroke to have this result come up at this point in the process.One moment, you’re trying to remember if you have SQL Server installed, and the next you’re looking at a completely configured, pre-populated, functioning, and slick-looking online sales machine.You can see why Microsoft found this app suitable to include in its Web Gallery. It fits the brief perfectly: empowering prospective web developers by letting them adapt an existing framework to their own needs, rather than having to build one from scratch. And it doesn’t require great technical knowledge, although the more you learn about it, the more you can do with it.The presentation of the draft site in a working format allows you to really explore the functionality you can make available to site visitors. As you explore the structure of the site you’ve just created, you’ll notice the many ways nopCommerce provides us to tap into the commercial power of social networking. Sharing through Facebook, Twitter, and the like; wishlists; comparison lists; email a friend; customer ratings; and user reviews all provide ways for site visitors to help promote your products — and they’re all built in.Now, nicely put together as this is, you will undoubtedly want to customize the visual design to your own tastes. At the start of this article, I mentioned that WebMatrix is a very useful website editor and this is where it comes into play as an ideal tool to edit the HTML and CSS of your site’s front end before you publish. That’s a whole article in itself, so for now we’ll focus on management of the back end.Having decided to stay with the default visual design for now, we’re going to find out how to set up nopCommerce.
Administration
To get to the back end, log in to the site as a user would, through the Log In link at the top of the home page. If you set a new admin email and password back in Step 4 of the installation, use that, otherwise use the default login.Once you’re logged in, you’ll see that a link called Administration has been added to the top toolbar. This link only appears to users signed in with administrator rights.Click the Administration link to display the nopCommerce backend dashboard depicted in Figure 9, “The nopCommerce Dashboard”.
Figure 9. The nopCommerce Dashboard
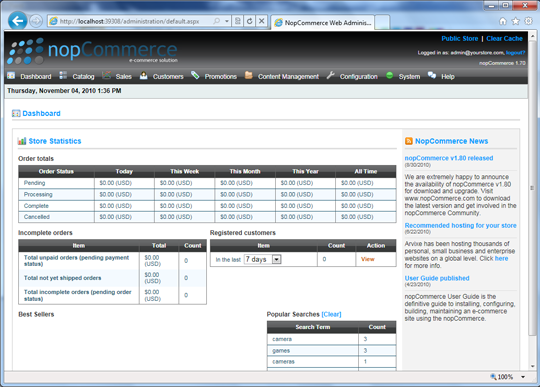 When there’s money at stake, site administration needs to be clear and powerful, enabling a site owner to maintain their online presence, and manage orders and sales. In this regard, nopCommerce is outstanding. Functionality is enhanced by a simple, clear layout and logical structure.Let’s take a quick walk through the toolbar at the top of the display.CatalogueThis set of fields defines your stock: categories and sub-categories, the products, the attributes those products might have such as color and size, and the product manufacturers’ details.SalesThese fields cover how transaction details are handled, including managing orders, recurring payments, gift cards, and sales reports.CustomersYou can manage your new and returning customers here, assign roles to them that help you market to them, and analyze statistics about their online behavior.PromotionsThis area lets you set up arrangements for affiliates to sell your products, product sales and marketing campaigns, discount offers, price lists, and promotion providers.Content ManagementThese fields represent ways in which you can use additional content to increase the value of the site to your prospective customers. Options available for you to configure and customize are voting polls, news item listings, a complementary blog, topics to be used in specialist pages such as FAQs, templates for product, category and manufacturer, customized messages to the site visitor, and a means to set the language options for the site.ConfigurationHere’s where you’ll find the settings that fine-tune the customer’s experience and your ability to meet their needs, including global settings, blacklists, payment methods, tax settings, shipping options, user-focused localized settings such as countries to which your products can be sold, any restrictions or conditions relating to states and provinces, languages into which your customers can translate key content, currencies you will accept, and options for assigning stock to specific physical warehouses or distributors.SystemThe System menu includes options for managing site logs, message queues and general site maintenance tasks.HelpThere are two main sources of site management support: user forums maintained by nopCommerce, which are designed to allow experienced users to act as troubleshooters for those users who have queries; and a User Guide, which is available as a paid download from the nopCommerce website.So that’s the overview. Let’s get our hands dirty.
Add a Product
Go back to the Catalog menu and hover the cursor over Products to reveal the flyout menu. Click on Manage Products, as shown in Figure 10, “Manage Products”.
Figure 10. Manage Products
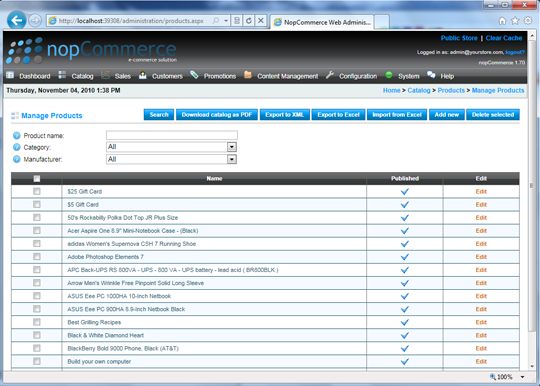 The main display is a list of all your products ordered alphabetically by title. There are three ways to filter this display: by product name, category and manufacturer, or by using a Search button to apply selected filters.There are also options to download the catalog as a PDF, export it to an
 .xml file, export it to an Excel spreadsheet, to import product data from an Excel spreadsheet, and to delete selected products.These are all powerful tools, allowing you to maintain stock control with a minimum of fuss, but the option we want right now is Add new.
Figure 11. Add a New Product
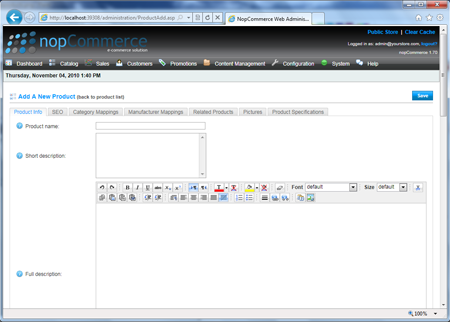 The three tabs across the top of the Add A New Product window shown in Figure 11, “Add a New Product” represent the categories of information relating to your products. Not all of them have to be completed, but some are mandatory for the ecommerce set-up to work.
Payment Integration
Payment Integration is a real strength of nopCommerce. Among the 36 payment provider options are PayPal, Google Checkout, Worldpay, and 2Checkout. It’s a smart move to tie up deals with so many payment providers, putting nopCommerce a step ahead of many of its competitors.Let’s set our site up to accept payments made via PayPal.PayPal provides an option to advise you when a payment is made through your website, so let’s do that. You have to activate PDT and Auto Return in your PayPal account profile, and acquire a PDT identity token, which you will enter into the appropriate field in your nopCommerce back end. This token is used in all PDT communication you send to PayPal. Follow these steps to configure your account for PDT:
- Log in to your PayPal account, click on the Profile subtab and, in the Seller Preferences column, click on Website Payment Preferences.
- Under Auto Return for Website Payments, switch the radio button to On.
- In the Return URL field, enter the URL of the site that will receive the transaction ID posted by PayPal after a customer payment,
http://www.yourstore.com/PaypalPDTHandler.aspx. - Under Payment Data Transfer, switch the radio button to On, and click on the Save button.
- Now click on Website Payment Preferences again, and scroll down to Payment Data Transfer. You will see your Identity Token.
- Go back to your nopCommerce admin page and from the Configuration menu, select Payment and then Payment Methods. You’ll see the full list of possible payment methods and providers.
- Click on Edit for PayPal Standard.
- Switch to the Configuration tab, and scroll down to the foot of the page.
- All you need to do right now is enter a valid email address and copy your PayPal Identity Token into the PTI Identity Token field.
- Switch back to the System Info tab and check the box titled Active.
- Click the blue Save button, and you’re done.
Now if you go to the draft version of your site on localhost and click through as if purchasing a product until you get to the Select Payment Method page, you’ll see that PayPal Standard now appears as a payment option alongside the others.That list, of course, correlates to the payment methods marked as Active on the nopCommerce administration Payment Methods page. This is a very straightforward way to manage online payments.
Summary
It’s a measure of what a powerful little app nopCommerce is that, on the one hand it can so quickly construct a draft site and so painlessly add a payment method, while on the other hand it’s sophisticated enough to accept over 50 variables relating to the product and how it can be purchased.As we saw when we were adding our Product Record, the key to getting the most out of an app like nopCommerce is to do your homework. The more you — or your client, or employer — work out all those variables that might affect a prospective customer’s decision to buy your product, the more work your site can do to complete the sale.
This tutorial has been made possible by the support of Microsoft. In cooperation with Microsoft and independently written by SitePoint, we strive to work together to develop the content that’s most useful and relevant to you.
This kind of sophisticated web development is now available to just about everyone, since it requires little or no knowledge of any kind of code. Microsoft has done well to embrace the open source community as it populates its Web App Gallery.Powerful, smart and easy-to-use web apps like nopCommerce, supported by an active developer community and made available at no cost through tools like WebMatrix, will win a lot of friends.Care to test your knowledge of what’s in this article? Go on, take the quiz!
 Ricky Onsman
Ricky Onsman is a freelance web designer, developer, editor and writer. With a background in information and content services, he built his first website in 1994 for a disability information service and has been messing about on the Web ever since.


