Go: Building Web Applications with Beego

Key Takeaways
- Beego is a feature-rich web development toolkit for Go, providing a full ORM, caching, session support, internationalization, live monitoring and reloading, and deployment support. It builds on a number of existing Go packages, making it a powerful tool for developers.
- Beego comes with a command line tool called Bee, which can create new applications, run an application, test the application, and create routes. It also has in-built scaffolding support, aiding in the creation of new projects.
- Developers can extend the default controller in Beego by adding new methods or actions, initializing template variables, and specifying the template file name. This allows for the creation of custom routes and actions within the application.
- Beego allows for the restriction of access to an action to one or more specific methods, making it possible to limit access to certain routes or actions based on the type of request. This can be useful for controlling access to certain parts of the application.
Introduction
Are you a web application developer coming to Go from a dynamic language as PHP, Python or Ruby, and wondering how to develop web-based applications using it? Are you wondering how to develop in a manner analogous to your existing frameworks, where you can leverage your existing knowledge?
If so, then you’ve likely done some searching, whether on Google, StackOverflow or other sites, in search of a framework to help you out; and you may have seen that there are a number of options available, including Beego, Martini and Gorilla; in addition to the net/http package.
Of these four, the one that I’ve been experimenting quite a lot with is Beego. I’ve found that it’s quite feature rich, yet not overly complicated, so I’ve been able to get up to speed with it relatively quickly.
Beego is not your average web development toolkit. As well as providing a lot of functionality, it builds on a large number of existing Go packages, which allows it to provide:
- A full ORM
- Caching
- Session support
- Internationalization (i18n)
- Live monitoring and reloading
- Deployment support.
But whilst there are a number of similarities between Beego and the frameworks from the previously mentioned dynamic languages, there are enough differences between them to require some time to be invested before becoming truly productive and proficient.
Furthermore, whilst the Beego documentation is quite comprehensive, I feel that it suffers a bit by missing points here and there, so I’ve written this 2-part series to help overcome that and help you learn the basics of Beego.
In this series you’ll see just what an excellent framework it is and how much it takes care of for us as developers. Specifically, here in part 1 we’ll cover:
- Installing Beego and the command line tool Bee
- Creating a project
- Actions
- Views / Templates
- Routing
- Request Parameters
If you want to read through the completed code for this series, it’s available on Github. Feel free to browse it online or clone it and experiment with it. Let’s Go!
Before we get started, make sure that your GO environment is set up. If it’s not, or you’re not sure what I mean, check out Getting Started with Go or this post from Bill Kennedy, then come back and let’s continue.
1. Installing Beego
Ok, let’s start off by installing Beego. Like a number of frameworks and toolkits, Beego has in-built scaffolding support, via the command line tool bee. Bee can:
- Create new applications
- Run an application
- Test the application
- Create routes and more
Bee isn’t the only way to run Beego apps, but it’s the one I’ll be covering in this 2-part series. To install it, run go get github.com/beego/bee.
2. Creating The Core Project
Once installed, from your $GOPATH directory, run the following command, which will scaffold the application, called sitepointgoapp:
bee new sitepointgoapp
This displays output similar to the following:
[golang]
[INFO] Creating application…
/Users/matthewsetter/Documents/workspace/Golang/src/sitepointgoapp/
/Users/matthewsetter/Documents/workspace/Golang/src/sitepointgoapp/conf/
/Users/matthewsetter/Documents/workspace/Golang/src/sitepointgoapp/controllers/
/Users/matthewsetter/Documents/workspace/Golang/src/sitepointgoapp/models/
/Users/matthewsetter/Documents/workspace/Golang/src/sitepointgoapp/routers/
/Users/matthewsetter/Documents/workspace/Golang/src/sitepointgoapp/tests/
/Users/matthewsetter/Documents/workspace/Golang/src/sitepointgoapp/static/
/Users/matthewsetter/Documents/workspace/Golang/src/sitepointgoapp/static/js/
/Users/matthewsetter/Documents/workspace/Golang/src/sitepointgoapp/static/css/
/Users/matthewsetter/Documents/workspace/Golang/src/sitepointgoapp/static/img/
/Users/matthewsetter/Documents/workspace/Golang/src/sitepointgoapp/views/
/Users/matthewsetter/Documents/workspace/Golang/src/sitepointgoapp/conf/app.conf
/Users/matthewsetter/Documents/workspace/Golang/src/sitepointgoapp/controllers/default.go
/Users/matthewsetter/Documents/workspace/Golang/src/sitepointgoapp/views/index.tpl
/Users/matthewsetter/Documents/workspace/Golang/src/sitepointgoapp/routers/router.go
/Users/matthewsetter/Documents/workspace/Golang/src/sitepointgoapp/tests/default_test.go
/Users/matthewsetter/Documents/workspace/Golang/src/sitepointgoapp/main.go
14-05-14 06:02:59 [SUCC] New application successfully created!
[/golang]
You’ll now see the following directory structure has been created:
sitepointgoapp
    ├── conf
│   └── app.conf
├── controllers
│   └── default.go
├── main.go
├── models
├── routers
│   └── router.go
├── static
│   ├── css
│   ├── img
│   └── js
├── tests
│   └── default_test.go
└── views
    └── index.tpl
Looking at the files, we have:
- Our bootstrap file
main.go - The core configuration file
conf/app.conf - A default controller
controllers/default.go - A default set of tests in
tests/default_test.go - A default view template in
views/index.tpl
Right, the basic app is ready to go so let’s get it up and running. From the project directory, $GOPATH/src/sitepointgoapp/, run the following command:
bee run
This loads our new application. As a side benefit, bee also monitors the source files for modifications. If changes are detected, bee will reload the application automatically. After running the command above, you should see output similar to that below.
14-05-05 11:34:17 [INFO] Start building...

14-05-05 11:34:20 [SUCC] Build was successful

14-05-05 11:34:20 [INFO] Restarting sitepointgoapp ...

14-05-05 11:34:20 [INFO] ./sitepointgoapp is running...

2014/05/05 11:34:20 [I] Running on :8080
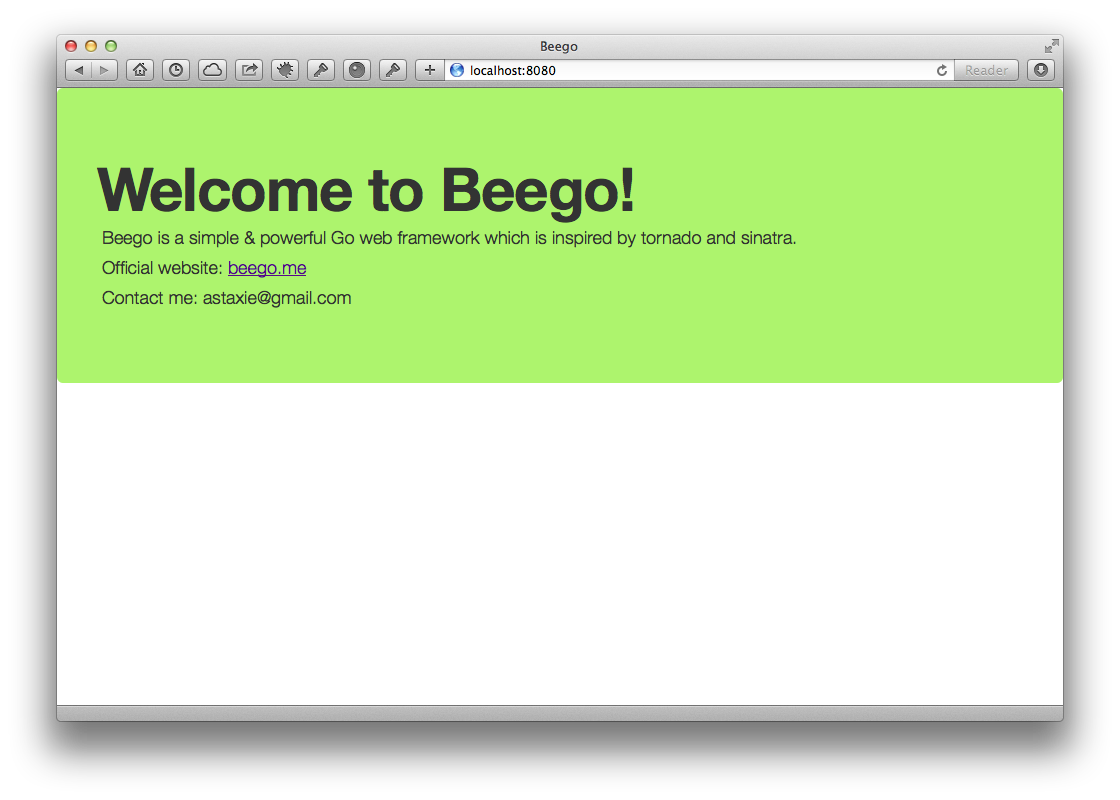
You can see that the application’s ready to run on port 8080. Loading up http://localhost:8080/ in the browser shows the following output:

It’s nothing too flashy, but works. So let’s get our hands dirty and extend the default controller, adding in a new action, along with some custom routes.
3. Adding a New Action
Opening up controllers/default.go, you’ll see a pretty bare bones controller. This is because the display logic is all contained in the view template. Let’s change that around a bit and see how to add view template variables and specify a template file. In default.go, add the following method:
func (main *MainController) HelloSitepoint() {

    main.Data["Website"] = "My Website"

    main.Data["Email"] = "your.email.address@example.com"

    main.Data["EmailName"] = "Your Name"

    main.TplNames = "default/hello-sitepoint.tpl"

}
Let’s step through what that means. What we’ve done is to add a new method (or action) Get onto the current controller, by specifying main *MainController as the receiver of the method.
We’ve then initialised three template variables, Website, Email and EmailName, by storing them in a field in the Controller, called Data, which is a map representing template variables and values.
Following that, I’ve specified the template file name, by setting this.TplNames to default/hello-sitepoint.tpl. In case you’re wondering, by default Beego will look in the views directory for the file specified.
So when this route is executed, Beego will fetch views/default/hello-sitepoint.tpl and render it.
Views
Right, let’s create the accompanying view. Under views, create a new directory default and in there, create a new file hello-sitepoint.tpl, inserting the code below:
<header class="hero-unit">
    <div class="container">
        <div class="row">
            <div class="hero-text">
                <h1>Welcome to the Sitepoint / Beego App!</h1>
                <h2>This is My Test Version</h2>
                <p>{{.Website}} {{.Email}} {{.EmailName}}</p>
            </div>
        </div>
    </div>
</header>
If this is your first time working with templates in Go, be aware that Beego’s template layer extends Go’s html/template package. For some good examples of using variables in templates, check out this example from the text/template package.
Like most Go packages, html/template is quite extensive, so I’ll stick just to the relevant features. All template variables are available in a global context, able to be accessed using the dot operator, embedded using the {{}} syntax.
So to access the three template variables we set in the controller action previously, we refer to them as {{.Website}}, {{.Email}}, and {{.EmailName}}.
Routing
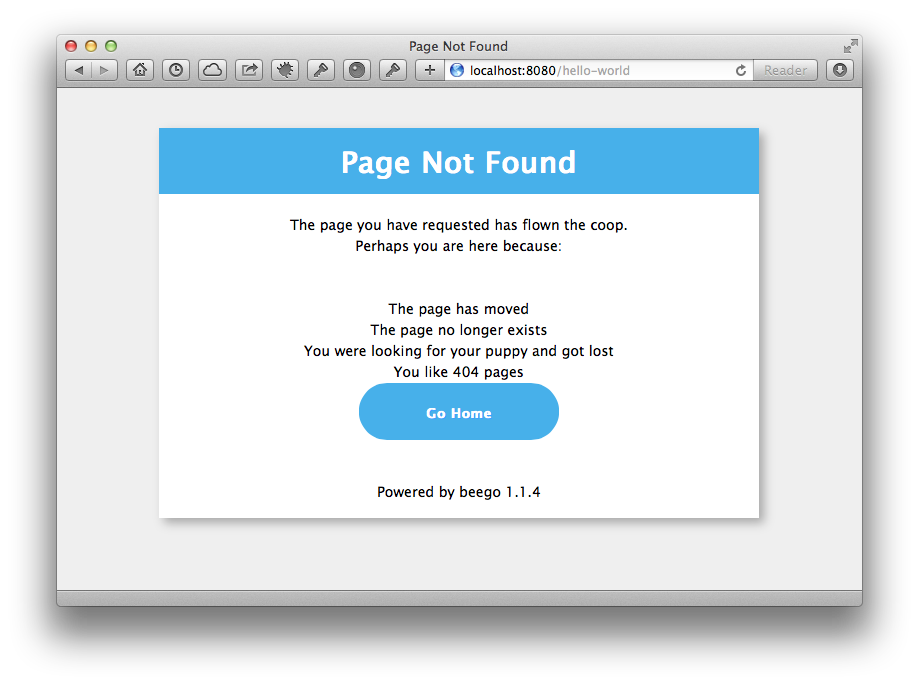
Ok, we have a new action and an accompanying view. But we can’t yet execute the route. If we tried to access anything other than the default action, we’d see the default 404 error page, as in the screenshot below.

So, we need to add a route to it. In routers/router.go update the init method to look as follows:
func init() {

    beego.Router("/", &controllers.MainController{})

    beego.Router("/hello-world", &controllers.MainController{}, "get:HelloSitepoint")

}
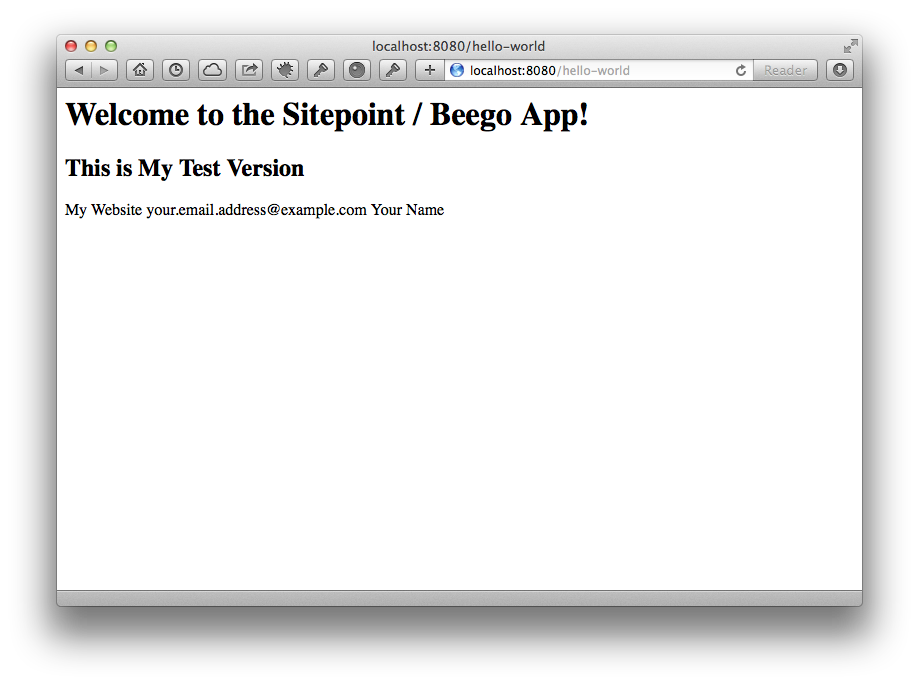
Focusing on the last line, what this does is call the HelloSitepoint action on the MainController when we attempt to dispatch to /hello-world. Save that and wait a short moment for the recompile to complete, then open http://localhost:8080/hello-world in your browser. All being well, it will look like the page below:

Request Parameters
Now what we’ve done so far is fine for simple actions. But in a real world application, we’ll interact with the request, inspecting the query string or POST data and then reacting accordingly. So how do we access that information with Beego?
Let’s start by retrieving data from the query string. Another of the pre-defined values in Beego is the Context Module which contains the Input value, which in turn encapsulates a request.
It provides us with access to such things as:
- method
- protocol
- user agent
- query (Get and Post data)
- session information and more
Let’s make this a bit more interesting by updating the route to require an id value to be set, which we can then inspect and print out in the action. In router.go, change the /get route to the following:
beego.Router("/hello-world/:id([0-9]+)", &controllers.MainController{}, "get:HelloSitepoint")Now, we need to supply a GET value which can only be a number, because of the regex we’ve supplied to the route, ([0-9]+). Save that and try and load /hello-world again without id. Do you see an error?
Now dispatch to /hello-world/213 and it should complete successfully. Now that it does, let’s get a hold of the information. In the Get method, add in the following, above this.TplNames:
this.Data["Id"] = this.Ctx.Input.Param(":id")
Then in hello-world.tpl add the following next to the existing template variables: {{.Id}}. Reloading the page will now display 213 next to Email Name.
Restricting Actions By Method Type
Ok, we’re just about done for today, but I want to cover one last thing before we go. Often times, you want to restrict access to an action to one or more specific methods. For example, you may only want to access a delete route, with a POST request; you may only want to display search results with a GET request.
Beego makes it easy to access an action via all types, or restrict it to one or a few. In router.go again, change the /hello-world route further to the following:
beego.Router("/hello-world/:id([0-9]+)", &controllers.MainController{}, "get,post:Get")
What this has done is allow dispatches to be made the /hello-world/ as either GET or POST requests. Try curl’ing it either a PUT or DELETE, using the following examples, and see what you get.
# PUT request

curl -X PUT http://localhost:8080/hello-world/213
# DELETE request

curl -X DELETE http://localhost:8080/hello-world/213
Wrapping Up
I hope you’ve enjoyed this introduction to the Beego web application framework. In part 2, we’ll be integrating a database (SQLite3), looking a Models, Forms and Validation.
At the end of part 2, we’ll have a nicely rounded out application, covering the majority of features you’d expect to use day to day.
Whilst Beego and Go are different from the dynamic languages you may be used to using, with a little bit of time and effort, it’s pretty simple to harness the power that they provide.
Don’t forget, the code for this series is available on Github. Feel free to browse it on online or clone it and experiment with it.
What did you think? Is this enough to get you using Go, if you aren’t already? Share your thoughts in the comments.
Links
- http://www.goinggo.net/2013/06/installing-go-gocode-gdb-and-liteide.html
- https://groups.google.com/forum/#!topic/golang-nuts/hbNCHMIA05g
- http://stackoverflow.com/questions/10105935/how-to-convert-a-int-value-to-string-in-go
- http://beego.me/
- https://github.com/astaxie/beego
- http://golang.org/pkg/text/template/
- http://golang.org/doc/effective_go.html#if
- http://blog.golang.org/go-maps-in-action
Frequently Asked Questions (FAQs) about Building Web Applications with Beego
What are the key features of Beego that make it suitable for building web applications?
Beego is a full-fledged, open-source, high-performance web framework for the Go programming language. It is designed to simplify the process of building scalable, high-performance web applications. Some of its key features include a robust ORM for database operations, built-in tools for session handling and caching, and support for middleware and plug-ins. Beego also comes with a built-in web server, which eliminates the need for third-party servers. Its MVC architecture makes it easy to separate logic, data, and design, which can greatly simplify the development process.
How does Beego compare to other web frameworks in terms of performance and scalability?
Beego is known for its high performance and scalability. It is built on Go, a language known for its efficiency and speed. Beego can handle a large number of requests per second, making it suitable for high-traffic applications. It also supports concurrent processing, which allows it to handle multiple requests simultaneously without slowing down. Compared to other web frameworks, Beego offers superior performance and scalability, making it a popular choice for developers building high-performance web applications.
Can I use Beego for building RESTful APIs?
Yes, Beego is an excellent choice for building RESTful APIs. It has built-in support for routing, request handling, and response formatting, which are essential for building APIs. Beego also supports automatic generation of API documentation, which can save developers a lot of time and effort. Furthermore, Beego’s ORM makes it easy to interact with databases, making it a great choice for building data-driven APIs.
How easy is it to learn and use Beego?
Beego is designed to be easy to learn and use. It follows the MVC architecture, which is a common pattern in web development, making it familiar to many developers. Beego’s documentation is comprehensive and well-organized, making it easy for developers to get started. Furthermore, Beego has a supportive and active community, which can be a great resource for learning and troubleshooting.
What kind of applications can I build with Beego?
Beego is a versatile web framework that can be used to build a wide range of applications. It is suitable for building everything from simple static websites to complex web applications. Beego is particularly well-suited for building high-performance, scalable applications, such as social networking sites, e-commerce platforms, and real-time applications. It is also a great choice for building RESTful APIs, thanks to its robust routing and request handling features.
Does Beego support database operations?
Yes, Beego comes with a robust ORM (Object-Relational Mapping) that simplifies database operations. The ORM supports a wide range of databases, including MySQL, PostgreSQL, SQLite, and more. It provides a simple and intuitive API for performing common database operations, such as querying, inserting, updating, and deleting data.
How does Beego handle session management and caching?
Beego has built-in support for session management and caching. It provides a simple API for managing sessions, allowing developers to easily store and retrieve session data. Beego’s caching system supports several caching mechanisms, including in-memory caching, file caching, and distributed caching. This makes it easy to optimize the performance of your application by reducing database load and improving response times.
Does Beego support middleware and plugins?
Yes, Beego supports both middleware and plugins. Middleware in Beego can be used to perform operations on requests and responses, such as logging, authentication, and more. Beego also has a plugin system that allows developers to extend the functionality of the framework. There are many third-party plugins available for Beego, and developers can also create their own.
Can I use Beego with other Go libraries and packages?
Yes, Beego is designed to work seamlessly with other Go libraries and packages. You can easily import and use any Go package in your Beego application. This allows you to leverage the vast ecosystem of Go libraries and packages to add functionality to your application.
How can I get started with Beego?
The best way to get started with Beego is to read the official documentation, which provides a comprehensive guide to the framework. You can also check out tutorials and examples online to get a feel for how Beego works. Once you have a basic understanding of the framework, you can start building your own applications with Beego.
Matthew Setter is a software developer, specialising in reliable, tested, and secure PHP code. He’s also the author of Mezzio Essentials (https://mezzioessentials.com) a comprehensive introduction to developing applications with PHP's Mezzio Framework.
Published in
�·Cloud·Community·Open Source·Performance & Scaling·PHP·Programming·Web·December 28, 2013


