
Key Takeaways
- ImpressPages is a PHP based CMS with a unique code structure, customizability, an admin panel built on Bootstrap and an inline drag and drop editor.
- ImpressPages allows for easy theme installation and customization, with the ability to preview themes similar to WordPress.
- ImpressPages supports multilingual options by default, without the need for plugins or PHP extensions, making it easier to add more languages to your website.
- ImpressPages offers a drag and drop interface for working with content and widgets, inline content editing, and easy SEO configuration, making it user-friendly even for new users.
Content management systems (CMSs) are among the most used web tools nowadays. Users range from designers and developers, to bloggers and project managers. However, even with a wide range of products on the market, users often neglect to try out new systems and experience new possibilities.
To broaden my horizons, I decided to explore the market and see what other CMSs have to offer. This time I am going to look into ImpressPages, a PHP based CMS built on an MVC engine.
What makes ImpressPages differ from other CMSs is code structure, customizability, the admin panel built on Bootstrap and an inline drag and drop editor. In this step-by-step tutorial, I am going to cover the very first steps of launching a website on ImpressPages.
Downloading and Installing ImpressPages
Download ImpressPages first. It’s important to check if your system meets all the requirements for running the CMS:
- Apache server with “mod_rewrite” (adapt to Nginx as needed)
- PHP 5.3.3 or newer;
- PHP GD library;
- PHP mbstring library;
- PHP curl library;
- PHP PDO library;
- MySQL 5 and higher;
- 30+ MB free disk space;
- ini_set function enabled.
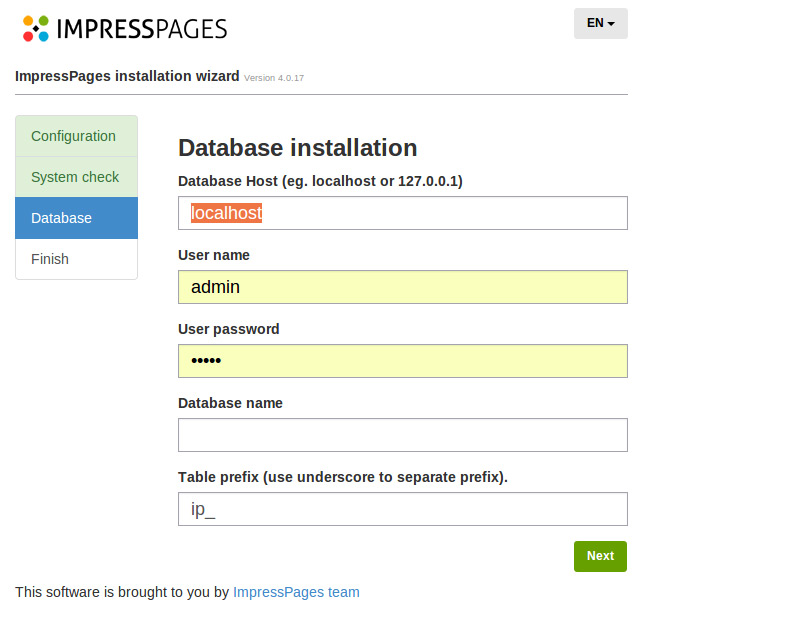
After you create a database in MySQL which ImpressPages will use, unzip the contents of its archive into your web server’s root, or wherever you mean to serve it from, and run it (either via localhost, or through the virtual host you’ve set up, depending on your configuration).
Note: You can also install it into a Vagrant virtual machine with this quick tip.
The installation process has been recently updated and now takes only two steps instead of six.
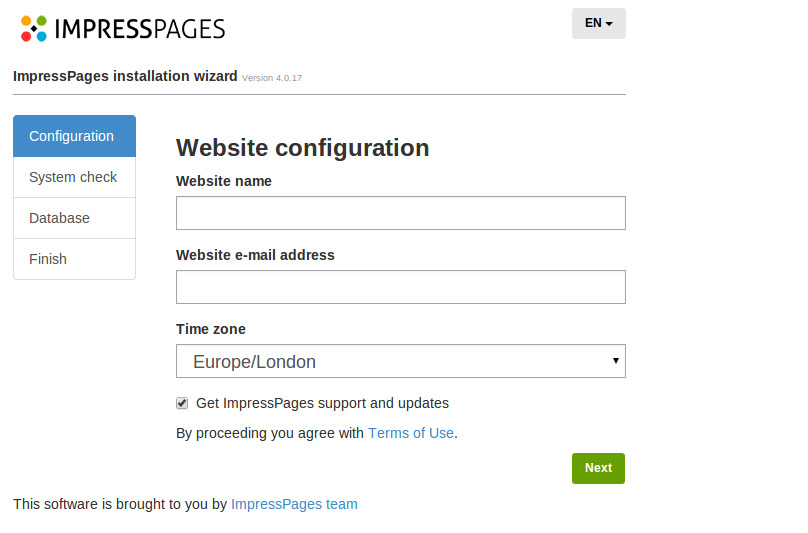
After configuring your site information (website name, email and time zone), you will be automatically transferred to database installation. If your system doesn’t meet all the requirements, an error will be shown with information on what needs to be fixed.
Once the installation is complete, you will be transferred straight to your new website. You’ll be be able to change the administrator’s credentials there.
Short UI Overview
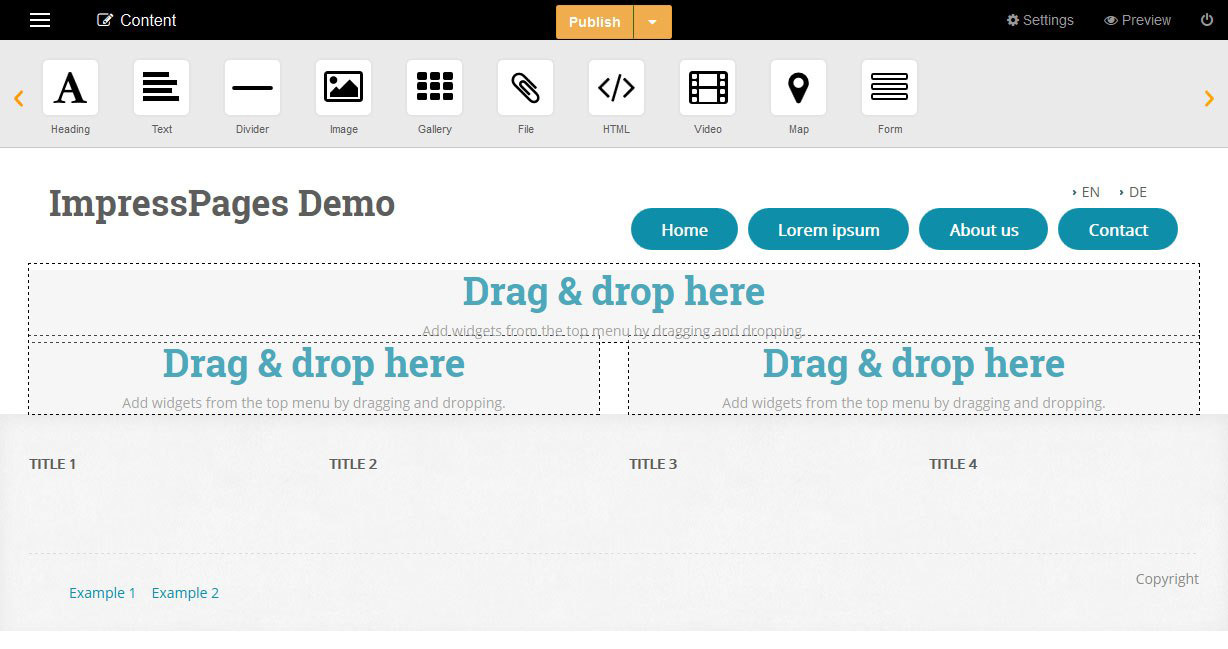
After logging in, you are instantly greeted by the Content page. This is a somewhat unusual experience as most other systems take you through the “backdoor” first configuration, etc. ImpressPages is based on inline editing and it shows straight away. The UI here is very minimalistic and clear, the whole page is divided into three main sections: preheader, widget bar and content area.
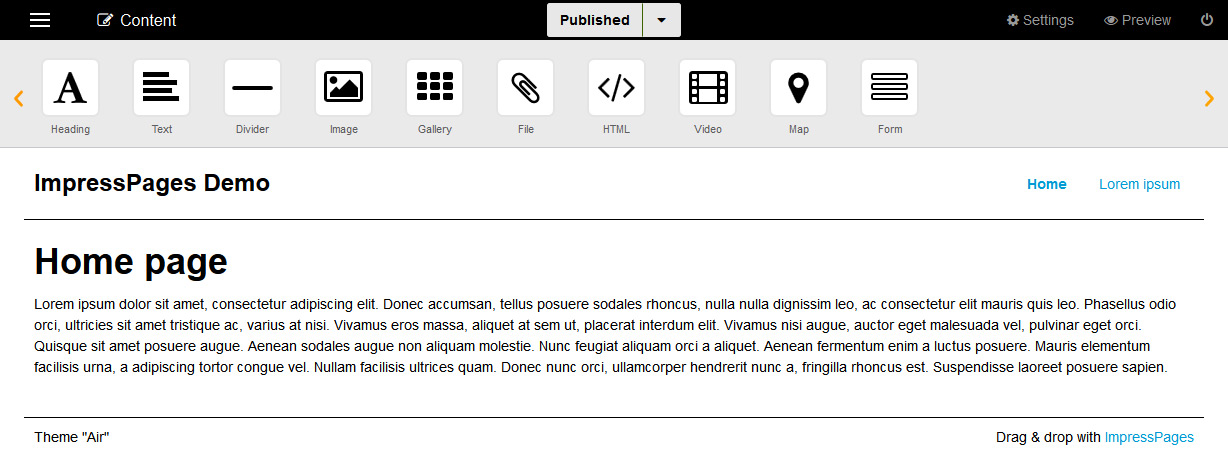
Going from left to right, in the preheader area, you see main navigation marked with the hamburger icon. Next to it there’s a navigation indicator. In the center of the preheader area there is a status indicator and on the right there are “Settings”, “Preview” and “Logout” buttons. The section beneath the preheader is the widget bar with all the drag and drop tools for page editing. Last and biggest is the page content area where the content is displayed.
Installing a Theme
Let’s get started with the website design. Hover over the hamburger icon and the main navigation will show up. If you select Design, you will see which theme is currently selected (by default it is the “Air” theme). You can select the theme of your choice by going to the ImpressPages Theme Marketplace.
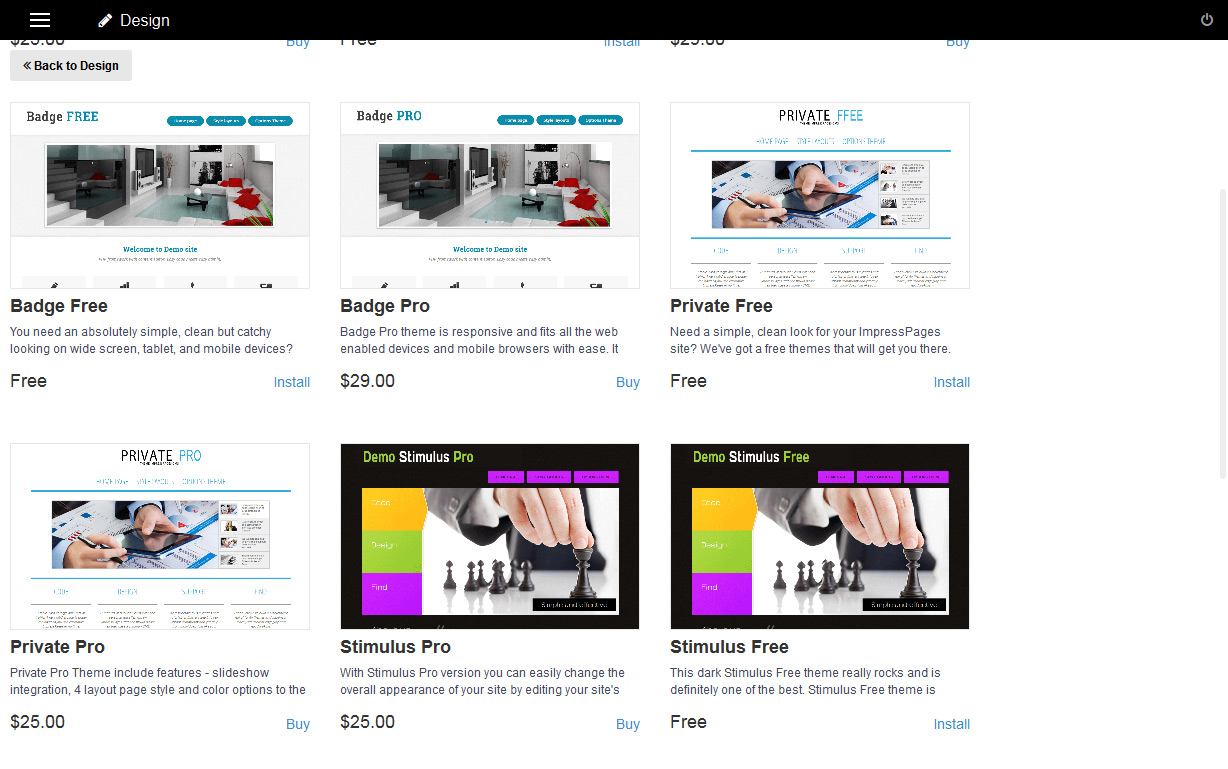
I chose the “Badge Free” theme after previewing it in action. When you click “Install” to add it to your Local themes, you will be referred to the Design page again. To activate the chosen theme, click on the “Install” button which is going to appear when you hover over the theme image on the right side of the page.
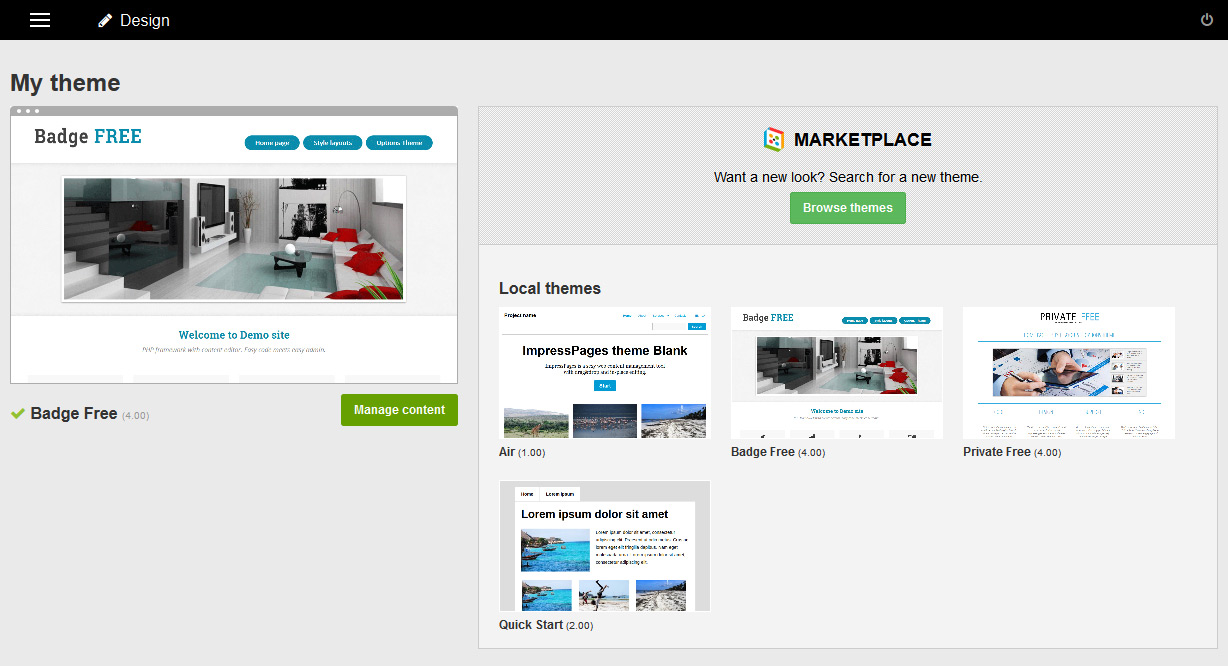
That’s it, the installed and activated theme will be shown on the left side of the page. Installing a theme with ImpressPages is pretty simple. The theme preview is similar to WordPress so anyone who’s ever used WP will find their way around.
Working With Menus
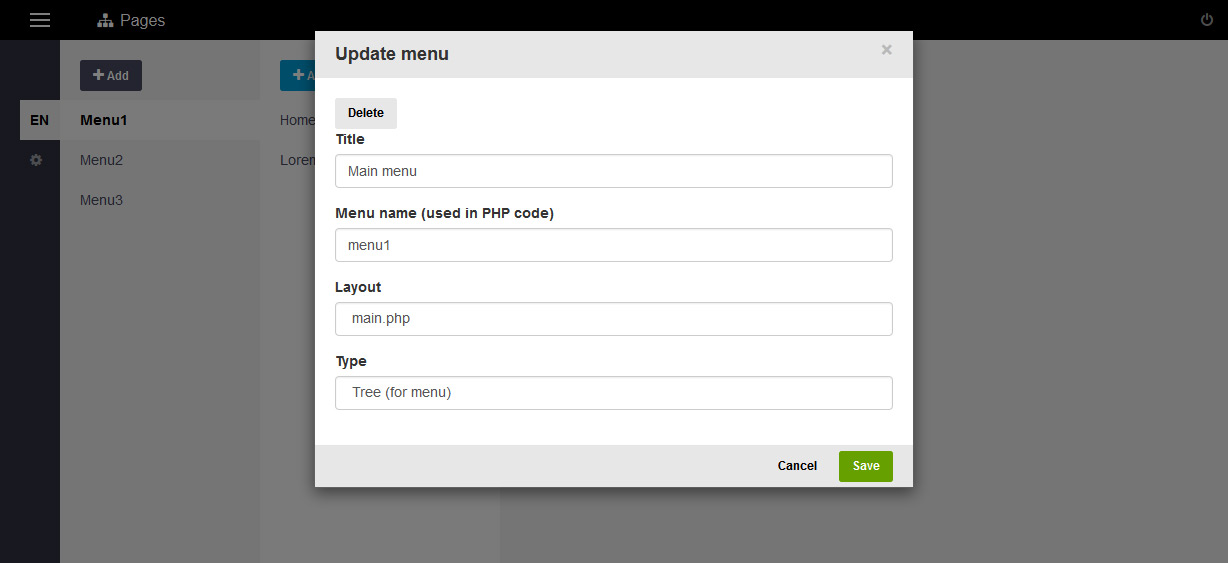
With a theme installed, it’s time to start editing. I started by adding some pages to my new website. In the Pages section you can see which pages and menus are already present. To edit the first menu, hover over it and click on the gear icon. You can set the title, edit the menu name, type of layout and menu type.
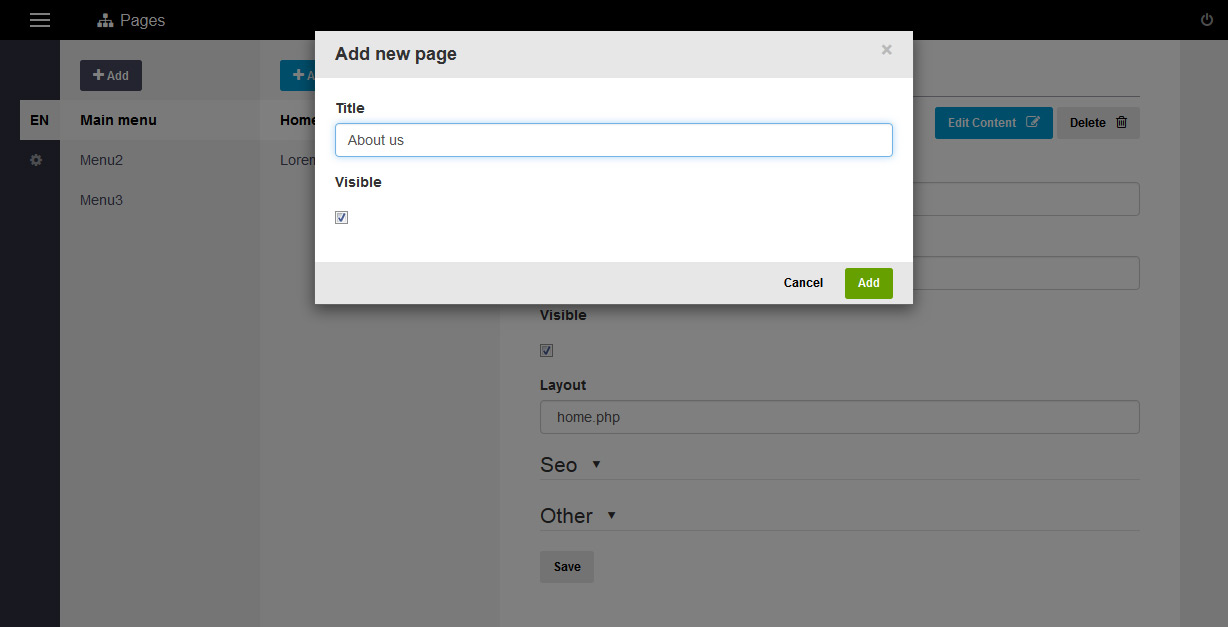
Click on “Menu1”, on the right and you will see menu items connected with it. Click “Home” and the page properties will appear (title, URL path, visibility control and such). Plus, SEO related options are conveniently here. If you want to add a new page, simply select the “Add” button. I did it with the following two pages About us and Contact.
Making Changes In the Layout
Let’s see how we can create a custom page template. Theme files are stored in the theme folder of the ImpressPages installation. In my case there’s three folders: the default ”Air” theme, the theme that I chose to install (BadgeFree) and QuickStart which allows us to create a theme from scratch.
I opened the “BadgeFree” theme folder. There are four folders and the same number of .php files. The assets directory stores images, css, less css files and javascript files, Images directory stores images for the slider and some icons used by this theme.
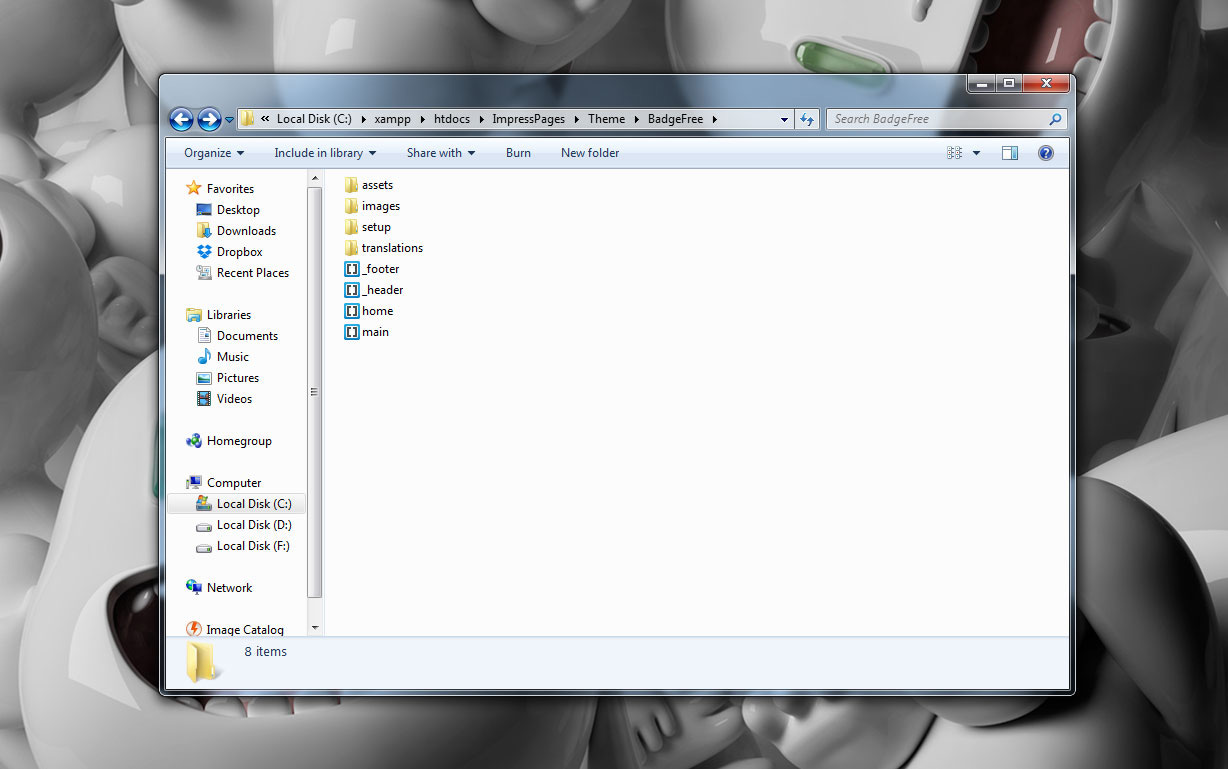
The setup directory holds setup files for setting and previewing theme options in the design tab inside the administration interface; Translations contains multilingual translations of theme interface strings. As for .php files, there are header and footer files that are prefixed with underscore because they are not full layouts, only sections of a page. Plus, two layout files are here – “ home.php” and “main.php”.
To start creating a custom layout, I opened my text editor, created one .php file and named it “layout”. I inserted the code which you can see in the picture below.
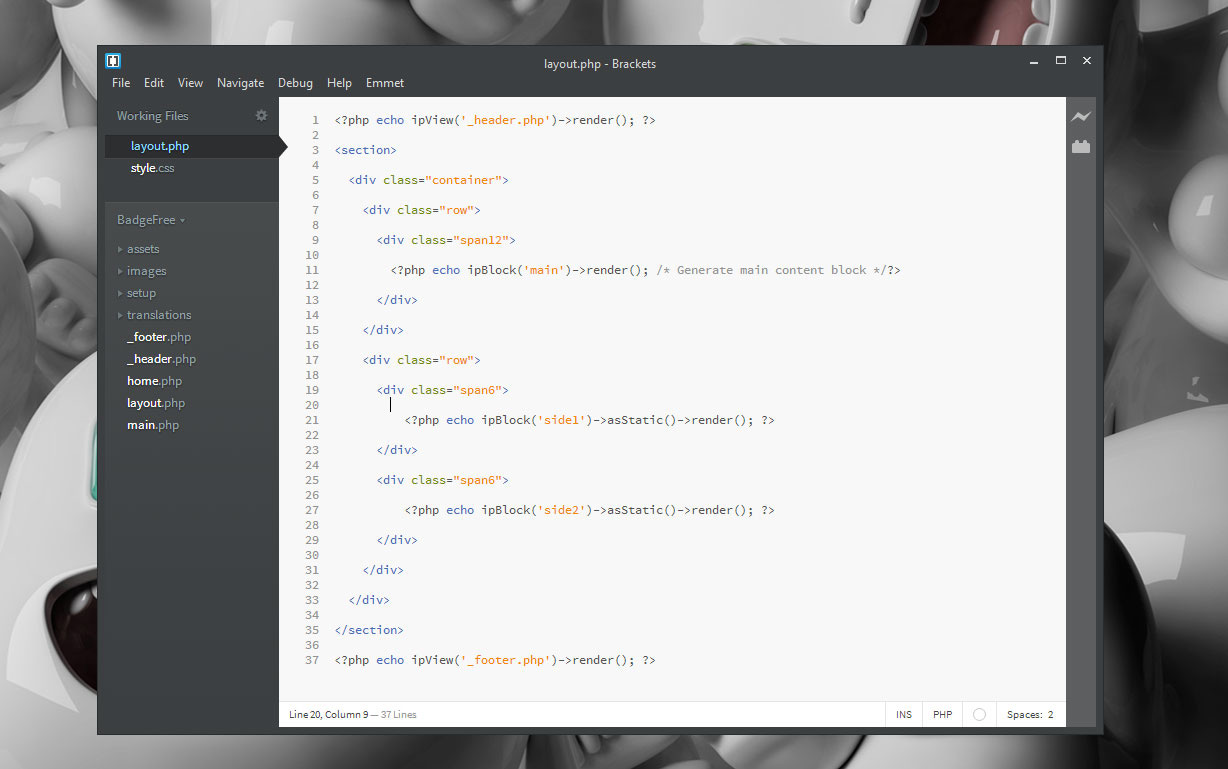
With this code I inserted header and footer on lines 1 and 37, on line 11 the main content block and on lines 21 and 27 I created two more blocks (sidebars) where I can add content using the drag and drop editor.
To start using this template, you need to go to the admin panel, Pages section, from Menu 1 select Contact page and in the Layout combo box choose layout.php. Click “Save” and select the “Edit content” button to see how the template looks.

Adding Multilingual Option
While you are still in the pages section, you can add a multilingual option for your website.
This is supported by default in ImpressPages which is quite handy – it means that adding more languages to your website doesn’t require the installation of plugins and/or PHP extensions, which is the case when you deal with other CMSs.
Adding another language can be done in two ways: clicking on the gear icon beneath the language indicator on the left side of the screen; or choosing language from main menu in the upper left corner of the screen.
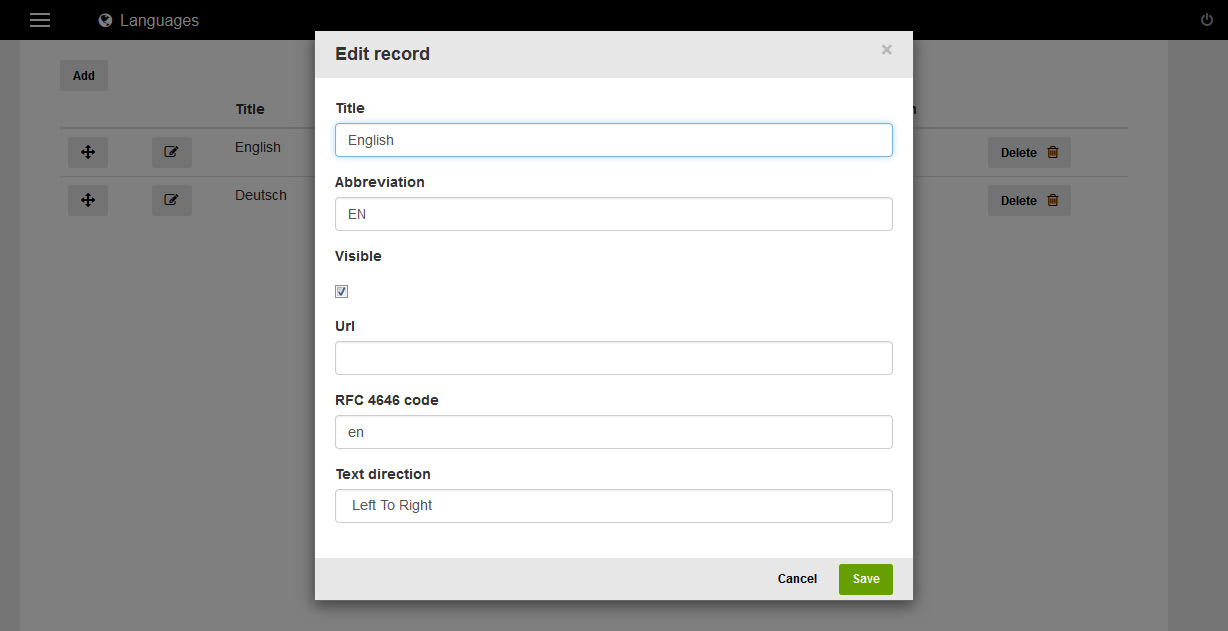
Click the “Add” button in the upper left corner of the screen and when the “Add language” dialog opens, select the language of your choice (currently, ImpressPages has 17 languages and supports contributed translations on Transifex ).

The language menu will be automatically added to the website. In my case, with this template installed, it’s displayed in the upper right corner of my website. To change language order, just drag them up and down using the cross-arrow icon. You can also edit the language records: title, abbreviation, visibillity, URL, etc.
Conclusion
To sum up, working with ImpressPages is seamless and quite fun. The whole system is very simple to understand even for a new user. I’ve created this improvised website in under an hour. Within this time, I even coded a tiny layout template.
The drag and drop interface is very comfortable for working with content and widgets. With inline content editing everyone can add and edit content in a minute. Features like localization and easy SEO configuration are also a big plus that allow users to have better control over their websites.
Did you try ImpressPages? What did you like/dislike about it? Let us know!
Frequently Asked Questions (FAQs) about Getting Started with ImpressPages
What is ImpressPages and why should I use it?
ImpressPages is a user-friendly PHP framework with a built-in content editor. It allows developers to create responsive websites with ease. The main advantage of using ImpressPages is its simplicity and flexibility. It provides a drag-and-drop interface, making it easy for non-technical users to create and manage their websites. Moreover, it comes with a variety of plugins and themes, allowing you to customize your website to your liking.
How do I install ImpressPages?
Installing ImpressPages is a straightforward process. You need to download the latest version of ImpressPages from the official website, extract the files, and upload them to your web server. After that, you can follow the installation wizard to complete the setup. Make sure your server meets the minimum requirements for ImpressPages.
How can I create a new page in ImpressPages?
Creating a new page in ImpressPages is simple. Go to the admin panel, click on ‘Pages’, then ‘Add New’. You can then enter the title of your page and start adding content using the drag-and-drop interface. You can also choose a layout for your page from the available options.
How do I add plugins to my ImpressPages site?
ImpressPages has a marketplace where you can find a variety of plugins. To add a plugin, go to the admin panel, click on ‘Plugins’, then ‘Add New’. You can then search for the plugin you want and click on ‘Install’. Once installed, you can activate the plugin and configure its settings.
Can I customize the design of my ImpressPages site?
Yes, ImpressPages allows you to customize the design of your site. You can choose from a variety of themes available in the marketplace, or you can create your own theme. ImpressPages uses a simple and flexible templating system, making it easy for developers to create custom designs.
How do I update ImpressPages?
Updating ImpressPages is easy. When a new version is available, you will see a notification in the admin panel. You can then click on ‘Update’ to start the update process. Make sure to backup your site before updating to prevent any data loss.
How can I add a contact form to my ImpressPages site?
ImpressPages comes with a built-in contact form plugin. To add a contact form, go to the admin panel, click on ‘Plugins’, then ‘Contact Form’. You can then configure the form settings and add it to any page on your site.
How do I optimize my ImpressPages site for SEO?
ImpressPages has several built-in SEO features. You can add meta tags, create SEO-friendly URLs, and generate sitemaps. Additionally, there are several SEO plugins available in the marketplace that can help you further optimize your site.
Can I use ImpressPages to create an e-commerce site?
Yes, ImpressPages can be used to create an e-commerce site. There are several e-commerce plugins available in the marketplace that can add shopping cart functionality to your site. You can also integrate with popular payment gateways to accept online payments.
What kind of support is available for ImpressPages?
ImpressPages has a strong community of users and developers who can provide support. You can find help on the official ImpressPages forum, or you can check out the documentation and tutorials available on the ImpressPages website.