Fire up Your E-Commerce Site with Solidus
Key Takeaways
- Solidus is an open-source, eCommerce application for high volume retailers, built with Ruby on Rails, providing a scalable, stable, and highly customizable platform for online commerce. It is a continuation of Spree 2.4, without the commercial direction of the newly-acquired Spree Commerce.
- Solidus requires PostgreSQL as the default database, Rails gem for generating the Rails application, and Imagemagick for product thumbnail generation. Devise is used for authentication. After installing these, Solidus can be installed and the necessary configuration files and migrations can be created.
- Solidus allows for the addition of new user accounts and the replacement of the default Solidus logo with a custom logo. The logo can be changed by specifying it in the config file and restarting the Rails server.
- Solidus consists of several different gems, including solidus_api for the RESTful API, solidus_frontend for the cart and storefront, solidus_backend for the admin area, solidus_core for essential models, mailers, and classes, and solidus_sample for sample data. All these gems work together to provide a fully functional e-commerce platform.

This article was peer reviewed by Thom Parkin. Thanks to all of SitePoint’s peer reviewers for making SitePoint content the best it can be!
A few days ago Sean Schofield, the CEO of Spree, announced the acquisition of Spree by First Data. It appears that the open source project Spree will no longer be supported.
Solidus is an open source, eCommerce application for high volume retailers. Built with Ruby on Rails, this mountable engine provides a scalable, stable, and highly customizable platform for online commerce. It’s just a continuation (meaning, a fork) of Spree 2.4 without the commercial direction of the newly-acquired Spree Commerce
In this tutorial, we will learn to install Solidus.
NOTE: I am using Ubuntu 14.04 as I write this tutorial. For the sake of readers using Mac, links are added where necessary.
Installing PostgreSQL
We will be using PostregSQL as our default database, it is important we have it installed.
For Mac users, follow these instructions here.
For Ubuntu users, in your terminal enter:
sudo apt-get update
Enter your admin password when prompted. Next, we’ll install PostgreSQL with the following command:
sudo apt-get install postgresql postgresql-contrib
This installs the core PostgresSQL engine and the additional packages that work with the database server.
Now we’ll create a user, for the purpose of this tutorial the user will have same name as our store:
sudo -u postgres createuser sprubyshop -s
sudo -u postgres psql
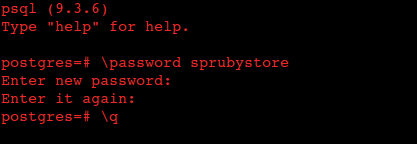
At the postgresql prompt, enter:
\password sprubyshop
Then enter your password (You’ll be required to enter it twice.) You can now exit using CTRL + D.
Generating Rails App
Open up your terminal and install the rails gem, if you do not have it installed yet:
gem install rails
That should install the latest available version of Rails gem. We can now generate our Rails application. From your terminal run:
rails new sprubyshop -d postgresql
Here we ask rails to generate an app called “sprubystore”, setting the default database to PostgreSQL. This adds the pg gem into our Gemfile and sets it as the default database. It also means sqlite3 won’t be in our Gemfile. We’re using PostgreSQL for development, test, and production environments. This is why we went through the stress of installing Postgres on our machine earlier.
With that, our store application should be generated. Open your Gemfile and you should see the pg gem there. If the sqlite3 gem happens to still be there, comment it out. Your Gemfile should look like this:
Gemfile
source 'https://rubygems.org'


gem 'rails', '4.2.3'
gem 'pg'
gem 'sass-rails', '~> 5.0'
gem 'uglifier', '>= 1.3.0'
gem 'coffee-rails', '~> 4.1.0'
gem 'jquery-rails'
gem 'turbolinks'
gem 'jbuilder', '~> 2.0'
gem 'sdoc', '~> 0.4.0', group: :doc

group :development, :test do
  gem 'byebug'
  gem 'web-console', '~> 2.0'
  gem 'spring'
end
Next, we need to edit the database configuration. Navigate to config/database.yml, using your text editor, and change the test and development options to look like what I have below:
config/database.yml
test:
  <<: *default
  host: localhost
  database: sprubyshop_test
  username: sprubyshop
  password: sprubyshop

development:
  <<: *default
  host: localhost
  database: sprubyshop_development
  username: sprubyshop
  password: sprubyshop
To create the database, open up your terminal and run:
rake db:create
NOTE: If you encounter errors due to a missing JavaScript Runtime, you can either add therubytracer to your Gemfile or install NodeJS. For the purpose of this tutorial we would defer to using NodeJS which you can install like so:
sudo apt-get install nodejs
On the Mac, use homebrew (brew install nodejs)
Now try running the rake command and it should work, without error.
Installing Solidus
Imagemagick is needed for Solidus to work. You need it to take take care of product thumbnail generation. Let’s install that:
For Mac users;
brew install imagemagick
For Ubuntu users;
sudo apt-get install imagemagick
Now it’s time to install the solidus gem. Open up your Gemfile and add the following:
gem 'solidus'
gem 'solidus_auth_devise
As you can see, we’re going to use Devise for authentication.
Run bundle install to install the gems.
After installing the gems, you’ll have to run the generators to create necessary the configuration files and migrations.
bundle exec rails g spree:install
During installation, you’ll be asked to create an Admin user:
Create the admin user (press enter for defaults).
Email [spree@example.com]:
Password [spree123]:
For now just use the default options.
You might have noticed a warning during installation:
[WARNING] You are not setting Devise.secret_key within your application!
You must set this in config/initializers/devise.rb. Here's an example:

Devise.secret_key = "b2e58acf575db38200dd2058ecd85539c8713c9f1efd45ad42c68c593c6cd4cb78e0d4388ce84672879c359212dedb4b73f3"
Fixing this is easy, enter the command below in your terminal:
rails g solidus:auth:install
The warning will pop up one more time, afterwhich a config file for devise will be created.
Excellent! Now it’s time to check our progress. Start up your rails server using:
rails server
Open your browser and point to http://localhost:3000 to see what we have.
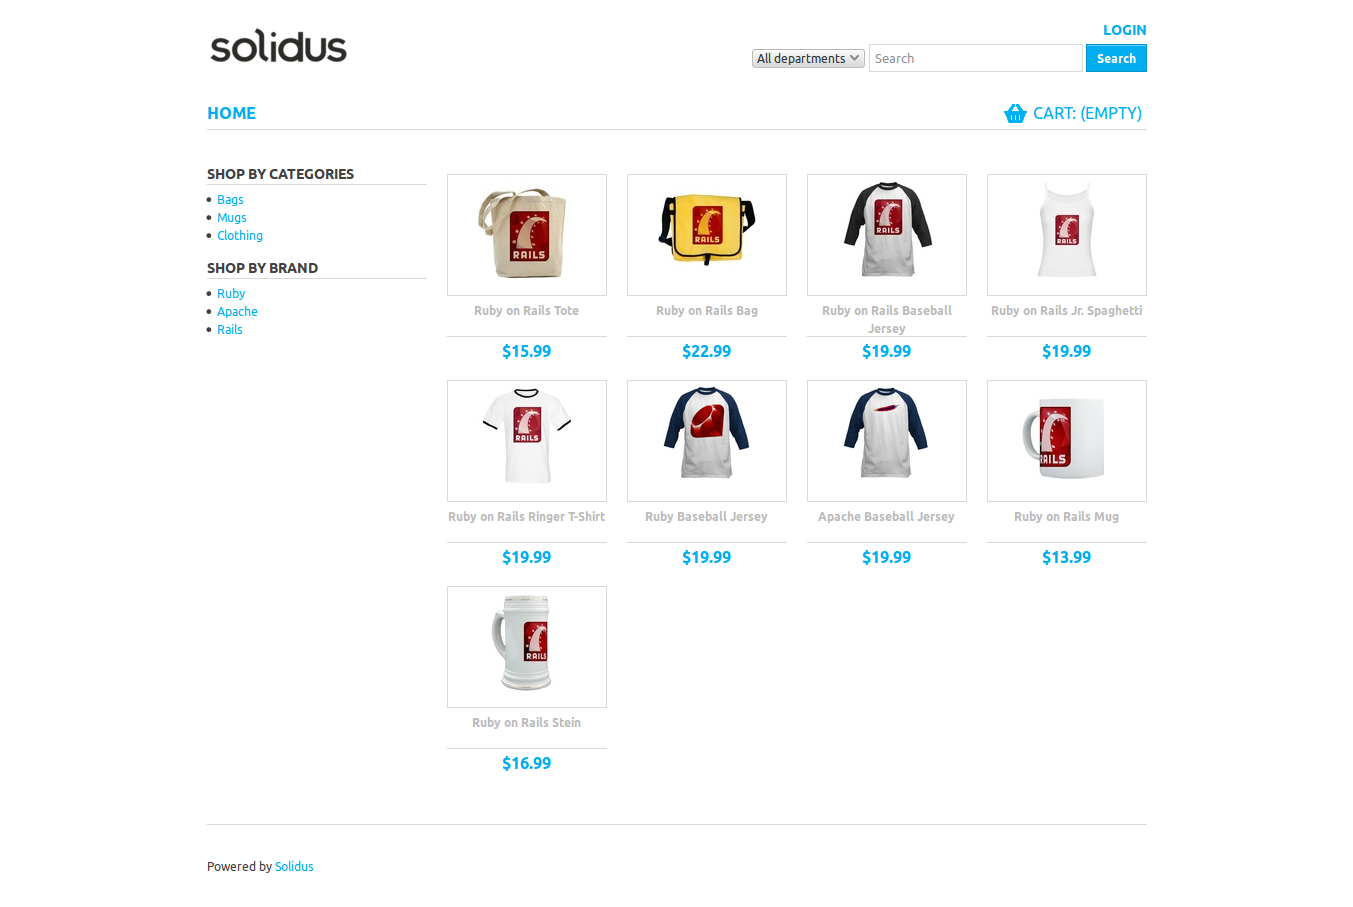
To view the admin dashboard, point your browser to http://localhost:3000/admin

Let us see how the admin dashboard looks like. Login with the default details that Solidus provided you with during installation.
Email: spree@example.com
Password: spree123
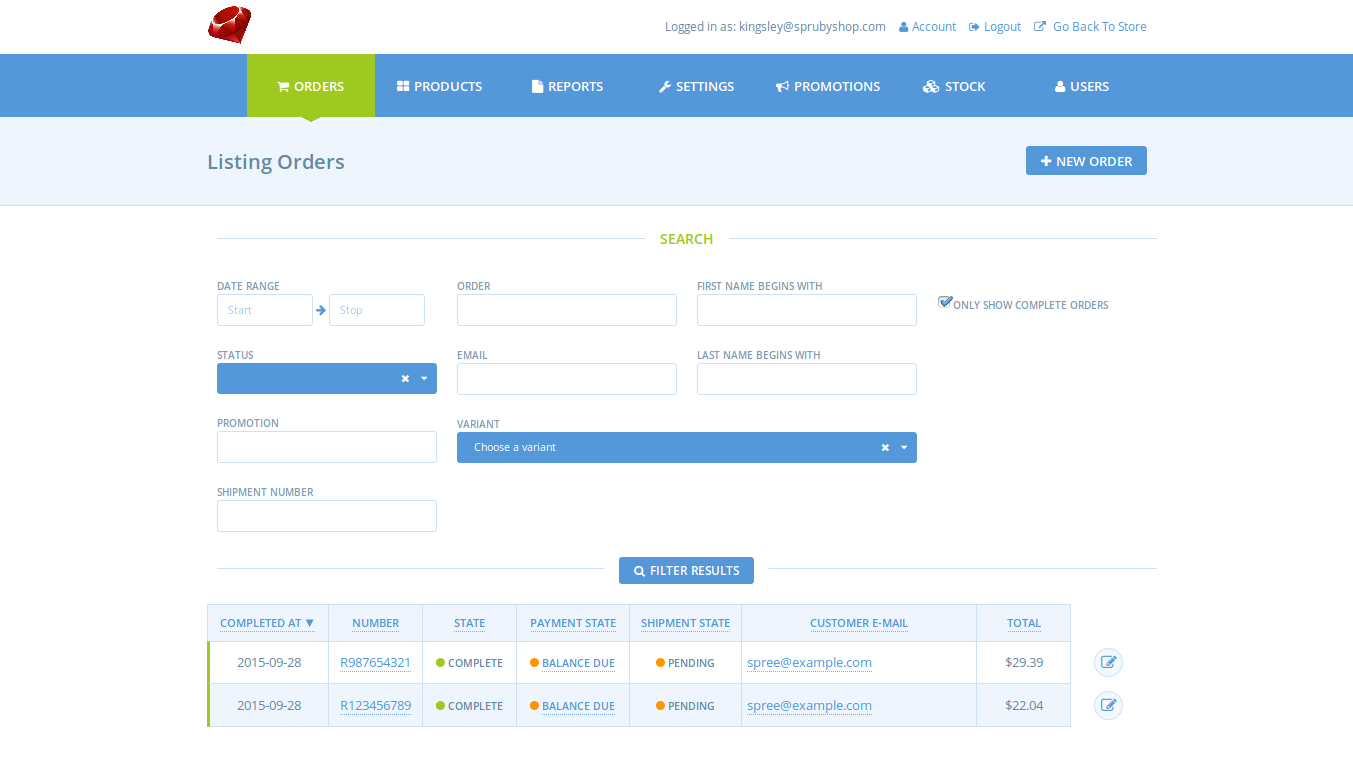
Solidus presents you with all the basic requirements for an e-commerce store and more. There is the “Orders” section that handles all the orders from your customers. The “Product” panel makes management of products easy with a couple of clicks. You are also able to generate reports from the “Reports” panel. All these options are visible on the right side of the admin dashboard.
There is a guide available to walk you through these options.
Add New User
We do not want to use the default login account. Solidus gives us an easy way of adding accounts in just a few steps:

From inside the Admin panel, click on Users at the right hand side of your screen. You’ll be presented with a screen that shows you the current user, which, at the moment, is the default user.
Click on the New User at the right side of your screen.
Fill the form as you please and click CREATE.
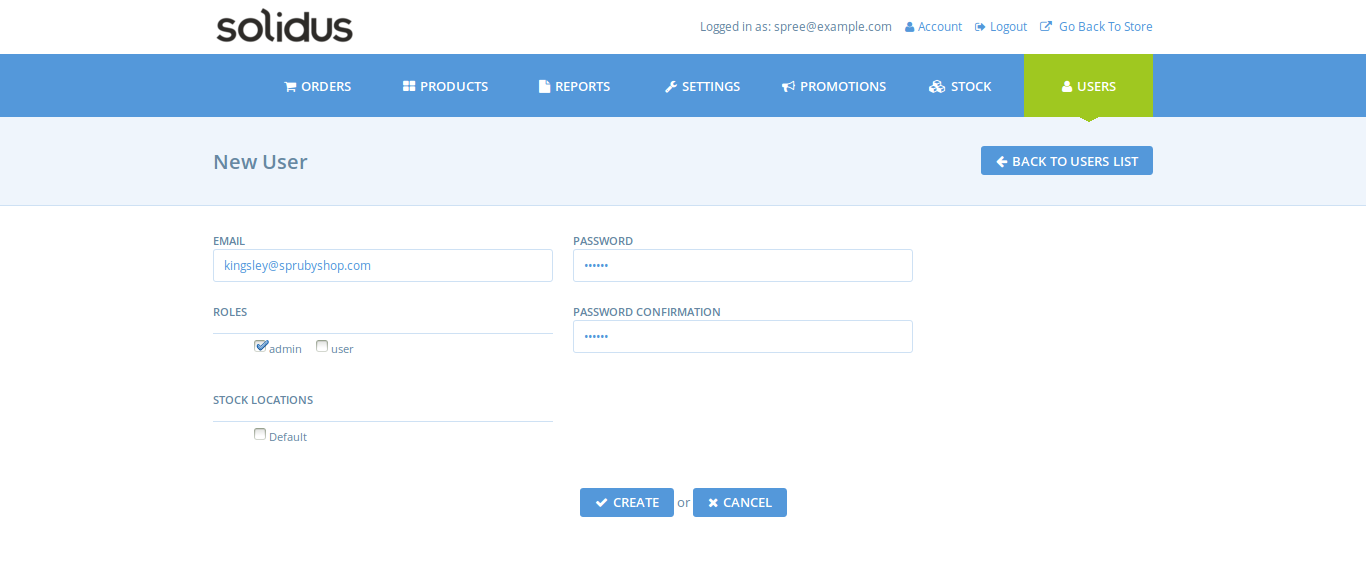
Now logout from the Spree default account and login with the details you just created. To delete the default Solidus account, from the Users panel click on Users List. You’ll see all the available Users listed there. Click on the trash icon to delete a User.
Replacing the Solidus Default Logo
Solidus comes with a default logo which you can see at the top left corner of your store. This logo is available both for the main and adminstrator views of the store. Let us see how we can change that.
Copy your logo, from your store home folder migrate to app > assets > images using a file explorer. Create a folder named logo and paste your custom logo in there.
Just doing that won’t make the logo change, we have to specify it inside of our config file. Open up text editor to config/initializers/spree.rb.
Change the line below:
#config.logo = "logo/solidus_logo.png"#
Let it look like this:
config.logo = "logo/sprubyshop_logo.png"
Restart the Rails server for the logo to change. We do not have to specify a path for the logo as the assets folder where we pasted the logo is the default path.
The administrator logo is modified similarly. To change it, edit the line below in spree.rb:
config.admin_interface_logo = "logo/solidus_logo.png
To look like this:
config.admin_interface_logo = "logo/sprubyshop_logo.png"
NOTE: The name of my logo is sprubyshop_logo.png
Your spree.rb should look like this:
# Configure Solidus Preferences
# See http://docs.solidus.io/Spree/AppConfiguration.html for details

Spree.config do |config|
  # Without this preferences are loaded and persisted to the database. This
  # changes them to be stored in memory.
  # This will be the default in a future version.
  config.use_static_preferences!

  # Core:

  # Default currency for new sites
  config.currency = "USD"

  # from address for transactional emails
  config.mails_from = "store@example.com"

  # Uncomment to stop tracking inventory levels in the application
  # config.track_inventory_levels = false

  # When true, product caches are only invalidated when they come in or out of
  # stock. Default is to invalidate cache on any inventory changes.
  # config.binary_inventory_cache = true


  # Frontend:

  # Custom logo for the frontend
  config.logo = "logo/sprubyshop.png"

  # Template to use when rendering layout
  # config.layout = "spree/layouts/spree_application"


  # Admin:

  # Custom logo for the admin
  config.admin_interface_logo = "logo/sprubyshop.png"

  # Gateway credentials can be configured statically here and referenced from
  # the admin. They can also be fully configured from the admin.
  #
  # config.static_model_preferences.add(
  #   Spree::Gateway::StripeGateway,
  #   'stripe_env_credentials',
  #   secret_key: ENV['STRIPE_SECRET_KEY'],
  #   publishable_key: ENV['STRIPE_PUBLISHABLE_KEY'],
  #   server: Rails.env.production? ? 'production' : 'test',
  #   test: !Rails.env.production?
  # )
end

Spree.user_class = "Spree::LegacyUser"
Here is how mine looks like:
Front View:
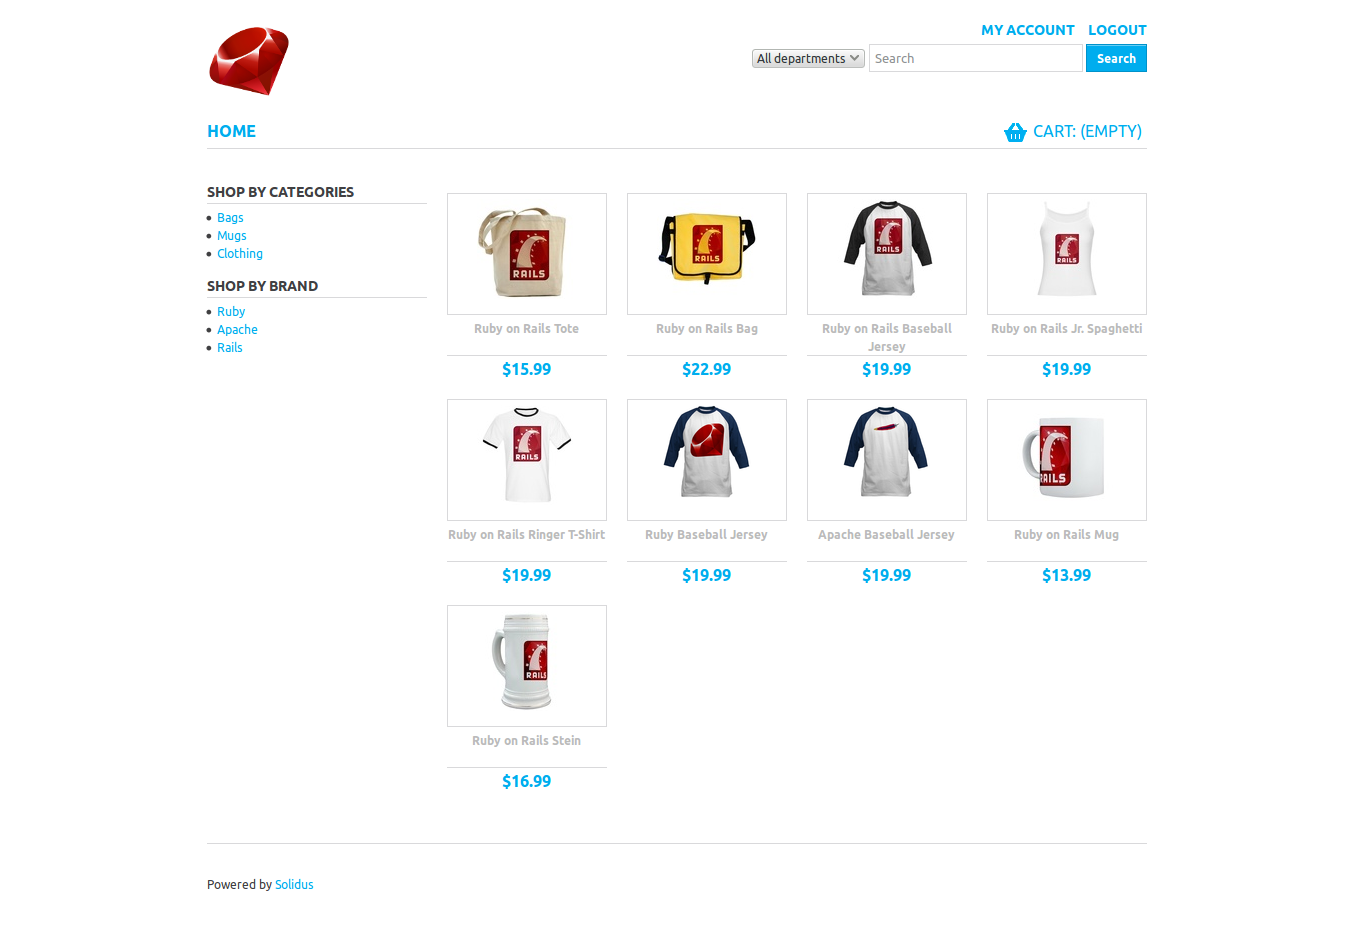
Back View;
Conclusion
Solidus actually consists of several different gems, each of which is maintained in a single repository and documented in a single set of online documentation. By requiring the solidus gem you automatically require all of the necessary gem dependencies which are:
- solidus_api (RESTful API)
- solidus_frontend (Cart and storefront)
- solidus_backend (Admin area)
- solidus_core (Essential models, mailers, and classes)
- solidus_sample (Sample Data)
All the gems are designed to work together to provide a fully functional e-commerce platform. You can learn more about this on Solidus Github Repository.
In this tutorial, we learned how to install Solidus, add a new user, and add a custom logo. I hope to cover more customization in a future post or two.
Thanks for staying with me. Feedback is always welcome.
Frequently Asked Questions (FAQs) about Solidus E-commerce Platform
What are the key features of Solidus that make it a good choice for e-commerce?
Solidus is a robust, open-source e-commerce platform built with Ruby on Rails. It offers a wide range of features that make it an excellent choice for e-commerce. These include a comprehensive admin interface that allows for easy management of products, orders, and users. It also supports multiple payment gateways, making it flexible for different business needs. Solidus is also highly customizable, allowing developers to tailor the platform to their specific requirements. Moreover, it has a supportive and active community that continually works on updates and improvements.
How does Solidus compare to other e-commerce platforms?
Solidus stands out from other e-commerce platforms due to its flexibility and scalability. Unlike many other platforms, Solidus does not limit the number of products or variants you can have in your store. It also supports multiple storefronts and currencies, making it ideal for businesses looking to expand internationally. Additionally, Solidus is built on Ruby on Rails, a modern and popular programming language, which ensures a high level of code quality and maintainability.
Is Solidus suitable for beginners?
While Solidus is a powerful platform, it does require a certain level of technical knowledge to set up and customize. It is built on Ruby on Rails, so familiarity with this programming language is beneficial. However, Solidus has a comprehensive documentation and a supportive community that can help beginners navigate the platform.
How secure is Solidus?
Solidus takes security seriously. It follows best practices for web application security and includes features like encrypted passwords and secure credit card handling. Additionally, being open-source, its code is publicly available for scrutiny, which allows for continuous security improvements.
Can I migrate my existing e-commerce store to Solidus?
Yes, it is possible to migrate an existing e-commerce store to Solidus. However, the process can be complex and requires careful planning to ensure data integrity. It’s recommended to seek help from a developer experienced with Solidus for such a task.
Does Solidus support mobile commerce?
Absolutely. Solidus is designed to be responsive, meaning it can adapt to different screen sizes, including mobile devices. This ensures a seamless shopping experience for customers, regardless of the device they are using.
How can I extend the functionality of Solidus?
Solidus is designed to be highly extensible. Developers can add new features or modify existing ones by creating extensions. The Solidus community has also created a wide range of extensions that are available for use.
What kind of support is available for Solidus?
Solidus has a vibrant and active community that provides support through various channels. These include the Solidus Slack channel, GitHub, and the Solidus Guides. There are also numerous tutorials and resources available online.
How does Solidus handle payments and shipping?
Solidus supports a variety of payment gateways, including PayPal, Stripe, and Braintree. It also has a flexible shipping system that allows for different shipping methods and rates.
Is Solidus a good choice for large-scale e-commerce businesses?
Yes, Solidus is designed to handle high volumes of traffic and transactions, making it a good choice for large-scale e-commerce businesses. It is scalable and can be customized to meet the specific needs of any business.
Kingsley Silas is a web developer from Nigeria. He has a hunger for acquiring new knowledge in every aspect he finds interesting.


