

Perhaps you’re (legitimately) concerned about your privacy on Facebook, and for whatever reason the major alternative social networks just aren’t cutting it for you. Or maybe you wish there were some way to get your clients more engaged with your business.
Why not create your own social network with open source software?
Today I’m going to introduce you to Elgg, a full-featured open source social networking engine that is easy to install and set up. You can augment its power with many third-party plugins. Elgg is dual-licensed under the GPL and MIT License. This article applies to Elgg 1.8.
Here’s what you need to set up your Elgg network:
- Web hosting and a domain name. If you don’t want to spend anything, you can use your own server. Look into a free dynamic DNS service such as DynDNS, which will give you a domain name. If you’re running your server on a wireless network, you’ll also need to enable port forwarding on your router to make your site accessible outside your LAN.
- PHP 5
- MySQL 5+
- The latest release of Elgg
Getting Started
Download the .ZIP file from the Elgg download page and unpack it wherever you want on your server.
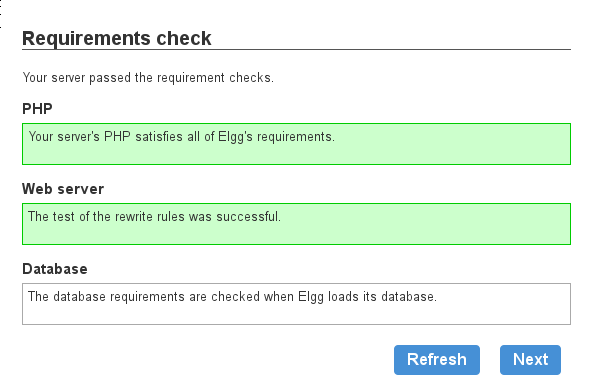
Now navigate to the install.php page within that directory. Read the welcome message and click “Next”; Elgg will now check your server for the required software. If all goes well, you should see this:
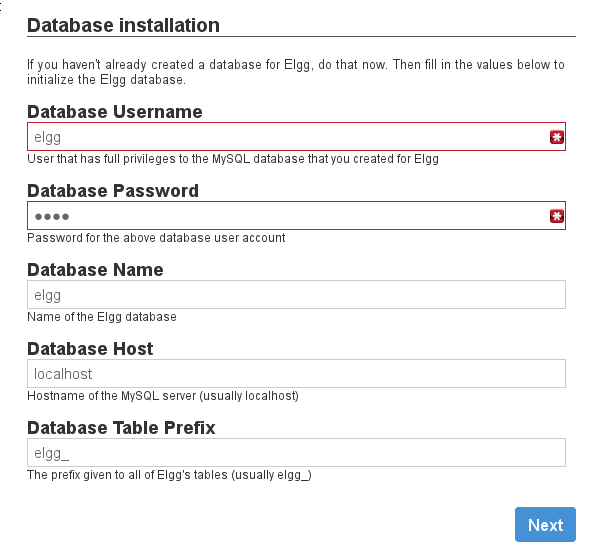
Elgg will then prompt you to initialize a database. Note that you must first create the database on your server and give the database user read/write privileges. Most web hosting companies provide a management interface for MySQL, such as phpMyAdmin.
Next you’ll get to name your site and fill in some other details, such as the installation directory and administrator information. When you get to the “Data Directory” section, the installer will ask you for “the directory that you created for Elgg to save files,” so be sure to create this directory before proceeding. I made mine outside the root directory of my site (public_html) to keep it secure.
When you’re done with the installation and go to visit your site, you will see something like this:
Configuring Elgg
The right-side menu gives you several links to Elgg settings. You can change the site name and description in “Basic Settings” (under the “Settings” drop-down menu), and going to “Advanced Settings” will let you adjust several other parameters, including the default post privacy level and the ability for new users to register.
Go to the “Plugins” section to activate or deactive plugins. Several of the pre-installed plugins are already activated by default. Some noteworthy deactivated plugins that you might wish to activate include:
- Elgg Developer Tools (for writing plugins and themes)
- Embed (for letting users embed media content in their posts)
- User dashboard
- OAuth API (allows an Elgg installation to connect to other OAuth-protected sites)
If you enable the Developer Tools, you’ll see a new menu called “Develop” on the bottom right on your screen. You can go here to Tools->Theming Sandbox to test out themes for your Elgg installation using CSS. The Sandbox serves as a visual overview of the CSS properties of various site elements.
The Dashboard
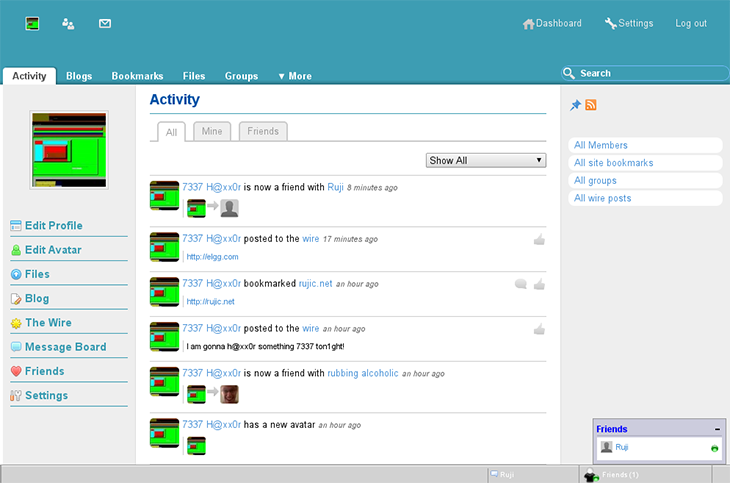
The dashboard acts as a customizable site portal for registered users. Any user can change the configuration of their own dashboard. I registered as a non-administrative user to test out the registration process (which has become much smoother since the last time I tried out Elgg, a year or two ago; this time the confirmation email actually came through!). Upon logging in as this user, I was initially greeted by the (so far) rather plain-looking activity page, which by default shows public events and interactions on the site:
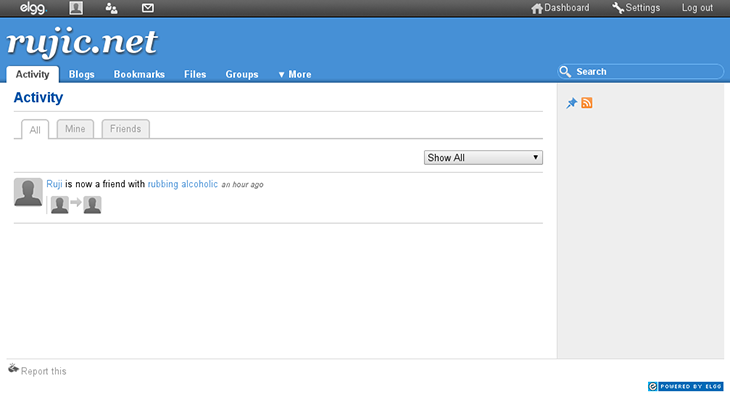
Rubbing Alcoholic is my developer friend who helped test my Elgg installation. Now we’ve consummated our friendship the Elgg way!
From there I went to the dashboard (your-elgg-installation.com/dashboard), which was also perfectly empty:

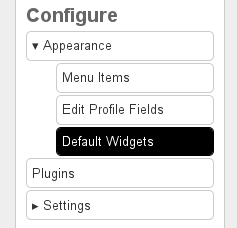
To soup up your own dashboard, just click the “Add widgets” button on the right. If you wish to modify the appearance of the default dashboard for all new users, log in as the administrator and go to Appearance->Default Widgets in the right-side toolbar (this will not change the dashboard for already-registered users).
Now select the “Dashboard” tab under the page header and click “Add widgets.” You can choose to add any of the following:
- Activity (kind of like Facebook’s news feed)
- Bookmarks
- Friends
- Group membership
- The Wire (for microblogging)
- Blogs
- Files (yes, you can share files with Elgg!)
- Group activity
- Pages
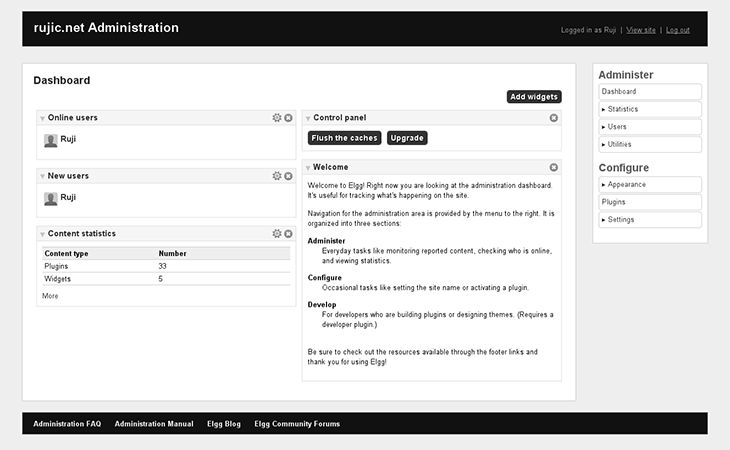
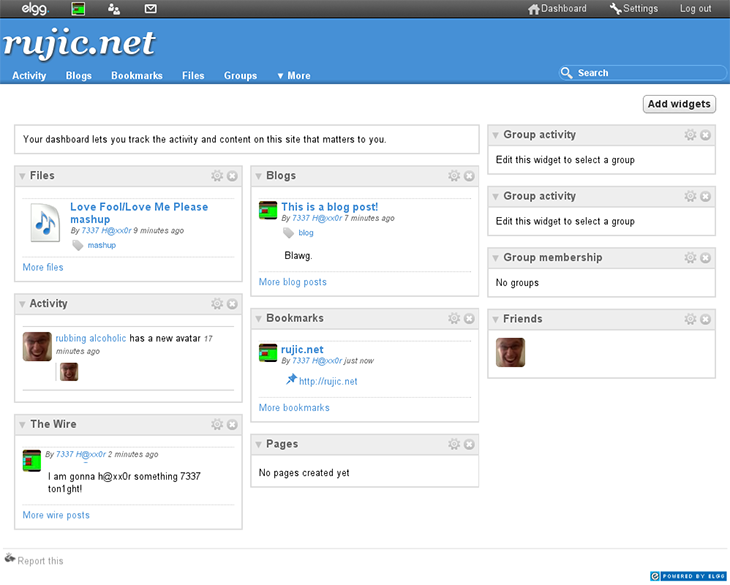
Once you’ve added a widget, you can modify its settings by clicking the gear wheel on top of the widget. You can also use this section to add default widgets to users’ profiles. This is what my user dashboard looked like after I added some widgets and produced some site activity:
Third-Party Tools
The buck doesn’t stop here. There are thousands of third-party plugins and themes available for Elgg.
Once you’ve downloaded a plugin or theme, install it by placing the extracted folder into the “mod” directory of your Elgg installation. Then, logged in as the administrator, go to Configure->Plugins and activate it. You can sort plugins by newest to quickly find the one you just uploaded.
Here are some cool plugins I found on the Elgg community site:
- Independence Pro theme
- SW Wire Links Pro – thumbnails for links posted in The Wire (to make this one work you need to go into the plugin settings and select “Yes” where it asks, “Do you want to use Wirelinks Pro?”)
- Facebook Connect
- Social Connect – lets you connect through a number of other social networks using the HybridAuth engine
- Elgg Chat – adds a bottom chat bar much like Facebook’s
Developers, build your own plugins! The Elgg website has plenty of documentation on creating plugins, themes, and other customizations.
Conclusion
While Elgg doesn’t offer all the bells and whistles of Facebook and Google+ out of the box, it is highly configurable and thus could make a great solution for anyone’s needs. It has matured gracefully over the past couple of years, and its user community continues to grow.
Frequently Asked Questions about Elgg Open Source Social Networking
What makes Elgg a leading open-source social networking platform?
Elgg is a leading open-source social networking platform due to its flexibility and robust features. It allows developers to create and manage their own social networking site. It offers a range of features including user management, activity streams, notifications, and a powerful plugin system. This makes it a versatile platform for building any type of social networking site, from a small private network to a large public platform.
How does Elgg compare to other social networking platforms?
Compared to other social networking platforms, Elgg stands out for its open-source nature and its flexibility. It allows developers to have full control over their site, with the ability to customize and extend it as needed. It also has a strong community of developers who contribute to its ongoing development and improvement.
Is Elgg suitable for building a professional networking site?
Yes, Elgg is suitable for building a professional networking site. It offers features such as user profiles, groups, and activity streams, which are essential for a professional networking site. It also supports third-party plugins, which can be used to add additional functionality such as job postings, professional skills, and more.
How easy is it to customize and extend Elgg?
Elgg is designed to be highly customizable and extendable. It has a powerful plugin system that allows developers to add new features and functionality to their site. It also has a flexible theme system that allows for extensive customization of the site’s appearance.
What kind of support is available for Elgg?
Elgg has a strong community of developers who provide support through the official Elgg community site. There are also numerous resources available online, including documentation, tutorials, and forums where users can ask questions and share their experiences.
How secure is Elgg?
Elgg takes security seriously. It includes built-in features to protect against common web security threats, and its open-source nature allows for regular security updates and improvements. However, like any web platform, the security of an Elgg site also depends on the practices of the site administrator.
Can Elgg be used to build a private social network?
Yes, Elgg can be used to build a private social network. It includes features for user management and access control, allowing the site administrator to control who can join the network and what they can do.
What are the server requirements for running Elgg?
Elgg requires a web server with PHP and MySQL. It is compatible with most common web server software, including Apache and Nginx. The specific requirements may vary depending on the version of Elgg and the plugins used.
Is Elgg mobile-friendly?
Yes, Elgg is designed to be responsive and mobile-friendly. It includes a default theme that adapts to different screen sizes, and it also supports mobile-specific plugins for enhanced mobile functionality.
Is Elgg free to use?
Yes, Elgg is free to use. It is an open-source platform, which means that it is free to download, use, and modify. However, there may be costs associated with hosting and maintaining an Elgg site, as well as any premium plugins or themes used.

