
In my previous articles, we’ve covered what Docker is, and prepared our local environment. In the second article we got Docker to work with WordPress. In the third article, we saw how we can better use Docker Compose to build containers more easily and in a much more manageable way. Now, I’m going to show you how to deploy a project (WordPress) from a local machine to a DigitalOcean droplet.
Key Takeaways
- Deploying a WordPress project from a local machine to a DigitalOcean droplet can be achieved using Docker Compose. Docker Compose simplifies the setup process, allowing users to build containers more easily and manageably.
- Using git and a repository, changes made to a local WordPress installation can be pushed to the repository and then pulled back to the droplet, ensuring synchronization between local development and DigitalOcean. This process can be facilitated through private repositories such as BitBucket.
- Docker provides an isolated environment for WordPress applications, improving security and management. It also allows for easy replication of the WordPress environment across different servers, simplifying the deployment process and making it particularly useful for scaling applications or creating matching development and testing environments.
Setting up Your DigitalOcean Droplet
First, create an account on DigitalOcean. DigitalOcean is a popular and affordable VPS provider. It is one of the cheaper VPS providers out there, but that being said, it doesn’t mean that cheap=poor quality. You can run a 512MB instance with 20GB of SSD storage for only $5 per month.
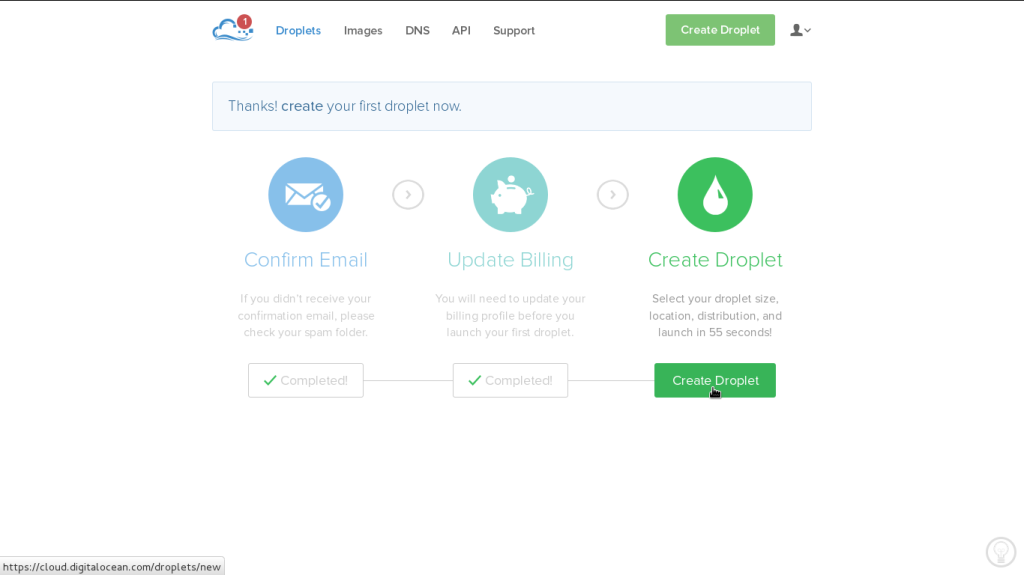
After updating the billing information (if you are new on DigitalOcean), you now need to create a droplet. A droplet is a single VPS instance (after all, cloud technology is all about cool names!).
Next, select a name for your instance. When you’re starting out, 512MB instance for $5/month is pretty good. Later you can upgrade this instance to 1GB, or go all the way up to 64GB instances. The region is where your instance will live. Select your instance somewhere near the region where you and/or your users will be. After all, you want the best speed for your website. In my case I chose Amsterdam, as I live in Europe. For Images you can start with a plain OS or go with an application. There is an application (pre-built box) that comes with Docker installed. Select that image.
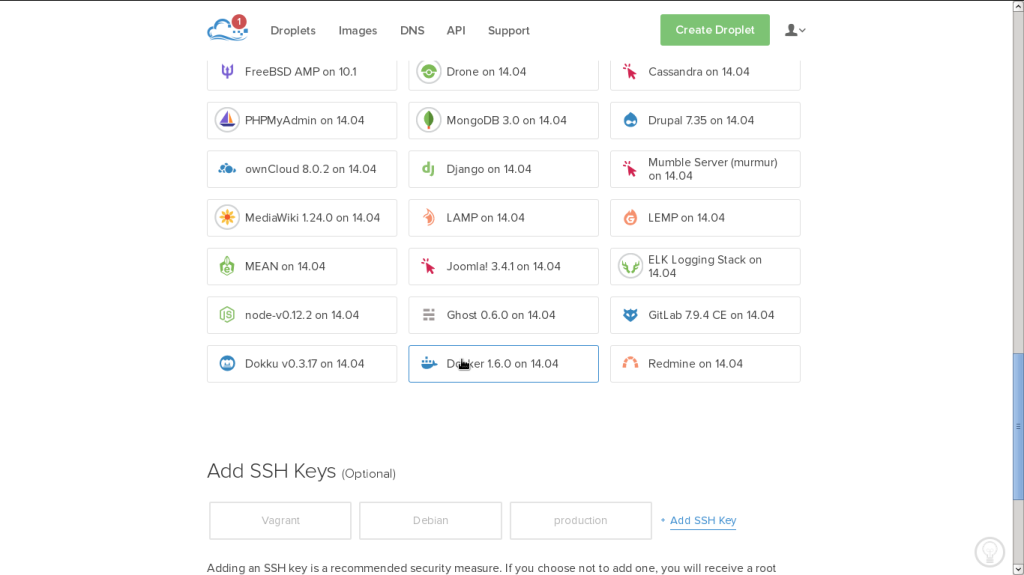
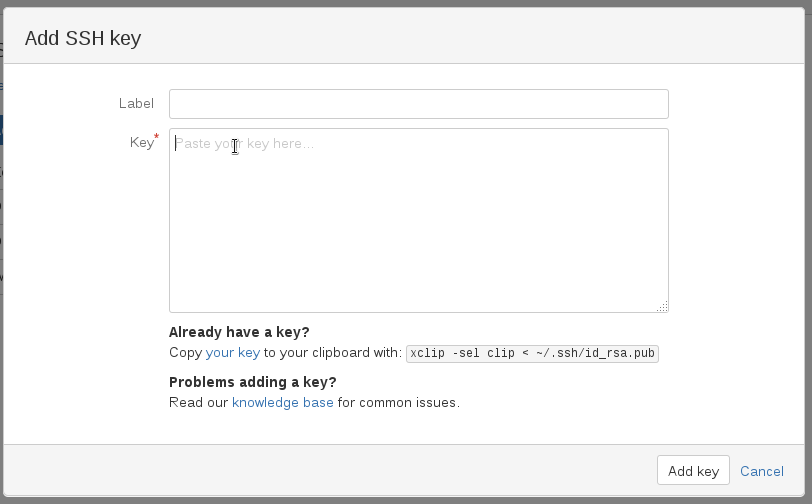
Now you have to select an SSH key. SSH is a secure way that we can connect to our droplet and start working via the terminal. To better understand how SSH works and how to configure it for use with DigitalOcean, read this article on their blog. As I have an SSH key already configured I don’t need to add a new one. After that, simply click create droplet and it should only take a couple of seconds until it creates a fully functional Ubuntu 14.04 system with Docker pre-installed.
Installing Docker Compose
The easiest way to setup WordPress on DigitalOcean is to use Docker Compose. After all, who wants to be stuck working with cryptic commands all the time. To set up Docker Compose, we need a connection to our droplet. An SSH connection will let us execute commands on the droplet.
ssh root@[ip_of_the_machine]
To install Compose, execute these two commands:
curl -L https://github.com/docker/compose/releases/download/1.2.0/docker-compose-`uname -s`-`uname -m` > /usr/local/bin/docker-compose
chmod +x /usr/local/bin/docker-compose
Now we’ll check if Compose was installed properly:
docker-compose --version
If you get the version number, you’ve done everything correctly.
Next, create a folder for the project. Inside that, create a new docker-compose.yml file.
⧸⧸mkdir wpdocker
cd wpdocker
touch docker-compose.yml
nano docker-compose.yml
Inside your docker-compose.yml file, add this:
web:
    image: wordpress
    links:
     - mysql
    environment:
     - WORDPRESS_DB_PASSWORD=password
    working_dir: /var/www/html
    volumes:
     - wordpress/wp-content/:/var/www/html/wp-content
    ports:
     - "80:80"
mysql:
    image: mysql:5.7
    environment:
     - MYSQL_ROOT_PASSWORD=password
     - MYSQL_DATABASE=wordpress
The only difference from our last example is that the IP address isn’t specified. The ports should be configured, even if port 80 on container is port 80 on the droplet, without this it wont work.
Execute:
docker-compose up
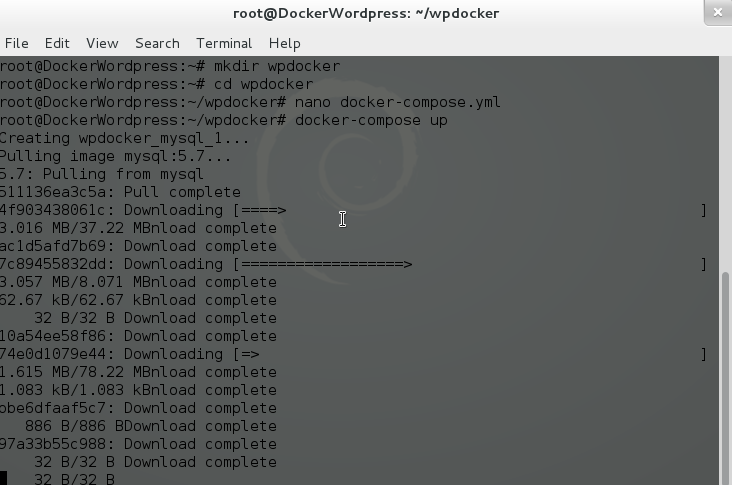
Because it’s the first time that this droplet will use Docker, it will pull all the images first. Now check on the browser for the droplet IP and you’ll get an installation WordPress page. Hurray, you have done it!
There are two problems with this example. First, if we close the terminal, the process (on the droplet) will shutdown. The second problem is that we may want to edit our theme files. This is not really a deployment, but rather just an installation on a VPS.
For the first problem, you only need to add -d.
docker-compose up -d
Sync Local Development with DigitalOcean
This is where the fun part starts. We can use git and a repository to make changes to our local WordPress installation and push the changes to the repository. After pushing the changes to the repository we can pull those changes back to the droplet. You may want to choose a private repository. You can choose BitBucket as an alternative, since GitHub only offers public repositories if you’re not paying. In my example, I’m going to use BitBucket.
Next we need an SSH key. If you don’t have an SSH key yet, read this article on GitHub.
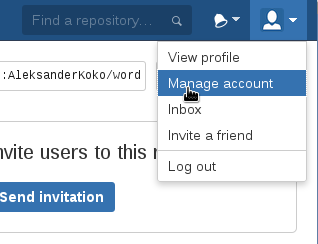
Once you have your SSH key, create an account on BitBucket. If you want to use GitHub feel free, it will work the same way. Create a new repository and configure your SSH keys. Your SSH keys are located under the ~/.ssh/ folder. Open the id_rsa.pub file under the SSH folder and copy the contents of that file.
Next, go to your local project (the project that we created in the previous article if you’re following along). Execute docker-compose up -d if it isn’t running and start making changes. Install some plugins and a theme. Also, add new posts, pages or whatever else you want.
Now navigate inside the wp-content folder and execute these commands:
git init
git remote add origin git@bitbucket.org:[repository].git
git add .
git commit -m "first init"
git push -u origin master
The contents of the wp-content folder is now in your BitBucket repository. Next we need to pull them on to our droplet. SSH to your droplet, if you’re not already logged in.
ssh root@[droplet_ip]
Once you’ve connected, navigate inside the project folder then:
docker-compose stop
cd wordpress
rm -rf wp-content
You’ll see I’ve removed the wp-content folder on the droplet because we’ll use the content from the repository.
Now we need to generate an SSH key for the droplet, we can do this by running:
ssh-keygen -t rsa -C "your_email_here"
We need to copy the id_rsa.pub contents again and register that SSH key on BitBucket:
cat ~/.ssh/id_rsa.pub
Copy the contents that was echoed on the terminal and add that as a new key to BitBucket, making sure you give it a meaningful name.
git clone git clone git@bitbucket.org:[repository].git wp-content
You’ve just cloned the repository and given the new folder the name ‘wp-content‘.
After that, navigate back to the root of the project and start the containers again.
cd ..
docker-compose up -d
Now you can check your site using your browser. You should be able to login to the Admin panel and you’ll see the new plugins and theme installed. You can also export the local WordPress data and use it on your droplet installation. I’ll let you tackle this step as homework (if you like that kind of homework).
Conclusion
We’re now getting towards the end of this series on Docker. Docker is an exciting new technology, it’s looking like it will change the way we create applications and deploy them.
In this article we’ve seen how to deploy our local WordPress Docker installation to DigitalOcean. We created a repository on BitBucket and used that repository to sync with our DigitalOcean droplet. If you haven’t yet read our previous articles in this series on Docker, you can find them below:
- Introduction to Docker for WordPress Developers
- How to Manually Build Docker Containers for WordPress
- How to Use the Official Docker WordPress Image
We really want to hear from you. And, the same question as last time, would you consider using Docker in production?
Frequently Asked Questions (FAQs) about Deploying WordPress with Docker
What are the benefits of deploying WordPress with Docker?
Deploying WordPress with Docker offers several benefits. Firstly, Docker provides an isolated environment for your WordPress application, ensuring that it doesn’t interfere with other applications running on the same server. This isolation improves security and makes it easier to manage your application. Secondly, Docker allows you to easily replicate your WordPress environment across different servers. This is particularly useful for scaling your application or for creating development and testing environments that match your production environment. Lastly, Docker can simplify the process of deploying your WordPress application, as it automates many of the steps involved.
How can I scale my WordPress application with Docker?
Docker makes it easy to scale your WordPress application. You can create multiple containers for your application and distribute them across different servers. Docker’s built-in orchestration features, such as Docker Swarm or Kubernetes, can manage this distribution for you. These tools can also monitor your containers and automatically replace any that fail, ensuring that your application remains available.
Can I use Docker for WordPress development?
Yes, Docker is an excellent tool for WordPress development. By creating a Docker container for your development environment, you can ensure that it matches your production environment exactly. This can help to prevent bugs that occur when moving your application from development to production. Docker also makes it easy to reset your development environment if you need to start fresh.
How can I migrate my existing WordPress site to Docker?
Migrating your existing WordPress site to Docker involves several steps. Firstly, you’ll need to create a Dockerfile that describes your WordPress environment. This includes the version of WordPress you’re using, any plugins or themes you’ve installed, and any custom configuration you’ve applied. Once you’ve created your Dockerfile, you can use it to build a Docker image. You can then use this image to create a Docker container that runs your WordPress site. Finally, you’ll need to migrate your WordPress database to the new container. This can be done using a tool like phpMyAdmin or WP Migrate DB.
How can I backup my WordPress site running in a Docker container?
Backing up your WordPress site running in a Docker container is similar to backing up a traditional WordPress site. You’ll need to backup both your WordPress files and your WordPress database. For the files, you can simply copy them from the Docker container to a safe location. For the database, you can use a tool like mysqldump to create a backup. It’s important to regularly backup your WordPress site to protect against data loss.
How can I update my WordPress site running in a Docker container?
Updating your WordPress site running in a Docker container involves updating the Docker image that your container is based on. This can be done by updating your Dockerfile to use a newer version of WordPress, and then rebuilding your Docker image. Once you’ve created the new image, you can create a new container based on it. It’s important to backup your WordPress site before performing an update, in case anything goes wrong.
Can I use Docker to run multiple WordPress sites on the same server?
Yes, Docker makes it easy to run multiple WordPress sites on the same server. Each site can be run in its own Docker container, ensuring that it doesn’t interfere with the others. This can be a cost-effective way to host multiple WordPress sites, as it allows you to make full use of your server’s resources.
How can I monitor my WordPress site running in a Docker container?
There are several tools you can use to monitor your WordPress site running in a Docker container. Docker itself provides basic monitoring features, such as the ability to view the CPU and memory usage of your containers. For more detailed monitoring, you can use a tool like New Relic or Datadog. These tools can monitor your WordPress application, your Docker containers, and your server as a whole, providing a comprehensive view of your system’s performance.
How can I improve the performance of my WordPress site running in a Docker container?
There are several ways to improve the performance of your WordPress site running in a Docker container. Firstly, you can optimize your Dockerfile to create a smaller, more efficient Docker image. This can reduce the resources your container uses, improving its performance. Secondly, you can use a caching plugin to reduce the load on your WordPress application. Lastly, you can use a content delivery network (CDN) to serve your site’s static files, reducing the load on your server and improving your site’s load times.
How can I secure my WordPress site running in a Docker container?
Securing your WordPress site running in a Docker container involves several steps. Firstly, you should ensure that your Dockerfile doesn’t include any unnecessary software, as this can create potential security vulnerabilities. Secondly, you should regularly update your Docker image to include the latest security patches. Lastly, you should use a security plugin to protect your WordPress application from common attacks, such as brute force login attempts or SQL injection attacks.