Create a Folded Paper Sidebar in Photoshop
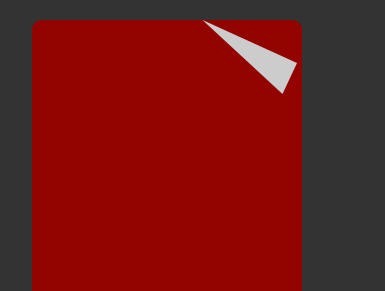
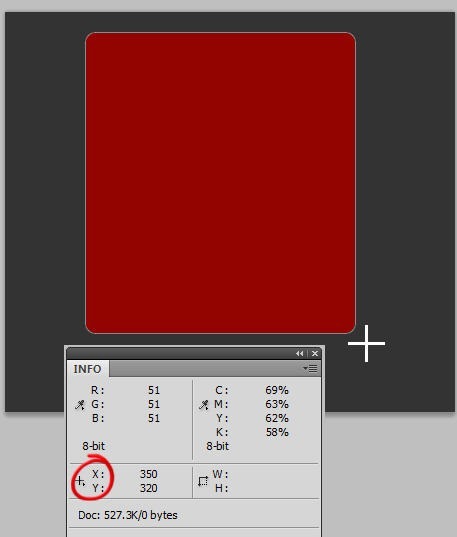 4. Select the Pen tool and set the options to Shape Layers and color set to #cccccc (light grey). Draw out a rectangle something like what’s shown below. The new triangle layer should be above the rounded rectangle layer.
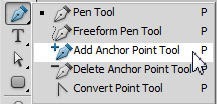
 5. Under the Pen tool in the tool box, select the Add Anchor Point tool.
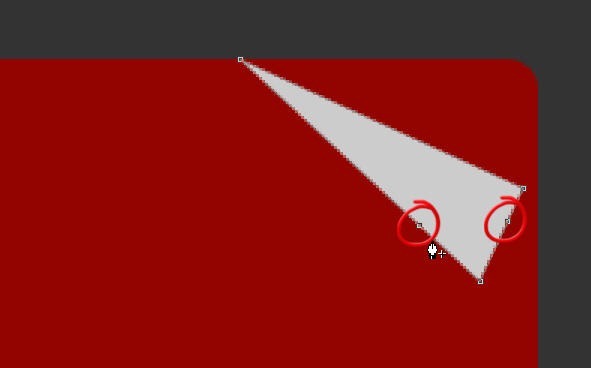 6. With the Direct Selection Tool (white arrow) click on the point on the bottom right and gently bend a curve as shown. Then do the same thing with the second point on the bottom left.
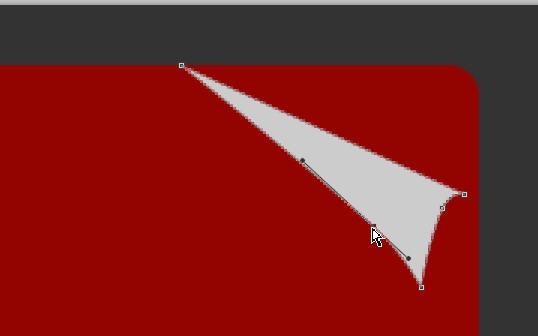 7. Ok, that’s most of the fold in place but now we need to fold our rectangle down to meet the triangle. Once again select the Add Anchor Point tool and add two new points as shown.
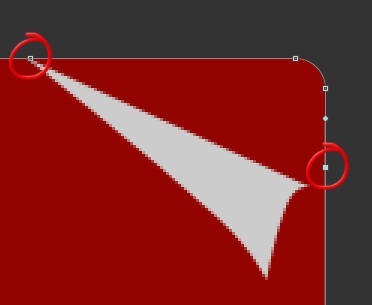 8. Now we need to do some folding. On the rectangle layer which you added the new point to, using the Direction Selection tool, drag one of the corner points down behind the triangle.
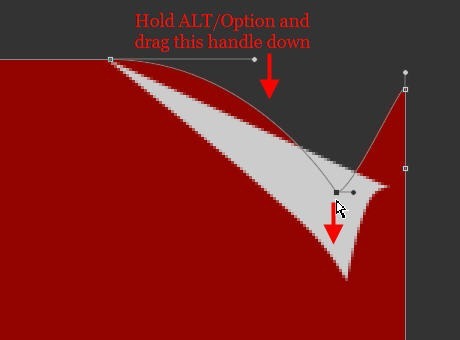 Hold down the Alt key and drag the handle of the new point you added just above the top of the triangle. Holding down Alt prevents the line on the other side of the anchor point from moving.
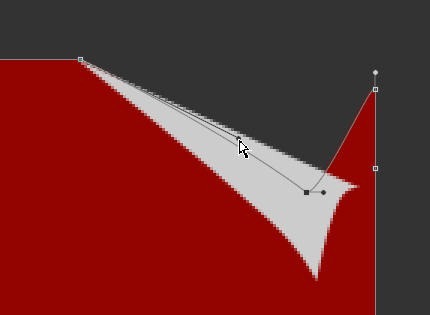 Repeat this process with the remaining round rectangle corner point and newly added anchor point so you get something like this:
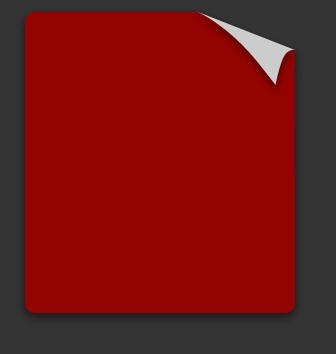
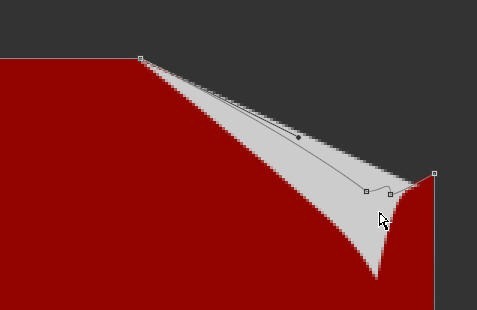 To finish tidying up, use the Direct Selection tool to drag to top corner point of the triangle to meet the edge of the rectangle. You may need to readjust the curves on the triangle at this point too. This part of the process is a bit of trial and error and comes down to what pleases the eye so play around with the anchor points.
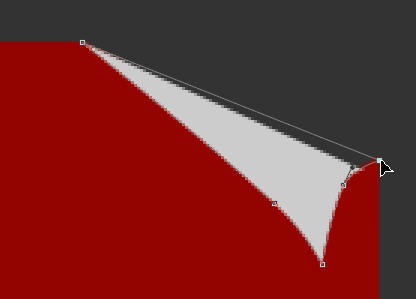 My final rectangle and triangle look like this:
 9. Select the Triangle shape layer and add a Drop Shadow effect by clicking on the Layer Effects button at the bottom of the Layers Palette (Fx).
I set the color of the drop shadow to be a deeper, dark red #330000 rather than black, opacity set to 50%, Angle of light 90%, Distance 4 pixels, Spread 10% and Size 10 pixels. Click OK to add the Drop Shadow.
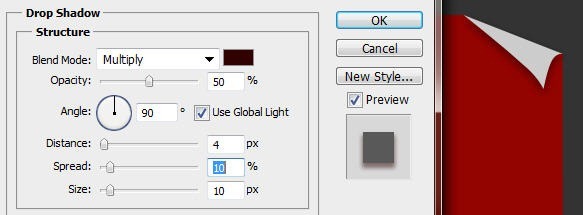 10. We’ll add the same effect to the rounded rectangle layer. Click on the layer effects on the triangle layer, hold down Alt/Option and drag the drop down shadow onto the rounded rectangle layer. This duplicates exactly what you had on the triangle layer. Make sure that you haven’t just dragged the style from one layer to another.
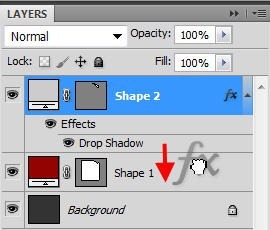
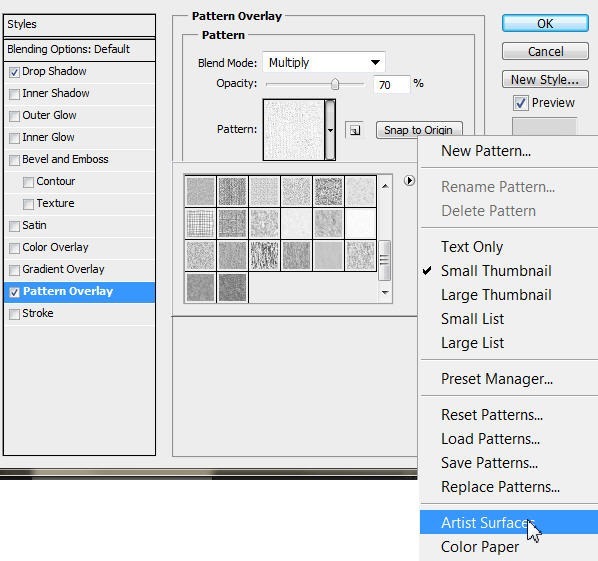
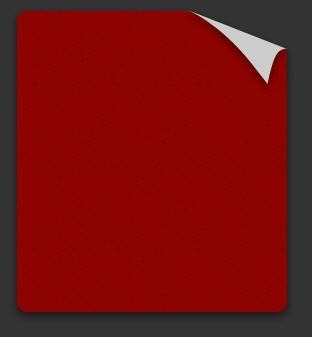
 Now to make it look a little more textured we’ll add a Pattern Overlay to the rectangle layer. Select it in the Layers Palette then click on the Add Layer Style button and choose Pattern Overlay. When the layer styles dialog box open up, click on the small triangle and from the menu choose Artist Surfaces. This gives you a pile of new textures which you can apply. I chose Canvas and reduced the Opacity to 70% and the Blend Mode to Multiply.
 This takes the very clean look off the “paper.”
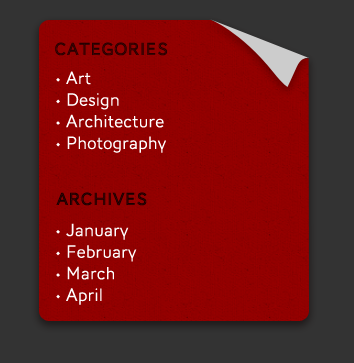
 12. The final task is to add your navigation to the sidebar, et voila!
Frequently Asked Questions about Creating a Folded Paper Sidebar in Photoshop
What are the basic tools I need to create a folded paper sidebar in Photoshop?
To create a folded paper sidebar in Photoshop, you will need to familiarize yourself with a few basic tools. These include the Rectangle Tool for creating the basic shape of the sidebar, the Gradient Tool for adding depth and dimension, and the Burn Tool for creating shadows. You will also need to use the Pen Tool for creating the folded effect, and the Brush Tool for adding texture and detail.
How can I add a realistic texture to my folded paper sidebar?
Adding a realistic texture to your folded paper sidebar can be achieved by using the Brush Tool. You can select a brush with a texture that resembles paper, such as a rough or grainy brush. Then, lightly brush over your sidebar to add the texture. You can also adjust the opacity of the brush to control the intensity of the texture.
How can I create a shadow effect to make my folded paper sidebar look more realistic?
Creating a shadow effect can be done using the Burn Tool. This tool darkens the area where it is applied, creating a shadow-like effect. To use it, select the Burn Tool, choose a soft round brush, and set the exposure to a low percentage. Then, gently brush over the areas where you want to add shadows.
Can I use different colors for my folded paper sidebar?
Yes, you can use any color you want for your folded paper sidebar. You can change the color by using the Paint Bucket Tool or the Gradient Tool. You can also use the Color Picker to select a specific color from an image or a color palette.
How can I create a folded effect in Photoshop?
Creating a folded effect in Photoshop can be done using the Pen Tool. First, draw a path where you want the fold to be. Then, right-click on the path and select ‘Make Selection’. After that, use the Burn Tool to darken the selected area, creating a shadow that gives the illusion of a fold.
Can I add text to my folded paper sidebar?
Yes, you can add text to your folded paper sidebar using the Text Tool. Simply select the Text Tool, click on the area where you want to add text, and start typing. You can also adjust the font, size, and color of the text as needed.
How can I save my folded paper sidebar design?
Once you’re satisfied with your folded paper sidebar design, you can save it by going to File > Save As. Choose a location where you want to save the file, give it a name, and select a file format. It’s recommended to save your work in PSD format so you can edit it later if needed.
Can I use my folded paper sidebar design in other projects?
Yes, once you’ve created and saved your folded paper sidebar design, you can use it in other projects. You can import it into other Photoshop documents, or use it in other design software. Just make sure to save it in a compatible file format.
What if I make a mistake while creating my folded paper sidebar?
If you make a mistake while creating your folded paper sidebar, you can easily undo it by going to Edit > Undo. Photoshop also has a History panel where you can see a list of your recent actions and undo any of them.
Can I create a folded paper sidebar in other versions of Photoshop?
Yes, you can create a folded paper sidebar in any version of Photoshop. The tools and techniques may vary slightly depending on the version, but the basic process is the same.
Jennifer Farley is a designer, illustrator and design instructor based in Ireland. She writes about design and illustration on her blog at Laughing Lion Design.
