Create A Better, More Realistic Drop Shadow In Photoshop
You can add a simple drop shadow to any object on its own layer in Photoshop by clicking on the “Add a layer style” button at the bottom of the palette and choose Drop Shadow from the drop down menu. This opens up the Layer Style dialog box and you can choose your drop shadow settings from there. Simple. The drop shadow adds a little extra dimension to objects but it doesn’t always look particularly realistic. Most objects such as paper or photographs do not always lie completely flat so let’s take a look at how you can create a more realistic drop shadow with of a hint of a curl.
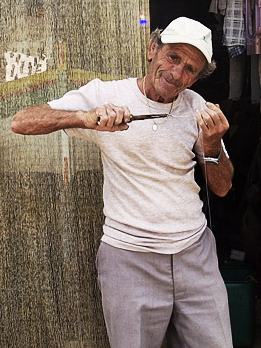
- Open up a photograph that you want to apply the effect to.
- Create a new document which is larger in width and height than your photograph.
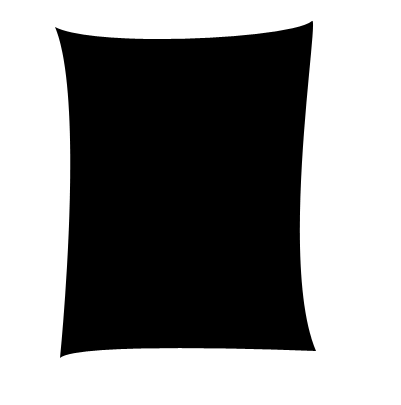
- Now draw a shape like the one below which will eventually become the shadow under the photograph. You get the best results using the Pen Tool here, but you can also make the shape using a Brush if you don’t feel happy using the Pen. The shape should be slightly bigger than your photograph.
- Blur the edge of the shape by using Filter > Blur >Gaussian Blur. I used a radius setting of 4 so that you get something that looks like this.

- Drag your photograph over the curl drop shadow. They should be on separate layers, with the photograph on the layer above the drop shadow.
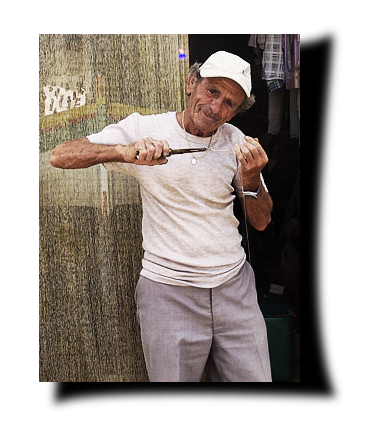
- Once the photograph is placed over the drop shadow, select the drop shadow layer and Press Ctrl + T (windows) or Cmd + T (Mac) to Free Transform. You may need to scale the curl drop shadow up or down or even skew it, depending on the effect you want to achieve. Hit Enter/Return to commit the transformation.
- At this stage the shadow is too dark. Make sure the Shadow layer is selected and the reduce the opacity to about 40% to make it less obtrusive. If the shadow looks too big, or the picture looks like it is floating too far above the shadow, just drag the shadow so it is sitting mostly hidden under the photograph.
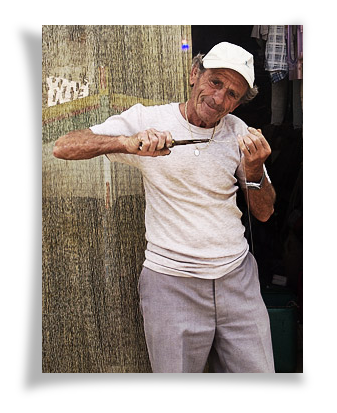
- Once you’ve made your drop shadow you can create different effects by transforming it. For example you can give the impression of lifting up three corners of the photo by offsetting the drop shadow horizontally and enlarging it vertically.
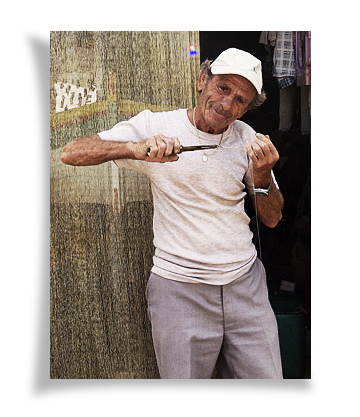
- You can also give the impression of lifting the photo higher off the “page” or surface by showing a larger but softer shadow. Or you can make it look like the top of the photo is lifting by shortening the shadow vertically.
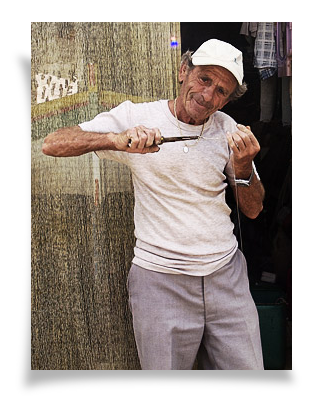
- Finally, tilt the photograph and shadow together for a more natural look. Select both layers in the layers palette, then press Ctrl + T or Cmd + T to free transform. Then bring your mouse close to one of the corner so that it turns into a double curved arrow and drag around one corner. Press Return/Enter to commit the transformation.
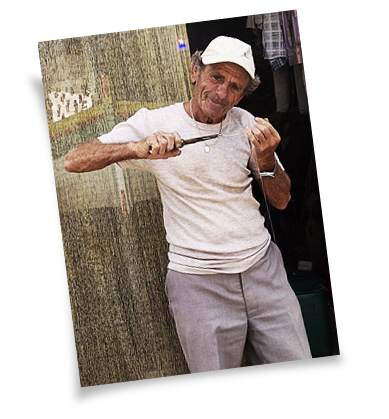
Ta da! So it does involve a little more work than a simple layer style but you can certainly achieve some nice effects by playing around with it.
Frequently Asked Questions on Creating Realistic Drop Shadows in Photoshop
What are the key factors to consider when creating a realistic drop shadow in Photoshop?
When creating a realistic drop shadow in Photoshop, there are several key factors to consider. Firstly, the direction and angle of the light source should be consistent. This will determine the direction and length of the shadow. Secondly, the distance of the object from the surface will affect the size and blur of the shadow. Objects closer to the surface will have sharper and smaller shadows, while objects further away will have larger and blurrier shadows. Lastly, the color and opacity of the shadow should be adjusted according to the lighting conditions. Shadows are usually darker and more opaque in bright light, and lighter and less opaque in dim light.
How can I adjust the opacity and color of the drop shadow in Photoshop?
To adjust the opacity and color of the drop shadow in Photoshop, you can use the Layer Style dialog box. Select the layer with the drop shadow, then click on the “fx” button at the bottom of the Layers panel and choose “Drop Shadow”. In the Drop Shadow settings, you can adjust the opacity slider to make the shadow more or less transparent, and click on the color box to choose a different shadow color.
How can I create a drop shadow that follows the shape of the object in Photoshop?
To create a drop shadow that follows the shape of the object in Photoshop, you can use the “Transform” function. After creating the drop shadow, select the shadow layer and go to Edit > Transform > Warp. This will allow you to manipulate the shape of the shadow to match the contours of the object.
Why does my drop shadow look too sharp or too blurry in Photoshop?
The sharpness or blurriness of the drop shadow in Photoshop is determined by the “Spread” and “Size” settings in the Drop Shadow dialog box. If your shadow looks too sharp, try reducing the Spread and increasing the Size. If your shadow looks too blurry, try increasing the Spread and reducing the Size.
How can I create a drop shadow with a soft fade in Photoshop?
To create a drop shadow with a soft fade in Photoshop, you can use the “Gradient” tool. After creating the drop shadow, select the shadow layer and go to Layer > Layer Mask > Reveal All. Then select the Gradient tool, choose a black-to-white gradient, and draw a line across the shadow in the direction you want the fade to occur.
How can I create a drop shadow that casts onto another object in Photoshop?
To create a drop shadow that casts onto another object in Photoshop, you can use the “Duplicate Layer” and “Transform” functions. First, create a drop shadow for the object. Then duplicate the shadow layer, and use the Transform function to adjust the shape and position of the duplicate shadow so that it appears to cast onto the other object.
How can I create a drop shadow with a color gradient in Photoshop?
To create a drop shadow with a color gradient in Photoshop, you can use the “Gradient Overlay” layer style. After creating the drop shadow, select the shadow layer and go to Layer > Layer Style > Gradient Overlay. In the Gradient Overlay settings, you can choose a gradient color and adjust the angle and scale to create a color gradient effect on the shadow.
How can I create a drop shadow with a texture in Photoshop?
To create a drop shadow with a texture in Photoshop, you can use the “Pattern Overlay” layer style. After creating the drop shadow, select the shadow layer and go to Layer > Layer Style > Pattern Overlay. In the Pattern Overlay settings, you can choose a pattern and adjust the scale and opacity to create a texture effect on the shadow.
How can I create a drop shadow that appears to be cast by multiple light sources in Photoshop?
To create a drop shadow that appears to be cast by multiple light sources in Photoshop, you can use the “Duplicate Layer” function. After creating the drop shadow, duplicate the shadow layer and adjust the angle and distance settings in the Drop Shadow dialog box for each duplicate shadow to create the effect of multiple light sources.
How can I create a drop shadow that appears to be cast on a curved surface in Photoshop?
To create a drop shadow that appears to be cast on a curved surface in Photoshop, you can use the “Displace” filter. After creating the drop shadow, select the shadow layer and go to Filter > Distort > Displace. In the Displace dialog box, you can adjust the horizontal and vertical scale to create the effect of a shadow cast on a curved surface.
Jennifer Farley is a designer, illustrator and design instructor based in Ireland. She writes about design and illustration on her blog at Laughing Lion Design.

