
Key Takeaways
- Headless Flexibility: A headless CMS offers unparalleled flexibility, allowing developers to use any programming language or framework to display content across multiple platforms, not just websites.
- Simplified Backend Management: By focusing solely on the backend without a fixed front-end, headless CMSs simplify content management and delivery via robust APIs, making them ideal for dynamic, multi-platform deployment.
- Enhanced Developer Experience: Developers can leverage their preferred tools and technologies, thanks to the API-driven approach of headless CMSs, which separates content management from content presentation.
- Rapid Content Updates: Updates in a headless CMS propagate swiftly across all platforms, ensuring consistency and speeding up the process of content revision and distribution.
- Demo Project Insight: The article provides a practical demonstration of building a simple portfolio site using Elemeno, showcasing the straightforward setup and integration process typical of modern headless CMSs.
The “Headless CMS” is a relatively new type of tool, but what is it? What makes it different? And, how do you get started with one?
Traditional CMSs typically have two major components: a back end where you create and manage your content, and a front end which displays the content. The front end is almost always a website which is often built using outdated techniques, tools, and libraries.
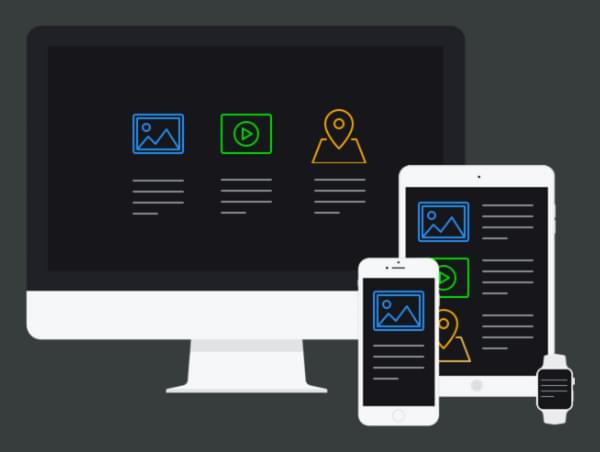
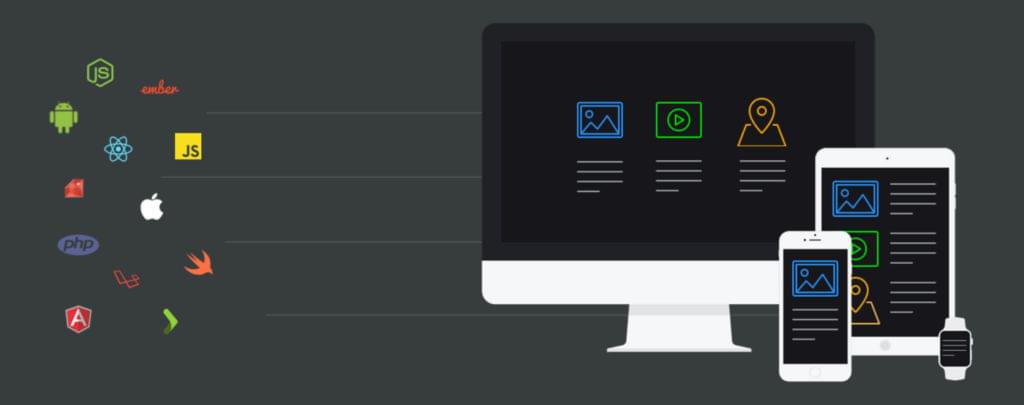
Headless CMSs take a different approach, only having a back end where you create and manage your content. They typically deliver your content via a robust API which allows you to easily retrieve your content in a developer-friendly way. This separation of concerns means the CMS does only one thing: manage your content. Headless CMSs don’t dictate how or where you display your content. You can deliver your content to any device or platform, using practically any programming language, framework or library.
Looking for more CMS topics? Check out these great links:
- Building Faster Websites with Grav, a Modern Flat-file CMS
- 6 Static Blog Generators That Aren’t Jekyll
- Building Database-free Websites with Statamic CMS
- Building Lightning-fast, Extensible Websites with Perch CMS
- Introduction to Craft CMS
- CMS Content Organization Structures: Trees vs Facets vs Tags
- KeystoneJS: The Best Node.js Alternative to WordPress
- MODX: The Best CMS You’ve Never Used?
And check out SitePoint Premium for more books, courses and free screencasts.
Building a Simple Portfolio Site with Elemeno
Let’s take a look at how we would build a simple portfolio site using Elemeno, a popular Headless CMS cofounded by yours truly. We’ll use a typical Node.js development stack, but the same principles could be applied to any language or framework.
The tools we’ll be using include:
- Node.js, a server-side JavaScript runtime environment
- Express, a web framework
- Pug, a templating library (formerly known as Jade)
- Elemeno, a headless CMS
We’ll get started first by setting up our project on Elemeno. Elemeno is a hosted product, so there’s nothing to install and no databases to set up. Simply create an account, if you don’t already have one, then create a new project. You can get started 100% free by choosing the development plan, which will fit our needs perfectly for this demo.
Defining content models
The next step is to define our content models. You can think of a content model as the template of inputs that will be displayed when creating content. Elemeno has two different types of content models: Singles and Collections. Collections allow you to create many items from the same content model. This is perfect for things like collections of products, articles, or projects. Singles allow you to create a single item from a content model. This is ideal for things like contact info, or about us pages.
For our simple portfolio site, we’ll create a Collection to store information about our projects. We’ll need to determine what information we want to display for each project, and what type of input is best suited to capture that information. For our portfolio, each project will have:
- Title (Plain Text)
- Description (Markdown)
- Date (Date and Time)
- Screenshot / Photo (Image Picker)
- URL (Plain Text)
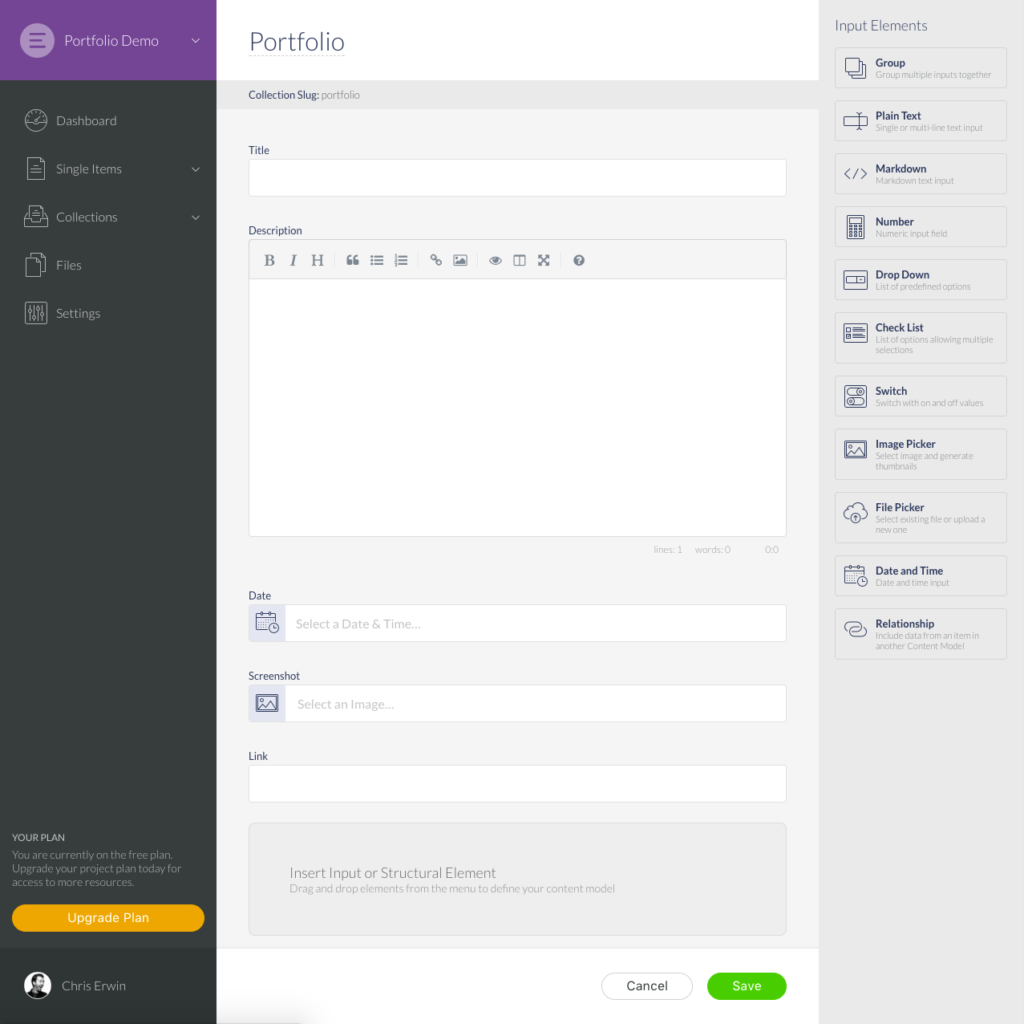
When creating a collection on Elemeno, you start by giving your collection a name at the very top of the screen. We’ll call our collection “Portfolio”. You’ll see that our collection starts with a single “title” input on the left side of the screen, and a list of input elements on the right. To define our content model we simply drag and drop input elements from the list onto our blank slate on the left. These inputs are exactly what you’ll see when creating the content items for your portfolio.
After placing each input element, click on the input to change its settings. We’ll set the “label” for each input and leave the other options to their default setting for now.
Our Portfolio collection should now look something like this:
Once we’re happy with what we have, we can click the “Save” button to create the collection.
Creating Items
Now that we have our Portfolio collection defined, we can start creating items. Simply click the “Create the first item” button to get started. Fill out each of the inputs and click the “Save and Publish Now” button to create our Portfolio item. Next, create a few more items to fill up our Portfolio Collection a little bit.
Now we’re ready to jump into the code and start building our site. First we’ll need to ensure we have Node.js and NPM installed for our development environment. You can do a simple check by opening Terminal and entering the following command:
node -v
You should see your installed version show up, or command not found: node if Node isn’t installed. If you need to install Node, simply download the installer from the Node.js website.
First create a new directory to store our project files, and then navigate to that folder in a Terminal window. We need a couple of node packages for our project, so we’ll use NPM to install them by entering the following command:
npm install elemeno express pug
We’ll create a new file called server.js, and we’ll get started by including the packages we just downloaded:
var Elemeno = require('elemeno'),
    express = require('express'),
    pug = require('pug');
We’ll create a new Express application by simply calling Express:
var app = express();
Now we need to create a new directory called views to hold all of our Pug template files. Then we’ll configure Express to tell it where our templates live, and which templating engine we’re using. Note: you can use any other supported templating engine based on personal preference.
app.set('views', './views');
app.set('view engine', 'pug');
We can now create the route for our landing page. We’ll keep things nice and simple by defining all of our routes right inside server.js. To define our first route, we’ll use:
app.get('/', function(req, res) {
    res.render('index.pug');
});
This simply tells Express when someone makes a GET request to our root / we want to render our index.pug template.
The next step is to create the index.pug template inside of our views directory. Create a new file, save it as index.pug and for now we’ll just fill it with something simple like:
h1 Hello World!
Now back in server.js we just need to tell Express which server port it should listen on:
app.listen(3000, function () {
    console.log('Portfolio listening on port 3000');
});
From a Terminal window you can now type node server and hit enter to get our website up and running.
Voila! We have a super basic node website. In your web browser go to localhost:3000 and you should see our super awesome “Hello World!” message.
Including content
Now let’s include the content from Elemeno in our website. We’ll start by creating an API Key which will allow us to access the content from our portfolio website. Go to the Settings screen on Elemeno, find the API Keys section and click the “Create API Key” button. We’ll give our key a name of “Website” and we’ll leave the other settings to their defaults. We’ll see our new API Key listed, click on it to view the details and copy the “Access Token” value.
Back in our server.js file, we’ll create a new instance of the Elemeno client near the top of our file:
var Elemeno = require('elemeno'),
    express = require('express'),
    pug = require('pug');

var app = express();
var elemeno = new Elemeno('PASTE-ACCESS-TOKEN-HERE');
Paste in the Access Token we copied from Elemeno. Now inside our index route we’ll fetch a list of projects from our Portfolio collection
app.get('/', function(req, res) {
    elemeno.getCollectionItems('portfolio', function(err, response) {
        res.render('index.pug', {projects: response.data});
    });
});
We pass the slug for our Portfolio collection, portfolio, to the getCollectionItems function. This function will return an array of objects representing the items in our collection. We then render our Pug template and pass along the data that was returned.
Implementing the data in the template
Our next step is to implement that data in our Pug template. Open the index.pug template and create a simple for in loop to display a list of our projects.
for project in projects
    h1= project.title
    div!= project.content.description.html
    img(src= project.content.screenshot.imageUrl)
    p: a(href= project.content.link) Visit Site
If you’re not familiar with Pug templates, this will look a little strange, but essentially each line defines which tag we want to output, and the content for that tag. We use dot notation to access the nested structure of each portfolio object returned from Elemeno. For reference, an item from our portfolio will have a structure similar to:
{
  "id": "123e4567-e89b-12d3-a456-426655440000",
  "slug": "google",
  "title": "Google",
  "dateCreated": "2017-07-11T14:28:49.772Z",
  "dateUpdated": "2017-07-11T14:28:49.772Z",
  "datePublished": "2017-07-11T14:28:49.772Z",
  "published": true,
  "content": {
    "description": {
      "markdown": "The best little search engine that ever existed",
      "html": "<p>The best little search engine that ever existed</p>"
    },
    "date": "2005-07-11T04:00:00+00:00",
    "link": "http://google.com",
    "screenshot": {
      "dateCreated": "2017-07-11T14:25:04.950Z",
      "dateUpdated": "2017-07-11T14:25:04.950Z",
      "title": "google.png",
      "fileSize": "65941",
      "mimeType": "image/png",
      "metaData": {
        "width": 580,
        "colors": {
          "palette": null,
          "dominant": {
            "rgb": {
              "b": 232,
              "g": 233,
              "r": 233
            },
            "hex": "E9E9E8",
            "isLight": true
          }
        },
        "height": 407,
        "alternativeText": null,
        "copyrightInformation": null
      },
      "tags": [],
      "imageUrl": "https://d1o9o9r2qlybfc.cloudfront.net/full/08c3f6dd-b6da-4241-bdd0-288799b1e1a4.png",
      "thumbnails": {}
    }
  }
}
We can restart our server by going back to our Terminal window where our Node server is running and hitting Control + C on our keyboard. This will stop our node server. We can start the server again by typing node server and hitting enter.
We’ll create a project details page next so that we don’t display all of our content directly on the home page. Create a new template in the views directory called details.pug. In this file, we create something like:
h1= project.title
div!= project.content.description.html
img(src= project.content.screenshot.imageUrl)
p: a(href= project.content.link) Visit Site
And we’ll update our index template to only list the project name with a link to the details view:
for project in projects
    ul
        li: a(href='/view/' + project.slug) #{project.title}
Note how we’re including the project.slug in the URL for the details page. This will allow us to determine which portfolio item to fetch on the details page.
Now we need to define a new route for our details view in our server.js file
app.get('/view/:slug', function(req, res) {
    var slug = req.params.slug;

    elemeno.getCollectionItem('portfolio', slug, function(err, response) {
        res.render('details.pug', {project: response.data});
    });
});
Here you can see that we define our route path with a dynamic parameter :slug. This means that if we make a GET requests to /views/ANYTHING it will get handled by this route. We extract the slug param from the URL and set to a new variable slug which we then pass to our getCollectionItem function. Note this function is fetching a singular item from the collection, so we need to pass both the collection slug and the item slug. This function returns a single object representing the item that we requested. We render our details.pug template and pass along the data for our portfolio item.
We can now restart our server again, and we’ll have a home page that links to our details page and all of the content will be pulled from Elemeno. If we create a new portfolio item on Elemeno, and then refresh our portfolio’s home page, we’ll see the new project listed there as well.
One last step will help handle any cases where we try to access a project that doesn’t exist in our portfolio collection. We’ll build a simple error handler in the details route that will display an error message, instead of crashing our server:
app.get('/view/:slug', function(req, res) {
    var slug = req.params.slug;

    elemeno.getCollectionItem('portfolio', slug, function(err, response) {
        if (err) {
            return res.render('404.pug');
        }

        res.render('details.pug', {project: response.data});
    });
});
Then we just create a simple 404.pug template in our views directory with our error message:
h1 Oops! that project does not exist
We can restart our server again, and if we try access a non-existent project we should get our new 404 page.
Wrapping Up
That’s it! We have a simple website pulling content from a Headless CMS. Our website is incredibly crude, and leaves much to be desired in terms of design and user experience. However, you can see how easy it is to access content from a Headless CMS like Elemeno and use virtually any programming language, templating engine, or framework. We could have easily used a different templating engine like EJS, Dust, or Handlebars. Instead of Express we could have used a different framework like Koa, Hapi, or Sails. Instead of Node we could have used a different programming language altogether like Ruby, PHP, or Python. Instead of a website we could have built a Mobile App, Watch App, or some sort of Arduino prototype.
A Headless CMS allows you to easily manage your content while allowing you to build projects on multiple devices using your favorite tools and techniques. Your CMS should not dictate where or how you build your projects.
I’ve shared a fully baked version of this simple portfolio site on GitHub: Elemeno Portfolio Demo. Feel free to fork it and make it your own!
Frequently Asked Questions about Building Web Apps with a Headless CMS
What is a headless CMS and how does it differ from a traditional CMS?
A headless Content Management System (CMS) is a back-end only content management system built as a content repository that makes content accessible via a RESTful API for display on any device. Unlike a traditional CMS, a headless CMS does not have a front-end or presentation layer. This means that it doesn’t concern itself with how and where content gets displayed. Instead, it focuses on storing and delivering structured content. This makes it a perfect choice for delivering content across multiple platforms like websites, apps, IoT devices, and more.
Why should I consider using a headless CMS for my web app?
A headless CMS offers several advantages for web app development. It provides greater flexibility in choosing your technology stack as it can work with any coding language. It also allows for a more personalized user experience as you can tailor the front-end presentation for different platforms. Moreover, it supports omnichannel delivery, meaning you can use the same back-end for your website, mobile app, IoT devices, and more. Lastly, it facilitates faster content updates as changes can be made in one place and reflected across all platforms.
What are some popular headless CMS options for Node.js?
There are several headless CMS options that work well with Node.js. Some of the popular ones include Strapi, Keystone.js, and Sanity.io. Strapi is an open-source headless CMS that is highly customizable and developer-friendly. Keystone.js is another open-source framework that offers a powerful Admin UI and supports GraphQL API. Sanity.io, on the other hand, is a platform for structured content that comes with real-time editing features.
How do I choose the right headless CMS for my web app?
Choosing the right headless CMS depends on your specific needs and requirements. Some factors to consider include the programming languages and frameworks you’re using, the complexity of your project, your budget, and the level of customization you need. It’s also important to consider the CMS’s scalability, security features, and community support.
Can I migrate my existing web app to a headless CMS?
Yes, it’s possible to migrate your existing web app to a headless CMS. The process involves moving your content to the new CMS and then integrating it with your app via the CMS’s API. However, the complexity of the migration will depend on the structure of your existing app and the CMS you’re moving to. It’s recommended to work with a developer or a development team experienced in such migrations to ensure a smooth transition.
How does a headless CMS work with Node.js?
A headless CMS works with Node.js by providing a RESTful or GraphQL API that you can use to fetch content from the CMS and display it in your Node.js app. You can make HTTP requests from your Node.js app to the CMS’s API to retrieve the content you need. This allows you to manage your content in the CMS and display it in your app without having to worry about the presentation layer.
What are the security considerations when using a headless CMS?
When using a headless CMS, it’s important to ensure that your API is secure. This includes using secure HTTP (HTTPS), implementing authentication and authorization, and regularly updating and patching your CMS. It’s also recommended to use a CMS that has built-in security features and follows best practices for data protection.
Can I use a headless CMS for e-commerce applications?
Yes, a headless CMS can be a great choice for e-commerce applications. It allows you to manage and deliver product information, blog posts, and other content across multiple platforms. This can provide a more consistent and personalized shopping experience for your customers. Some headless CMSs even offer integrations with e-commerce platforms for seamless content and commerce management.
How does a headless CMS support SEO?
A headless CMS supports SEO by allowing you to manage meta tags, URLs, and other SEO-related content for each piece of content. However, since a headless CMS does not have a presentation layer, you’ll need to implement SEO best practices on the front-end of your application. This includes creating SEO-friendly URLs, using structured data, and ensuring your site is fast and mobile-friendly.
Can I use a headless CMS for mobile app development?
Yes, a headless CMS is an excellent choice for mobile app development. Since it separates content from presentation, you can use the same content for your website and mobile app, ensuring consistency across platforms. You can also tailor the presentation of your content for different devices, providing a better user experience.