

Key Takeaways
- Okta’s Sign-In Widget can be integrated into a React app to provide user authentication. The widget is an embeddable Javascript tool that leverages Okta’s secure, scalable architecture with minimal effort from within React applications.
- The tutorial demonstrates the process of adding user authentication to a simple React app, starting with the cloning of a basic React seed project and installing the Okta Sign-In Widget via npm. The tutorial then guides the reader through creating a LoginPage component, setting up an OpenID Connect Application in Okta, and adding the widget to the component.
- The tutorial further explains how to render the Sign-In Widget, check if a user is logged in, and add a login link to the app’s navigation bar. The final version of the LoginPage React component includes methods for logging in, logging out, and rendering based on the user’s login status.
This article originally appeared on the OKTA blog. Thank you for supporting the partners who make SitePoint possible.
React has quickly become one of the most favored front-end web frameworks, and is second only to plain old HTML5, according to JAXenter. So it’s no surprise that developers are learning it, and employers are asking for it.
In this tutorial, you’ll start with a very simple React app with a couple of pages and some routing built in, and add authentication using Okta’s Sign-In Widget. The Sign-In Widget is an embeddable Javascript widget that allows developers to use Okta’s secure, scalable architecture with a minimum of effort from within React applications. Let’s get started!
Get the Simple React Seed Project
Start by cloning the simple React seed project.
git clone https://github.com/leebrandt/simple-react-seed.git okta-react-widget-sample
cd okta-react-widget-sample
Add the Okta Sign-In Widget
Install the Okta Sign-In Widget using npm.
npm install @okta/okta-signin-widget@2.3.0 --save
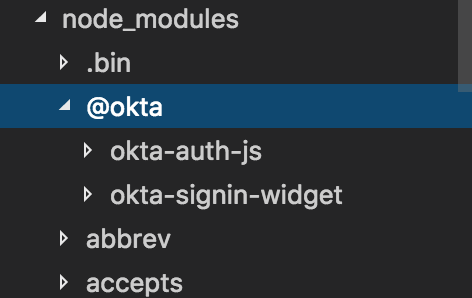
This will add the Okta Sign-In Widget code to your node_modules folder. We’ll be using version 2.3.0 of the Sign-In Widget.
Then add the styles for the widget in your index.html file from the Okta CDN. Add these lines inside the <head> tag:
    <link
     href="https://ok1static.oktacdn.com/assets/js/sdk/okta-signin-widget/2.3.0/css/okta-sign-in.min.css"
      type="text/css"
      rel="stylesheet"/>

    <!-- Theme file: Customize or replace this file if you want to override our default styles -->
    <link
      href="https://ok1static.oktacdn.com/assets/js/sdk/okta-signin-widget/2.3.0/css/okta-theme.css"
      type="text/css"
      rel="stylesheet"/>
The LoginPage Component
First, create a folder called auth in the ./src/components folder, then create a file called LoginPage.js where the LoginPage component will go.
Start with the most basic of components:
import React from 'react';

export default class LoginPage extends React.Component{
  render(){
    return(
      <div>Login Page</div>
    );
  }
}
This little component doesn’t do much but at least you now have a handle to add the LoginPage to your routing. So in your ./src/app.js file, you’ll import the component at the top:
import LoginPage from './components/auth/LoginPage';
and then add the route inside the main route (the one with the path of “/”)
<Route path="/login" component={LoginPage}/>
Add the OpenID Connect Application in Okta
In order to use Okta as your OpenID Connect provider for authentication, you’ll need to set up an application in the Okta developer console.
If you don’t have an Okta developer account, go create one! Once you’re logged in, click on Applications in the top navbar, then click Add Application. Select SPA as the platform and click Next. Change the redirect URI to http://localhost:3000, and click Done. The application will be created with the following settings:
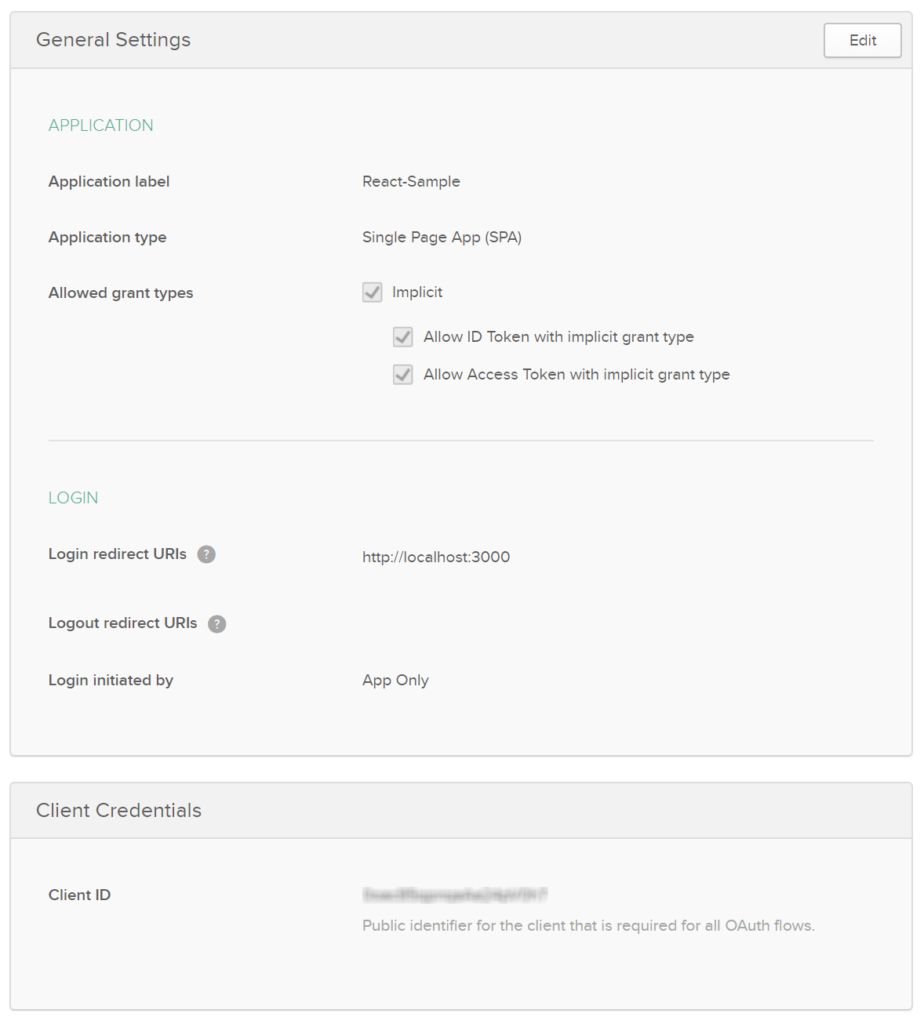
Now that you have an application created in Okta, you can set up the widget to talk to your new app!
Add the Widget to Your Component
import React from 'react';
import OktaSignIn from '@okta/okta-signin-widget';

export default class LoginPage extends React.Component{
  constructor(){
    super();
    this.widget = new OktaSignIn({
      baseUrl: 'https://{oktaOrgUrl}',
      clientId: '{clientId}',
      redirectUri: 'http://localhost:3000',
      authParams: {
        responseType: 'id_token'
      }
    });
  }

  render(){
    return(
      <div>Login Page</div>
    );
  }
}
Copy the Client ID generated from your application’s settings page and paste it over {clientId}. Make sure you also replace {oktaOrgUrl} with your Okta organization URL, which you can find by going back to the main Dashboard page in the developer console. Usually it will look like: https://dev-12345.oktapreview.com.
Thus far you’ve imported the OktaSignIn function from the Okta Sign-In Widget npm module you installed earlier. Next, in the constructor of the component, you initialized an instance of OktaSignIn with the configuration for the application. This way, the application code will be able to talk to Okta and Okta will recognize that this is the app you just created.
Show The Login Widget
Next, you’ll create the code to actually render the Sign-In Widget to the page! You’ll need to change your render method to create an HTML element you can render the widget into. Make sure to get a reference to the element that will be rendered. Then, add a componentDidMount function to make sure you don’t try to render the widget before the HTML element is on the page.
import React from 'react';
import OktaSignIn from '@okta/okta-signin-widget';

export default class LoginPage extends React.Component{
  constructor(){
    super();
    this.state = {user:null};
    this.widget = new OktaSignIn({
      baseUrl: 'https://{oktaOrgUrl}',
      clientId: '{clientId}',
      redirectUri: 'http://localhost:3000',
      authParams: {
        responseType: 'id_token'
      }
    });
  }

  componentDidMount(){
    this.widget.renderEl({el:this.loginContainer},
      (response) => {
        this.setState({user: response.claims.email});
      },
      (err) => {
        console.log(err);
      }
    );
  }

  render(){
    return(
     <div ref={(div) => {this.loginContainer = div; }} />
    );
  }
}
You also added state to your component. If you’re using a flux implementation, this would naturally come from the app state. But to keep this tutorial simple, let your LoginPage keep track of its own state.
Check Whether the User is Logged In
We’re almost there, but you don’t necessarily want to render the widget right away. You’ll need to add a check to make sure the user isn’t already logged in, and move your renderEl out to a function called showLogin.
 // ...other stuff removed for brevity's sake
 componentDidMount(){
    this.widget.session.get((response) => {
      if(response.status !== 'INACTIVE'){
        this.setState({user:response.login});
      }else{
        this.showLogin();
      }
    });
  }

  showLogin(){
    Backbone.history.stop();
    this.widget.renderEl({el:this.loginContainer},
      (response) => {
        this.setState({user: response.claims.email});
      },
      (err) => {
        console.log(err);
      }
    );
  }
You might have noticed a weird bit of code in that showLogin method. That first line: Backbone.history.stop(). The widget itself uses Backbone.js to navigate between its own screens (login, forgot password, etc.), and when it renders, it starts the Backbone.history. Since you’ve now moved it out into a showLogin function, the widget is going to re-render whenever the function is called. So this is just a little trick to tell Backbone to stop the history, because it’s going to restart when the widget is rendered.
The Final LoginPage React Component
Let’s wrap this up. Make sure you bind the class’s this context to each of your methods. Add a logout method, and change your render method to make a decision on what to render, based on whether there is a currently logged in user.
So the final version of LoginPage.js should look like this:
import React from 'react';
import OktaSignIn from '@okta/okta-signin-widget';

export default class LoginPage extends React.Component{
  constructor(){
    super();
    this.state = { user: null };
    this.widget = new OktaSignIn({
      baseUrl: 'https://{oktaOrgUrl}',
      clientId: '{clientId}',
      redirectUri: 'http://localhost:3000',
      authParams: {
        responseType: 'id_token'
      }
    });

    this.showLogin = this.showLogin.bind(this);
    this.logout = this.logout.bind(this);
  }

  componentDidMount(){
    this.widget.session.get((response) => {
      if(response.status !== 'INACTIVE'){
        this.setState({user:response.login});
      }else{
        this.showLogin();
      }
    });
  }

  showLogin(){
    Backbone.history.stop();
    this.widget.renderEl({el:this.loginContainer},
      (response) => {
        this.setState({user: response.claims.email});
      },
      (err) => {
        console.log(err);
      }
    );
  }

  logout(){
    this.widget.signOut(() => {
      this.setState({user: null});
      this.showLogin();
    });
  }

  render(){
    return(
      <div>
        {this.state.user ? (
          <div className="container">
            <div>Welcome, {this.state.user}!</div>
            <button onClick={this.logout}>Logout</button>
          </div>
        ) : null}
        {this.state.user ? null : (
          <div ref={(div) => {this.loginContainer = div; }} />
        )}
      </div>
    );
  }
}
Add a Login Link
React is now wired up to handle the /login route and display the Okta Sign-In Widget to prompt the user to log in.
Add a Login link to the top navbar by editing ./src/components/common/Navigation.js and adding a new link under the existing Contact link:
<li><Link to="login">Login</Link></li>
Check It Out
Now install the npm packages:
npm install
When you run the app now (with npm start), you should see something like this:
If you have any problems with the application, try deleting the node_modules folder and the package-lock.json file and re-run the npm install command. This should fix any problems with package dependency management.
If it works: congrats! If it doesn’t, please post a question to Stack Overflow with an okta tag, or hit me up on Twitter @leebrandt.
React + Okta
You can find a completed version of the application created in this blog post on GitHub.
Building authentication in an application is hard. It’s even less fun to build it over and over again in each application you build. Okta does the hard part for you and makes it a lot more fun to be a developer! Sign up for a forever-free developer account and try Okta today!
I hope you’ve enjoyed this quick tour of our React support. If you have questions about Okta’s features, or what we’re building next, please hit me up on Twitter @leebrandt, leave a comment below, or open an issue on GitHub.
Frequently Asked Questions on Building a React App with User Authentication
How can I add social login to my React app?
Adding social login to your React app can be done using various libraries such as react-facebook-login, react-google-login, or react-twitter-login. These libraries provide components that make it easy to integrate social login functionality into your app. You’ll need to register your app with the respective social media platform to get the necessary credentials. Once you have these, you can use them to configure the social login component in your app.
How can I secure my React app’s user authentication?
Securing your React app’s user authentication can be achieved in several ways. One of the most common methods is to use JSON Web Tokens (JWT). JWTs are used to send information that can be verified and trusted with a digital signature. They are secure because the information is digitally signed, meaning it can be verified and trusted. Another method is to use HTTPS to encrypt the data between the client and the server.
How can I handle user sessions in my React app?
User sessions can be handled in React apps using cookies or local storage. When a user logs in, a session is created on the server side, and a cookie with the session ID is saved on the client side. This cookie is sent with every request to the server, and the server uses it to identify the user. Alternatively, you can use local storage to store the session ID. However, this method is less secure because local storage is vulnerable to cross-site scripting (XSS) attacks.
How can I add role-based access control to my React app?
Role-based access control can be added to your React app by assigning roles to users and then restricting access to certain components based on these roles. This can be done using React’s context API to create a context that holds the user’s role. Then, you can use this context in your components to conditionally render content based on the user’s role.
How can I handle password reset in my React app?
Handling password reset in your React app involves several steps. First, you need to create a form where users can enter their email to request a password reset. When this form is submitted, a unique reset token should be generated and sent to the user’s email. Then, you need to create another form where users can enter their new password. This form should be accessible only through the link sent to the user’s email, and the reset token should be used to verify the user’s identity.
How can I add two-factor authentication to my React app?
Two-factor authentication can be added to your React app using libraries such as speakeasy or authy. These libraries generate a unique token that is sent to the user’s phone or email. The user must enter this token along with their password to log in. This adds an extra layer of security to your app.
How can I handle user registration in my React app?
User registration in a React app typically involves creating a form where users can enter their details such as name, email, and password. When this form is submitted, these details should be sent to the server where they are stored in a database. The server should then respond with a confirmation message or an error message if the registration was unsuccessful.
How can I validate user input in my React app?
User input can be validated in React apps using various methods. One of the most common methods is to use controlled components. With controlled components, the component’s state is directly controlled by the React component. This means you can add validation logic in your component’s state or event handlers.
How can I handle errors in my React app’s user authentication?
Errors in your React app’s user authentication can be handled using error boundaries. Error boundaries are React components that catch JavaScript errors anywhere in their child component tree, log those errors, and display a fallback UI instead of the component tree that crashed.
How can I test my React app’s user authentication?
Testing your React app’s user authentication can be done using testing libraries such as Jest and React Testing Library. These libraries provide functions that simulate user actions, such as filling in input fields and clicking buttons. You can use these functions to test your app’s authentication flow.