

Key Takeaways
- OXID eShop, or OXID eSales, is a highly customizable and scalable ecommerce platform. This tutorial provides a step-by-step guide to creating a new OXID module extension that implements infinite scrolling for the article list, replacing traditional pagination.
- The first part of the tutorial covers the creation of a proper folder structure for the new module extension, working with metadata.php to extend a necessary controller, replace the existing template with a new one, and add a new module configuration option. It also explains how to work with back-end language files to create a display name and help text for the module’s settings and how to work with the new module controller.
- The second part of the tutorial will focus on working with the new template, including how to properly get the module URL, working with the OXID template engine, adding content for the new template, adding JavaScript to handle the execution of infinite scrolling on the article list, and updating the database views and activating the module.
- The tutorial assumes some working experience with OXID eShop, and focuses on the back-end implementation to develop a new module extension. The next part will go into details about essential front-end implementation, which consists of customizing the template, and adding JavaScript to handle workflow for infinite scrolling.
OXID eShop, officially known as OXID eSales, is a powerful and scalable ecommerce standard platform optimized for every segment of online business. As a developer spending most of my “9-to-5” tasks with OXID, I found out that this e-commerce system is extremely easy to customize and extend.
If you are new to OXID or are looking for a simple but effective platform for your own online business, I recommend you read Matthew Setter’s series on OXID eSales that came up with a standard implementation to get started with OXID system.
In this 2-part tutorial, we will create a new OXID module extension that implements infinite scrolling to the article list instead of traditional pagination. During this article, I attempt to share my personal experience that may help you speed up your working process if you encounter any OXID development later.
Here is what you will achieve.
The entire source code will be available at the end of the series.
The tutorials will cover the following areas:
Part 1:
- Creating proper folder structure for new module extension.
- Working with
metadata.phpto:- Extend a necessary controller.
- Replace the existing template with a new template.
- Add a new module configuration option.
- How to work with back-end language files to create a display name and help text for the module’s settings.
- Work with the new module controller.
Part 2:
- Working with the new template:
- How to properly get the module URL.
- Recap to working with OXID template engine.
- Adding content for the new template.
- Adding JavaScript to handle the execution of infinite scrolling on article list.
- Updating the database views and activating the module.
Note: I assume that you have some working experience with OXID eShop (if not, see Matthew’s article, linked above). Thus, there won’t be much explanation for basic concepts of OXID.
OXID Module Folder Structure
The most important task you have to do first is to create a standard folder structure.
- Please go to {your_web_root}/oxid/modules/
- Create a new folder called aho_infinitescroll followed by its subsequent folders/files.
aho_infinitescroll/

|

|--- controllers/

|		|-- aho_infinite_alist.php 	# A new controller that extends alist.php

|

|--- out/

|	|--admin/

|		|--en/

|			|-- aho_infinitescroll_lang.php 	# Back-end English text.

|		|--de/

|			|-- aho_infinitescroll_lang.php 	# Back-end Deustch text.

|

|	|--css/

|		|--> infinitescroll.css  	# Style for infinite scrolling elements.

|

|	|--img/

|		|--> ajax-loader.gif     # image indicates the loading status.

|	|--js/

|

|--- translations/

|		|--de/

|			|--> aho_infinitescroll_lang.php  # Front-end Deustch text.

|		|--en/

|			|--> aho_infinitescroll_lang.php  # Front-end English text.

|

|--- views/

|		|-- page/

|			|-- list/

|				|--> aho_infinitescroll_list.tpl  # new template file.

|

|--- metadata.php  # Define extension name, classes and other infos.

|--- picture.jpg   # A thumbnail for the module's functionality.
NOTE:
The best practice of naming a new module is to combine the name of vendor/developer/group and the module’s functionality. It helps to reveal instantly the vendor and functionality of the new module for team collaboration.
Thus, the formula can be as follows:vendor name + underscore + functionality
- i.e: sitepoint_infinitescroll
Vendor name can be replaced by either
developer nameorgroup name. It’s up to you.
Working with Metadata.php
Metadata.php is essential to any module development. That file provides basic details about module, classes to be extended, blocks to be overidden, templates to be replaced, settings for both front-end and back-end sides, etc.
Please open the file metadata.php and add the following lines of code into it:
<?php
$sMetadataVersion = '1.0';  # Define version of this file
// An array to store modules' details

$aModule = array

(

    'id' => 'aho_infinitescroll',

    'title' => '[AHO] Infinite Scrolling List',

    'description' => 'Infinite Scrolling for article list',

    'thumbnail' => 'picture.jpg',

    'version' => '1.0.0',

    'author' => 'Tuan Anh Ho',

    'url' => '',

    'email' => 'anhhothai@gmail.com'

);
-
We’ve just inserted basic information for our new module, and all elements are self-descriptive by their terms.
-
Please note that the
idandtitleare mandatory variables. Especially, the value ofidhas to be the same as the module’s folder name. -
thumbnailis an optional element that describes your module visually. I usually prepare a good-looking thumbnail because I believe that a picture is worth a thousand words. Sometimes, you intend to sell some of your favourite self-developed modules via OXID market, and a better designed thumbnail entices more buyers.
Next, we’re going to define some more elements, right after email.
    'extend' => array(

        'alist' => 'aho_infinitescroll/controllers/aho_infinitescroll_alist'

    ),

    'templates' => array(

        'aho_infinitescroll_list.tpl'

            => 'aho_infinitescroll/views/page/list/aho_infinitescroll_list.tpl'

    )
-
The value
extendspecifies a particular core/controller class from which the new module will extend. In this case, it will bealist.php, located at/oxid/application/controllers/. -
The value
templatesis an array, which stores all registered templates of the new module. It’s recommended we create the same folder structure of the template to be replaced, for easy team collaboration. Please note that both items and values oftemplatesneed to include the file name extension.tplNOTE:
- The proper way to name a new template is “
module name+_+the old template name” - i.e: aho_infinitescroll_list.tpl
- The proper way to name a new template is “
We leave the new template file empty at the moment and continue with the file metadata.php. Please insert an array called settings just after the item templates:
'settings' => array(

    array(

        'group' => 'aho_infinitescroll',

        'name' => 'sInfiniteScrollListType',

        'type' => 'str',

        'value' => 'line'

    )

)
-
The value
settingsis a place to register all configuration options of a new module.groupalways has the value identical to the module’s id. -
Value: this new setting helps to manage the view type of list. In the scope of this tutorial, I will set the default value as
lineand keep using it till the end. -
As we activate the module for the first time, this setting is inserted into two tables
oxconfigandoxconfigdisplay. OXID will automatically insert the valuemodule:aho_infinitescrollinto columnsOXMODULE(tableoxconfig) andOXCFGMODULE(table oxconfigdisplay) with the valuemodule:aho_infinitescroll. This is very handy as it happens automatically.
You can follow this online document of extension metadata to read more about other possible arguments.
Next, we look into the back-end translations.
Adding Back-end Translations
In the last section, we added the settings for the new module. Now it’s time to work with its translation.
Please open the file aho_infinitescroll/out/admin/en/aho_infinitescroll_lang.phpand add the following lines in it.
<?php
$sLangName = 'English'; // English or Deustch
$aLang = array(
'charset' => 'UTF-8',
'SHOP_MODULE_GROUP_aho_infinitescroll' => 'Settings',
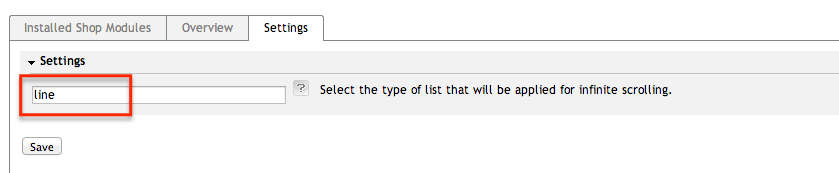
'SHOP_MODULE_sInfiniteScrollListType' => 'Select the type of list that will be applied for infinite scrolling.',
'HELP_SHOP_MODULE_sInfiniteScrollListType' => 'OXID supports 3 default view types as `line`,`grid` and `infogrid`. If you define an extra view type, make sure it has been created in your shop directory.'
);
-
Syntax to add translation for a configuration option
SHOP_MODULE+_+setting_column_name. -
Syntax to add the help text for a configuration option
HELP_SHOP_MODULE+_+setting_colum_name.
The above lines of codes will result in output as in the figure below. Later, when you activate the module, please enter line into the text box:
Please do the same for the file aho_infinitescroll/out/admin/de/aho_infinitescroll_lang.php. Assign the variable $sLangName with value Deustch and have someone specializing in language translate all the text into German, or just put gibberish in there, as long as it’s different from English so you can see the difference.
Working with the new controller
Please open aho_infinitescroll/controllers/aho_infinite_alist.php and add the following lines in it:
<?php
class aho_infinitescroll_alist extends aho_infinitescroll_alist_parent

{

    protected $_sThisTemplate = 'aho_infinitescroll_list.tpl';
    /**

     * @Todo: Change the template view

     * @return string

     */

    public function render(){

        parent::render();

        return $this->_sThisTemplate;

    }
    /** @Todo: Get the module option of view type

     *  @return string

     */

    public function getViewTypeList(){

        return $this->getConfig()->getConfigParam('sInfiniteScrollListType');

    }

}
This new controller does just a few things:
-
Change the value of
$_sThisTemplatetoaho_infinitescroll.tpl, which we have defined inmetadata.php: Please note that we only need to specify the template name here. Thus, template name should be unique. It helps the system find the correct template quickly. -
The function
renderdoes nothing but just returns the new template name. -
The function
getViewTypeListwill return value of data columnsInfiniteScrollListTypethat is defined inmetadata.php. The templateaho_infinitescroll.tplwill make use of this value to determine which view type will be applied for the article list. -
You can note that the name of the extended class is
aho_infinitescroll_alist_parent. The formula ismodule controller name+_+parent.
Tips to find the necessary class to extend
- You usually need to know which classes need to be extended. There is an easy way to find out which class is running in the current view. You just browse the file
/application/views/{theme_name}/tpl/layout/page.tpland insert the following line in the top of the file:
[{$oViewConf->getActiveClassName()}]
The above line helps print out which core class is used in the current view. If you want to detect the core class that performs Ajax requests, you will need a little more effort working with ChromeDev Tools.
Conclusion
So far, we’ve gone through the step-by-step back-end implementation to develop a new module extension. At the moment, we are able to activate the module to see what we will have in the administration dashboard. If any issues come up, please feel free to leave your comment here. I’m going to do my best to help you out.
The next part will go into details about essential front-end implementation, which consists of customizing the template, and adding JavaScript to handle workflow for infinite scrolling.
Frequently Asked Questions about Building an Infinite Scroll List in Oxid eShop
What is the purpose of using infinite scroll in Oxid eShop?
Infinite scroll is a web design technique that prevents the browser scroll bar from scrolling to the bottom of the page, causing the page to grow with additional content instead. In the context of Oxid eShop, this technique can be used to continuously display products as the user scrolls down the page, improving user experience by allowing seamless navigation and exploration of products.
How does infinite scroll improve the performance of an e-commerce website?
Infinite scroll can significantly enhance the performance of an e-commerce website by reducing the load time. Instead of loading all the products at once, which can slow down the site, infinite scroll loads a certain number of products initially and then loads more as the user continues to scroll. This not only improves site speed but also enhances user engagement and retention.
How can I implement infinite scroll in Oxid eShop using PHP?
Implementing infinite scroll in Oxid eShop involves using PHP to manipulate the AJAX calls and the pagination system. You’ll need to modify the functions in the list controller and the product list template to handle the AJAX requests and update the product list. The detailed steps and code snippets can be found in the article.
Are there any potential drawbacks to using infinite scroll in Oxid eShop?
While infinite scroll can enhance user experience, it may not be suitable for all types of e-commerce websites. For instance, if your website has a footer with important links, infinite scroll may make it difficult for users to reach the footer. Also, infinite scroll can sometimes be confusing for users who want to navigate to specific products or pages.
Can I use infinite scroll in other e-commerce platforms apart from Oxid eShop?
Yes, infinite scroll can be implemented in various e-commerce platforms that support custom coding. However, the implementation process may vary depending on the platform’s architecture and coding language. It’s recommended to refer to the specific platform’s documentation or seek help from a professional developer.
How does infinite scroll affect SEO?
Infinite scroll can potentially affect SEO as search engines may not be able to properly crawl and index content loaded via AJAX. However, this can be mitigated by implementing a paginated version of your site for search engines, alongside the infinite scroll version for users.
Is PHP recommended for e-commerce websites?
PHP is a popular choice for e-commerce websites due to its flexibility, scalability, and robustness. It supports a wide range of databases and is compatible with various e-commerce platforms, including Oxid eShop. However, the choice of programming language should depend on your specific requirements and expertise.
What are some alternatives to infinite scroll?
Alternatives to infinite scroll include pagination and “Load More” buttons. Pagination involves dividing content into separate pages, while “Load More” buttons allow users to load more content manually. The choice between these options depends on your website’s design and your users’ preferences.
How can I customize the look and feel of the infinite scroll in Oxid eShop?
The look and feel of the infinite scroll can be customized using CSS. You can modify the styles of the loading indicator, the product list, and other elements to match your website’s design.
Can I disable infinite scroll for certain pages in Oxid eShop?
Yes, you can choose to disable infinite scroll for certain pages in Oxid eShop. This can be done by modifying the conditions in the list controller and the product list template to exclude the specific pages.

