
![]()
Welcome to the the second part of the article where we look at Opal, a Ruby to Javascript compiler!
In the previous installment, I introduced Opal and showed how to get it set up on your system. We created the first half of Conway’s Game of Life in Opal. In particular, implementing the grid using the HTML 5 canvas element, and adding some interactivity to it.
In this article, we will complete our application by implementing the rest of the logic, and hooking it to the canvas. The completed source can be found at the end of the article.
Let’s dive right in!
Key Takeaways
- Opal is a Ruby to JavaScript compiler, used to write game logic in Ruby and then compile it into JavaScript, which can run in a web browser.
- The implementation of Conway’s Game of Life in Opal involves creating a grid using the HTML 5 canvas element, adding interactivity, and implementing the game’s logic.
- The game logic is based on four rules that determine the state of each cell in the grid, these rules are implemented using Ruby methods like map and reduce.
- Opal is compatible with the asset pipeline in Rails, and there are several libraries already written for Opal, such as opal-browser, opal-rails, and opal-rspec.
- The debugging process in Opal is straightforward, as error logs in the browser are usually sufficient to identify issues, largely due to the JavaScript function having the same name as the Ruby method.
Game Rules
As you might recall, Conway’s Game of Life consists of 4 simple rules:
Rule 1
Any live cell with fewer than two live neighbors dies, as if caused by under-population.
Rule 2
Any live cell with two or three live neighbors lives on to the next generation.
Rule 3
Any live cell with more than three live neighbors dies, as if by overcrowding.
Rule 4
Any dead cell with exactly three live neighbors becomes a live cell, as if by reproduction.
Protip: Using pp as console.log
Along the way, you might use lots of console.log statements for debugging. Indeed, that was what I used to do. Then, I learned an awesome trick:
@bentanweihao @opalrb #protip `console.log` is mapped to #pp (https://t.co/5mrxIiOJdV), awesome article btw :)
— EliaSchito(͡° ͜ʖ ͡°) (@elia) April 4, 2014
Implementing the Game Logic
Step 1: Create conway.rb
In the app directory, go ahead and create conway.rb:
require 'opal'

require 'opal-jquery'

require 'grid'
class Conway

attr_reader :grid
def initialize(grid)

@grid = grid

end

end
We pass in an instance of Grid to the Conway initializer.
Step 2: Discovering Liveness and Population Count
Before the 4 rules can be implemented, we need to find out whether a cell at a particular coordinate is alive or dead:
def is_alive?(x, y)

state[[x, y]] == 1

end
def is_dead?(x, y)

!is_alive?(x, y)

end
Also how many neighbors for a given coordinate:
def population_at(x, y)

[

state[[x-1, y-1]],

state[[x-1, y ]],

state[[x-1, y+1]],

state[[x, y-1]],

state[[x, y+1]],

state[[x+1, y-1]],

state[[x+1, y ]],

state[[x+1, y+1]]

].map(&:to_i).reduce(:+)

end
Notice how we can happily make use of Ruby methods like map and reduce, and even Symbol#to_proc works! It almost makes you forget that you are also working with Javascript.
Step 3: Implementing the Rules
Now that we can check for the liveness and population count at a coordinate, implementing the 4 rules is simple:
# Any live cell with fewer than two live neighbours dies,

# as if caused by under-population.

def is_underpopulated?(state, x, y)

is_alive?(x, y) && population_at(x, y) < 2

end
# Any live cell with two or three live neighbours lives

# on to the next generation.

def is_living_happily?(x, y)

is_alive?(x, y) && ([2, 3].include? population_at(x, y))

end
# Any live cell with more than three live neighbours dies,

# as if by overcrowding.

def is_overpopulated?(x, y)

is_alive?(x, y) && population_at(x, y) > 3

end
# Any dead cell with exactly three live neighbours becomes a live cell,

# as if by reproduction.

def can_reproduce?(x, y)

is_dead?(x, y) && population_at(x, y) == 3

end
Next, check if a cell makes it at the next interval, or tick, in Game of Life parlance:
def get_state_at(x, y)

if is_underpopulated?(x, y)

0

elsif is_living_happily?(x, y)

1

elsif is_overpopulated?(x, y)

0

elsif can_reproduce?(x, y)

1

end

end
Step 4: Accessing the Grid State
Recall how Grid was implemented:
class Grid

attr_reader :height, :width, :canvas, :context, :max_x, :max_y

attr_accessor :state
CELL_HEIGHT = 15;

CELL_WIDTH = 15;
def initialize

@height = `$(window).height()`

@width = `$(window).width()`

@canvas = `document.getElementById(#{canvas_id})`

@context = `#{canvas}.getContext('2d')`

@max_x = (height / CELL_HEIGHT).floor

@max_y = (width / CELL_WIDTH).floor

@state = blank_state

draw_canvas

end
def blank_state

h = Hash.new

(0..max_x).each do |x|

(0..max_y).each do |y|

h[[x,y]] = 0

end

end

h

end

# ...

end
Note that the state of the grid is stored in the @state attribute. In order to access the grid state, a Conway object needs to do something like grid.state.
Turns out, there’s a more idiomatic way to do this in Ruby. Enter the Forwardable module. What does this do exactly?
The Forwardable module provides delegation of specified methods to a designated object, using the methods
def_delegatoranddef_delegators.
In the code:
require 'opal'

require 'opal-jquery'

require 'grid'

require 'forwardable'
class Conway

attr_reader :grid

extend Forwardable
def_delegators :@grid, :state, :state=
def initialize(grid)

@grid = grid

end

# ...

end
First, require and extend Forwardable. Then, declare which object (@grid) and which methods we want delegated. This means that both of these are now the same thing:
Conway.new(Grid.new).grid.state
Conway.new(Grid.new).state
Step 5: Computing the Next State
At each tick, the next state for each cell needs to be computed. In other words, find out whether that cell is alive or dead. The computed new state is then saved into grid. The entire canvas is redrawn with these new coordinates.
def tick

# def_delegators at work again!

# This call is delegate to grid.state=

self.state = new_state

redraw_canvas

end
def new_state

new_state = Hash.new

state.each do |cell, _|

new_state[cell] = get_state_at(cell[0], cell[1])

end

new_state

end
Redrawing the Canvas
We have yet to implement redraw_canvas. Let’s rectify that. Open up grid.rb and add this:
class Grid

# ...

def redraw_canvas

draw_canvas

state.each do |cell, liveness|

fill_cell(cell[0], cell[1]) if liveness == 1

end

end

# ...

end
redraw_canvas redraws a blank canvas and iterates through state. If the coordinate value is 1 (alive), it fills it, otherwise it is left unfilled.
Head back to conway.rb and make an addition to the def_delegators:
def_delegators :@grid, :state, :state=, :redraw_canvas
Step 6. Looping
There is no way to transition into the next tick.
In Opal, you cannot write an infinite loop in the traditional Ruby way. So, doing something like this does not work:
loop do

tick

end
Neither will this:
while true do

tick

end
Let’s think for a bit. What we really want is to run tick at certain, fixed intervals. Javascript has setInterval! How can we use this in our code?
Create yet another file called interval.rb in app.
class Interval

# Note that time is in ms.

def initialize(time=0, &block)

@interval = `setInterval(function(){#{block.call}}, time)`

end
def stop

`clearInterval(#@interval)`

end

end
I hope your mind is blown after you realize what is going on here.
The Interval initializer takes in a time (no surprise), and a block! Then it calls the block in the Javascript setInterval function!
This means that we can now implement our infinite loop. Remember to require interval and then pass in a block containing the tick method like so:
require 'interval'

#...
class Conway

# ...

def run

Interval.new do

tick

end

end

# ...

end
run kickstarts the loop which drives the entire animation. But before we get to that, we have a bit more work left to do.
Step 7: Seeding
We have yet to tackle the issue of the initial state of the board, also known as the seed. seed should contain the coordinates of all the clicked positions of the board.
When the grid is first loaded, it is blank. The user gets to click the cells to fill them up. This makes up the seed. The seed coordinates are recorded. When the user is done, he/she presses the Enter key, triggering Conway#run. The user now gets to enjoy a lovely animation.
Open up grid.rb, and add the seed attribute. For convenience, we call add_mouse_event_listener when Grid is initialized.
class Grid

attr_accessor :state, :seed
def initialize

# ...

@seed = []

# ...

add_mouse_event_listener

end

# ...

end
When a click occurs, add the coordinates into seed. Similarly, for double-click, remove the coordinates from seed.
def add_mouse_event_listener

Element.find("##{canvas_id}").on :click do |event|

# ...

seed << [x, y]

end
Element.find("##{canvas_id}").on :dblclick do |event|

# ...

seed.delete([x, y])

end

end
Turn your attention now to conway.rb. First, add seed to def_delegators:
def_delegators :@grid, :state, :state=, :redraw_canvas, :seed
We need to detect when the ‘Enter’ key is pressed.
def add_enter_event_listener

Document.on :keypress do |event|

if enter_pressed?(event)

seed.each do |x, y|

state[[x, y]] = 1

end
run

end

end

end
When ‘Enter’ is detected, this method iterates through the coordinates of seed and populate the grid‘s initial state. After that, the game is run.
How do we detect if an ‘Enter’ is pressed? Just like in JavaScript/jQuery, check event.which for the ‘Enter’ key code:
def enter_pressed?(event)

event.which == 13

end
Again for convenience, we run add_enter_event_listener when Conway is initialized:
class Conway

# ...

def initialize(grid)

@grid = grid

add_enter_event_listener

end

# ...

end
Step 8: Bonus! The Glider Gun Pattern
Drop this code into grid.rb:
class Grid
def initialize

# ...

add_demo_event_listener

end
# Ctrl+D displays a demo of the Glider Gun:

# https://en.wikipedia.org/wiki/File:Game_of_life_glider_gun.svg

def add_demo_event_listener

Document.on :keypress do |event|

if ctrl_d_pressed?(event)

[

[25, 1],

[23, 2], [25, 2],

[13, 3], [14, 3], [21, 3], [22, 3],

[12, 4], [16, 4], [21, 4], [22, 4], [35, 4], [36, 4],

[1, 5], [2, 5], [11, 5], [17, 5], [21, 5], [22, 5], [35, 5], [36, 5],

[1, 6], [2, 6], [11, 6], [15, 6], [17, 6], [18, 6], [23, 6], [25, 6],

[11, 7], [17, 7], [25, 7],

[12, 8], [16, 8],

[13, 9], [14, 9]

].each do |x, y|

fill_cell(x, y)

seed << [x, y]

end

end

end

end
def ctrl_d_pressed?(event)

event.ctrl_key == true && event.which == 4

end

# ...

end
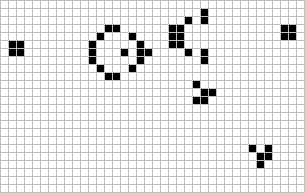
Here, when you type Ctrl + D together, the Glider Gun pattern would be drawn. Press ‘Enter’ to start the animation.
Step 9: All Done!
Give yourself a big pat on the back. We have reached the end. Go ahead and try out a couple of patterns. If you need any inspiration for starting patterns, a quick search will yield many interesting results.
Concluding Remarks
I hope you had a bit of fun experimenting with Opal and, along the way, maybe even found ways to integrate Opal into your existing project. Rails developers will be pleased to know that Opal plays nice with the asset pipeline with the opal-rails gem.
In my short experience playing with Opal, I didn’t find debugging that big of an issue. Usually, inspecting the error log in the browser was sufficient in figuring out what went wrong. This is especially true since during compilation, the Javascript function has the same name as the Ruby method. Most of the times the error messages were descriptive enough.
You will notice that this implementation is not exactly performant, and depends on the size of the canvas. I chose to go for the most straightforward implementation, therefore, some performance had to be sacrificed. Nonetheless, I hope you had lot of fun building this application!
Another thing to note is that there are a few libraries already written for Opal, such as opal-browser, opal-rails and opal-rspec. You can see even more on the Opal github page. We could make our application shorter with opal-browser, for example, but I wanted to demonstrate what could be achieved with the bare minimum.
Opal is very promising, and I hope it gains more widespread adoption. It will be very interesting to see what other developers do with this.
Thanks for reading!
Resources
- Opal, A new hope (for Ruby programmers) (Ruby Conf 2013) – video
- Opal mailing list is pretty active, and a good place to ask questions if you get stuck.
The Complete Source
For your convenience, the complete source is on Github
Frequently Asked Questions (FAQs) about Opal, Ruby, and Browser Game Life
What is the significance of Opal in the browser game life?
Opal is a Ruby to JavaScript source-to-source compiler. It is used in the browser game life to write the game logic in Ruby, which is then compiled into JavaScript. This allows developers to leverage the power of Ruby’s elegant syntax and powerful features while still being able to run the game in a web browser, which typically only supports JavaScript.
How does the game life work?
The game life is a zero-player game, meaning its evolution is determined by its initial state, requiring no further input. A player interacts with the game by creating an initial configuration and observing how it evolves. It’s an excellent example of cellular automaton, where each cell’s future state is determined by its eight neighbors.
How can I use Ruby in my own browser games?
To use Ruby in your own browser games, you can use Opal, a Ruby to JavaScript compiler. This allows you to write your game logic in Ruby, and then compile it into JavaScript, which can be run in a web browser. You can include the Opal library in your project, write your Ruby code, and then compile it using Opal’s build tools.
What are the benefits of using Opal for browser game development?
Opal allows you to write your game logic in Ruby, a language known for its elegance and readability, and then compile it into JavaScript, which is universally supported by web browsers. This means you can leverage the power of Ruby while still being able to run your game in any web browser.
How can I get started with Opal?
To get started with Opal, you’ll first need to install it. You can do this by adding it to your project’s Gemfile and running bundle install. Once installed, you can start writing your Ruby code and then compile it into JavaScript using Opal’s build tools.
What are the keys in Dead Cells?
In Dead Cells, keys are items that are used to unlock doors and access new areas. There are several types of keys, including the Emerald, Ruby, and Sapphire keys, each of which unlocks a different door.
How can I find the Emerald, Ruby, and Sapphire keys in Dead Cells?
The Emerald, Ruby, and Sapphire keys in Dead Cells can be found in various locations throughout the game. They are typically hidden and require the player to explore and interact with the environment to find them.
What can I do with the Emerald, Ruby, and Sapphire keys in Dead Cells?
The Emerald, Ruby, and Sapphire keys in Dead Cells are used to unlock doors and access new areas. Each key corresponds to a specific door, so finding and using these keys is essential for progressing through the game.
How does the pickup system work in Dead Cells?
In Dead Cells, pickups are items that the player can collect throughout the game. These include weapons, power-ups, and keys. Once picked up, these items are added to the player’s inventory and can be used at any time.
How can I improve my skills in Dead Cells?
Improving your skills in Dead Cells requires practice and strategy. Understanding the game’s mechanics, mastering combat, and learning to effectively use pickups and keys are all crucial aspects of becoming a better player.