

Key Takeaways
- Redis can be effectively utilized for managing activity feeds in web applications, contributing to speed, scalability, ease of use, and the option of data expiration.
- The ‘redis_timeline’ gem can be used in conjunction with Redis for creating user timelines, tracking specific activities, and pushing updates to a user’s followers.
- Redis’s “fan-out-on-write” model, implemented using ‘lpush’, allows for efficient call making to the Redis store. The feed is stored as a list of hashes with JSON encoder and decoder used for reading and writing the list.
- Redis-based activity feeds can be optimized by trimming the list to display only the most recent activities or setting the list to expire after a certain time period, reducing overhead.
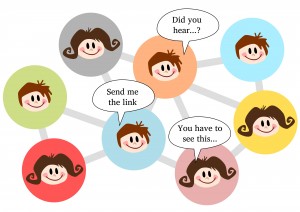 Today, activity feeds are an essential part of almost all web apps. SaaS based apps, social apps, and the like all need a user timeline. These activity feeds and user timelines can get easily out of hand if not managed properly, especially with a large set of users logging in regularly.
Redis, in this case can be a good choice to attain ease of use, speed of operation, scalability, and the option of expiring data if that is not required after a specific time period.
In my approach, the default database for the application is MySQL, and I am running Redis within my application separately for activity feeds. This architecture decision is debatable, because it does increase an effort of managing 2 separate data stores. However, it does provide a significant boost to the performance of the application.
Let’s quickly run throgh setting up Redis in our application. Add the redis gem to our Gemfile and run bundle.
gem 'redis', :git => 'https://github.com/redis/redis-rb.git'
bundle install
Then in our config/initializers, create a file called redis.rb and initialize the connection to the Redis server:
$redis = Redis.new(:host => 'localhost', :port => 6379)
Let’s load up the rails console and see if the redis connection works:
$ rails c

Loading development environment (Rails 4.0.0.rc1)

1.9.3-p327 :001 > $redis

 => #<Redis client v3.0.4 for redis://localhost:6379/0>

1.9.3-p327 :002 >
Works great!
Here is the context of our application: The app allows people to create and share meals with others. Now, a system timeline would provide activity about creation and updating of meals from the people whom they’re following.
We will use the redis timeline gem for creating our Redis-based timeline. Later in this article, we will deconstruct that gem’s functions. The gem uses an after_create callback to serve as events for tracking a particular activity. This also provides us with necessary ids.
The current version of gem supports Rails 3.2 (due to the dependency on ActiveSupport and ActiveModel 3.2 for callbacks.) However, I just forked it and updated the gemspec dependency to work with Rails 4.0.0.rc1 here. You can utilize my fork in your Gemfile as shown:
gem 'redis_timeline', :git => 'https://github.com/saurabhbhatia/redis-timeline.git'</p>
<p>bundle install
The redis_timeline gem requires us to first setup an actor. It’s typically wired to our User class because the actor is reponsible for an action and User performs all the actions in an app.
class User < ActiveRecord::Base

  include Timeline::Actor

  has_many :meals

end
After setting up the actor, we need to setup the class to track. In our case, we need to track the Meal class create and edit methods. Let’s see how to do that.
We first setup an include Timeline::Track method to setup tracking on the particular model. You can now define the method you want to ‘track’ and the callback you want it to track ‘on’.
class Meal < ActiveRecord::Base

 include Timeline::Track

 belongs_to :user
  track :new_meal,

    on: :create,

    actor: :user
  track :edit_meal,

    on: :update,

    actor: :user

end
Let’s load the rails console and see if this works.
rails c

Loading development environment (Rails 4.0.0.rc1)

1.9.3-p327 :001 > meal = Meal.create(:title => 'Nachos', :description => 'Cheesy & Corny' , :user_id => 1)

 => #<Meal id: 5, title: "Nachos", description: "Cheesy & Corny", created_at: "2013-06-23 09:13:30", updated_at: "2013-06-23 09:13:30", user_id: 1>
In order to make a call on timeline, we need to get the actor (in our case the user) and call timeline.
1.9.3-p327 :002 > user = User.find(1)

1.9.3-p327 :003 > user.timeline

 => [#<Timeline::Activity actor=#<Timeline::Activity class="User" display_name="#<User:0x000000049b2900>" id=1> created_at="2013-06-23T17:13:31+08:00" object=#<Timeline::Activity class="Meal" display_name="#<Meal:0x000000051b50f8>" id=5> target=nil verb="new_meal">]
The timeline object contains the class name, meal name, user object and a verb. The verb basically denotes the action being tracked.
This still has something missing. We need to push our updates to a user’s followers. Our follow mechanism is also built with Redis and looks something like this. For convenience’s sake I have used the article here to create this mechanism and defined it in my user model.
def follow!(user)

  $redis.multi do

    $redis.sadd(self.redis_key(:following), user.id)

    $redis.sadd(user.redis_key(:followers), self.id)

  end

end
def unfollow!(user)

  $redis.multi do

    $redis.srem(self.redis_key(:following), user.id)

    $redis.srem(user.redis_key(:followers), self.id)

  end

end
def followers

  user_ids = $redis.smembers(self.redis_key(:followers))

  User.where(:id => user_ids)

end
def following

  user_ids = $redis.smembers(self.redis_key(:following))

  User.where(:id => user_ids)

end
In order to send a user’s update to a follower, we would use the `followers` key and configure it as shown in the following snippet. The gem includes a param called `followers` where we can send our followers key stored in the Redis database.
track :new_post,

  on: :create,

  actor: :user,

  followers: :followers
track :edit_post,

  on: :update,

  actor: :user,

  followers: :followers
In order to display your feed, you can make a call on the `current_user` method and call the feed in your controller. (Note: This presumes you are using something like [Devise](https://github.com/plataformatec/devise) which provides a `current_user` helper.)
def index

 @feed = current_user.timeline

end
Under the Hood
The gem uses a “fan-out-on-write” kind of model for making the call to the Redis store. It implements this using lpush. The feed is stored as a list of hashes. It first creates a hash of all the items to be tracked and ids using setters. Then sends them to a list using lpush. You can check this out in more detail in the track class docs.
def redis_add(list, activity_item)

  Timeline.redis.lpush list, Timeline.encode(activity_item)

end
In order to read and write the list, it uses a JSON encoder and decoder. This is because redis treats all its objects as strings, and hashes need to be serialized as strings before they can be stored. This is defined in the helper class.
Also defined in the helper class is the method to read the list using lrange.
def get_list(options={})

  Timeline.redis.lrange options[:list_name], options[:start], options[:end]

end
Some Tricks
Other things that can be done to optimize the lists :
- Trim the list: One advantge of using list as the datastructure is you can trim it. In case, for example, you want a generalized timeline of the system and want to display last 100 objects, you can simply trim the list to that.
LTRIM <user timeline list key> 0 99 - Expire the list: In case you feel that maintinging a permanent store of system timeline is too much overhead, you can expire it within a given time interval. The time is defined in seconds.
EXPIRE <user timeline list key> 3600
Conclusion
Redis is an effective way to develop and manage activity feeds and isolate them from the system. This can help in scaling the main app as it would keep some unnecessary writes out of the main database. Now, go create those activity feeds!
Frequently Asked Questions (FAQs) on Redis-Based Activity Feeds
What are the benefits of using Redis for activity feeds?
Redis is a powerful in-memory data structure store that offers several advantages for implementing activity feeds. Firstly, it provides high-speed data access, which is crucial for real-time applications like activity feeds. Secondly, Redis supports a variety of data structures, including lists, sets, and sorted sets, which can be used to model complex relationships and interactions in an activity feed. Lastly, Redis offers built-in replication and persistence features, ensuring data durability and reliability.
How does Redis compare to other databases for implementing activity feeds?
Compared to traditional relational databases, Redis offers superior performance due to its in-memory nature. It also provides more flexibility in terms of data modeling, as it supports a variety of data structures. Compared to other NoSQL databases, Redis stands out for its simplicity, ease of use, and robust feature set. However, it’s important to note that Redis may not be the best choice for all use cases. For instance, if your application requires complex queries or transactional consistency, a relational database might be a better fit.
How can I implement pagination in Redis-based activity feeds?
Pagination can be implemented in Redis-based activity feeds using the LRANGE command. This command retrieves a range of elements from a list, which can be used to fetch a specific page of activity feed items. The start and stop parameters for the LRANGE command can be calculated based on the current page number and the number of items per page.
How can I ensure data durability in Redis-based activity feeds?
Redis provides several options for ensuring data durability. One option is to use Redis’s built-in persistence features, which include snapshotting and append-only file (AOF) persistence. Snapshotting saves the entire state of the database to disk at regular intervals, while AOF logs every write operation and can be used to reconstruct the database state in case of a crash. Another option is to use Redis’s replication feature, which allows you to maintain multiple copies of your data on different servers.
How can I handle large volumes of data in Redis-based activity feeds?
Handling large volumes of data in Redis-based activity feeds can be challenging due to Redis’s in-memory nature. However, there are several strategies you can use to manage this. One strategy is to use Redis’s built-in data eviction policies, which automatically remove less important data when memory is full. Another strategy is to use Redis’s partitioning feature, which allows you to split your data across multiple Redis instances. Lastly, you can use Redis’s data compression features to reduce the size of your data.
How can I implement real-time updates in Redis-based activity feeds?
Real-time updates in Redis-based activity feeds can be implemented using Redis’s Pub/Sub feature. This feature allows you to publish messages to specific channels, and any clients subscribed to those channels will receive the messages. You can use this feature to push updates to your activity feed in real time.
How can I secure my Redis-based activity feeds?
Redis provides several security features that you can use to protect your activity feeds. These include password authentication, command renaming and disabling, and encrypted connections using SSL. Additionally, you can use firewall rules and network segmentation to limit access to your Redis servers.
How can I monitor the performance of my Redis-based activity feeds?
Redis provides several tools for monitoring performance, including the INFO command, the MONITOR command, and the SLOWLOG command. These tools can provide valuable insights into your Redis server’s performance and help you identify potential bottlenecks or issues.
How can I scale my Redis-based activity feeds?
Scaling Redis-based activity feeds can be achieved through various methods. One approach is to use Redis’s built-in replication feature to create read replicas of your data, which can offload read traffic from your primary server. Another approach is to use Redis’s partitioning feature to distribute your data across multiple Redis instances. Lastly, you can use cloud-based Redis services, which offer automatic scaling features.
How can I handle complex queries in Redis-based activity feeds?
While Redis doesn’t support complex queries like SQL databases, you can still perform complex operations by combining multiple commands. For example, you can use the SORT command with the BY option to sort activity feed items based on a specific attribute. You can also use the ZINTERSTORE or ZUNIONSTORE commands to perform set operations on sorted sets. However, keep in mind that these operations can be resource-intensive and may impact performance.

