A Better Tag Cloud for Tumblr
Key Takeaways
- The Tumblr Tag Cloud, a PHP app developed by Rubbing Alcoholic, offers a more efficient alternative to Heather Rivers’ Tumblr Tag Clouds. The new app relies on server-side caching, minimizing load times for blogs with a large number of posts.
- To use the Tumblr Tag Cloud app, it must be hosted on a personal server. While this may initially make the setup more complex, it ultimately results in faster load times as it doesn’t rely on shared servers used by other bloggers.
- The app allows bloggers to create a customized tag cloud for their Tumblr blog. After setting up the app and adding the blog to the database, users can adjust configuration options and receive an embed code for their tag cloud. This code can then be pasted into the HTML editor on the Tumblr blog’s customization page.
Requirements
- A web hosting server
- PHP 5
- MySQL
- A domain or subdomain to host the app on (this must be a true subdomain, not just a subdirectory of your main site)
Installation
First create a database and a database user on your server for the app to use. If your site uses cPanel, go to the “Databases” section and select “MySQL Databases.” This will bring you to the database management page, where you can create your database and add a user: Once that’s done, grab the latest version of Tumblr Tag Cloud from GitHub:
git clone https://github.com/rubbingalcoholic/tumblr_tag_cloud.git
Note: If you don’t have Git on your system, you can download the ZIP archive from the GitHub page.
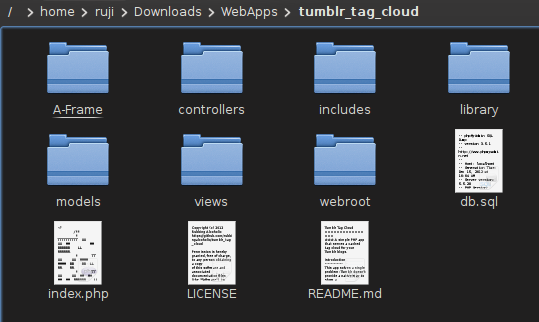
You’ll now have a directory called tumblr_tag_cloud. Its contents look like this:
 We need to edit the configuration. Copy the file
 includes/local.default.php to includes/local.php
, and open local.php in a text editor.
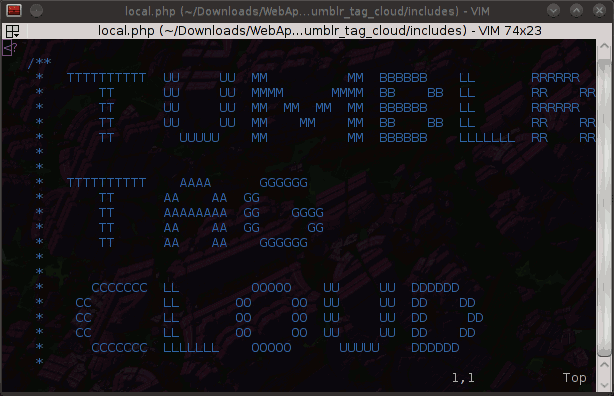 The file is heavily commented, so it is easy to see what different sections are for. First enter the admin username and password that you want to use (this prevents random people from hosting their own tag clouds on your database):
define('ADMIN_USERNAME', 'admin');

define('ADMIN_PASSWORD', 'p@ssw0rd');

Below that, put in your database information. Don't forget to include the prefixes. For example:

$config['db']['dsn'] = array(

'hostspec' => '127.0.0.1',

'port' => '3306',

'username' => 'rujic_cloud',

'password' => 'p@ssw0rd',

'database' => 'rujic_cloud',webroot must go inside the public_html folder of your domain or subdomain. If your server uses a single public_html directory for all your subdomains, put these files directly into the appropriate subdomain’s main directory.
Next, all other files and directories in tumblr_tag_cloud must go into the parent directory of the directory you placed the webroot files in.
Creating the Tag Cloud
If everything went well in the previous steps, you can access Tumblr Tag Cloud by visiting the domain or subdomain you installed it in.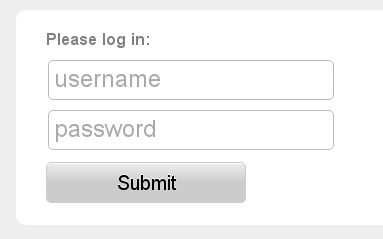 Log in with the admin credentials you set earlier in
 local.php. Assuming you configured your database information correctly, you should see this:
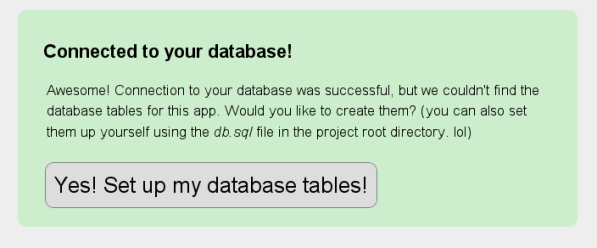 Proceed to set up your database tables. You’ll then be prompted to add the blog for which you want to create the tag cloud (you can add more blogs later).
 After you add your blog to the database, you’ll see some configuration options. Play around with these as you please.
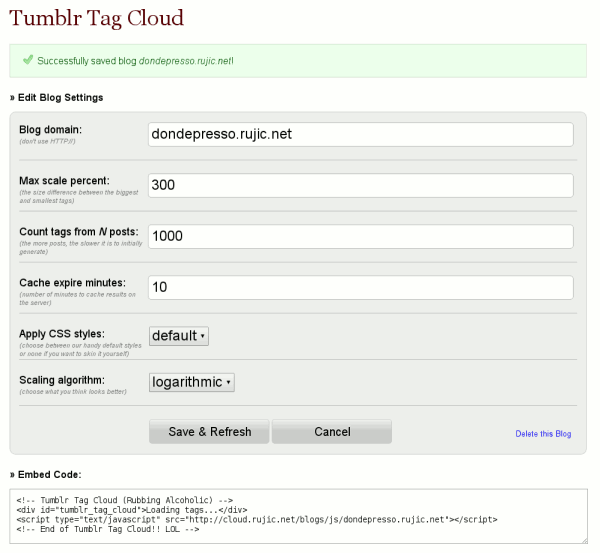 This page will also give you the embed code for your tag cloud along with a preview. Note that the preview doesn’t take into account the CSS on your Tumblr blog, so the final product will probably look different.
Putting Your Tag Cloud on Tumblr
Log into your Tumblr blog and go to the settings page. In the “Theme” section, click “Customize”: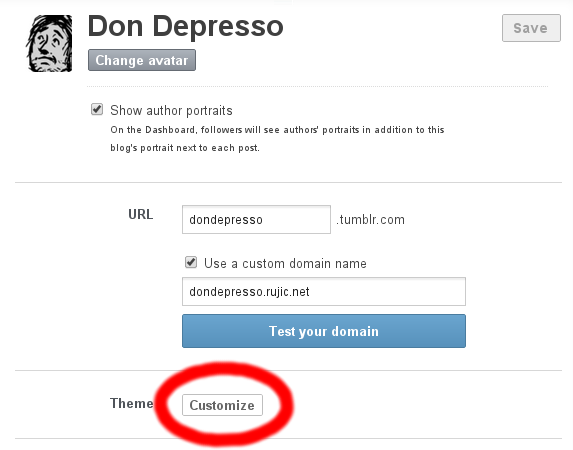 This will take you to a preview of your blog along with a left sidebar for editing the theme. Click on “Edit HTML”:
 An HTML editor will open up in the sidebar. Paste the embed code where you want your tag cloud to display. This will vary according to the theme you’re using. I put mine in the right sidebar for The Minimal Theme:
 Save your changes and go to your blog. The tag cloud may take a few seconds to generate the first time, but after that it will be cached in the server’s memory.
 And that’s that! Do you use a tag cloud on your Tumblr blog? If not, do you want one? Let us know in the comments how this solution works out for you!
Frequently Asked Questions about Tumblr Tag Clouds
How can I create a tag cloud for my Tumblr blog?
Creating a tag cloud for your Tumblr blog involves a few steps. First, you need to access your Tumblr account and go to the customization page. From there, you can add a new page and select the ‘HTML’ option. You can then paste the code for the tag cloud generator into this HTML page. Remember to save your changes before exiting. This will create a tag cloud that is unique to your blog and displays all your tags in a visually appealing way.
Why is my Tumblr tag cloud not displaying correctly?
If your Tumblr tag cloud is not displaying correctly, it could be due to a few reasons. One common issue is incorrect placement of the tag cloud code. Ensure that the code is placed in the correct section of your HTML page. Another issue could be conflicting CSS styles. If your blog’s CSS is interfering with the tag cloud’s CSS, it could cause display issues. Try isolating the tag cloud in its own div and see if that resolves the issue.
Can I customize the appearance of my Tumblr tag cloud?
Yes, you can customize the appearance of your Tumblr tag cloud. This can be done by modifying the CSS associated with the tag cloud. You can change the font, color, size, and even the shape of the tags. However, keep in mind that any changes you make should not interfere with the readability and functionality of the tag cloud.
How can I make my Tumblr tag cloud more user-friendly?
Making your Tumblr tag cloud more user-friendly can be achieved by ensuring that it is easy to navigate and visually appealing. You can do this by organizing your tags in a logical manner, using a readable font, and choosing colors that are easy on the eyes. Additionally, you can also include a search function to allow users to quickly find specific tags.
Why are some tags in my Tumblr tag cloud larger than others?
The size of the tags in your Tumblr tag cloud is determined by how frequently they are used. Tags that are used more often will appear larger, while less frequently used tags will be smaller. This is a visual way to indicate the popularity of different topics on your blog.
Can I use a tag cloud on other blogging platforms?
Yes, tag clouds can be used on various blogging platforms, not just Tumblr. The process of creating and implementing a tag cloud may vary depending on the platform, but the concept remains the same. You will need to find a tag cloud generator that is compatible with your chosen platform.
How can I add a search function to my Tumblr tag cloud?
Adding a search function to your Tumblr tag cloud can be done by incorporating a search box into your HTML code. This will allow users to type in specific tags and quickly find the content they are looking for.
Why is my Tumblr tag cloud not updating with new tags?
If your Tumblr tag cloud is not updating with new tags, it could be due to a caching issue. Try clearing your cache and refreshing the page. If the problem persists, check your tag cloud code to ensure it is set up to automatically update with new tags.
Can I exclude certain tags from my Tumblr tag cloud?
Yes, you can exclude certain tags from your Tumblr tag cloud. This can be done by modifying the tag cloud code to ignore specific tags. This can be useful if you have certain tags that you do not want to be displayed in your tag cloud.
How can I make my Tumblr tag cloud more visually appealing?
Making your Tumblr tag cloud more visually appealing can be achieved by experimenting with different fonts, colors, and sizes. You can also try arranging your tags in different shapes or patterns. Remember, the goal is to create a tag cloud that is not only visually appealing but also easy to navigate and understand.
Rebecca "Ruji" Chapnik is a freelance creator of miscellanea, including but not limited to text and images. She studied art at the University of California, Santa Cruz and writing at Portland State University. She went on to study Linux in her bedroom and also in various other people's bedrooms, crouched anti-ergonomically before abandoned Windows computers. Ruji currently lives in Portland, Oregon. You can find her experiments at http://rujic.net and her comics at http://dondepresso.rujic.net.
