
Vector images are becoming increasingly common on the web. SVGs provide a scalable, responsive and fast alternative to standard images with the primary benefit being that they look crisp and sharp across any device and they are typically smaller in file size.
Cross-browser support is also now comprehensive, with all modern browsers supporting SVGs when used with the image tag or in CSS as part of the background property.
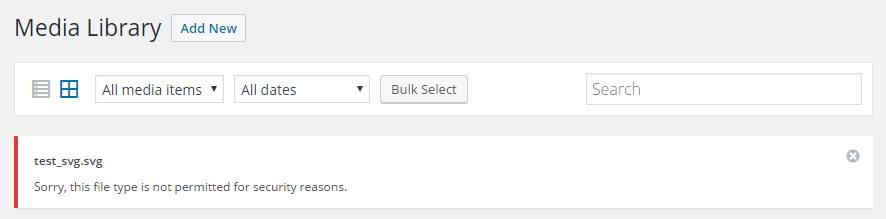
If you’re using WordPress, you’re probably familiar with the Media Library and how it works as a central repository for your media assets. The manager which handles uploading of files is initially restricted to a listing of approved file types.
Today’s tutorial will focus on how we can add SVG media support and also improve WordPress’ processing, handling and display of SVGs overall.
Key Takeaways
- SVGs offer a scalable, responsive, and efficient alternative to traditional image formats, providing clarity and reduced file sizes across different devices and browsers.
- Due to security concerns related to potential JavaScript injection, SVGs are not included in WordPress’s default list of supported media types.
- Users can enable SVG uploads in WordPress by modifying the `upload_mimes` filter in the `functions.php` file or through a custom plugin, allowing SVGs to be added to the Media Library.
- Enhancements to the Media Library’s display of SVGs can be achieved through JavaScript and AJAX, using Mutation Observers to dynamically update SVG previews in the grid view.
- Admin CSS tweaks are necessary to ensure SVGs display correctly in various parts of the WordPress admin, addressing issues with visibility and layout consistency.
Backstory – Why No SVG Support in WordPress?
You’re probably wondering why SVGs never made it onto the list of supported file types in WordPress, the answer is entirely about security.
SVGs are not raster images like other formats (such as png, jpg, gif), they are actually vectors and because of that they can potentially be used to carry malicious JavaScript. There’s a great article from Bjørn Johansen which pinpoints how this all works. The short and sweet of it is that JavaScript can be injected into it and it’s executed when the SVG is displayed.
WordPress core developers have been discussing SVG inclusion for a very long time (3 – 4 years) and the main sticking point is the potential security risks it could pose. The media manager is used across several levels, from full site administrators to editors and contributors, what this means is that there are several groups who could potentially upload (unwittingly or intentionally) malicious SVG files to a site.
There most likely won’t be any movement on this for a while and sadly that means SVGs won’t be a default upload option anytime soon.
Adding the SVG Format to the Allowed File Types
Thankfully, because WordPress is highly flexible, we can adjust the file types allowed to be uploaded to the media library. We need only to hook into the upload_mimes filter and add our SVG support. You can add this code to either your functions.php file in your child theme or create it as a plugin.
//add SVG to allowed file uploads

function add_file_types_to_uploads($file_types){
    $new_filetypes = array();

    $new_filetypes['svg'] = 'image/svg+xml';

    $file_types = array_merge($file_types, $new_filetypes );
    return $file_types;

}

add_action('upload_mimes', 'add_file_types_to_uploads');
What we’re doing is hooking into the array of allowed file types and adding the SVG extension (which is image/svg+xml) as an accepted file type.
That’s all we need to do to enable WordPress to upload these images. Now when you go to the media library you can drag and drop your SVGs straight into the library and they’ll appear as a standard file.
Improving SVG Display in the Media Library
Because SVGs aren’t a default file type, the display and processing of them is provided ‘as is’, meaning that they will all work in the admin dashboard, but you won’t necessarily have the most streamlined user experience.
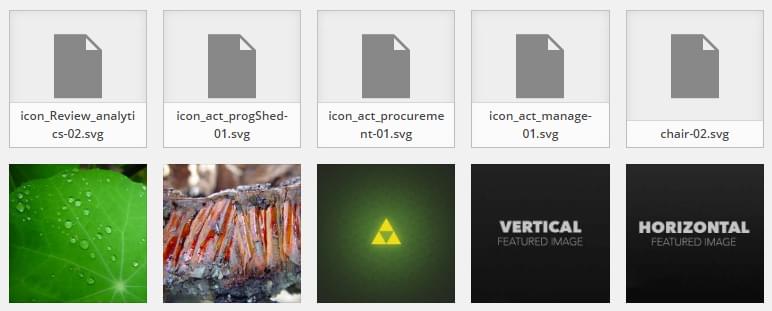
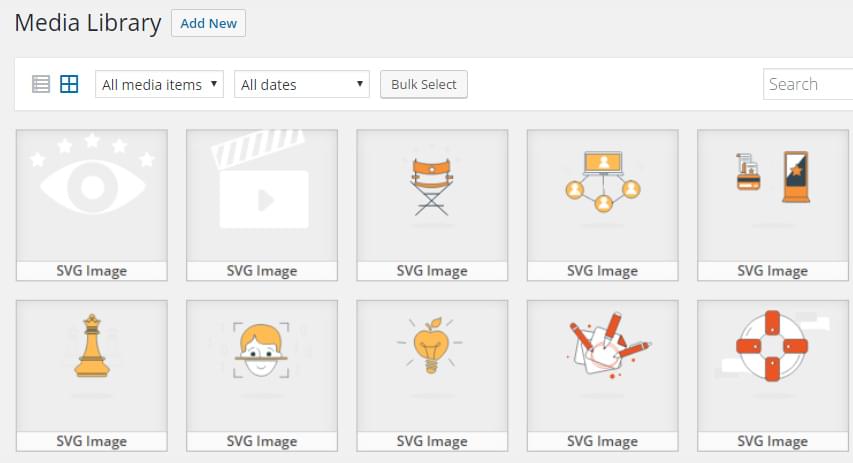
One such area where SVG optimisation is lacking is the ‘Grid View’ of the library.
When viewing SVGs in this view, each SVG appears as the generic placeholder, showing a default icon and the name of the file (as seen in the previous image). While this still all works, it doesn’t really help you much as unless you memorized the file names of your SVGs you won’t know which is which. What it should display is the image itself, not a placeholder.
That’s what we’re going to look at now, optimising the ‘Grid’ so that we get something more visually useful.
Manually Updating SVGs in the Grid View
WordPress’ media library is built dynamically, fetching all of the uploaded files asynchronously as the page loads and fetching more as you scroll. That being the case there isn’t really any filter or action that you can hook into to adjust how files are displayed. You need to use JavaScript to do your changes manually.
What we’re looking for is to replace the default icon and wording displayed for SVGs with the image itself. Doing this will make managing a library of SVGs much simpler.
The plan to is execute a function on each attachment in the media library. This function will execute only for applicable SVG images and will trigger an AJAX call to a custom PHP function. Inside this function we will return the SVG image URL to replace our default icon.
Mutation Observers
One of the first complexities with the media library is that it’s all built dynamically. We can’t trigger a function on page load or reliably with a setTimeout because we’ll never be sure when it’s ready. What we need to do is trigger our function when the DOM has been updated and our attachments added to the page.
This is a perfect use case to implement Mutation Observers
‘Mutation Observers’ provide a way for developers to react to changes in the DOM and to get a listing of all changes (mutations) that have happened for it’s nodes. These observers replace the deprecated mutation events and have fairly comprehensive browser support, working on all modern systems, even back to IE11.
Admin CSS Tweaks to Improve SVG Display
There are several places we need to apply some light styling to ensure our SVG images look great across the whole WordPress backend. The only real note is that in older browsers (IE8-IE10) SVGs don’t like to be resized and require a set height and width attribute when displayed as an image. For our purposes and for the majority of browsers, these CSS tweaks will be enough.
The main issue we will run into is that no height or width values are assigned to the SVGs, causing them to collapse (and becoming invisible). Setting the SVGs width to 100% and it’s height will solve this.
Media Library Grid Layout
The newer default grid layout provides an easy to use interface for managing and viewing your attachments. While it’s great and works well, it doesn’t do a very good job of showcasing your SVGs, defaulting them to an icon with their filename.
What we need is for the SVG image itself to be shown as the preview, making it easier for us to manage collections of SVGs.
The difficulty with this is that the library is built dynamically, meaning that we need to adjust everything in JavaScript to get it the way we want. This is where our Mutation Observer comes into play. We can look for all newly added DOM nodes and then check if they’re an attachment, if they are we can manipulate them the way we want.
Our solution involves using JavaScript to detect our attachment and passing it’s ID back to PHP so we can fetch the full attachment URL. For that to work we need to hook into WordPress’s AJAX functionality and register a custom function such as below.
//call our function when initiated from JavaScript

add_action('wp_AJAX_svg_get_attachment_url', 'get_attachment_url_media_library');
The wp_AJAX_{name_of_action} hook is used to create custom AJAX calls. Meaning that whenever WordPress AJAX is called it will look for an action that has the same name registered with this hook. In our case when we call our AJAX function later on, we will be passing in the action called svg_get_attachment_url, which will in turn call our get_attachment_url_media_library function.
If this is your first time looking into WordPress AJAX, then reading the Codex documentation is a good place to start.
Our function to return the URL of the attachment is pretty simple:
//called via AJAX. returns the full URL of a media attachment (SVG) function get_attachment_url_media_library(){
    $url = '';

    $attachmentID = isset($_REQUEST['attachmentID']) ? $_REQUEST['attachmentID'] : '';

    if($attachmentID){

        $url = wp_get_attachment_url($attachmentID);

    }
    echo $url;
    die();

}
Now that we have our PHP elements sorted, let’s jump into the JavaScript component and add the following. You’ll need to add the following to an enqueued public facing script for this to work.
//create a mutation observer to look for added 'attachments' in the media uploader

var observer = new MutationObserver(function(mutations){
  // look through all mutations that just occured

  for (var i=0; i < mutations.length; i++){
    // look through all added nodes of this mutation

    for (var j=0; j < mutations[i].addedNodes.length; j++){
        //get the applicable element

        element = $(mutations[i].addedNodes[j]);
        //execute only if we have a class

        if(element.attr('class')){
            elementClass = element.attr('class');

            //find all 'attachments'

            if (element.attr('class').indexOf('attachment') != -1){
                //find attachment inner (which contains subtype info)

                attachmentPreview = element.children('.attachment-preview');

                if(attachmentPreview.length != 0){
                    //only run for SVG elements

                    if(attachmentPreview.attr('class').indexOf('subtype-svg+xml') != -1){
                        //bind an inner function to element so we have access to it.

                        var handler = function(element){
                            //do a WP AJAX call to get the URL

                            $.AJAX({
                                url: AJAXurl,

                                data: {

                                    'action'        : 'svg_get_attachment_url',

                                    'attachmentID'  : element.attr('data-id')

                                },

                                success: function(data){

                                    if(data){

                                        //replace the default image with the SVG

                                        element.find('img').attr('src', data);

                                        element.find('.filename').text('SVG Image');

                                    }

                                }

                            });
                        }(element);
                    }

                }

            }

        }

    }

  }

});
observer.observe(document.body, {

  childList: true,

  subtree: true

});
Here’s a breakdown of how it all works:
- We create a new ‘Mutation Observer’ and listen to all changes on the body element. We’re looking for our attachments which load dynamically (initially as the library opens and additionally as we scroll to load more).
- We go through all the added DOM elements and assign them to our
element, it’s on this element we will do our comparisons to check if we’re on the right element. - We check that our element has a class (as sometimes we loop through standard text elements) and then we use it’s class to see if it has the
attachmentclass name. Each of our attachments will have this so it’s these elements we’re looking for. - Once we’re on an attachment we do another check to ensure we’re on a single attachment (as sometimes we could be on other elements that just so happen to be related to attachments, but not an attachment themselves), then a search for any children with the
'attachment-previewclass will let us know if we’re on the right track. - The next step is checking if the attachment preview has the
subtype-svg+xmlclass. We only want to trigger our functionality for SVG images. - Here is the important part. For each attachment, we create a new function and pass in the
elementas a reference. Inside this we create aAJAXcall. It’s here we extract thedata-idand call our PHP function we registered before. Our action is calledsvg_get_attachment_urland this relates to the function hooked to thewp_AJAX_svg_get_attachment_urlaction. - Our AJAX function passes the attachment ID back to PHP which we use the fetch the URL of the object. We pass it back to our AJAX call so it can then be appended to
element, visually updating it.
There’s a fair few moving parts here, but the majority of them handle finding the right DOM elements to execute our function against. When it’s all said and done you’ll now see your SVG images displayed in a grid:
Additional Notes:
-
The good thing about this is that it’s triggered whenever the DOM changes such as on initial library load, library scrolling (loading new attachments) and also when dropping a new attachment onto the library, uploading it.
-
The speed at which you see your SVG images appear will be entirely up to WordPress as each SVG attachment has to perform it’s own AJAX call and then pass back it’s URL, forcing the browser to load the new image. We are effectively waiting twice which will slow things down. While all of this works it might take several seconds for everything to ‘pop’ into place.
-
Another interesting ‘feature’ (issue) is that when you drop new images into the media library, all of the attachments are refreshed, meaning that the AJAX fetching and image rendering has to happen again. There’s not really much that can be adjusted here as it’s part of the dynamic process of the media library.
Media Library Column Layout
When you view the media library using the traditional column layout, you’ll notice that again SVG’s aren’t displayed correctly.
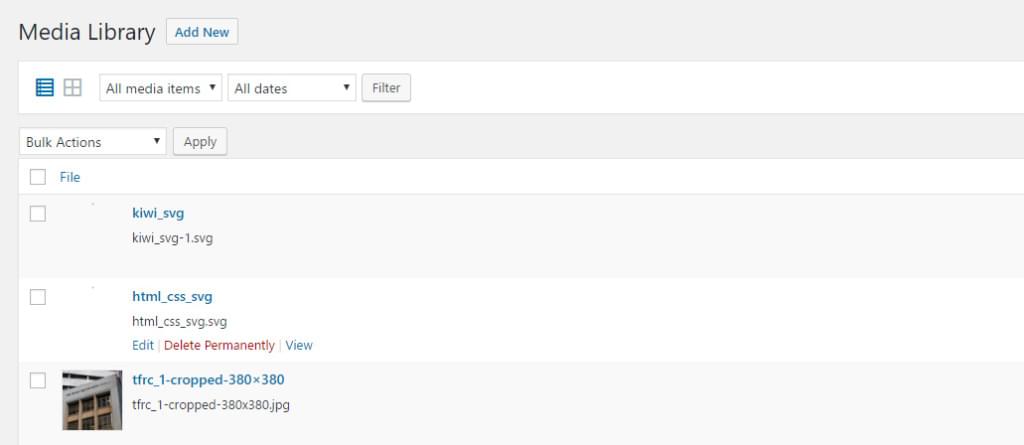
The reason it looks like this is because they don’t have a set height or any CSS to style them. We need to adjust them much like we did for the featured image section:
/*adjust SVG images when displayed inside media library column view*/

table.media .column-title .media-icon img[src*='.svg']{

    width: 100%;

    height: auto;

}
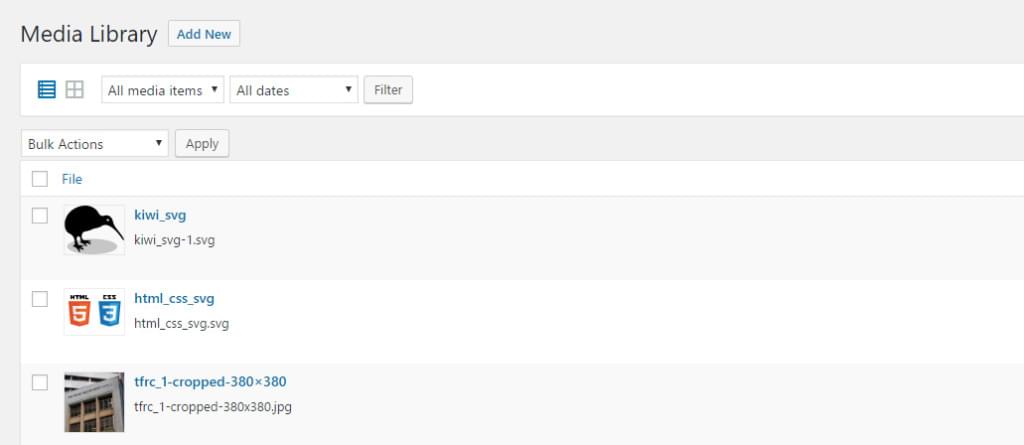
This will style your SVG previews so that they look inline with the other images. You’ll be able to see exactly what they are at a glance.
Media Attachment Preview
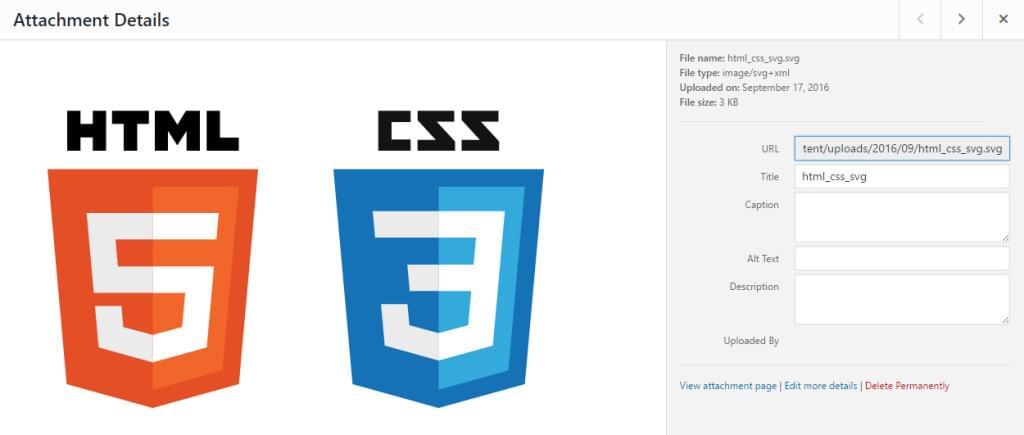
When you’re inside the ‘Grid’ layout for the media library, you can click on an item to have it open up in a modal window that displays attachment metadata, that’s another area we need to adjust so that our SVGs are displayed.
Here’s how it looks by default, notice the default icon used.
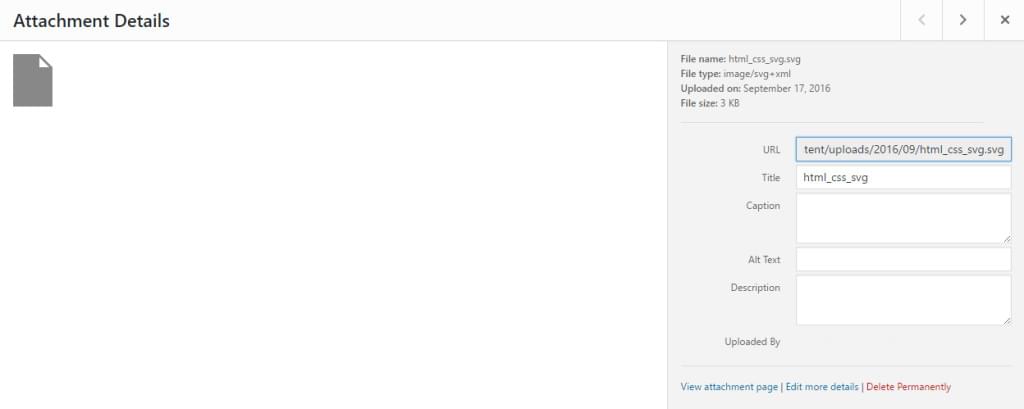
Unlike other areas, we already have the full URL to the SVG as part of this modal, it’s displayed under the URLfield. The complexity here is that although we have the information on hand, because it’s dynamic we need to create another listener that looks for when the attachment preview is opened (or navigated though) and populate the media pane with the applicable SVG.
Let’s jump back into our JavaScipt file and add the following:
//Observer to adjust the media attachment modal window

var attachmentPreviewObserver = new MutationObserver(function(mutations){

    // look through all mutations that just occured

    for (var i=0; i < mutations.length; i++){
        // look through all added nodes of this mutation

        for (var j=0; j < mutations[i].addedNodes.length; j++){
            //get element

            var element = $(mutations[i].addedNodes[j]);
            //check if this is the attachment details section or if it contains the section

            //need this conditional as we need to trigger on initial modal open (creation) + next and previous navigation through media items

            var onAttachmentPage = false;

            if( (element.hasClass('attachment-details')) || element.find('.attachment-details').length != 0){

                onAttachmentPage = true;

            }
            if(onAttachmentPage == true){

                //find the URL value and update the details image

                var urlLabel = element.find('label[data-setting="url"]');

                if(urlLabel.length != 0){

                    var value = urlLabel.find('input').val();

                    element.find('.details-image').attr('src', value);

                }

            }

        }

    }

});
attachmentPreviewObserver.observe(document.body, {

  childList: true,

  subtree: true

});
Here’s how it all works:
- We create a new ‘Mutation Observer’ and attach it to the body, looking for all changes (including the child nodes and all their children).
- We loop through all the mutations and added nodes. We’re looking for an element that has either the
attachment-detailsclass or has it as one of its descendants. The reason we have this conditional is so that it’s triggered when the modal is initially opened and each time the modal is updated (by clicking through the next and previous buttons). This is because as you navigate through the triggering element itself will be theattachment-detailsDOM element. - Once we know we’re inside the right place we need to search for the
URLelement and extract it. Once we have it, we populate our preview with the SVG image.
After we’re all done, the attachment details modal now looks like this:
Output on the Front-end
When WordPress outputs images that have SVG content as their source, often you’ll find nothing will be visible. This is caused by the SVG not having a correct width and height set as either attributes or in CSS (which makes sense considering SVGs aren’t supported).
To get this to work we need to add another style that will apply and make our SVG elements responsive.
/*sets all SVG's to be responsive. displaying at full width*/

img[src*='.svg']{

    width: 100%;

    height: auto;

}
After you add this to your style.css all of your SVG images will stretch full width and maintain their aspect ratio (on modern browsers).
Here’s an example of how a standard SVG image now looks with its new styling.
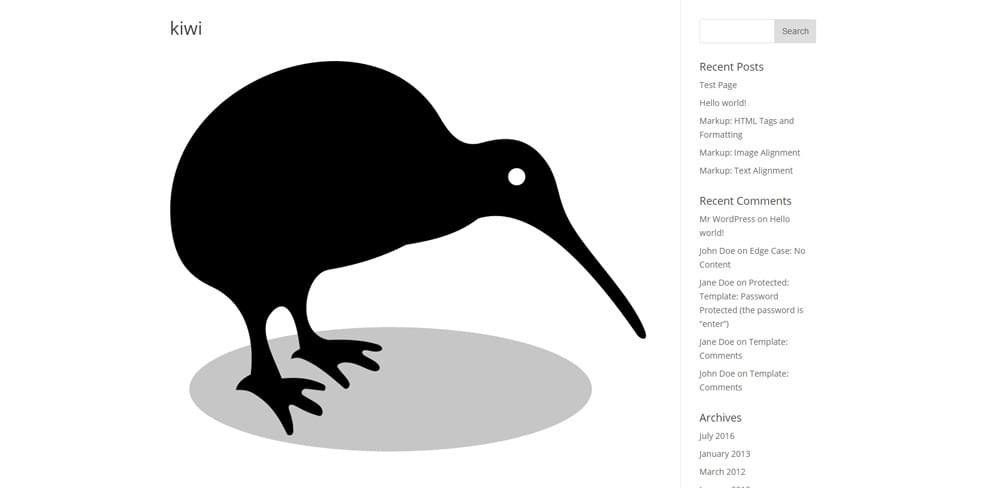
One thing to be conscious of is since it’s a selector it’s fairly weak, it can be overridden by your theme or by other plugins. It’s up to you to make sure these things look good on the front-end and that they scale well.
Wrapping It All Up
With these changes you’ll be able to use and interact with SVGs like any other image, being able to quickly view them and manipulate them without having to worry which SVG is which.
Hopefully at some point SVGs will be introduced into WordPress core and all of this will be seamlessly handled in the back-end for you, but until then these workarounds will have to do.
For some further reading checkout Alex Walkers article The Designer’s Guide to Working with SVG – Pt 1 and Maria Antonietta Perna’s article on Canvas vs. SVG: Choosing the Right Tool for the Job.
Frequently Asked Questions about SVG in WordPress
Why are SVG files not displaying on my WordPress site?
SVG files may not display on your WordPress site due to security reasons. WordPress, by default, doesn’t allow SVG file uploads because they are XML-based and can contain malicious scripts. To enable SVG file uploads, you can use a plugin like “SVG Support” or “Safe SVG”. These plugins sanitize the SVG files, removing any potential security threats, and allow you to upload them to your WordPress site.
How can I enable SVG support in WordPress?
To enable SVG support in WordPress, you can use a plugin like “SVG Support”. After installing and activating the plugin, go to ‘Settings’ > ‘SVG Support’ and check the box that says ‘Enable SVG Support’. Remember to save your changes. Now, you should be able to upload SVG files to your WordPress site.
Are there any risks associated with enabling SVG support in WordPress?
Yes, there are potential risks associated with enabling SVG support in WordPress. SVG files are XML-based and can contain malicious scripts. Therefore, it’s important to only upload SVG files from trusted sources. Also, consider using a plugin that sanitizes SVG files, removing any potential security threats.
Why are my SVG files not scaling properly in WordPress?
SVG files may not scale properly in WordPress if the width and height attributes are not set correctly in the SVG code. To fix this, you can manually edit the SVG code and set the width and height attributes to 100%. This should make the SVG file responsive and scale properly on all devices.
Can I use CSS to style SVG files in WordPress?
Yes, you can use CSS to style SVG files in WordPress. SVG files are XML-based, which means you can directly manipulate their elements using CSS. You can change the color, size, stroke width, and more. However, keep in mind that not all CSS properties work with SVG.
Why is the quality of my SVG files poor in WordPress?
SVG files are vector-based, which means they should not lose quality regardless of the size. If your SVG files appear poor in quality, it could be due to the way they were created. Make sure to create your SVG files using a vector graphics editor like Adobe Illustrator or Inkscape.
Can I animate SVG files in WordPress?
Yes, you can animate SVG files in WordPress. SVG files support SMIL (Synchronized Multimedia Integration Language), which allows you to animate the elements of the SVG. However, keep in mind that SMIL is not supported by all browsers.
How can I optimize SVG files for WordPress?
To optimize SVG files for WordPress, you can use an SVG optimizer like SVGO or SVGOMG. These tools remove unnecessary data from SVG files, reducing their file size without affecting their quality. This can improve the loading speed of your WordPress site.
Can I use SVG files as logos in WordPress?
Yes, you can use SVG files as logos in WordPress. However, keep in mind that WordPress, by default, doesn’t allow SVG file uploads due to security reasons. To enable SVG file uploads, you can use a plugin like “SVG Support” or “Safe SVG”.
Can I use SVG files in WordPress without a plugin?
Yes, you can use SVG files in WordPress without a plugin by adding a function to your theme’s functions.php file that allows SVG file uploads. However, this method doesn’t sanitize the SVG files, which can pose a security risk. Therefore, it’s recommended to use a plugin that enables SVG support and sanitizes the SVG files.