
Want to learn Vue.js from the ground up? Get an entire collection of Vue books covering fundamentals, projects, tips and tools & more with SitePoint Premium. Join now for just $14.99/month.
This article has been updated, primarily to bring the tooling section up to date.
As soon as the popular JavaScript framework Vue.js released v2, I was eager to give it a spin and see what it’s like to work with. As someone who’s pretty familiar with Angular and React, I was looking forward to seeing the similarities and differences between them and Vue.
Vue 2 sports excellent performance stats, a relatively small payload (the bundled runtime version of Vue weighs in at 30KB once minified and gzipped), along with updates to companion libraries like vue-router and Vuex, the state management library for Vue. There’s far too much to cover in just one article, but keep an eye out for some later articles where we’ll look more closely at various libraries that couple nicely with the core framework.
Key Takeaways
- Vue.js 2.0 introduces a virtual DOM, inspired by React, for efficient rendering, and it integrates improved libraries like vue-router and Vuex for state management.
- Components are fundamental in Vue.js 2.0, where applications are structured as a series of nested components, and single file components (.vue) are recommended for better organization.
- Setting up a Vue project from scratch involves using webpack and vue-loader to handle .vue files, along with Babel for using modern JavaScript features, enhancing the development workflow.
- Vue Devtools is essential for debugging, providing a deep insight into the application’s state and the flow of data through components.
- Vue.js 2.0 facilitates building interactive forms by leveraging v-model for two-way data binding, and custom event handling using v-on, making state management between components seamless.
- The article demonstrates building a GitHub user stat fetching application, employing Vue’s reactivity system and lifecycle hooks to manage and display data effectively, illustrating practical usage of Vue.js in a real-world scenario.
Inspiration from Other Libraries
As we go through this tutorial, you’ll see many features that Vue has that are clearly inspired by other frameworks. This is a good thing; it’s great to see new frameworks take some ideas from other libraries and improve on them. In particular, you’ll see Vue’s templating is very close to Angular’s, but its components and component lifecycle methods are closer to React’s (and Angular’s, as well).
One such example of this is that, much like React and nearly every framework in JavaScript land today, Vue uses the idea of a virtual DOM to keep rendering efficient. Vue uses a fork of snabbdom, one of the more popular virtual DOM libraries. The Vue site includes documentation on its Virtual DOM rendering, but as a user all you need to know is that Vue is very good at keeping your rendering fast (in fact, it performs better than React in many cases), meaning you can rest assured you’re building on a solid platform.
Components, Components, Components
Much like other frameworks these days, Vue’s core building block is the component. Your application should be a series of components that build on top of each other to produce the final application. Vue.js goes one step further by suggesting (although not enforcing) that you define your components in a single .vue file, which can then be parsed by build tools (we’ll come onto those shortly). Given that the aim of this article is to fully explore Vue and what it feels like to work with, I’m going to use this convention for my application.
A Vue file looks like so:
<template>
  <p>This is my HTML for my component</p>
</template>

<script>
  export default {
    // all code for my component goes here
  }
</script>

<style scoped>
  /* CSS here
   * by including `scoped`, we ensure that all CSS
   * is scoped to this component!
   */
</style>
Alternatively, you can give each element a src attribute and point to a separate HTML, JS or CSS file respectively if you don’t like having all parts of the component in one file.
Setting Up a Project
Whilst the excellent Vue CLI exists to make setting up a full project easy, when starting out with a new library I like to do it all from scratch so I get more of an understanding of the tools.
These days, webpack is my preferred build tool of choice, and we can couple that with the vue-loader plugin to support the Vue.js component format that I mentioned previously. We’ll also need Babel and the env preset, so we can write all our code using modern JavaScript syntax, as well as the webpack-dev-server, which will update the browser when it detects a file change.
Let’s initialize a project and install the dependencies:
mkdir vue2-demo-project
cd vue2-demo-project
npm init -y
npm i vue
npm i webpack webpack-cli @babel/core @babel/preset-env babel-loader vue-loader vue-template-compiler webpack-dev-server html-webpack-plugin --save-dev
Then create the initial folders and files:
mkdir src
touch webpack.config.js src/index.html src/index.js
The project structure should look like this:
.
├── package.json
├── package-lock.json
├── src
│   ├── index.html
│   └── index.js
└── webpack.config.js
Now let’s set up the webpack configuration. This boils down to the following:
- Tell webpack to use the
vue-loaderfor any.vuefiles - Tell webpack to use Babel and the
envpreset for any.jsfiles - Tell webpack to generate an HTML file for the dev-server to serve, using
src/index.htmlas a template:
//webpack.config.js
const VueLoaderPlugin = require('vue-loader/lib/plugin')
const HtmlWebPackPlugin = require("html-webpack-plugin")

module.exports = {
  module: {
    rules: [
      {
        test: /\.vue$/,
        loader: 'vue-loader',
      },
      {
        test: /\.js$/,
        exclude: /node_modules/,
        use: {
          loader: 'babel-loader',
          options: {
            presets: ['@babel/preset-env']
          }
        }
      }
    ]
  },
  plugins: [
    new VueLoaderPlugin(),
    new HtmlWebPackPlugin({
      template: "./src/index.html"
    })
  ]
}
Finally, we’ll add some content to the HTML file and we’re ready to go!
<!-- src/index.html -->
<!DOCTYPE html>
<html>
  <head>
    <title>My Vue App</title>
  </head>
  <body>
    <div id="app"></div>
  </body>
</html>
We create an empty div with the ID of app, as this is the element that we’re going to place our Vue application in. I always prefer to use a div, rather than just the body element, as that lets me have control over the rest of the page.
Writing Our First Vue.js App
We’re going to stay true to every programming tutorial ever and write a Vue application that puts “Hello, World!” onto the screen before we dive into something a bit more complicated.
Each Vue app is created by importing the library and then instantiating a new Vue instance:
import Vue from 'vue'

const vm = new Vue({
  el: '#app',
})
We give Vue an element to render onto the page, and with that, we’ve created a Vue application! We pass a selector for the element that we want Vue to replace with our application. This means when Vue runs it will take the div#app that we created and replace it with our application.
The reason we use the variable name vm is because it stands for “View Model”. Although not strictly associated with the “Model View View-Model” (MVVM) pattern, Vue was inspired in part by it, and the convention of using the variable name vm for Vue applications has stuck. Of course, you can call the variable whatever you’d like!
So far, our application isn’t doing anything, though, so let’s create our first component, App.vue, that will actually render something onto the page.
Vue doesn’t dictate how your application is structured, so this one is up to you. I ended up creating one folder per component, in this case App (I like the capital letter, signifying a component), with three files in it:
index.vuescript.jsstyle.css
mkdir src/App
touch src/App/{index.vue,script.js,style.css}
The file structure should now be:
.
├── package.json
├── package-lock.json
├── src
│   ├── App
│   │   ├── index.vue
│   │   ├── srcipt.js
│   │   └── style.css
│   ├── index.html
│   └── index.js
└── webpack.config.js
App/index.vue defines the template, then imports the other files. This is in keeping with the structure recommended in the What About Separation of Concerns? section of Vue’s docs.
<!-- src/App/index.vue -->
<template>
  <p>Hello, World!</p>
</template>
<script src="./script.js"></script>
<style scoped src="./style.css"></style>
I like calling it index.vue, but you might want to call it app.vue too so it’s easier to search for. I prefer importing App/index.vue in my code versus App/app.vue, but again you might disagree, so feel free to pick whatever you and your team like best.
For now, our template is just <p>Hello, World!</p>, and I’ll leave the CSS file blank. The main work goes into script.js, which looks like so:
export default {
  name: 'App',
  data() {
    return {}
  },
}
Doing this creates a component which we’ll give the name App, primarily for debugging purposes, which I’ll come to later, and then defines the data that this component has and is responsible for. For now, we don’t have any data, so we can just tell Vue that by returning an empty object. Later on, we’ll see an example of a component using data.
Now we can head back into src/index.js and tell the Vue instance to render our App component:
import Vue from 'vue'

import AppComponent from './App/index.vue'

const vm = new Vue({
  el: '#app',
  components: {
    app: AppComponent,
  },
  render: h => h('app'),
})
Firstly, we import the component, trusting webpack and the vue-loader to take care of parsing it. We then declare the component. This is an important step: by default, Vue components are not globally available. Each component must have a list of all the components they’re going to use, and the tag that it will be mapped to. In this case, because we register our component like so:
components: {
  app: AppComponent,
}
This means that in our templates we’ll be able to use the app element to refer to our component.
Finally, we define the render function. This function is called with a helper — commonly referred to as h — that’s able to create elements. It’s not too dissimilar to the React.createElement function that React uses. In this case, we give it the string 'app', because the component we want to render is registered as having the tag app.
More often than not (and for the rest of this tutorial) we won’t use the render function on other components, because we’ll define HTML templates. But the Vue.js guide to the render function is worth a read if you’d like more information.
Once we’ve done that, the final step is to create an npm script in package.json:
"scripts": {
  "start": "webpack-dev-server --mode development --open"
},
Now, run npm run start. Your default browser should open at http://localhost:8080/ and you should see “Hello, World!” on the screen.
Try editing src/index.vue to change the message to something else. If all has gone correctly, webpack-dev-server should refresh the page to reflect your changes.
Yay! We’re up and running with Vue.js.
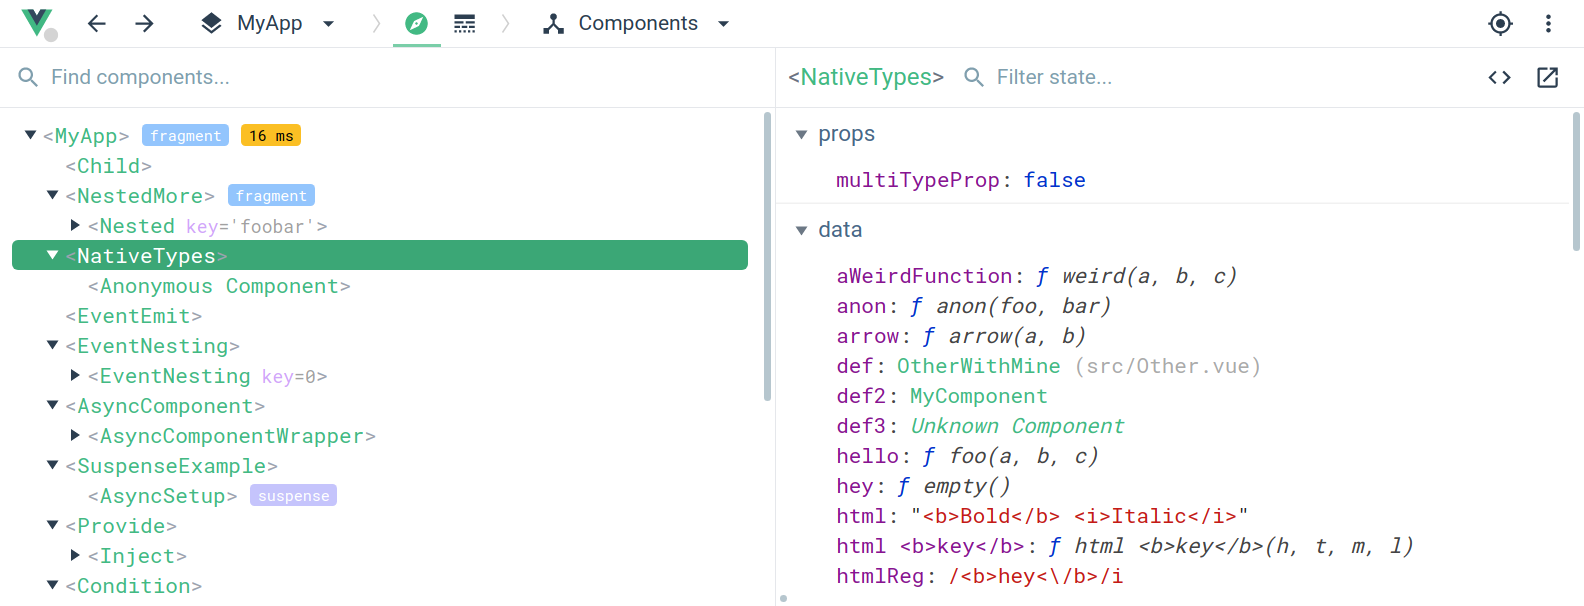
Vue Devtools
Before we dive into a slightly more complicated app with Vue, now is a good time to mention that you should definitely get the Vue devtools installed. These sit within the Chrome developer tools and give you a great way to look through your app and all the properties being passed round, state that each component has, and so on.
Building the App
As an example application, we’re going to be using the GitHub API to build an application that lets us enter a username and see some GitHub stats about that user. I’ve picked the GitHub API here as it’s familiar to most people, usable without authenticating, and gives us a fair amount of information.
Before starting an application I like to have a quick think about what components we’ll need, and I’m thinking that our App component will render two further components: GithubInput, for taking input from the user, and GithubOutput, which will show the user’s information on the screen. We’ll start with the input.
Note: you can find all the code on GitHub and even check out the application running online.
Initial Setup
Create folders for the GithubOutput and GithubInput components within the src directory:
mkdir src/{GithubInput,GithubOutput}
Add the necessary files to each:
touch src/GithubInput/{index.vue,script.js,style.css}
touch src/GithubOutput/{index.vue,script.js,style.css}
The structure of the src folder should now look like so:
.
├── App
│   ├── index.vue
│   ├── script.js
│   └── style.css
├── GithubInput
│   ├── index.vue
│   ├── script.js
│   └── style.css
├── GithubOutput
│   ├── index.vue
│   ├── script.js
│   └── style.css
├── index.html
└── index.js
Forms in Vue.js
Let’s start with the GithubInput component. As with the App component, the index.vue file should contain the template, as well as loading in the script and CSS file. The template simply contains <p>github input</p> for now. We’ll fill it in properly shortly. I like putting in some dummy HTML so I can check I’ve got the template wired up properly when creating a new component:
<!-- src/GithubInput/index.vue -->
<template>
  <p>github input</p>
</template>

<script src="./script.js"></script>
<style scoped src="./style.css"></style>
When creating this component the one thing we do differently is create a piece of data that’s associated with the component. This is very similar to React’s concept of state:
// src/GithubInput/script.js
export default {
  name: 'GithubInput',
  data() {
    return {
      username: '',
    }
  }
}
This says that this component has a piece of data, username, that it owns and is responsible for. We’ll update this based on the user’s input shortly.
Finally, to get this component onto the screen, I need to register it with the App component, as it’s the App component that will be rendering it.
To do this, I update src/App/script.js and tell it about GithubInput:
// src/App/script.js
import GithubInput from '../GithubInput/index.vue'

export default {
  name: 'App',
  components: {
    'github-input': GithubInput,
  },
  data() {
    return {}
  },
}
And then I can update the App component’s template:
<!-- src/App/index.vue -->
<div>
  <p>Hello World</p>
  <github-input></github-input>
</div>
A restriction of Vue components (which is also true in Angular and React) is that each component must have one root node, so when a component has to render multiple elements, it’s important to remember to wrap them all in something, most commonly a div.
Tracking a Form Input
Our GithubInput component will need to do two things:
- Keep track of the current value of the input
- Communicate that the value has changed, so that other components can know and therefore update their state.
We can do the first version by creating a form with an input element in it. We can use Vue’s built-in directives that enable us to keep track of form values. The template for GithubInput looks like so:
<form v-on:submit.prevent="onSubmit">
  <input type="text" v-model="username" placeholder="Enter a github username here" />
  <button type="submit">Go!</button>
</form>
There are two important attributes that you’ll notice: v-on and v-model.
v-on is how we bind to DOM events in Vue and call a function. For example, <p v-on:click="foo">Click me!</p> would call the component’s foo method every time the paragraph was clicked. If you’d like to go through event handling in greater detail, I highly recommend the Vue documentation on event handling.
v-model creates a two-way data binding between a form input and a piece of data. Behind the scenes, v-model is effectively listening for change events on the form input and updating the data in the Vue component to match.
Taking our template above into consideration, here’s how we’re using v-on and v-model to deal with the data in the form:
v-on:submit.prevent="onSubmit"binds the methodonSubmitto be run when the form is submitted. By adding.preventthat means that Vue will automatically prevent the default action from occurring. (If Vue didn’t do this, we could callevent.preventDefault()in our code, but we might as well take advantage of Vue’s feature.)v-model:usernamebinds the input’s value to a value,username, in our code. For those of you familiar with Angular you may recognize this as very similar tong-model. When we createdGithubInputwe declared that it had a piece of data,username, and here we’ve bound that piece of data to the input field. The two will automatically be kept in sync.
Now, back in our component’s JavaScript, we can declare the onSubmit method. Note that the name here is entirely arbitrary — you can choose whatever you’d like — but I like to stick with the convention of naming the function after the event that will trigger it:
export default {
  name: 'GithubInput',
  data() {
    return { username: '', }
  },
  methods: {
    onSubmit(event) {
      if (this.username && this.username !== '') {
      }
    }
  }
}
We can refer to data directly on this, so this.username will give us the latest value of the text box. If it’s not empty, we want to let other components know that the data has changed. For this, we’ll use a message bus. These are objects that components can emit events on and use to listen to other events. When your application grows larger you might want to look into a more structured approach, such as Vuex. For now, a message bus does the job.
The great news is that we can use an empty Vue instance as a message bus. To do so, we’ll create src/bus.js, which simply creates a Vue instance and exports it:
import Vue from 'vue'
const bus = new Vue()

export default bus
In the GithubInput component we can then import that module and use it by emitting an event when the username changes:
import bus from '../bus'

export default {
  ...,
  methods: {
    onSubmit(event) {
      if (this.username && this.username !== '') {
        bus.$emit('new-username', this.username)
      }
    }
  },
  ...
}
With that, our form is done, and we’re ready to start doing something with the resulting data.
Displaying Results From GitHub
The GithubOutput component has the same structure as our other two components. In GithubOutput/script.js we also import the bus module, as we’ll need it to know when the username changes. The data that this component will be responsible for will be an object that maps GitHub usernames to the data we got from the GitHub API. This means we won’t have to make the request to the API every single time; if we’ve already fetched the data previously we can simply reuse it. We’ll also store the last username we were given, so we know what data to display on screen:
// src/GithubOutput/script.js
import bus from '../bus'
import Vue from 'vue'

export default {
  name: 'GithubOutput',
  data() {
    return {
      currentUsername: null,
      githubData: {}
    }
  }
}
When the component is created, we want to listen for any new-username events that are emitted on the message bus. Thankfully, Vue supports a number of lifecycle hooks, including created. Because we’re responsible developers, let’s also stop listening for events when the component is destroyed by using the destroyed event:
export default {
  name: 'GithubOutput',
  data: { ... },
  created() {
    bus.$on('new-username', this.onUsernameChange)
  },
  destroyed() {
    bus.$off('new-username', this.onUsernameChange)
  }
}
We then define the onUsernameChange method, which will be called and will set the currentUsername property:
methods: {
  onUsernameChange(name) {
    this.currentUsername = name
  }
},
Note that we don’t have to explicitly bind the onUsernameChange method to the current scope. When you define methods on a Vue component, Vue automatically calls myMethod.bind(this) on them, so they’re always bound to the component. This is one of the reasons why you need to define your component’s methods on the methods object, so Vue is fully aware of them and can set them up accordingly.
Conditional Rendering
If we don’t have a username — as we won’t when the component is first created — we want to show a message to the user. Vue has a number of conditional rendering techniques, but the easiest is the v-if directive, which takes a condition and will only render the element if it exists. It also can be paired with v-else:
<!-- src/GithubOutput/index.vue-->
<template>
  <div>
    <p v-if="currentUsername == null">
      Enter a username above to see their GitHub data
    </p>
    <p v-else>
      Below are the results for {{ currentUsername }}
    </p>
  </div>
</template>
<script src="./script.js"></script>
<style scoped src="./style.css"></style>
Once again, this will look very familiar to any Angular developers. We use double equals rather than triple equals here because we want the conditional to be true not only if currentUsername is null but also if it’s undefined, and null == undefined is true.
Fetching from GitHub
Vue.js doesn’t ship with a built-in HTTP library, and for good reason. These days the fetch API ships natively in many browsers (although at the time of writing, not IE11, Safari or iOS Safari). For the sake of this tutorial I’m not going to use a polyfill, but you can easily polyfill the API in browsers if you need to. If you don’t like the fetch API there are many third-party libraries for HTTP, and the one mentioned in the Vue docs is Axios.
I’m a big proponent of frameworks like Vue not shipping with HTTP libraries. It keeps the bundle size of the framework down and leaves it to developers to pick the library that works best for them, and easily customize requests as needed to talk to their API. I’ll stick to the fetch API in this article, but feel free to swap it out for one that you prefer.
If you need an introduction to the fetch API, check out Ludovico Fischer’s post on SitePoint, which will get you up to speed.
To make the HTTP request, we’ll give the component another method, fetchGithubData, that makes a request to the GitHub API and stores the result. It will also first check to see if we already have data for this user, and not make the request if so:
methods: {
  ...
  fetchGithubData(name) {
    // if we have data already, don't request again
    if (this.githubData.hasOwnProperty(name)) return

    const url = `https://api.github.com/users/${name}`
    fetch(url)
      .then(r => r.json())
      .then(data => {
        // in here we need to update the githubData object
      })
  }
}
We then finally just need to trigger this method when the username changes:
methods: {
  onUsernameChange(name) {
    this.currentUsername = name
    this.fetchGithubData(name)
  },
  ...
}
There’s one other thing to be aware of, due to the way that Vue keeps track of the data you’re working with so that it knows when to update the view. There is a great Reactivity guide which explains it in detail, but essentially Vue isn’t able to magically know when you’ve added or deleted a property from an object, so if we do:
this.githubData[name] = data
Vue won’t recognize that and won’t update our view. Instead, we can use the special Vue.set method, which explicitly tells Vue that we’ve added a key. The above code would then look like so:
Vue.set(this.githubData, name, data)
This code will modify this.githubData, adding the key and value that we pass it. It also notifies Vue of the change so it can rerender.
Now our code looks like so:
const url = `https://api.github.com/users/${name}`
fetch(url)
  .then(r => r.json())
  .then(data => {
    Vue.set(this.githubData, name, data)
  })
Finally, we need to register the GitHubOutput component with the App component:
// src/App/script.js
import GithubInput from '../GithubInput/index.vue'
import GithubOutput from '../GithubOutput/index.vue'

export default {
  name: 'App',
  components: {
    'github-input': GithubInput,
    'github-output': GithubOutput,
  },
  data() {
    return {}
  },
}
And include it in the template:
<!-- src/App/index.vue -->
<template>
  <div>
    <github-input></github-input>
    <github-output></github-output>
  </div>
</template>
Although we haven’t yet written the view code to show the fetched data on screen, you should be able to fill in the form with your username and then inspect the Vue devtools to see the data requested from GitHub. This shows how useful and powerful these devtools are; you can inspect the local state of any component and see exactly what’s going on.
Showing Some Stats in the View
We can now update the template to show some data. Let’s wrap this code in another v-if directive so that we only render the data if the request has finished:
<!-- src/GithubOutput/index.vue -->
<p v-if="currentUsername == null">
  Enter a username above to see their GitHub data
</p>
<p v-else>
  Below are the results for {{ currentUsername }}
  <div v-if="githubData[currentUsername]">
    <h4>{{ githubData[currentUsername].name }}</h4>
    <p>{{ githubData[currentUsername].company }}</p>
    <p>Number of repos: {{ githubData[currentUsername].public_repos }}</p>
  </div>
</p>
With that, we can now render the GitHub details to the screen, and our app is complete!
Refactors
There are definitely some improvements we can make. The above bit of HTML that renders the GitHub data only needs a small part of it — the data for the current user. This is the perfect case for another component that we can give a user’s data to and it can render it.
Let’s create a GithubUserData component, following the same structure as with our other components:
mkdir src/GithubUserData
touch src/GithubUserData/{index.vue,script.js,style.css}
There’s only one tiny difference with this component: it’s going to take a property, data, which will be the data for the user. Properties (or, “props”) are bits of data that a component will be passed by its parent, and they behave in Vue much like they do in React. In Vue, you have to explicitly declare each property that a component needs, so here I’ll say that our component will take one prop, data:
// src/GithubUserData/script.js
export default {
  name: 'GithubUserData',
  props: ['data'],
  data() {
    return {}
  }
}
One thing I really like about Vue is how explicit you have to be; all properties, data, and components that a component will use are explicitly declared. This makes the code much nicer to work with and, I imagine, much easier as projects get bigger and more complex.
In the new template, we have exactly the same HTML as before, although we can refer to data rather than githubData[currentUsername]:
<!-- src/GithubUserData/index.vue -->
<template>
  <div v-if="data">
    <h4>{{ data.name }}</h4>
    <p>{{ data.company }}</p>
    <p>Number of repos: {{ data.public_repos }}</p>
  </div>
</template>
<script src="./script.js"></script>
<style scoped src="./style.css"></style>
To use this component we need to update the GithubOutput component. Firstly, we import and register GithubUserData:
// src/GithubOutput/script.js
import bus from '../bus'
import Vue from 'vue'
import GithubUserData from '../GithubUserData/index.vue'

export default {
  name: 'GithubOutput',
  components: {
    'github-user-data': GithubUserData,
  },
  ...
}
You can use any name for the component when declaring it, so where I’ve placed github-user-data, you could place anything you want. It’s advisable that you stick to components with a dash in them. Vue doesn’t enforce this, but the W3C specification on custom elements states that they must contain a dash to prevent naming collisions with elements added in future versions of HTML.
Once we’ve declared the component, we can use it in our template:
<!-- src/GithubOutput/index.vue -->
<p v-else>
  Below are the results for {{ currentUsername }}:
  <github-user-data :data="githubData[currentUsername]"></github-user-data>
</p>
The crucial part here is how I pass the data property down to the component:
:data="githubData[currentUsername]"
The colon at the start of that attribute is crucial; it tells Vue that the attribute we’re passing down is dynamic and that the component should be updated every time the data changes. Vue will evaluate the value of githubData[currentUsername] and ensure that the GithubUserData component is kept up to date as the data changes.
If you find :data a bit short and magical, you can also use the longer v-bind syntax:
v-bind:data="githubData[currentUsername]"
The two are equivalent, so use whichever you prefer.
Conclusion
With that, our GitHub application is in a pretty good state! You can find all the code on GitHub and even check out the application running online.
I had high hopes when getting started with Vue, as I’d heard only good things, and I’m happy to say it really met my expectations. Working with Vue feels like taking the best parts of React and merging them with the best parts of Angular. Some of the directives (like v-if, v-else, v-model and so on) are really easy to get started with (and easier to immediately understand than doing conditionals in React’s JSX syntax), but Vue’s component system feels very similar to React’s.
You’re encouraged to break your system down into small components, and all in all I found it a very seamless experience. I also can’t commend the Vue team highly enough for their documentation: it’s absolutely brilliant. The guides are excellent, and the API reference is thorough yet easy to navigate to find exactly what you’re after.
If you’ve enjoyed this post and would like to learn more, the best place to start is definitely the official Vue.js site.
Frequently Asked Questions about Vue.js 2.0
What are the key differences between Vue.js 1.0 and Vue.js 2.0?
Vue.js 2.0 comes with several improvements over its predecessor. The most significant change is the introduction of a virtual DOM, which improves performance by reducing the number of direct manipulations of the actual DOM. Vue.js 2.0 also introduces a streamlined syntax for component-based development, making it easier to build complex user interfaces. Additionally, Vue.js 2.0 supports server-side rendering, which can improve the performance of your application and make it more SEO-friendly.
How do I use watchers in Vue.js 2.0?
Watchers in Vue.js 2.0 allow you to perform custom logic when a data property changes. To use a watcher, you need to define a method with the same name as the data property you want to watch, and then add it to the ‘watch’ object in your Vue instance. This method will be called whenever the data property changes, with the new and old value as its arguments.
What is eager loading in Vue.js and how can I use it?
Eager loading is a concept in Vue.js that allows you to load data from your server before it’s needed, improving the performance of your application. To use eager loading in Vue.js, you can use the ‘created’ lifecycle hook to fetch data from your server when a component is created. This data will then be available as soon as the component is rendered.
How can I use computed properties in Vue.js 2.0?
Computed properties in Vue.js 2.0 allow you to define reusable properties that are calculated based on your data. To use a computed property, you need to define a method that returns the calculated value, and then add it to the ‘computed’ object in your Vue instance. This method will be called whenever any of the data properties it depends on change, and its return value will be cached until the dependencies change again.
How can I handle events in Vue.js 2.0?
Vue.js 2.0 provides a powerful event handling system that allows you to listen for DOM events and run custom logic when they occur. To handle an event, you need to use the ‘v-on’ directive in your template, followed by the name of the event you want to listen for and the method you want to run when the event occurs. This method will be called with the event object as its argument.
How can I use Vue.js 2.0 with Laravel?
Vue.js 2.0 can be easily integrated with Laravel, a popular PHP framework. Laravel comes with Vue.js support out of the box, so you can start building Vue.js components right away. To use Vue.js in a Laravel project, you need to include the Vue.js script in your HTML, and then define your Vue components in separate JavaScript files.
How can I use Vue.js 2.0 with Webpack?
Webpack is a module bundler that can be used to bundle your Vue.js components into a single JavaScript file. To use Vue.js with Webpack, you need to install the ‘vue-loader’ package, which allows Webpack to understand Vue components. Then, you can import your Vue components in your JavaScript files and use them as you normally would.
How can I use Vue.js 2.0 with TypeScript?
Vue.js 2.0 supports TypeScript, a statically typed superset of JavaScript. To use Vue.js with TypeScript, you need to install the ‘vue-class-component’ package, which allows you to define Vue components using TypeScript classes. Then, you can define your Vue components as TypeScript classes, and use TypeScript’s static typing features to catch errors at compile time.
How can I use Vue.js 2.0 with Vuex?
Vuex is a state management library for Vue.js that allows you to manage your application’s state in a centralized store. To use Vuex with Vue.js, you need to install the ‘vuex’ package, and then define your state, mutations, actions, and getters in a Vuex store. Then, you can access your state and dispatch actions from your Vue components using the ‘this.$store’ property.
How can I use Vue.js 2.0 with Vue Router?
Vue Router is a routing library for Vue.js that allows you to define routes for your application. To use Vue Router with Vue.js, you need to install the ‘vue-router’ package, and then define your routes in a Vue Router instance. Then, you can navigate between routes using the ‘router-link’ component, and display the current route’s component using the ‘router-view’ component.