An Introduction to Swift 2.0 for iOS and OSX

This article was updated in February 2016 to reflect changes in Swift 2.0
Swift is Apple’s new language option for programming native iOS applications. It complements Objective-C, and this will be the case for some time, now at version 2, there is no better time to learn the new language.
Objective-C developers will find a lot of similarities with additional features such as type inference, strong typing, no reliance on header files, generics and more.
In this tutorial I will show you how to get started developing iOS applications with Swift 2. I will show how to setup a development environment, look into language fundamentals and compare the syntax with Objective-C, JavaScript and C#. At the end of this tutorial you will have created a simple but complete iOS application using Swift.
There are many cases when Objective-C, C# and Swift share similar syntax, refer to this file for a complete reference.
Key Takeaways
- Swift 2.0, Apple’s latest programming language for iOS and OSX, simplifies native app development with features like type inference and strong typing.
- Setting up Swift development requires a current Mac and Xcode 7.2, available through the Mac App Store.
- Swift’s syntax offers cleaner and more efficient code with no need for semi-colons in declarations or memory pointers in string handling.
- The tutorial demonstrates creating a simple iOS application in Swift, highlighting the ease of connecting UI elements and handling data.
- Swift’s integration with existing Apple frameworks ensures robust app functionality, including seamless API interactions and JSON parsing for dynamic data handling.
- The guide concludes by emphasizing Swift’s potential for both new learners and experienced developers, encouraging further exploration through additional resources like Swift Playgrounds and online tutorials.
Setting up Your Environment
As with Objective-C, Swift requires a current Mac and Xcode. At time of writing version 7.2 of Xcode is the latest and is downloaded from the Mac App store.

It’s a large download, about 2.5 GB, so may take a while. Once the download completes, open your Applications directory and launch Xcode. Install any additional components required when promoted. If you have a previous version of Xcode installed it will updated to the latest version.
You are now ready to start exploring and developing with Swift.
Language Fundamentals and Syntax
Let’s look at the language syntax, the differences to Objective-C and how it compares to other modern languages.
As it wont be possible to cover all aspects of Swift in depth in this tutorial, I will use simple examples that show high level concepts.
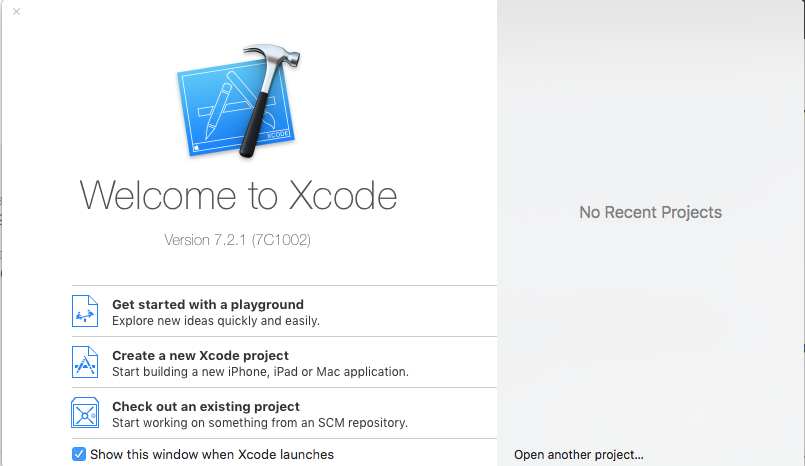
If you would like to follow along, open Xcode, select Get started with a Playground and type each example to see it in action.
You can download the code we will be trying from GitHub for quick reference.
Variables and Constants
To declare a variable in Swift use the keyword var:
var number = 1In other languages:
Objective-C
int number = 1;C#
var number = 1;Javascript
var number = 1;You can see how similar the Swift syntax is, the only difference is the lack of a semi-colon at the end of declarations.
The main difference with Objective-C is that you don’t have to define the variable type because Swift uses type inference and is able to understand that the variable is a number due to its initial value.
You are able to define the type if you wish:
var number: Int = 1Let’s declare a string variable in Swift:
var language = "Swift"Here the declaration in Swift looks a lot cleaner and almost identical to C# and JavaScript. How does this compare with Objective-C?
NSString *language = @"Swift";With Swift there is no need to use memory pointers (*) or to prefix the string value with the @ symbol.
If you are working with the Foundation framework, you can use a Swift string in anyway you use a NSString and have access to the entire NSString API
Constants in Swift can be declared using the let keyword:
let language = "swift"Or
let language: String = "Swift"In other languages the same declaration looks like this:
Objective-C
NSString *const language = @"Swift";C#
const string language = Swift";With Swift allowing for type inference when declaring constants.
Working with variables in Swift is no different from other languages, but it has an easy method for letting you add values in strings:
var designers = 4
var developers = 4

var teamSize = "The team has \(designers + developers) members"
Arrays
In Swift you create arrays and dictionaries using square brackets [ ] and access their elements by writing the index or key in those brackets.
var arr = ["first" , "second"]In other languages the same declaration looks like this:
Objective-C
NSArray *arr = @[@"first", @"second"];C#
var arr = new[] { "first", "second" };JavaScript
var arr = ["first" , "second"];You can access an item from the array using the index value:
var order = arr[0]And set the value using:
arr[0] = "zero"The code is the same in Javascript and C# but with a semi-colon at the end of the statement.
Objective-C
NSString *order = arr[0];You can enumerate an array using a for item loop:
for item in arr {
    // do something
}
In other languages the same declaration looks like this:
Objective-C
for(NSString *item in arr)
{
    // do something
}
C#
foreach (var item in arr) {
    // do something
}
JavaScript
for (index = 0; index < order.length; ++index) {
     //do something
}
To add another item to the array, use the += operator:
arr += ["fourth"]or the append function:
arr.append("fifth")Dictionaries
Declare a dictionary in Swift by defining key-value pairs. When declaring an empty dictionary you have to define the type of the key and the value.
var dict = Dictionary<String, String>()You can declare and assign values:
var dict = ["MEL": "Melbourne", "SYD": "Sydney"]In other languages the same declaration looks like:
Objective-C
NSDictionary *dict = @{
    @"MEL" : @"Melbourne",
    @"SYD" : @"Sydney"
};
C#
var dict = new Dictionary<string, string>
{
    { "MEL", "Melbourne" },
    { "SYD", "Sydney" }
};
To access an item from a Dictionary use:
var entry = dict["MEL"]In other languages the same declaration looks like:
Objective-C
NSString *entry = dict[@"MEL"];C#
var entry = dict["MEL"];To set or add an item to the Dictionary use:
dict["PER"] = "Perth"In other languages the same declaration looks like:
Objective-C
dict[@"PER"] = @"Perth"C#
dict["PER"] = "Perth";To iterate over a dictionary use:
for (cityCode, cityName) in dict {
    print("\(cityCode) : \(cityName)")
}
The cityCode variable will contain the key and the cityName variable the value.
In other languages the same declaration looks like:
Objective-C
for (id key in dict) {
    NSLog(@"key: %@, value: %@", key, dict[key]);
}
C#
foreach(var item in dict) {
    var cityCode = item.Key;
    var cityName = item.Value;
}
Loops
You’ve seen how to create items, let’s have a look at how to loop through them.
Firstly, for loop syntax:
for var number = 1; number < 5; number++ {
    //do something
}
As expected, you specify a value and increment until the condition is met. Objective-C and C# syntax is almost identical and so is JavaScript, but it omits the variable type.
You can achieve the same result by using the Swift for in variant:
for number in 1...5{
    //do something
}
Swift creates the number variable and assigns a value automatically while iterating over the specified value. 1…5 is a closed range that includes the numbers from 1 to 5.
Using the array created earlier you can iterate over the cities in the array using this syntax.
for city in arr {
  print(city)
}
Swift provides a while and repeat loop with syntax almost identical to Objective-C, C# and JavaScript:
while number < 10
{
    print(number)
    number++
}
The variable after the while statement is a boolean and the code will execute when it evaluates to true.
The repeat loop behaves the same way but ensures that code executes at least once before the condition is evaluated.
var number  = 9
repeat {
   print(number)
   number++
}
while number<10
This example ensures that the number value is displayed before it’s increased and evaluated by the while statement.
Conditionals
Whilst loops control repetitive tasks in code, if and switch statements control flow.
The if syntax in Swift can have parenthesis, but are optional, so you may use any style you prefer.
if city == "MEL" {
   print("Melbourne")
}
or
if (city == "MEL") {
    print("Melbourne")
}
if statements can be followed by an else if or an else.
if city == "MEL" {
    print("Melbourne")
} else if city == "SYD" {
    print("Sydney")
} else {
    print("Perth")
}
Switch statements in Swift are followed by a case validation, but a break statement is not required as there is no implicit fall-through. This means that once a case has evaluated to true and executed, the next case will not be evaluated. But, a default action is required.
switch city {
    case "MEL":
        print("Melbourne")
    case "SYD":
        print("Sydney")
    default:
        print("Perth")
}
The case statement can contain multiple values separated by a comma or ranges. With Swift you can use NSString in a switch statement, which is not possible with Objective-C.
Functions
Functions are a large subject to cover, but basic knowledge is useful so you can declare and use them.
Declare a function in Swift using the keyword func:
func sayName() {
  print("Patrick")
}
Pass parameters within the parenthesis by specifying a variable name and the type.
func sayName(name: String) {
  print(name)
}
You can pass multiple parameters separated by a comma.
func sayName(name: String, lastName: String) {
  print("\(name) \(lastname)")
}
Declare functions that return results by adding an -> after the parameters and specifying the return type.
func createName(name: String, lastName: String) -> String {
   return "\(name) \(lastname)"
}
Creating an iOS Application with Swift
Learning a new programming language is best achieved by writing code and creating applications. So let’s create a simple iOS application using Swift.
The app will connect to TheMovieDB API, request a list of upcoming movies, download the JSON results, parse them in to Dictionaries and Arrays and then populate this data into a Table View.
To keep this tutorial simple, it will cover common tasks such as creating and connecting UI elements to code, working with multiple controllers, delegates and protocols and show how to perform asynchronous operations with Swift, something that the language excels at.
Before starting, register and request an application API key from themoviedb.org website. Sign up if you do not have an account already, open your account page and generate a new key from within the API section.
The final code for the application is on GitHub and I have created branches for each stage.
Let’s Get Started.
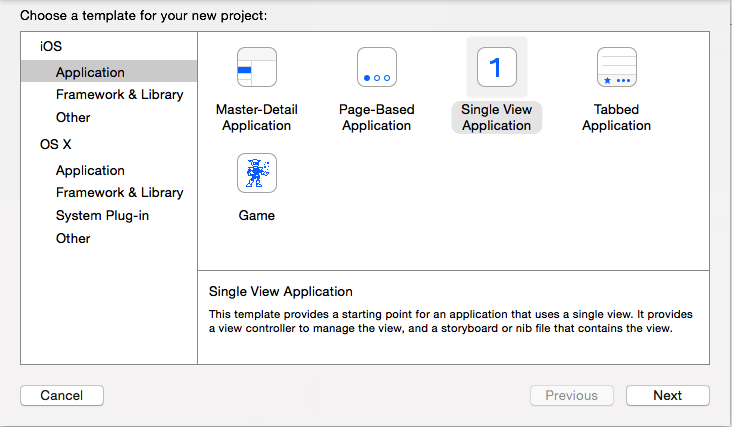
Open Xcode, create a new project, select a single view application in the iOS section and click next.
I called my project UpcomingMovies and select Swift as the language.
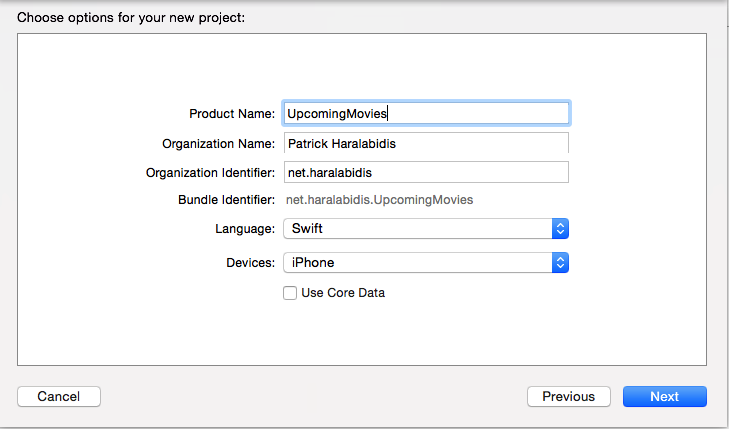
Click next and select a location to save the project.
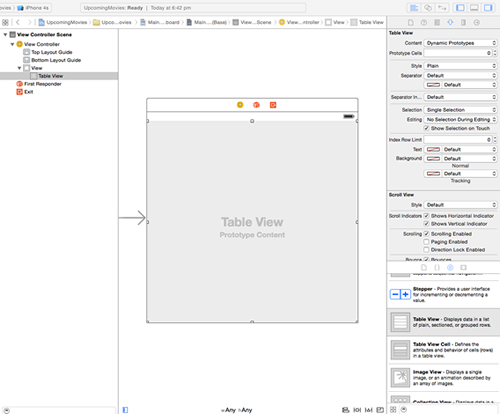
Now create a table to display application data by selecting the Main.storyboard file in Xcode and dragging a Table View object from the Object Library.
To access the table in code, you need to create a delegate, a data source and an outlet.
Select the storyboard file, hold control and click and drag from the Table View to the View Controller, selecting data source in the popup menu. Repeat the process and select the delegate option.
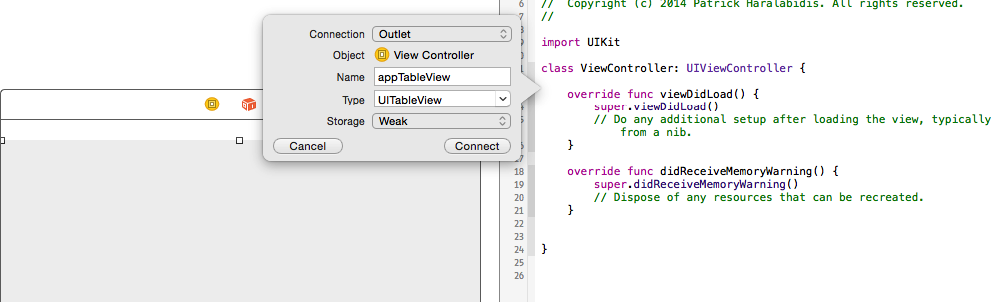
To create the outlet, select the View -> Assistant Editor -> Show assistant Editor menu item. You will see a new section that displays the code from the ViewControler.Swift file.
Select the table and this time hold control, then click and drag from the Table View to the code window, releasing under the class declaration.
Give the outlet a name, I used appTableView, and click connect.
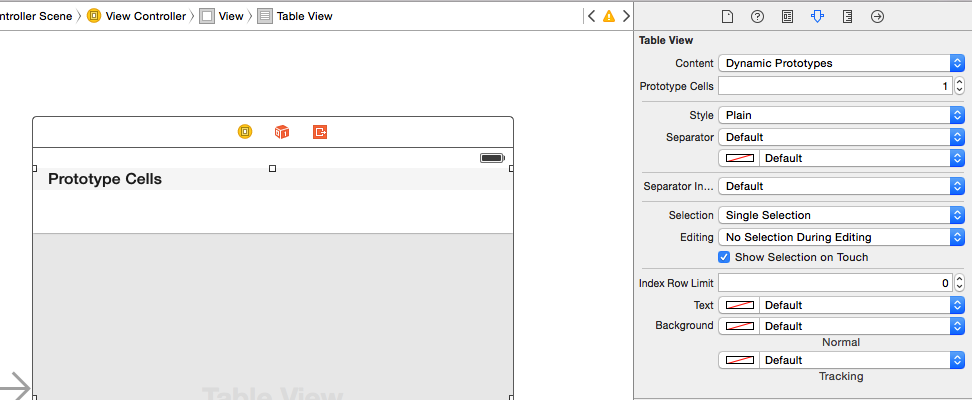
There’s one final task left to complete the UI. This is to create a prototype cell that will contain the movie details text and will be re-used for every cell created in the table.
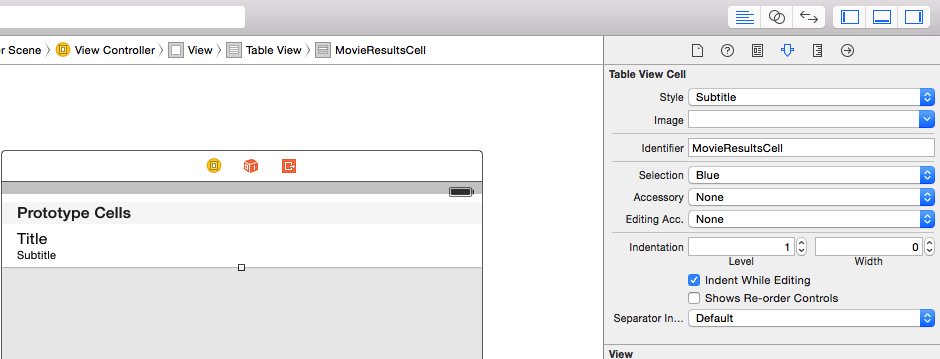
To achieve this, select the Table View and in the attributes inspector, change the number of prototype cells to 1. Then click in the cell, change the Style to Subtitle and give it an identifier of MovieResultsCell.
Alright, time to have some fun with Swift.
First you have to configure the data source and data set connected earlier in the storyboard.
In ViewController.swift change the class from this:
class ViewController: UIViewController {To this:
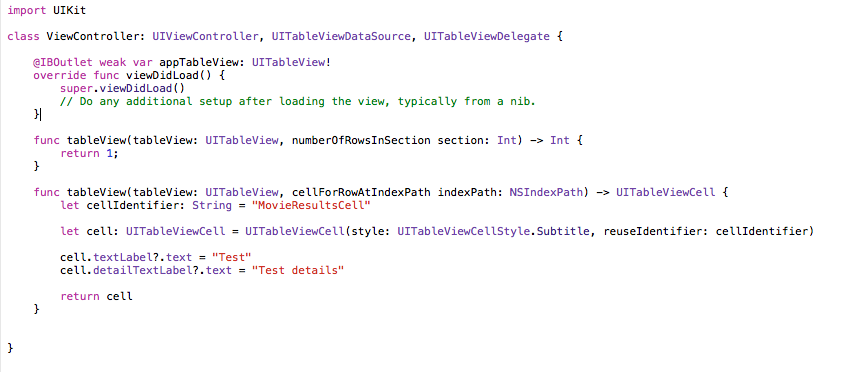
class ViewController: UIViewController, UITableViewDataSource, UITableViewDelegate {Now implement the 2 new protocols added above by creating the required methods.
Add the following lines of code to the ViewController.swift file.
func tableView(tableView: UITableView, numberOfRowsInSection section: Int) -> Int {
        return 1;
    }

func tableView(tableView: UITableView, cellForRowAtIndexPath indexPath: NSIndexPath) -> UITableViewCell {
        let cellIdentifier: String = "MovieResultsCell"

        let cell: UITableViewCell = UITableViewCell(style: UITableViewCellStyle.Subtitle, reuseIdentifier: cellIdentifier)

        cell.textLabel?.text = "Test"
        cell.detailTextLabel?.text = "Test details"

        return cell
    }
The first method defines the number of rows in the table and the second displays the data.
You can remove the following code as it’s not necessary.
override func didReceiveMemoryWarning() {
super.didReceiveMemoryWarning()
// Dispose of any resources that can be recreated.
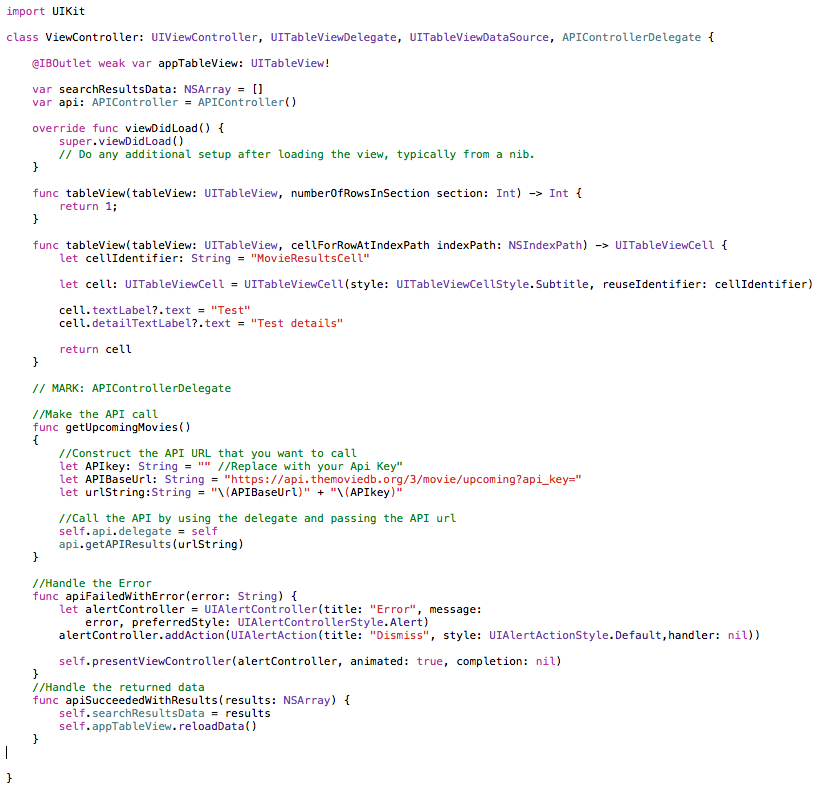
}The ViewController.Swift code should look like this:
This completes phase 1, go ahead and run the project, you should see the following result.
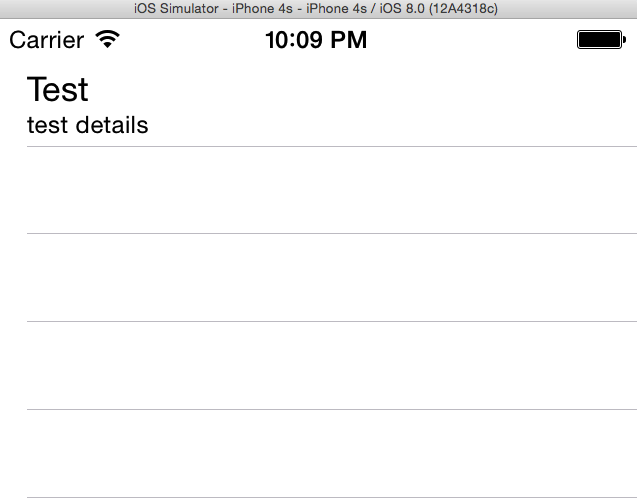
It’s time to connect to our API and retrieve the results. This code should be generic and reusable. The aim is to pass a URL as a parameter, get the result, parse the JSON and return an array with the data.
This code then can be re-used for subsequent API calls to other URLs.
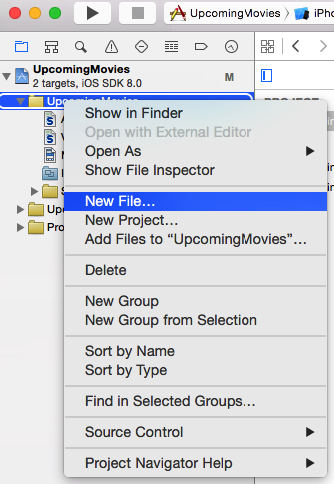
Create a new class by right clicking in the folder that contains the ViewController.swift in the navigation pane and selecting New File.
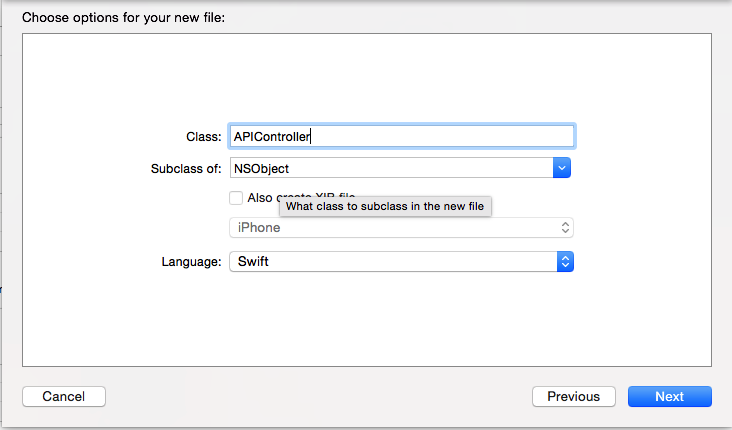
Select Cocoa Touch Class, click Next and give it a meaningful name, I used APIController. Leave the default options as below.
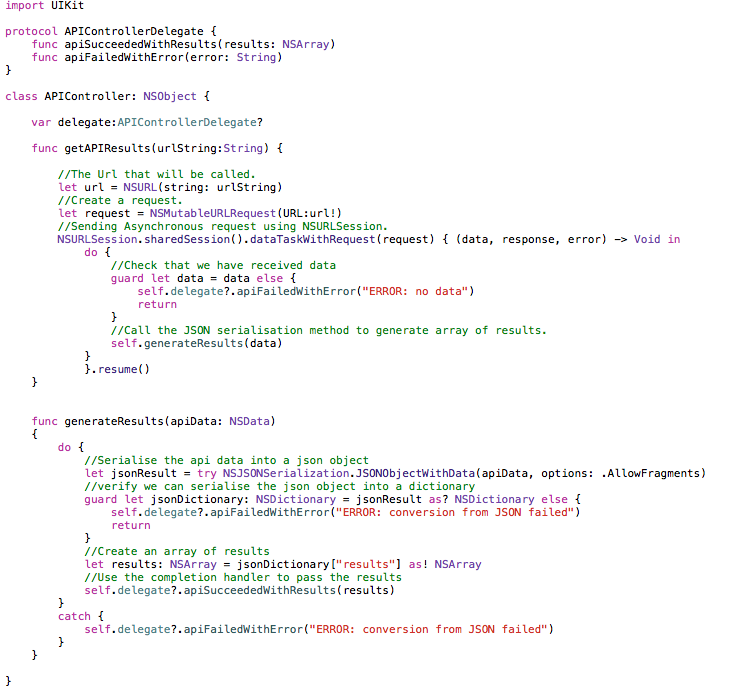
Open the file and enter the following code underneath the import UIKit line.
protocol APIControllerDelegate {
    func apiSucceededWithResults(results: NSArray)
    func apiFailedWithError(error: String)
}
This defines a protocol that will be implemented in ViewControler.swift and will receive the results once the API call has completed.
Let’s add the functions that will make the actual call and process the result.
Within the class decleration add the following code:
var delegate:APIControllerDelegate?

  func getAPIResults(urlString:String) {

      //The Url that will be called.
      let url = NSURL(string: urlString)
      //Create a request.
      let request = NSMutableURLRequest(URL:url!)
      //Sending Asynchronous request using NSURLSession.
      NSURLSession.sharedSession().dataTaskWithRequest(request) { (data, response, error) -> Void in
          do {
              //Check that we have received data
              guard let data = data else {
                  self.delegate?.apiFailedWithError("ERROR: no data")
                  return
              }
              //Call the JSON serialisation method to generate array of results.
              self.generateResults(data)
          }
          }.resume()
  }

func generateResults(apiData: NSData)
    {
        do {
            //Serialise the api data into a json object
            let jsonResult = try NSJSONSerialization.JSONObjectWithData(apiData, options: .AllowFragments)
            //verify we can serialise the json object into a dictionary
            guard let jsonDictionary: NSDictionary = jsonResult as? NSDictionary else {
                self.delegate?.apiFailedWithError("ERROR: conversion from JSON failed")
                return
            }
            //Create an array of results
            let results: NSArray = jsonDictionary["results"] as! NSArray
            //Use the completion handler to pass the results
            self.delegate?.apiSucceededWithResults(results)
        }
        catch {
            self.delegate?.apiFailedWithError("ERROR: conversion from JSON failed")
        }
    }
The first function takes a URL and makes a request to receive the data from the API. If there is an error it will execute the apiFailedwithError function of the protocol that passes the error string. On a Success it will call the generateResults function to parse the API data.
The APIController class should now look like this.
This completes Phase 2, if you build and run the project you will see that this has made no difference yet.
It’s time to populate the data in the table. Open ViewController.Swift and add the APIControler delegate to the Class:
class ViewController: UIViewController, UITableViewDelegate, UITableViewDataSource, APIControllerDelegate {Underneath the appTable outlet add the following 2 lines:
var searchResultsData: NSArray = []
  var api: APIController = APIController()
The first variable will contain the table data. The second variable creates an instance of the API controller that used to call any of its methods.
Now implement the API controller protocol by adding the following functions underneath the existing tableView ones. Make sure to replace the empty API key with your own.
// MARK: APIControllerDelegate
//Make the API call
func getUpcomingMovies()
{
//Construct the API URL that you want to call
let APIkey: String = "" //Replace with your Api Key"
let APIBaseUrl: String = "https://api.themoviedb.org/3/movie/upcoming?api_key="
let urlString:String = "\(APIBaseUrl)" + "\(APIkey)"
//Call the API by using the delegate and passing the API url
self.api.delegate = self
api.getAPIResults(urlString)
}
//Handle the Error
func apiFailedWithError(error: String) {
let alertController = UIAlertController(title: "Error", message:
error, preferredStyle: UIAlertControllerStyle.Alert)
alertController.addAction(UIAlertAction(title: "Dismiss", style: UIAlertActionStyle.Default,handler: nil))
self.presentViewController(alertController, animated: true, completion: nil)
}
//Handle the returned data
func apiSucceededWithResults(results: NSArray) {
self.searchResultsData = results
self.appTableView.reloadData()
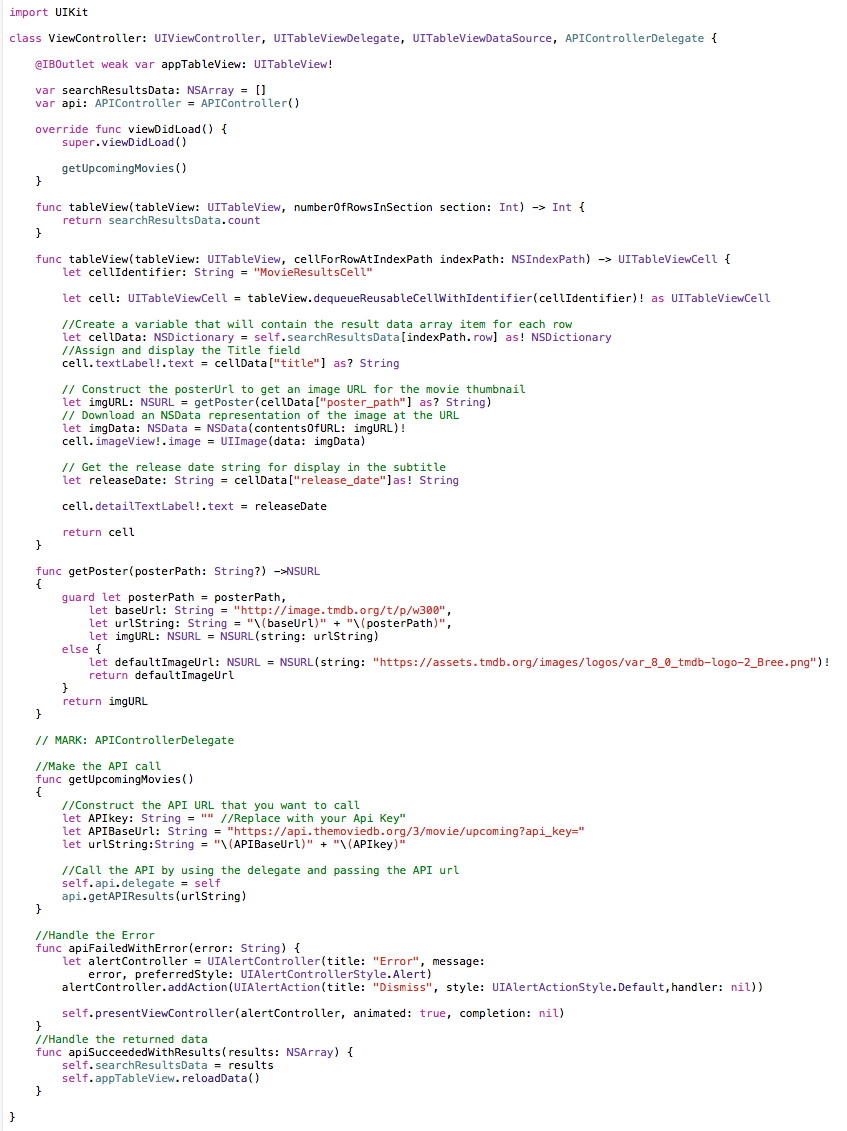
}The ViewController.swift should now look like this.
Let’s change the tableView function and map the API data to the rows and cells.
Replace the following code
func tableView(tableView: UITableView, cellForRowAtIndexPath indexPath: NSIndexPath) -> UITableViewCell {
    let cellIdentifier: String = "MovieResultsCell"
      let cell: UITableViewCell = UITableViewCell(style: UITableViewCellStyle.Subtitle, reuseIdentifier: cellIdentifier)

      cell.textLabel?.text = "Test"
      cell.detailTextLabel?.text = "Test details"

      return cell
  }
with this:
func tableView(tableView: UITableView, cellForRowAtIndexPath indexPath: NSIndexPath) -> UITableViewCell {
      let cellIdentifier: String = "MovieResultsCell"

      let cell: UITableViewCell = tableView.dequeueReusableCellWithIdentifier(cellIdentifier)! as UITableViewCell

      //Create a variable that will contain the result data array item for each row
      let cellData: NSDictionary = self.searchResultsData[indexPath.row] as! NSDictionary
      //Assign and display the Title field
      cell.textLabel!.text = cellData["title"] as? String

      // Construct the posterUrl to get an image URL for the movie thumbnail
      let imgURL: NSURL = getPoster(cellData["poster_path"] as? String)
      // Download an NSData representation of the image at the URL
      let imgData: NSData = NSData(contentsOfURL: imgURL)!
      cell.imageView!.image = UIImage(data: imgData)

      // Get the release date string for display in the subtitle
      let releaseDate: String = cellData["release_date"]as! String

      cell.detailTextLabel!.text = releaseDate

      return cell
  }
Here values from the API are assigned to each cell, grabbing the movie title, the poster and the release date.
The API does not always return an image for the poster. This should be handled through the JSON serialisation in the APIController, but that approach is too complex to cover here. So for the purposes of this app, let’s use the following function:
func getPoster(posterPath: String?) ->NSURL
    {
        guard let posterPath = posterPath,
            let baseUrl: String = "http://image.tmdb.org/t/p/w300",
            let urlString: String = "\(baseUrl)" + "\(posterPath)",
            let imgURL: NSURL = NSURL(string: urlString)
        else {
            let defaultImageUrl: NSURL = NSURL(string: "https://assets.tmdb.org/images/logos/var_8_0_tmdb-logo-2_Bree.png")!
            return defaultImageUrl
        }
        return imgURL
    }
This checks if an image path is returned from the API and a URL constructed for the table. Otherwise the tmdb logo is displayed.
Replace the following function
func tableView(tableView: UITableView, numberOfRowsInSection section: Int) -> Int {
        return 1;
    }
With:
func tableView(tableView: UITableView, numberOfRowsInSection section: Int) -> Int {
        return searchResultsData.count
    }
This will create as many rows in the table as the results from the API. Now that the table cells are ready to receive the data, it’s time to make the API call.
Add the following line into the viewDidLoad method
getUpcomingMovies()The complete ViewController class should now look like this.
Before the application can run you need to enable ‘App Transport Security for non HTTPS connections’ because the tmdb API doesn’t provide encrypted data.
Right click on the info.plist file and select Open as Source Code.
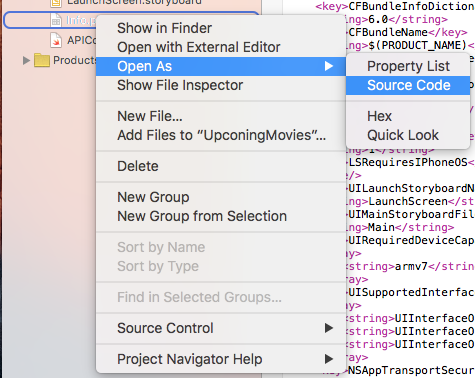
Add the following code at the bottom of the file, before the closing dictionary tag.
  <key>NSAppTransportSecurity</key>
  <dict>
      <key>NSAllowsArbitraryLoads</key><true/>
  </dict>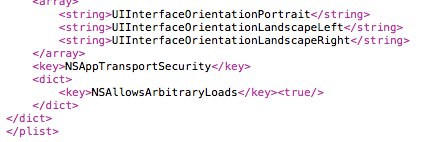
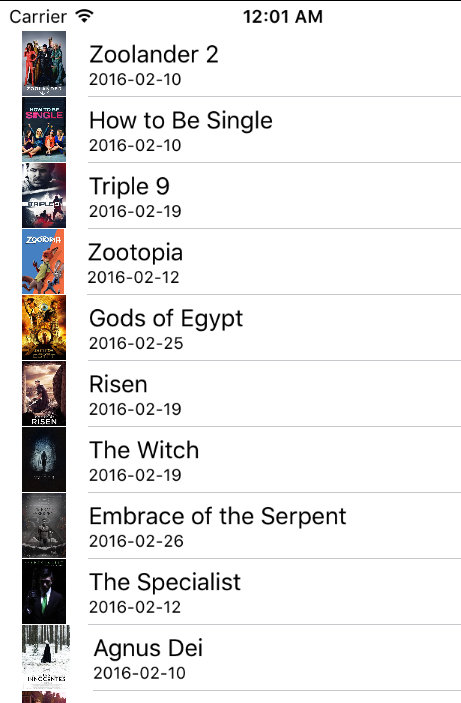
That’s it, now run the application, which should display all upcoming movies.
I hope you have enjoyed this ‘swift’ tour through Apple’s new language and welcome your comments and questions below. If you’re keen to learn more then I recommend SitePoint’s Hello World tutorial and Swift video series.
Frequently Asked Questions (FAQs) about Swift Programming Language
What are the key features of Swift that make it unique from other programming languages?
Swift is a powerful and intuitive programming language developed by Apple for iOS, macOS, watchOS, and tvOS app development. It’s designed to give developers more freedom than ever before. Swift is easy to use and open-source, so anyone with an idea can create something incredible. It’s also safe by design, yet also produces software that runs lightning-fast. Swift incorporates the best of C and Objective-C, without the constraints of C compatibility. It adopts safe programming patterns and adds modern features to make programming easier, more flexible, and more fun.
How does Swift ensure safety and performance?
Swift’s clean slate, backed by the mature and much-loved Cocoa and Cocoa Touch frameworks, is an opportunity to reimagine how software development works. Swift has been years in the making, and it continues to evolve with new features and capabilities. Swift eliminates entire classes of unsafe code. Variables are always initialized before use, arrays and integers are checked for overflow, and memory is managed automatically. Syntax is tuned to make it easy to define your intent — for example, simple three-character keywords define a variable (var) or constant (let).
How can I start learning Swift programming?
Swift is a powerful and intuitive programming language for macOS, iOS, watchOS, and tvOS. Writing Swift code is interactive and fun, the syntax is concise yet expressive, and Swift includes modern features developers love. Swift code is safe by design, yet also produces software that runs lightning-fast. If you’re just starting out, you can learn Swift with a series of interactive lessons in the Swift Playgrounds app on iPad or Mac, or via online tutorials and guides.
Is Swift suitable for beginners in programming?
Yes, Swift is a great language for beginners. Its syntax is concise and clear, making it easier to read and write than many other languages. It’s also designed to eliminate common programming errors and is backed by a supportive and active community. Swift also has a feature called Playgrounds that allows beginners to experiment with code and see the results immediately, without the need of setting up complex development environments.
What is the future of Swift programming?
Swift is a robust and intuitive programming language created by Apple for building apps for iOS, Mac, Apple TV, and Apple Watch. It’s designed to give developers more freedom than ever. Swift is easy to use and open source, so anyone with an idea can create something incredible. As Apple continues to innovate and release new devices, Swift is expected to evolve and grow accordingly. With its strong safety features, expressive syntax, and powerful performance, Swift is poised to continue shaping the future of software development.
How does Swift handle memory management?
Swift uses Automatic Reference Counting (ARC) for memory management. ARC keeps track of and manages your app’s memory usage to ensure that instances don’t take up space when they’re no longer needed. When an instance is no longer needed, ARC frees up the memory used by that instance so that the memory can be used for other purposes instead. This ensures that taking up too much space in memory doesn’t become a problem.
Can Swift be used for server-side programming?
Yes, Swift is not just for mobile apps. With frameworks like Vapor and Kitura, Swift is a powerful tool for server-side development as well. These frameworks allow you to write your server-side code in Swift, making your codebase more consistent and easier to manage. Swift’s performance and safety features make it a great choice for backend development.
What is Swift Playgrounds?
Swift Playgrounds is a revolutionary app for iPad and Mac that makes learning Swift interactive and fun. It requires no coding knowledge, so it’s perfect for students just starting out. Solve puzzles to master the basics using Swift — a powerful programming language created by Apple and used by the pros to build today’s most popular apps.
How is Swift different from Objective-C?
Swift is a modern language with the power of Objective-C without the complexity of its syntax. Swift adopts safe programming patterns and adds modern features to make programming easier, more flexible, and more fun. Swift’s clean slate, backed by the mature and much-loved Cocoa and Cocoa Touch frameworks, is an opportunity to reimagine how software development works.
Is Swift open source?
Yes, Swift is open source. In fact, it’s the first major computer language to be open source from its inception. This means that anyone can contribute to its development and use it for their own projects. The source code, bug tracker, forums, and regular development builds are available to everyone, fostering a vibrant community of contributors.
Patrick is a senior software developer at NAB in Melbourne. He is a certified .NET developer and has over 12 years of experience in application development. He is passionate about everything related to mobile and web and spends most of his time developing mobile applications on the iOS and Windows Phone platforms.