

If you’re a regular Photoshop user, chances are that you’ve played around with the Unsharp Mask filter (Filters > Sharpen > Unsharp Mask…). It’s a handy way to give your photograph a smoother, cleaner look, especially if it has been softened as a result of having other filters applied to it.
However, there may be times when using the Unsharp Mask filter doesn’t produce satisfactory results — with larger images or noisy images, for example. In this article, I’ll walk you through a sequence of steps that will give you more control over the Unsharp Mask filter and the areas of an image that you apply it to.
The PSD file I’ve used in this article is available as a downloadable zip archive (7.5MB), if you’d like to play along at home. Here’s what the image looks like.
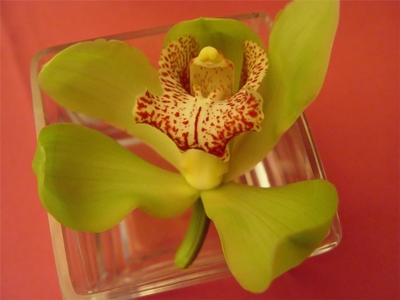
The original image that needs sharpening up!
As you can see, it’s a nice picture, but it’s lost some of its crispness. We’ll bring that back with this series of steps.
1. In the Channels palette, click on the Red, Green, and Blue layers individually to find the channel that has the greatest contrast. In this case, the Green channel looks like it will work the best. Hide the other channels and leave only the Green channel showing, then press Ctrl-A (Command-A on a Mac) and Ctrl-C (Command-C) to copy the channel.
2. Click on the RGB layer to return to the full-color image. Return to the Layers palette, and paste with Ctrl-V (Command-V). You should now have two layers: the original layer, and a grayscale layer.
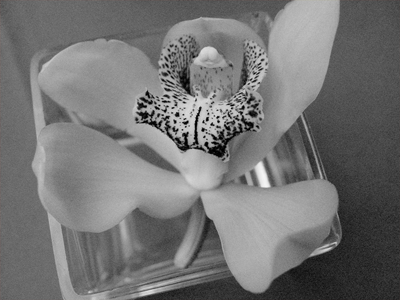
A grayscale layer based on the green channel
The next few steps will smooth the surfaces in the image, and increase the contrast even further, all of which will help us later on.
3. First, create a duplicate of the grayscale layer as a backup by typing Ctrl-J (Command-J on a Mac). Then click on the newly created layer, and select Filter > Blur > Surface Blur. Increase the Radius and Threshold values until most of the surfaces are smoothed out.
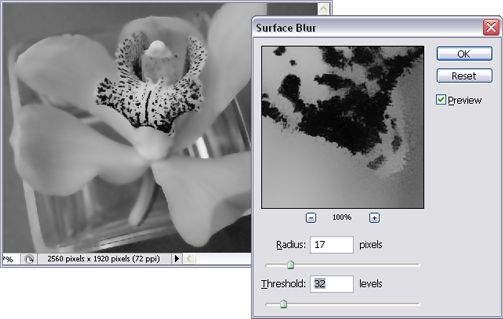
Using the Surface Blur
4. Create a duplicate of this layer as a backup, and select Image > Adjustments > Levels, or press the shortcut Ctrl-L (Command-L on a Mac). Drag the black and white sliders directly below the graph towards the center to increase the contrast. If necessary, also drag the gray slider along until you have an image that has as high a contrast as possible around the edges of shapes, but little variation on the surfaces.

Increasing the contrast using Levels
5. Create a backup of that layer. You’ll now have the original color layer, the grayscale layer, a blurred layer, the higher contrast layer, and a copy of the high contrast layer.
6. Select Filter > Stylized > Find Edges. Photoshop will automatically run the filter and change the layer so that the edges are defined. If the two previous steps were applied properly, you should now have very distinct edges. The image below compares the results of applying the Find Edges filter to the modified (blurred/levels change) image, to the image that results when the filter is used on the original grayscale image. You’ll want your image to look more like the one on the left. Once again, duplicate this layer as a backup.
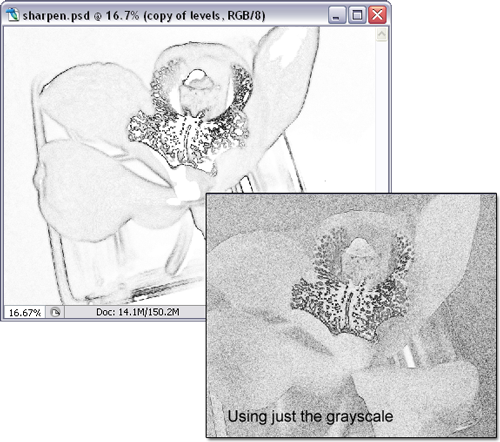
Using the Find Edges filter
7. At this point, if you still don’t have enough contrast in your image, you might want to delete the last few layers and try again by reapplying the Surface Blur, the Levels command, and the Find Edges filter. Adjust the values at each step to try to achieve that high-contrast look. When you’re happy with the result, create a backup duplicate layer.
8. Next, select Filter > Blur > Gaussian Blur. Increase the Radius until the small, fine lines created in the Find Edges filter are blurred into a solid color. This will blur the distinct, hard lines too, but as long as the darker lines are still visible (even if blurry), you needn’t worry about it. Once you’re done, duplicate this layer as well.
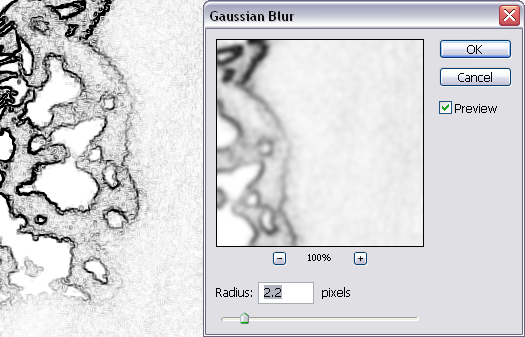
Applying a Gaussian Blur.
9. Once again, apply the Levels command to the newly created layer using Ctrl-L (Command-L on a Mac). Bring the black and white sliders directly below the graph inwards, until the outlines are very strong and the lighter grays have almost all turned to white.
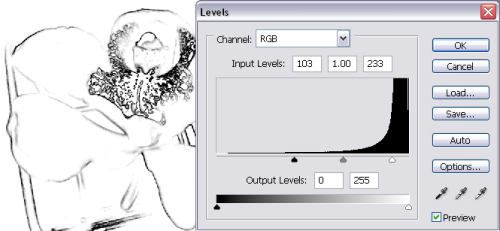
Applying Levels again.
10. With that layer selected, press Ctrl-I to invert the image (Command-I on a Mac). At this stage it might seem like we’re simply creating abstract artwork, but bear with me — we’re nearly there!
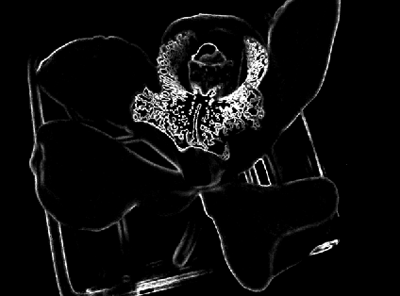
Inverting the image.
11. Open the Channels palette, hold down Ctrl (Command on a Mac) and click on the RGB layer. This will create a selection based on that channel; you’ll see dotted lines around the white areas.
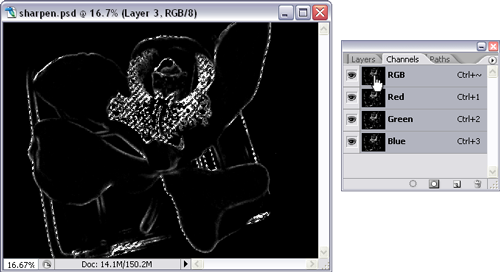
Creating a selection.
12. Now, go back to the Layers palette and click on the eye icon for each of the layers, hiding them all. Then click the eye icon to show the original layer (the bottom-most layer, which is the one we began working with). You should still see the dotted lines of the selection in your document window. With this selection active, go to Filter > Sharpen > Unsharp Mask, and experiment with the settings until the image looks sufficiently sharper.
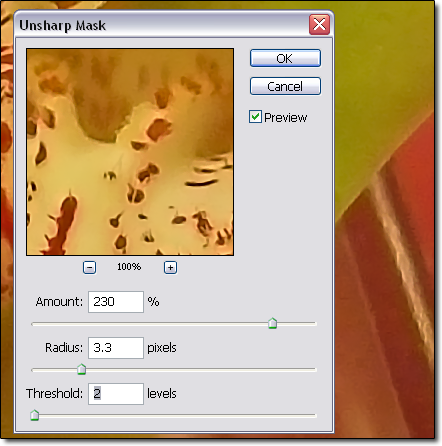
Applying the Unsharp Mask filter
13. Finally, click OK to apply the filter. Whew, we’re done! The result of this sharpening technique is shown below.
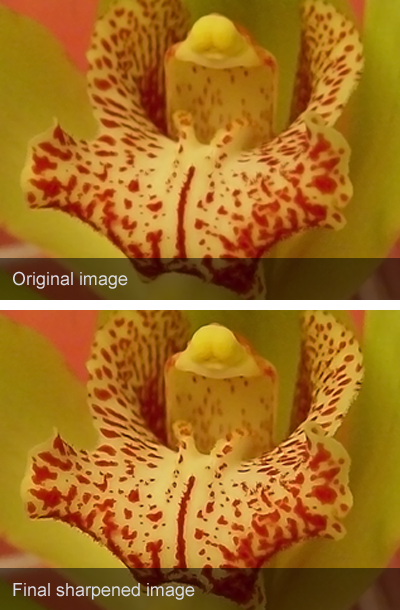
The final sharpened image
Summary
Sometimes, simply applying the Unsharp Mask filter won’t give you the best results, as other pixels throughout the image might be adversely affected.
In this article, the purpose of steps 1-10 (creating a grayscale image, blurring it, increasing the contrast, finding the edges, refining the edges, and inverting the image) was to create a controlled selection of the outlines of the image, so that we could then apply the Unsharp Mask filter and affect only the edges of the image. Experiment and compare the basic Unsharp Mask with this series of steps, and I think you’ll find that the extra time is worth it!
If you enjoyed this article, make sure you keep an eye out for my book, The Photoshop Anthology: 101 Web Design Tips, Tricks & Techniques, which is due out next month. It’s SitePoint’s first full-color title, and is packed full of Photoshop tips and techniques just like this one, with a focus especially for web designers. Enjoy!
Frequently Asked Questions about Sharpening in Photoshop CS2
What is the difference between Smart Sharpen and Unsharp Mask in Photoshop CS2?
Smart Sharpen and Unsharp Mask are two different tools in Photoshop CS2 used for sharpening images. Smart Sharpen is a more advanced tool that allows you to control the amount of sharpening in the shadows and highlights of an image. It also provides a preview of the changes before you apply them. On the other hand, Unsharp Mask is a simpler tool that sharpens the entire image uniformly. It’s easier to use but offers less control over the sharpening process.
How can I avoid over-sharpening my images in Photoshop CS2?
Over-sharpening can make your images look unnatural. To avoid this, always start with a lower sharpening value and gradually increase it until you achieve the desired effect. Also, use the preview feature to check the changes before applying them. Remember, the goal is to enhance the details, not to create high contrast edges.
Can I sharpen specific areas of an image in Photoshop CS2?
Yes, you can selectively sharpen specific areas of an image in Photoshop CS2. To do this, you need to create a layer mask and paint the areas you want to sharpen. This gives you more control over the sharpening process and helps to maintain the natural look of the image.
Why does my image look grainy after sharpening in Photoshop CS2?
If your image looks grainy after sharpening, it means you have overdone it. Sharpening increases the contrast between pixels, which can result in a grainy appearance if applied excessively. To fix this, reduce the sharpening amount or use the Fade command to lessen the effect.
How can I sharpen an image without increasing noise in Photoshop CS2?
Sharpening can sometimes increase the noise in an image. To avoid this, use the Smart Sharpen tool and adjust the Reduce Noise slider. This helps to sharpen the image while minimizing the noise.
What is the best resolution for sharpening images in Photoshop CS2?
The best resolution for sharpening images in Photoshop CS2 depends on the final output. For printing, a higher resolution is preferred, typically around 300 dpi. For web use, a lower resolution, such as 72 dpi, is sufficient.
Can I undo the sharpening effect in Photoshop CS2?
Yes, you can undo the sharpening effect in Photoshop CS2. Simply use the Undo command (Ctrl+Z) or the History panel to revert to a previous state.
How can I save my sharpening settings in Photoshop CS2?
You can save your sharpening settings in Photoshop CS2 by creating an action. This allows you to apply the same settings to other images with a single click, saving you time and ensuring consistency.
Can I sharpen a black and white image in Photoshop CS2?
Yes, you can sharpen a black and white image in Photoshop CS2. The process is the same as for color images. However, since black and white images rely more on contrast and texture, you might need to adjust the sharpening settings accordingly.
How can I sharpen an image for print in Photoshop CS2?
When sharpening an image for print in Photoshop CS2, it’s important to consider the printing process and the paper type. Generally, images for print require more sharpening than those for web use. Use the Smart Sharpen tool and adjust the settings based on the print size and resolution. Also, always check the final result with a print preview before printing.

