 first aid long shadow icon, vector symbol
As a researcher in medical image analysis, I can’t overemphasize the importance of images. The information these images reveal about the body, both internally (i.e. MRI) or externally (i.e. Dermatoscopy), is extremely valuable. I am amazed when I notice a tumor shown clearly in an image. Sometimes, the image needs some processing, but at the end of the day the medical image was the source for that information.
Tumors are not the only item shown through medical images, obviously. Other issues, such as bone fractures, are diagnosed using images. Medical image analysis is an essential part of medicine and many conferences and journals are specifically geared towards this type of domain.
In this series, I’ve focused on applying the Ruby programming language to the medical domain. In this article, I will show you how we can use Ruby to view and encode a medical image.
Without further ado, let’s get started.
Software
Tk
Before getting too far down the path, it is important to give a brief overview of Tk, which is an essential concept for our work in this article.
Tk is a free, open-source, cross-platform widget toolkit that is used for building graphical user interfaces (GUIs) in different programming languages, including Ruby. In other words, it provides us with GUI widgets like text, button, label, etc., which we need when building a desktop application. Tk is part of the Ruby standard library.
ImageMagick
ImageMagick is a library and set of command-line tools that provide the ability to manipulate various image formats.
RMagick
RMagick is an interface between Ruby and ImageMagick. RMagick abstracts the various ImageMagick-provided operations so they can be used in a Ruby program
Environment Setup
Now that we have gone through the essential concepts, let’s go ahead and setup the environment. We need to install the tools introduced above: Tk, ImageMagick, and RMagick.
Install Tk
I’m currently working on Mac OS X, so instructions will be based on this OS. Don’t worry, if you are running a different OS, you can find the instructions for installing Tk here.
On Mac OS X, ActiveTcl is the easiest way to get Tk. ActiveTcl includes Tcl, Tk, and other libraries. You can directly download it from here. Follow the setup wizard and you are all set!
Install ImageMagick
Installing ImageMagick is simple. Different distributions for different OS can be found here. I’ll use Homebrew to install ImageMigick. You can install Homebrew on your machine by typing the following command in your Terminal (without the $ sign):
$ ruby -e "$(curl -fsSL https://raw.githubusercontent.com/Homebrew/install/master/install)"
Now, in order to install ImageMagick, simply type the following command in your terminal (without the $ sign):
$ brew install imagemagick
Install RMagick
In order to install RMagick, you just need to type the following command in your terminal (presuming you have Ruby installed):
$ gem install rmagick
Viewing a Medical Image
The image we will be trying to view using Ruby is below:
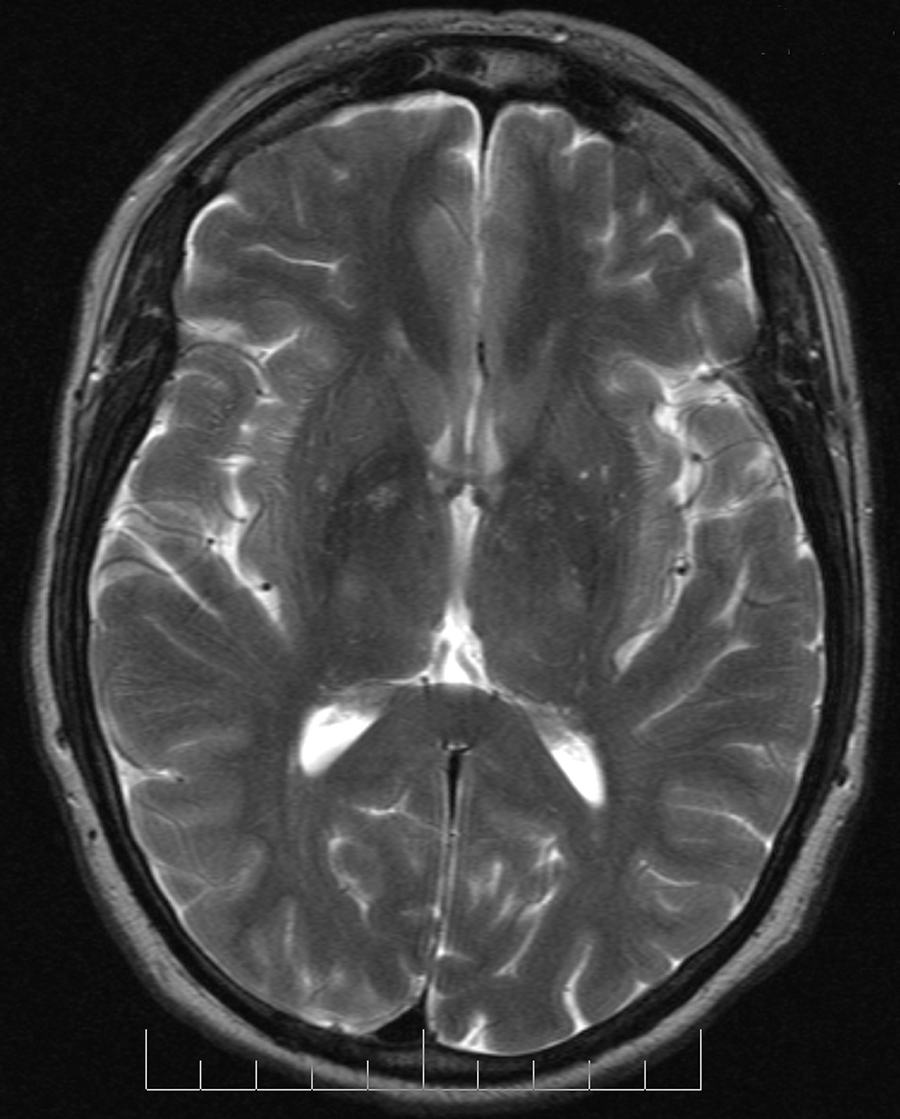
Go ahead and save it to your hard disk as brain.jpg.
The first thing we need to do is read the image. The TkPhotoImage class is used for this:
require 'tk'
img = TkPhotoImage.new
img.file = 'brain.jpg'
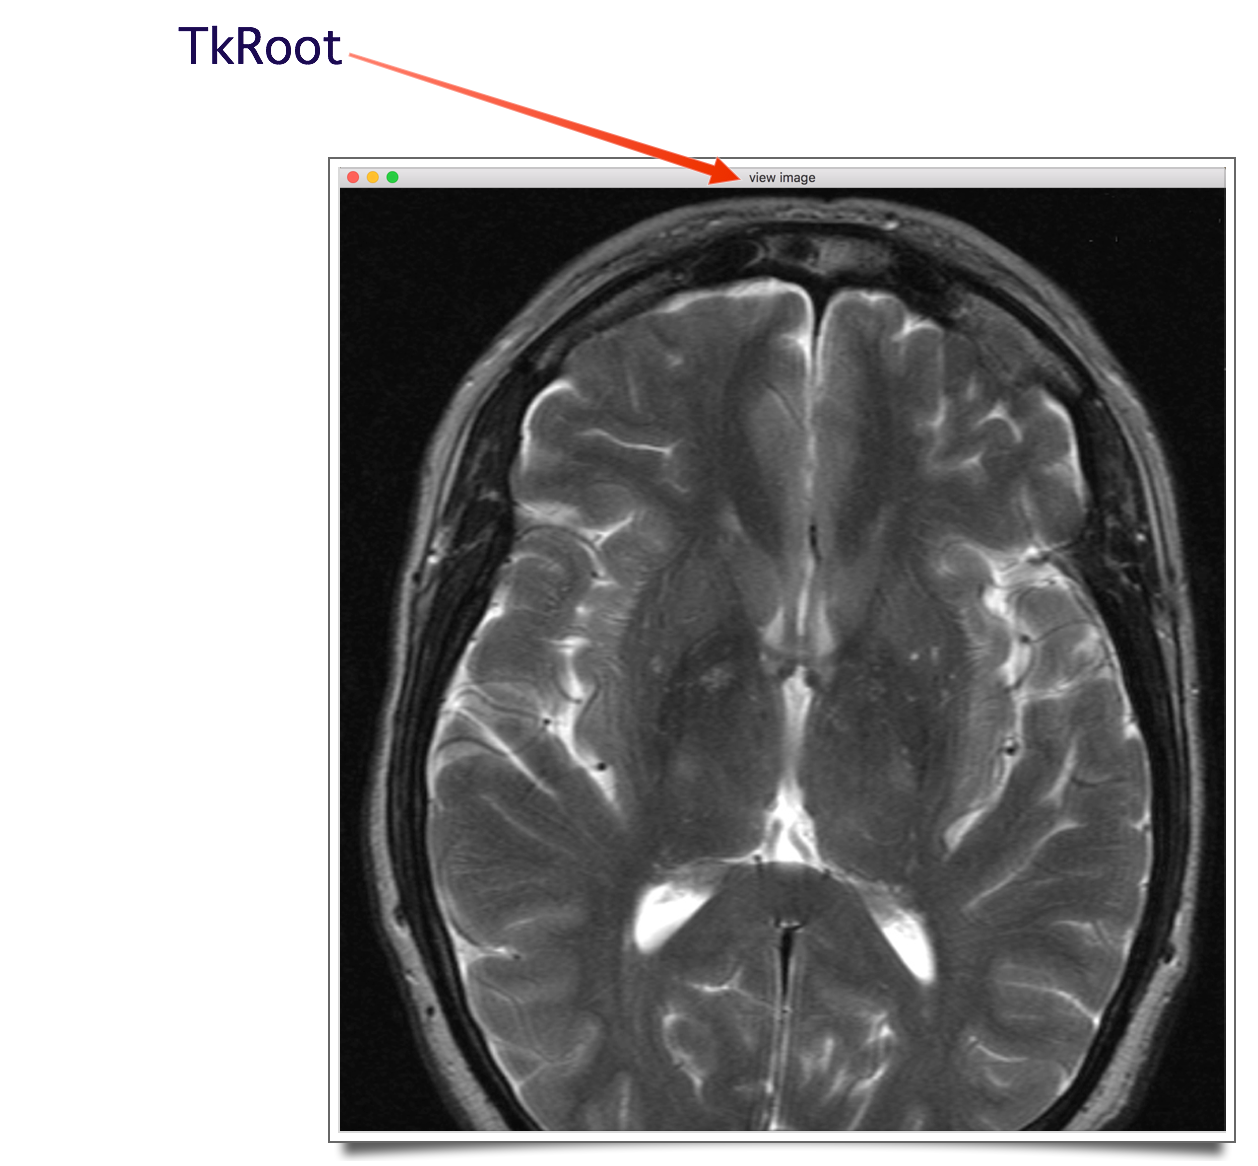
In Tk, a widget hierarchy is followed. In other words, widgets can be included within other widgets. The main widget in Tk is the root widget and can be created using the TkRoot class. Think of TkRoot as the main window. To create this main window in Ruby, do the following:
root = TkRoot.new(title 'view image')
Creating the main window, we now need a suitable widget to display the image. TkLabel will be suitable for this task, as it will enable us to create a new label that will be used to display our image. To include the label in the root, we do the following:
label = TkLabel.new(root)
Now, to display the image in the label, we write:
label.image = img
Before handling the control over to Tk, we need to specify the height and width of the label. Let’s make it equal to the height and width of our image. So, we can do the following:
label.place(height: img.height, width: img.width)
Finally things are ready and in place. In order to let Tk display the widgets, we need to call Tk.mainloop. Here’s the final script:
require 'tk'
img = TkPhotoImage.new
img.file = 'brain.jpg'
root = TkRoot.new {title 'view image'}
label = TkLabel.new(root)
label.image = img
label.place(height: img.height, width: img.width)
Tk.mainloop
Issues and Gotchas
Before I show you the output, I want to go through some issues that you may run into when dealing with Tk.
Gif issue
You might ask why did we install ImageMagick and RMagick, especially that we didn’t make use of them in the code above.
As you can see here, the standard Tk only supports the gif image format, and as you noticed, we are working with a jpg image. In this case, ImageMagick and RMagick come into the play. Using RMagick, we can convert a jpg image to a gif image, and then use the latter format in our program.
RMagick is implemented in the Magick module, thus, we need to include Magick as follows:
require 'RMagick'
include Magick
To carry out the conversion from jpg to gif, do the following:
img = ImageList.new('brain.jpg')
img.write('brain.gif')
So, you will be reading brain.gif instead of brain.jpg. It’s worth noting that you could also use the ImageMagick command-line tools for this task.
cannot load such file — tk (LoadError)
One of the things you might see when running the program is this error, which pops up from th require 'tk' statement:
cannot load such file -- tk (LoadError)

which only seems to happen if you're running RVM. Based on this post, the issue can be solved as follows:
- Make sure you have Tcl installed (see
Install Tkabove) - Run the following command in your terminal (this is a ruby upgrade to the current version 2.2.3, with Tk support on a Mac OS X):
rvm reinstall 2.2.3 --enable-shared --enable-pthread --with-tk --with-tcl
cannot load such file — RMagick (LoadError)
Another error you might encounter as a result of the require 'RMagick' statement is:
cannot load such file -- RMagick (LoadError)
In order to solve this problem, simply run:
$ gem install rmagick
Having those issues out of the way, the output of the program is shown below (I had a small window appear first, so I enlarged the window to get the figure below):
Ruby on Medicine: Base 64 Encoding and Decoding
Say your script had to transfer this image across a network, like in an email. You might get surprised when you realize that your file has strange characters on the other side! An explanation for this might be that you were trying to send your file in its raw bits and bytes format, while the media used was designed for streaming text.
But don’t worry, there is actually a tool to avoiding such issue. It is Base64 encoding. I will show you how easy it is to use Ruby to Base64 encode and decode a medical image.
What is Base64?
Base64 is a way that 8-bit binary data is encoded into a format that can be represented in 7-bits. This is done using only the characters A-Z, a-z, 0-9, +, and /, with = used to pad data. Using this encoding, three 8-bit bytes are converted into four 7-bit bytes.
Why Use Base64?
Base64 is very important for binary data representation, where it allows binary data to be represented in a way that looks and acts as plain text. This makes the data more reliable for storage in databases, sending in emails, or used in text-based formats, such as XML. Base64 is basically used for representing data in an ASCII string format.
Base64 Encoding
Base64 encoding is the process of converting binary data into a limited character set of 64 characters. As shown in the first section, those characters are A-Z, a-z, 0-9, +, and / (are they really 64 characters? Count them.) This character set is referred to as MIME’s Base64, and is considered the most common character set. It uses A-Z, a-z, 0-9, +, and / for the first 62 values, and +, and / for the last two values.
The Base64 encoded data ends up being longer than the original data, such that for every 3-bytes of binary data, there are at least 4-bytes of Base64 encoded data. Sometimes you may see a strange message similar to the one shown below, which most likely originates when you view a raw email with an attachment. You are actually seeing Base64 encoding in action! (if you notice the “=”, you can conclude that this is a Base64 encoding, since the equal sign is used for padding in the encoding process):
Content-Type: text/plain; charset=UTF-8
Content-Transfer-Encoding: base64

2KfZhNiz2YTYp9mFINi52YTZitmD2YUg2YjYsdit2YXYqSDYp9mE2YTZhyDZiNio2LHZg9in2KrZ
h9iMDQoNCtij2YjYryDZgdmC2Lcg2KfZhNin2LPYqtmB2LPYp9ixINi52YYg2KfZhNmF2YLYsdix
2KfYqiDYp9mE2K/Ysdin2LPZitipINin2YTYqtmKINiq2YbYtdit2YjZhiDYqNmH2Kcg2YTZhdmG
INmK2LHZitivINin2YTYqtmI2LPYuSDZgdmKDQrYt9mE2Kgg2KfZhNi52YTZhSDYp9mE2LTYsdi5
2YrYjCDYudmE2YXYpyDYqNij2YbZiiDYutmK2LEg2YXYqtiu2LXYtSDYqNin2YTYudmE2YUg2KfZ
hNi02LHYudmKINmI2KPZgdiq2YLYryDZhNmE2YXZhtmH2Kwg2KfZhNi52YTZhdmKDQrZhNiw2YTZ
gy4NCg0K2KzYstin2YPZhSDYp9mE2YTZhyDYrtmK2LHYpyDYudmE2Ykg2YbYtdit2YPZhSDZgdmK
INmH2LDYpyDYp9mE2LTYo9mGLg0KDQrYudio2K/Yp9mE2LHYrdmF2YYNCg==
--089e0141aa264e929a0514593016
Content-Type: text/html; charset=UTF-8
Content-Transfer-Encoding: base64
Base64 is preformed with the following steps:
- The text to be encoded is converted into its ASCII equivalents (i.e. a:97, b:98, etc). Look at the ASCII table here.
- The decimal values obtained in the previous step are converted into their binary equivalents (i.e. 97: 01100001).
- All the binary equivalents are concatenated, obtaining a large set of binary numbers.
- The large set of binary numbers is divided into equal sections, with each section containing only 6-bits.
- The equal sets of 6-bits are converted into their decimal equivalents.
- The decimal equivalents are finally converted into their Base64 values (i.e. 4: E). The decimal values and their Base64 alphabet can be found here.
Base64 Decoding
Base64 decoding is carried out by reversing the steps described in the previous section:
- Each character in the string is changed to its Base64 decimal value.
- The decimal values obtained are converted into their binary equivalents.
- The first two bits of the binary numbers are truncated from each of the binary numbers obtained, and the sets of 6-bits are combined, forming one large string of binary digits.
- The large string of binary digits obtained in the previous step is split into groups of 8-bits.
- The 8-bit binary numbers are converted into their decimal equivalents.
- The decimal values obtained are finally converted into their ASCII equivalent.
Encoding an Image
Enough theory, and let’s get to some Ruby coding. I will be using the brain image from the first part of this article. The first thing we have to do to use Base64 in Ruby is to include the base64 module, which is part of the Standard Library:
require base64In order to encode the image, simply use the function encode64(bin). The Ruby documentation for this function says:
>> Returns the Base64-encoded version of bin. This method complies with RFC 2045. Line feeds are added to every 60 encoded characters.
We can thus do the following in order to Base64 encode our image:
require 'base64'

#open the image file and treat it as a binary file

image = File.open('brain.jpg').binmode
image_read = image.read
image_64_encode = Base64.encode64(image_read)
If you want to see the output of the encoding process, type the following:
puts image_64_encode
Decoding an Image
To decode an image using Ruby, simply use the decode64(str) function. The Ruby documentation for this function:
>> Returns the Base64-decoded version of str. This method complies with RFC 2045. Characters outside the base alphabet are ignored.
In order to decode the image encoded in the previous section, do the following:
Base64.decode64(image_64_encode)Putting it Altogether
Let’s put the Ruby script that Base64 encodes and decodes an image together. The Ruby script that does that looks something like the following:
require 'base64'
image = File.open('brain.jpg').binmode
image_read = image.read
image_64_encode = Base64.encode64(image_read)
image_64_decode = Base64.decode64(image_64_encode)

#create a writable image and write the decoding result

image_result = File.open('brain_decode.jpg', 'w')
image_result.write(image_64_decode)
Opening the brain_decode.jpg image, notice that it’s the original image brain.jpg we encoded in the first step.
Conclusion
Ruby is a language designed to make programmers happy. It offers many tools to help us in our everyday jobs. The goal of this article and series is to teach some of the basics of Ruby while looking at a domain that is a bit less common when discussing Ruby. I hope you learned something today about how to use Tk and how to encode and decode images in Ruby. Hopefully, the image of your brain just got a bit larger. :)
 Abder-Rahman Ali
Doctor and author focussed on leveraging machine/deep learning and image processing in medical image analysis.