

The following is a short extract from our book, Rails: Novice To Ninja, available to SitePoint Premium members. Print copies are sold in stores worldwide, or you can order them here. We hope you enjoy this extract and find it useful.
Key Takeaways
- Rails plugins are components that extend the functionality of a Rails application, providing additional features such as extensions to ActiveRecord functionality, helper methods, and new template engines.
- Plugins are distributed as gems and can be integrated into an existing Rails application by adding them to the Gemfile and running bundle install. Bundler manages application dependencies and simplifies the process of including plugins in an app.
- The acts-as-taggable-on plugin allows for tagging functionality within Rails applications. It provides a simple means by which models can be made taggable, and comes with its own ActiveRecord model class.
- The acts-as-taggable-on plugin uses two tables: the tags table, which stores the ActsAsTaggableOn::Tag model, and the taggings table, which stores the mappings between the ActsAsTaggableOn::Tag model and those models that make use of the acts-as-taggable-on functionality.
- Rails plugins, while providing valuable functionalities, can also introduce potential security vulnerabilities. It’s important to only use plugins from trusted sources, keep them up-to-date with the latest security patches, and thoroughly review their documentation and any available security reports before using them in an application.
Rails Plugins
While this book is unable to cover all of the built-in functionality that ships with Rails—and there’s plenty of functionality for you to discover and experiment with once you’re beyond the last chapter— the plugins architecture of Rails warrants our attention.
What is a plugin?
A plugin is a component that you can add to your application to extend its functionality. While you can certainly write your own plugins, we’ll limit our discussion here to using existing plugins. Plugins have been developed for various parts of the Rails framework, adding functionality such as:
- extensions to ActiveRecord functionality
- helper methods
- new template engines (for coding a view using an alternate templating language)
The number of existing Rails plugins is enormous and grows every day. Programmers in the Ruby and Rails communities are excellent about sharing code and creating useful plugins based on extensions they need. A good resource of existing Rails plugins can be found by searching for “Rails” on the Rubygems site or on the Ruby Toolbox site.
Plugins are distributed as gems, which we covered in Chapter 2. Plugins can be pulled into an existing Rails application by adding them to the Gemfile and running bundle install. You probably remember our discussion about Bundler from Chapter 4, where its job is to manage application dependencies. Bundler makes including existing plugins into our app a breeze.
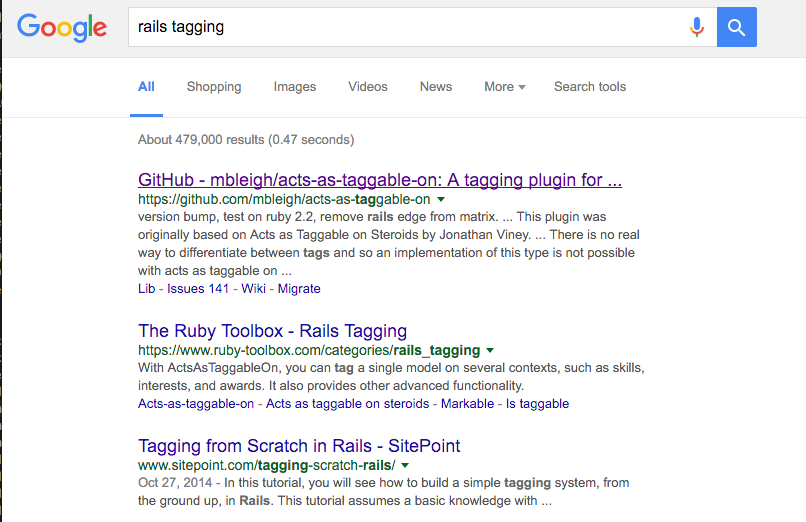
Finding a plugin that does what you require is usually just a Google or RubyGems search away. As seen in Figure 10-1, searching for “rails tagging” brings up a few gems that have been created, including one called acts-as-taggable-on.
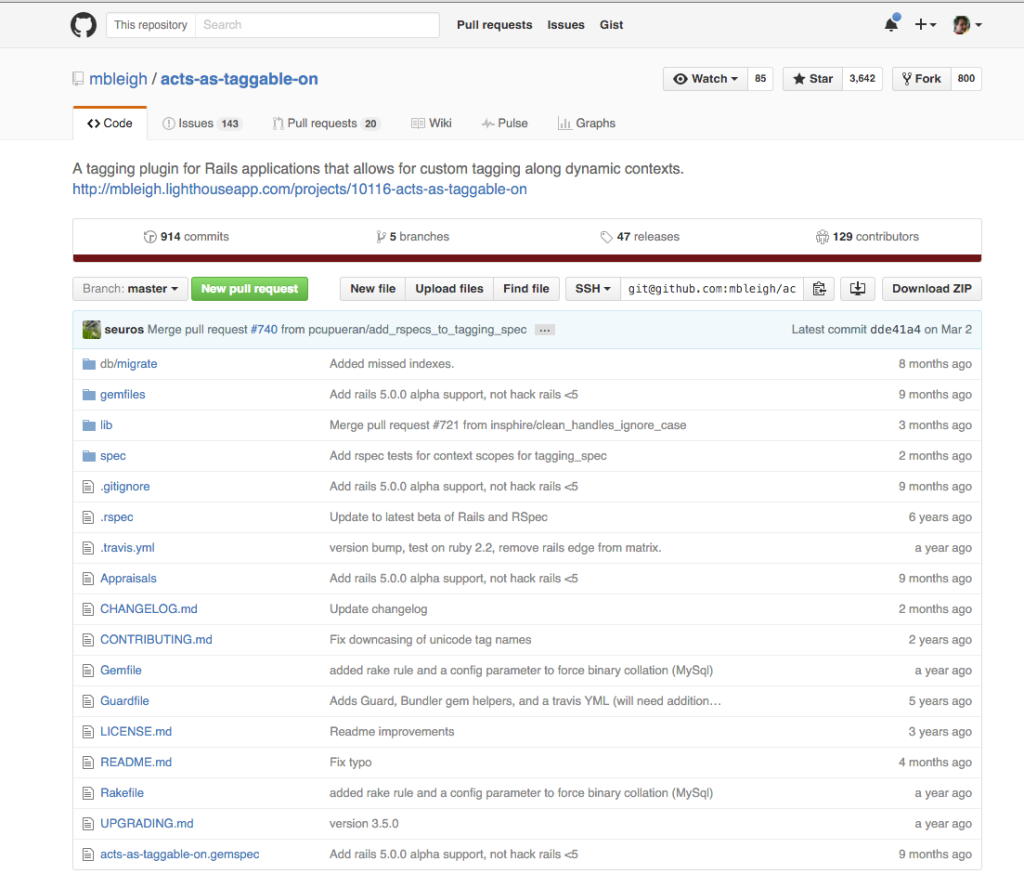
The overwhelming majority of gems keep their source on GitHub, including acts-as-taggable-on from the first link in our search above. Following that link leads to the source on GitHub, as shown in Figure 10-2.
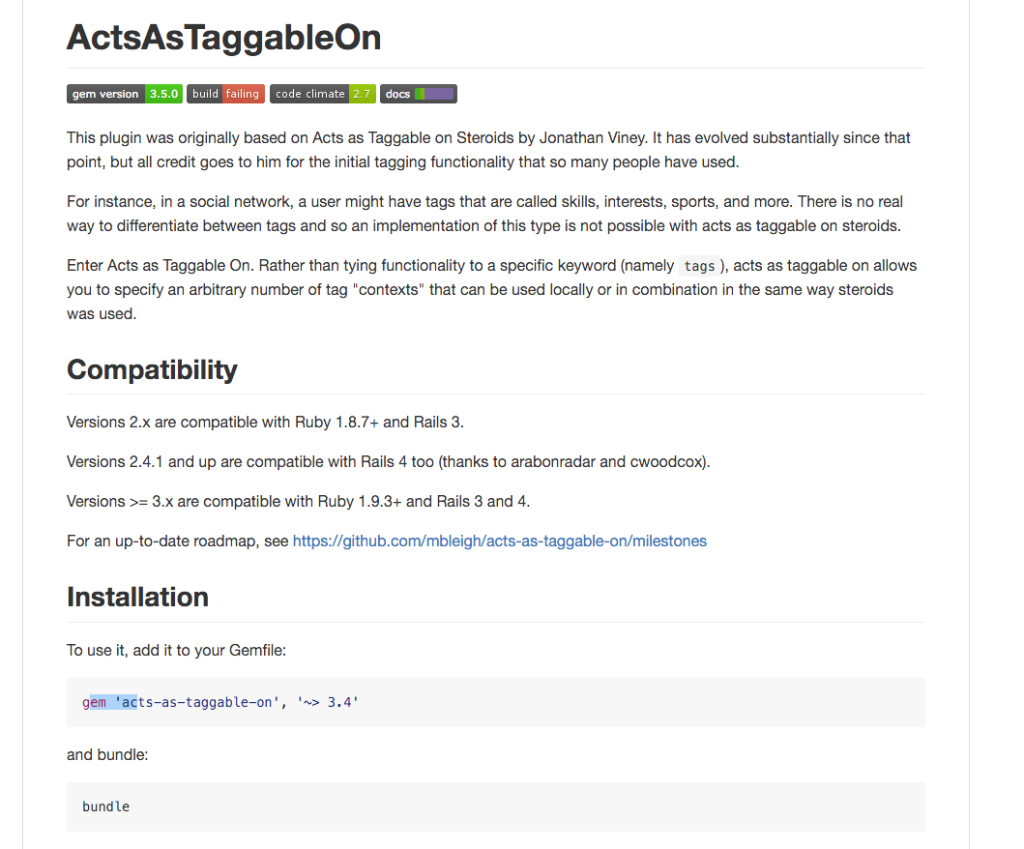
Most GitHub source repositories have a README or README.md file that explains what the gem does, how to install and use it, and so on. acts-as-taggable-on follows this convention, which can be seen in Figure 10-3. It explains the object of the gem, the supported versions of Rails, as well as how to install and configure the gem.
After reading through the README.md, we now know how to pull the gem into our application and use its functionality. You may feel that walking through the topic of “how to find and learn about gems” is a bit tedious, but you will find yourself spending loads of time doing just that–so I figured it was tedium well spent.
No Time for Name-calling
There are many ways to extend Rails; for example, by using a “plugin”, “engine”, and “railtie”, to name a few. While there are technical differences between these items, they are often (incorrectly) used interchangeably. Defining these terms and their differences is beyond the scope of this book, so I’m going to stick to the word “plugin” for now. As you grow in your Rails-fu, you’ll no doubt want to do some research around Rails extensibility. Boom–I just turned this note into an EXTRA CREDIT!
Okay, enough theory! Let’s go ahead and install our first plugin.
Adding Tagging to Readit
Tagging is the process by which content creators attach simple textual labels to their data, be it a photo, a link, or a restaurant review. These tags vary widely in their nature; they may be related to location or content, for instance. This results in everyone seeming to have a unique system for tagging data. Currently, the hashtag (#) is probably the most popular form of tagging content with metadata, thanks to Twitter!
Tags are definitely more flexible than a category tree, as they allow you to assign as many or as few tags as you like to any item of data. The convention that has evolved is for the user to enter tags for a content item into a text field. Multiple tags should be separated by a space or a comma.
Introducing the acts-as-taggable-on Gem
Instead of reinventing the wheel and implementing our own tagging system for Readit, we’ll use one of the available Rails plugins for this job, the aforementioned acts-as-taggable-on. You may be wondering what kind of name the developer originally chose for his plugin. At some point, David Heinemeier Hansson himself actually developed a plugin named acts_as_taggable as a proof of concept for some then-new features for Rails. It wasn’t intended for production use, and has since been deprecated, but was picked up again because tagging is such an essential component of today’s websites with user-generated content.
Jonathan Viney, a Rails core contributor and all-round guru, took up where Heinemeier Hansson left off and created his work under the name of acts_as_taggable_on_steroids. Yet development waned, so another developer name Michael Bleigh formed acts-as-taggable-on, and has been developing it ever since. With that bit of family history out of the way, let’s have a look at what this plugin can do for us.
A History of acts_as_*
As this is far being from an obvious name for a plugin, allow me to explain the background of the acts_as_* naming convention.
In Rails’ own plugin repository can be found a number of acts, which are functional extensions to an ActiveRecord model. These acts equip models with certain functionality that usually can be enabled using a single line of code.
As this functionality enables models to “act as something else,” the convention of calling these functional additions “acts” arose, and the code that enables the functionality acts_as_something shortly followed.
At the time of writing, many “acts as” gems are available on Rubygems.org: acts_as_list, acts_as_tree, and acts_as_paranoid, to name a few. While some are more complex than others, each of these acts apply a hierarchy to a set of model objects. In the case of acts_as_list, objects are positioned in a flat list; with acts_as_tree, the resulting hierarchy is a sophisticated tree system, such as that used in a threaded forum, for example.
But what about acts-as-taggable-on? As the name suggests, this plugin provides a simple yet effective means by which you can make your models taggable. It ships with its own ActiveRecord model class called ActsAsTaggableOn::Tag, as well as functionality for parsing a list of tags divided by spaces into separate model objects of class ActsAsTaggableOn::Tag.
Namespacing Safety Measures
You probably noticed that the
Tagclass is namespaced underActsAsTaggableOn. Namespacing classes inside a gem is a Ruby community best practice based on years of class names stomping all over each other from different gems and libraries.Tagis a fairly common name, so putting it in theActsAsTaggableOnnamespace ensures we avoid loading another gem that clobbers the class.
Of course, before we can play with this plugin, we’ll need to install it.
Installing the acts-as-taggable-on Gem
To install the gem, change directory to the application root folder and add the following line to the Gemfile:
gem "acts-as-taggable-on", "~> 4.0"The ~> tells Bundler that we want any version in the 4.x series. If 4.2 is the latest, that’s what we’ll get; however, if the versions went 4.2, then 5.0, we’d still end up with 4.2. Make sense?
Now run the following:
$ bundle install

Fetching gem metadata from https://rubygems.org/...........

Fetching version metadata from https://rubygems.org/...

Fetching dependency metadata from https://rubygems.org/..

Resolving dependencies...

Using rake 10.5.0

Using i18n 0.7.0

Using json 1.8.3

Using minitest 5.8.4

...

Installing acts-as-taggable-on 4.0.0.pre

...

Bundle complete! 14 Gemfile dependencies, 56 gems now installed.

Use `bundle show [gemname]` to see where a bundled gem is installed.

Post-install message from acts-as-taggable-on:

When upgrading
As you can see, Bundler runs through all the dependencies of our app, including installing the acts-as-taggable-on into the application “bundle”. There’s even a post-install message from the acts-as-taggable-on gem telling us what to do next.
Creating a Migration for the Plugin
Our plan is to allow users of our application to add tags to stories submitted to Readit, so our Story model needs to be taggable. Both the tags themselves and the relationships between tags and stories need to be stored somewhere, so we’ll use a migration to create new tables. And while this plugin makes use of a new model (the ActsAsTaggableOn::Tag model provided by the acts-as-taggable-on plugin), the model wasn’t created by the rails generate command, so we’re yet to have a migration to go with it. Luckily, the plugin does come with a convenient generator method to create a fitting migration:
$ rails acts_as_taggable_on_engine:install:migrations

Running via Spring preloader in process 64781

Copied migration

201...7_acts_as_taggable_on_migration.acts_as_taggable_on_engine.rb

from acts_as_taggable_on_engine

Copied migration

201...8_add_missing_unique_indices.acts_as_taggable_on_engine.rb

from acts_as_taggable_on_engine

Copied migration

2_add_taggings_counter_cache_to_tags.acts_as_taggable_on_engine.rb

from acts_as_taggable_on_engine

Copied migration

201...0_add_missing_taggable_index.acts_as_taggable_on_engine.rb

from acts_as_taggable_on_engine

Copied migration

201...1_change_collation_for_tag_names.acts_as_taggable_on_engine.rb

from acts_as_taggable_on_engine

Copied migration

201...2_add_missing_indexes.acts_as_taggable_on_engine.rb

from acts_as_taggable_on_engine
Rake’n’rails
The message received after we bundled instructed you to use
rakeinstead ofrails. Welcome to the bleeding edge. In previous versions of Rails,rakewas used to run tasks like this, but Rails 5 addedrailsas an alias. This was to allow devs to userailsfor all generators and tasks.
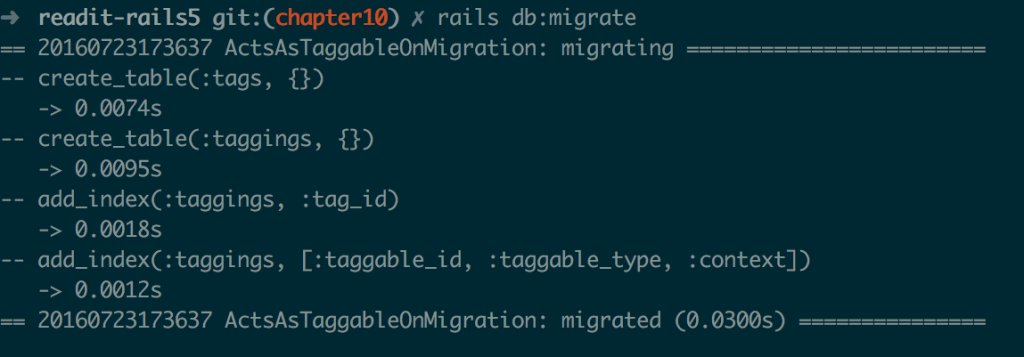
This task copied five migrations into our db/migrate directory. These files produce the tables used by acts-as-taggable-on, along with creating some database indexes and other database artifacts. The acts-as-taggable-on plugin uses two tables:
- The
tagstable stores theActsAsTaggableOn::Tagmodel, which is just a regularActiveRecordmodel. This table contains one entry for each tag. So, for example, if you tagged two or moreStorymodels with the tagruby, only oneActsAsTaggableOn::Tagobject (ruby) would be stored in the database. This approach makes it easy for our application’s users to find content; if users were interested in finding stories about Ruby, they could browse through all the stories to which therubytag was applied. - The
taggingstable stores the actual mappings between theActsAsTaggableOn::Tagmodel and those models that make use of theacts-as-taggable-onfunctionality.
Following is the migration code that was generated for us. It is ready to use as is, and is stored in the db/migrate/xxxx_acts_as_taggable_on_migration.rb file:
class ActsAsTaggableOnMigration < ActiveRecord::Migration

 def self.up

   create_table :tags do |t|

   t.string :name

 end
 create_table :taggings do |t|

   t.references :tag
   # You should make sure that the column created is

   # long enough to store the required class names.

   t.references :taggable, polymorphic: true

   t.references :tagger, polymorphic: true
   # Limit is created to prevent MySQL error on index

   # length for MyISAM table type: http://bit.ly/vgW2Ql

   t.string :context, limit: 128
   t.datetime :created_at

 end
 add_index :taggings, :tag_id

add_index :taggings, [:taggable_id, :taggable_type, :context]

 end
 def self.down

   drop_table :taggings

   drop_table :tags

 end

end
This migration starts out simply enough. It creates the tags table that contains just one column: name (in addition to the id column belonging to every table).
While it may appear straightforward on the surface, the taggings table is a little more complex than a mere list of objects and their tags. As mentioned, it’s possible to make more than one model in your application taggable; however, the mappings between the ActsAsTaggableOn::Tag model and those models to which tagging functionality has been added use a single table.
acts-as-taggable-on uses each of the columns created in the taggings table as follows:
tag_idis created byt.references :tagand stores theidof theActsAsTaggableOn::Tagtaggable_idis created byt.references :taggable, polymorphic: trueand stores theidof the object that is being tagged (for example, the ID of aStory)taggable_typeis created byt.references :taggable, polymorphic: trueand stores the class of the object that is being tagged (for example,Story)tagger_idis created byt.references :taggerand stores theidof the user that created the tag (for example, the ID of aUser)tagger_typeis created byt.references :taggerand stores the class of the object that is doing the tagging (for example,User)
You may be asking what “polymorphic” means in our migration. Hold tight, I’ll cover that soon enough.
Before we can give our Story model a little acts-as-taggable-on goodness, we need to apply the migration just generated, as shown below.
Great! Now we can make our Story model taggable. Let’s chat about polymorphic associations.
To read the full “Rails: Novice To Ninja” book by Glenn Goodrich, purchase the book here. We are also having an upcoming AMA with Glenn Goodrich where he’ll be answering all of your questions about Rails. Sign up for that here.

Frequently Asked Questions on Rails Plugins
What are the benefits of using Rails plugins?
Rails plugins are reusable applications that provide additional functionalities to your Rails application. They can help to speed up development time, reduce code duplication, and improve the maintainability of your application. Plugins can provide a wide range of functionalities, from adding authentication systems to integrating with third-party APIs. They can also be shared across multiple projects, making them a valuable tool for any Rails developer.
How do I install a Rails plugin?
Installing a Rails plugin is typically done using the command line. You can use the rails plugin install command followed by the URL of the plugin’s repository. Once installed, the plugin’s files will be added to your project’s vendor/plugins directory. Some plugins may require additional setup steps, so it’s always a good idea to check the plugin’s documentation for specific installation instructions.
How do I create my own Rails plugin?
Creating your own Rails plugin involves generating a new plugin structure, writing the plugin code, and then packaging it for distribution. You can generate a new plugin structure using the rails plugin new command followed by the name of your plugin. Once the structure is generated, you can write your plugin code in the lib directory. After your plugin is complete, you can package it as a gem for easy distribution.
What are some popular Rails plugins?
There are many popular Rails plugins available that provide a wide range of functionalities. Some of the most popular ones include Devise for authentication, Paperclip for file attachment, and CanCanCan for authorization. Other popular plugins include Sidekiq for background processing, and Kaminari for pagination.
How do I update a Rails plugin?
Updating a Rails plugin is similar to installing it. You can use the rails plugin update command followed by the name of the plugin. This will fetch the latest version of the plugin from its repository and replace the existing plugin files in your project. Some plugins may require additional steps to update, so it’s always a good idea to check the plugin’s documentation for specific update instructions.
Can I use Rails plugins with any version of Rails?
Not all Rails plugins are compatible with all versions of Rails. It’s important to check the plugin’s documentation to see which versions of Rails it supports. Some plugins may require a specific version of Rails, while others may work with a range of versions.
How do I uninstall a Rails plugin?
Uninstalling a Rails plugin can be done using the rails plugin remove command followed by the name of the plugin. This will remove the plugin’s files from your project. Some plugins may require additional steps to uninstall, so it’s always a good idea to check the plugin’s documentation for specific uninstall instructions.
Can I use Rails plugins in a production environment?
Yes, Rails plugins can be used in a production environment. However, it’s important to thoroughly test any plugins in a development environment before deploying them to production. This can help to identify any potential issues or conflicts with other parts of your application.
How do I troubleshoot issues with a Rails plugin?
Troubleshooting issues with a Rails plugin can involve a number of steps. First, check the plugin’s documentation for any known issues or troubleshooting guides. If that doesn’t help, try searching for the issue online or asking for help on a Rails forum or community. If all else fails, you can try contacting the plugin’s author or maintainer for assistance.
Are there any security concerns with using Rails plugins?
While Rails plugins can provide valuable functionalities, they can also introduce potential security vulnerabilities if not properly vetted. It’s important to only use plugins from trusted sources and to keep them up-to-date with the latest security patches. Always review the plugin’s documentation and any available security reports before using it in your application.