


This article was peer reviewed by Wern Ancheta. Thanks to all of SitePoint’s peer reviewers for making SitePoint content the best it can be!
AdMob is a mobile advertising platform from Google that developers can use to generate revenue from apps through in-app advertising. AdMob provides different sets of ads like banner ads, interstitial ads, video ads, or native ads integrated with native UI components. AdMob uses the Google Mobile Ads SDK which helps maximizing revenue and achieve massive scale with Google’s ad solutions. The focus of this article is to integrate AdMob with your apps, but before doing this it’s a good idea to understand the best practices and policies of how to implement ads. I recommend the AdMob YouTube videos for banner ads and interstitial ads.
Key Takeaways
- AdMob by Google allows app developers to monetize their applications by integrating various ad formats such as banner, interstitial, and native ads.
- Setting up AdMob involves creating ad units in the AdMob platform, configuring your Android project with Google Mobile Ads SDK, and adding necessary permissions in AndroidManifest.xml.
- Banner ads are simple to integrate and can be customized with different sizes; interstitial ads are full-screen and should be used sparingly at transition points to avoid disrupting user experience.
- Native ads offer a seamless integration with app content, enhancing user experience by matching the look and feel of the app, and can be implemented using Native Ads Express or Native Ads Advanced.
- AdMob also provides targeting options that allow developers to display ads based on user location, gender, or other specific criteria to increase ad relevance and effectiveness.
Getting Started with AdMob
First sign up to the AdMob service.
- Open the AdMob homepage.
- Click on the Monetize tab.
- Click on Monetize new app.
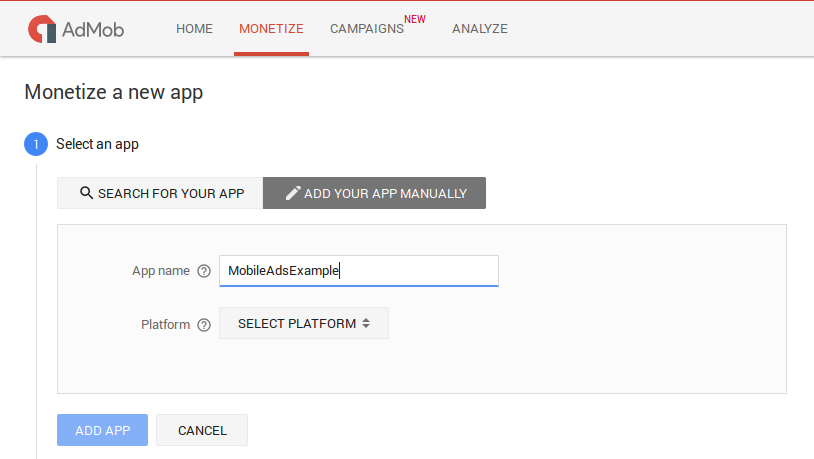
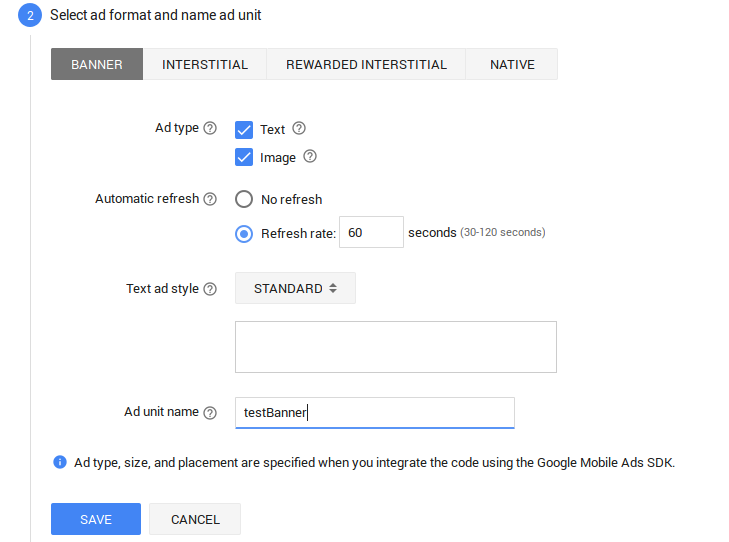
- Select the ad format Banner, Interstitial, Rewarded interstitial, or Native.
- Fill in the Ad unit name input.
- You can choose to link your ads to firebase. For this example I skipped this step.
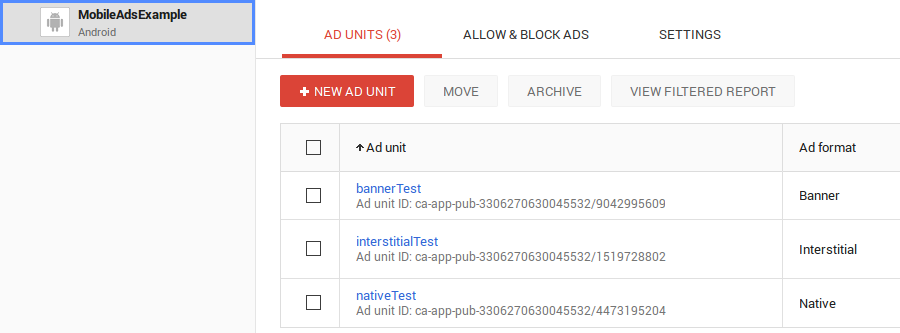
You can add different ad formats to your apps. For the sample app I am presenting in this article I created three different ad formats, banner, interstitial and native ads. To add new ad units to an app open the Monetize tab, and select the app.
Configuration
Create a new Android Project with an empty activity and add the following dependencies to build.gradle (Module: app).
    dependencies {
        compile 'com.google.android.gms:play-services:9.4.0'
    }
In res/values/strings.xml add the ads unit IDs. In my case the IDs look as follows.
<!--Ad unit ID-->
<string name="admob_banner_ad">ca-app-pub-3306270630045532/9042995609</string>
<string name="admob_interstitial_ad">ca-app-pub-3306270630045532/1519728802</string>
<string name="admob_native_ad">ca-app-pub-3306270630045532/4473195204</string>
In AndroidManifest.xml include the required permissions for Google Mobile Ads to run.
<uses-permission android:name="android.permission.INTERNET"/>
<uses-permission android:name="android.permission.ACCESS_NETWORK_STATE"/>
Integrating Ads into an Android App
The rest of this tutorial consist of three examples on how to integrate the ads you created into an Android app. You can integrate each of the examples into a standalone app, but in the GitHub repository for this project, I added the ads as different fragments and the process is similar.
Banner Ads
In this section I will focus on adding banner ads and event handling. Adding banner ads to an Android project is the easiest option, compared with the process of integrating other ad types. Choose an appropriate place in a layout file and add the following code snippet, for example an Activity‘s layout file.
<com.google.android.gms.ads.AdView
    android:id="@+id/adView"
    android:layout_width="wrap_content"
    android:layout_height="wrap_content"
    android:layout_centerHorizontal="true"
    ads:adSize="SMART_BANNER"
    ads:adUnitId="@string/admob_banner_ad">
</com.google.android.gms.ads.AdView>
I specified the ad size as SMART_BANNER which sets the width of the banner to match the screen size, but AdMob has multiple sizes available. Read the documentation for more. Make sure to add the name-space used for ads in the container Layout of the layout file:
<?xml version="1.0" encoding="utf-8"?>
<RelativeLayout xmlns:ads="http://schemas.android.com/apk/res-auto">
  ...
  <com.google.android.gms.ads.AdView>
    ...
  </com.google.android.gms.ads.AdView>
</RelativeLayout>
Now you have added the AdView to the layout file you must load content into it. In the Activity class which will display the ad, create the following global instance.
private AdView adView;
In the Activity onCreate() method add the following code snippet.
// Initialize the Mobile Ads SDK.
MobileAds.initialize(this, getResources().getString(R.string.admob_banner_ad));
adView = (AdView) findViewById(R.id.adView);
AdRequest adRequest = new AdRequest.Builder()
        .build();
adView.loadAd(adRequest);
When testing ads during development it’s recommended that you specify AdRequest as a test device. For this tutorial I have not specified any test device.
AdRequest adRequest = new AdRequest.Builder()
    .addTestDevice("DEVICE ID")
    .build();
An important part of managing ads are the Activity‘s lifecycle methods, so add the following methods to the MainActivity class.
@Override
public void onPause() {
  super.onPause();
  if (adView != null) adView.pause();
}

@Override
public void onResume() {
  super.onResume();
  if (adView != null) adView.resume();
}

@Override
public void onDestroy() {
  super.onDestroy();
  if (adView != null) adView.destroy();
}
Run the Android project and take a look at your cool ads.
Ad Events
Another important part of managing ads are lifecycle events. The list of ad events includes events like loading, opening, closing, failed to load and AdLeftApplication. You can chose to listen for any of the lifecycle events, in the following code I setup listeners for all possible events in onCreate.
adView.setAdListener(new AdListener() {
  @Override
  public void onAdClosed() {
      super.onAdClosed();
      //user returns to the app after tapping on an ad.
  }

  @Override
  public void onAdFailedToLoad(int i) {
      super.onAdFailedToLoad(i);
      //Ad request fails.
  }

  @Override
  public void onAdLeftApplication() {
      super.onAdLeftApplication();
      //User left the app.
  }

  @Override
  public void onAdOpened() {
      super.onAdOpened();
      //Ad displayed on the screen.
  }

  @Override
  public void onAdLoaded() {
      super.onAdLoaded();
      //Ad finishes loading.
  }
});
These events work both for banner and interstitial ads.
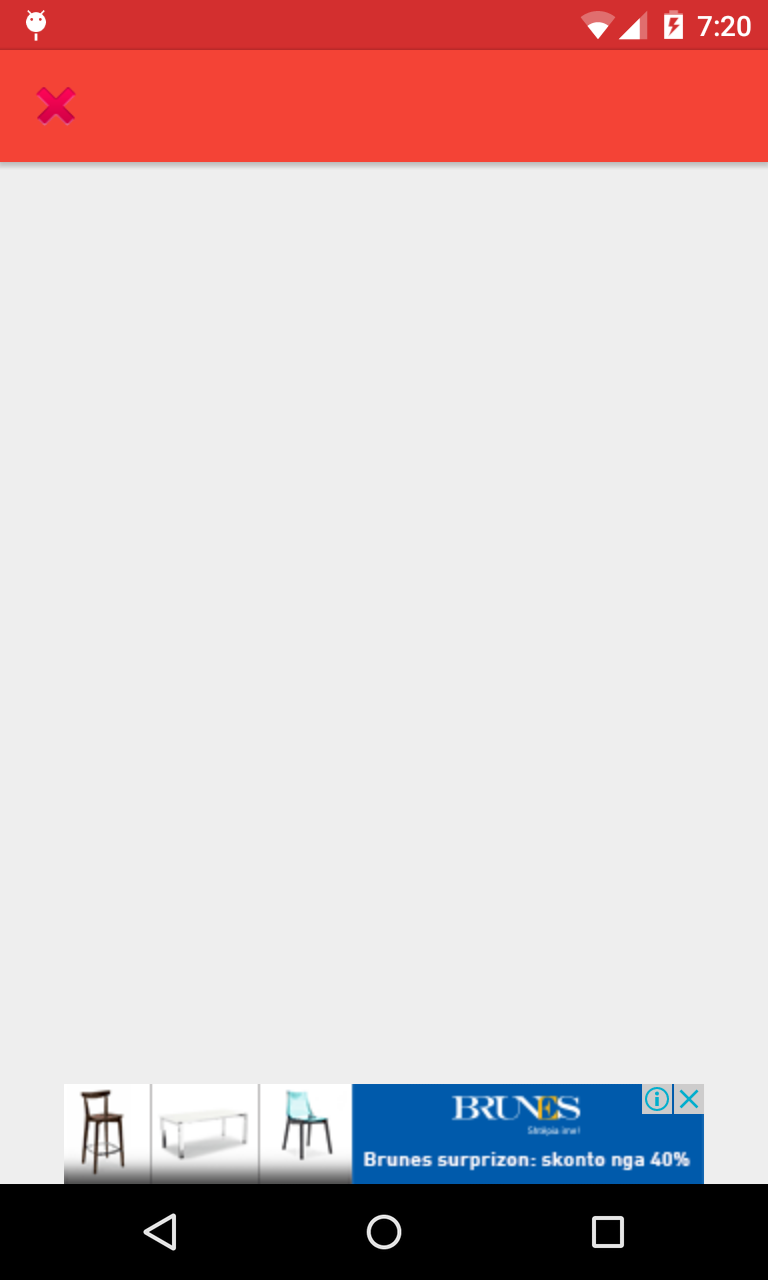
Interstitial Ads
Interstitial are full-screen ads that cover the full interface of the app. As the name suggests, the full-screen nature of this ads blocks the ability for the user to interact with the interface of the app so you should be careful when displaying interstitial ads. A good way do display them is at app’s transition points and it’s not a good idea to show this kind of ad frequently. Interstitials do not have a layout to load them, you load them in java code.
Create a global instance for the interstitial add in MainActivity.
private InterstitialAd interstitialAd;
To show a interstitial ad, call the following function.
private void loadInterstitialAd() {
  interstitialAd = new InterstitialAd(this);
  interstitialAd.setAdUnitId(getResources().getString(R.string.admob_interstitial_ad));
  AdRequest adRequest = new AdRequest.Builder()
          .build();
  interstitialAd.loadAd(adRequest);
  interstitialAd.setAdListener(new AdListener() {
      @Override
      public void onAdLoaded() {
          super.onAdLoaded();
          interstitialAd.show();
      }
  });
}
Keep in mind that interstitial ads use a lot of bandwidth and need time to load, so it’s important to show them after the loading process is complete. You can use the lifecycle events I showed earlier with interstitials to listen to certain ad events.

Native Ads
Native ads are a great way to customize ads to fit apps contents. Native Ads are CSS templates of the ad view. AdMob provides two different ways to implement native ads, Native Ads Express and Native Ads Advanced.
Native Ads Express are CSS templates created in the AdMob panel based on predefined view and ad templates. For developers who want full control over ad presentation, AdMob provides Native Ads Advanced.
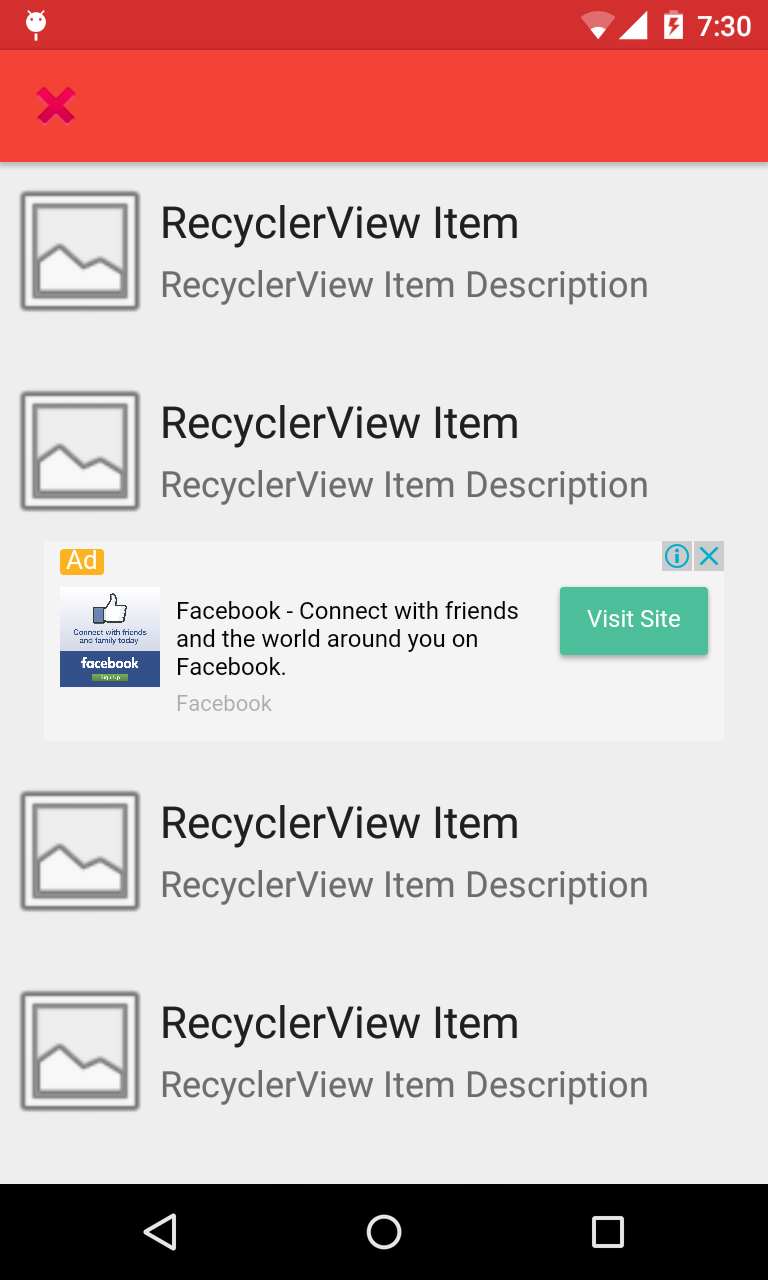
In the following example of Native Ads, I will work with Express Ads. The process of adding native ads in an Android project is similar to banner ads so the main focus of the following section is to build a RecyclerView with native ads included as of its items.
Building a RecyclerView requires a RecyclerView.Adapter, a RecyclerView.ViewHolder and a layout file for the RecyclerView items. It’s a good idea to have this item layout to look like with the Native Ads layout to make the ads integrate nicely with the rest of the app. For my example, the following layout will do. Create res/layout/item_layout.xml and add the following.
<LinearLayout xmlns:android="http://schemas.android.com/apk/res/android"
    android:layout_width="match_parent"
    android:layout_height="100dp"
    android:orientation="horizontal">

    <ImageView
        android:layout_width="80dp"
        android:layout_height="80dp"
        android:layout_marginBottom="8dp"
        android:layout_marginTop="15dp"
        android:src="@android:drawable/ic_menu_gallery" />

    <LinearLayout
        android:layout_width="match_parent"
        android:layout_height="match_parent"
        android:layout_marginTop="25dp"
        android:orientation="vertical">

        <TextView
            android:id="@+id/itemTitle"
            android:layout_width="match_parent"
            android:layout_height="wrap_content"
            android:layout_gravity="center_horizontal"
            android:layout_marginBottom="4dp"
            android:text="RecyclerView Item"
            android:textAppearance="?android:attr/textAppearanceLarge" />

        <TextView
            android:id="@+id/itemDescription"
            android:layout_width="match_parent"
            android:layout_height="wrap_content"
            android:layout_gravity="center_horizontal"
            android:text="RecyclerView Item Description"
            android:textAppearance="?android:attr/textAppearanceMedium" />
    </LinearLayout>
</LinearLayout>
And res/layout/native_ad.xml
<LinearLayout xmlns:android="http://schemas.android.com/apk/res/android"
    xmlns:ads="http://schemas.android.com/apk/res-auto"
    android:layout_width="match_parent"
    android:layout_height="wrap_content"
    android:orientation="vertical">

    <com.google.android.gms.ads.NativeExpressAdView
        android:id="@+id/nativeAdView"
        android:layout_width="wrap_content"
        android:layout_height="wrap_content"
        ads:adSize="340x100"
        ads:adUnitId="@string/admob_native_ad">

    </com.google.android.gms.ads.NativeExpressAdView>

</LinearLayout>
In the MainActivity layout file add a RecyclerView layout.
<android.support.v7.widget.RecyclerView
    xmlns:android="http://schemas.android.com/apk/res/android"
    android:id="@+id/recyclerview"
    android:layout_width="match_parent"
    android:layout_height="match_parent"/>
Setup RecyclerView Adapter
For a RecyclerView to display content it needs an adapter and a ViewHolder. Create a new java class called RV_Adapter and add the following code.
public class RV_Adapter extends RecyclerView.Adapter<ViewHolder> {

    private static final int ITEM = 0;
    private static final int NATIVE_AD = 1;
    int[] viewTypes;
    List<Data> list = Collections.emptyList();

    public RV_Adapter(List<Data> list, int[] viewTypes) {
        this.list = list;
        this.viewTypes = viewTypes;
    }

    @Override
    public ViewHolder onCreateViewHolder(ViewGroup parent, int viewType) {
        //Inflate the layout, initialize the View Holder
        View v;
        if (viewType == ITEM) {
            v = LayoutInflater.from(parent.getContext()).inflate(R.layout.item_layout, parent, false);
            ViewHolder holder = new ItemViewHolder(v);
            return holder;
        } else if (viewType == NATIVE_AD) {
            v = LayoutInflater.from(parent.getContext()).inflate(R.layout.native_ad, parent, false);
            ViewHolder holder = new AdViewHolder(v);
            return holder;
        }
        return null;
    }

    @Override
    public void onBindViewHolder(ViewHolder viewHolder, int position) {
        if (viewHolder.getItemViewType() == ITEM) {
            ItemViewHolder holder = (ItemViewHolder) viewHolder;
            //populate the RecyclerView
            //holder.title.setText(list.get(position).getTitle());
            //holder.description.setText(list.get(position).getDescription());
        } else if (viewHolder.getItemViewType() == NATIVE_AD) {
            AdViewHolder holder = (AdViewHolder) viewHolder;
            //Load the Ad
            AdRequest request = new AdRequest.Builder()
                    .build();
            holder.adView.loadAd(request);
        }
    }

    @Override
    public int getItemCount() {
        return list.size();
    }

    @Override
    public void onAttachedToRecyclerView(RecyclerView recyclerView) {
        super.onAttachedToRecyclerView(recyclerView);
    }

    @Override
    public int getItemViewType(int position) {
        return viewTypes[position];
    }
}

class ViewHolder extends RecyclerView.ViewHolder {
    public ViewHolder(View v) {
        super(v);
    }
}

class ItemViewHolder extends ViewHolder {

    TextView title;
    TextView description;

    ItemViewHolder(View itemView) {
        super(itemView);
        title = (TextView) itemView.findViewById(R.id.itemTitle);
        description = (TextView) itemView.findViewById(R.id.itemDescription);
    }
}

class AdViewHolder extends ViewHolder {
    NativeExpressAdView adView;

    public AdViewHolder(View v) {
        super(v);
        adView = (NativeExpressAdView) v.findViewById(R.id.nativeAdView);
    }
}
This class contains the RecyclerView.Adapter and three ViewHolder classes for the different RecyclerView items. There’s a lot of code and three other java classes only used in this adapter. You are free to implement them in different files, but make sure to import the right references to those classes. You load Native Ads in the RecyclerView in the adapters onBindViewHolder(). Binding this ad is similar to Banner Ads.
The RecyclerView is filled with a list of Data objects, so create the following class in the Android project.
public class Data {

    private String title;
    private String description;

    public String getTitle() {
        return title;
    }

    public void setTitle(String title) {
        this.title = title;
    }

    public String getDescription() {
        return description;
    }

    public void setDescription(String description) {
        this.description = description;
    }
}
Displaying a List of Ads
The final step to integrate Native Ads in a RecyclerView is to create the following function in MainActivity.
private void initRecyclerView() {
  //Create dummy data for RecyclerView
  int listSize = 50;
  int ITEM = 0;
  int NATIVE_AD = 1;
  List<Data> data = new ArrayList<>();
  int[] viewTypes = new int[listSize];
  for (int i = 0; i < listSize; i++) {
      data.add(new Data());
      //insert native ads once in five items
      if (i > 1 && i % 5 == 0) {
          viewTypes[i] = NATIVE_AD;
      } else {
          viewTypes[i] = ITEM;
      }
  }
  RecyclerView recyclerView = (RecyclerView) findViewById(R.id.recyclerview);
  RV_Adapter adapter = new RV_Adapter(data, viewTypes);
  recyclerView.setAdapter(adapter);
  recyclerView.setLayoutManager(new LinearLayoutManager(this));
}
This function generates a list of 50 Data items, with a Native Ad inserted every 5 items. In a real life project you wouldn’t insert ads this frequently as it would lead to a bad user experience. When the RecyclerView adapter is initiated, it’s constructor passes an array of Integers to notify the adapter when it’s time to display an Ad. Call this function in the MainActivity onCreate() method and run the project.
Targeting
Another great feature of AdMob is the possibility to target a specified user, to display ads related to specific conditions. Examples of targeting are displaying ads related to a specified location or user gender. To display ads based on a target group specify a targeting specification in AdRequest.Builder().
Here’s an example on how to target users based on location:
AdRequest request = new AdRequest.Builder()
    .setLocation(userLocation)
    .build();
Based on gender:
AdRequest request = new AdRequest.Builder()
    .setGender(AdRequest.GENDER_FEMALE)
    .build();
Based on birthday:
    AdRequest adRequest = new AdRequest.Builder()
    .setBirthday(userBirthdayDate)
    .build();
Based on Child-directed policies, and whether Google should treat the ad content as child-directed.
AdRequest adRequest = new AdRequest.Builder()
    .tagForChildDirectedTreatment(true)
    .build();
Let the Cents Roll In
And that’s the basics for integrating AdMob ads into Android apps. The process provides a simple way to add monetization potential to any app. If you need further help with AdMob read the google support pages as there are good tips there. If you have any questions or comments about this tutorial, please let me know below.
Frequently Asked Questions about Monetizing Apps with Google AdMob SDK
What is Google AdMob SDK and how does it work?
Google AdMob SDK is a mobile advertising platform that you can use to generate revenue from your app. It works by displaying ads in your app, and you earn money when users interact with those ads. The SDK, or Software Development Kit, is a set of tools that allows developers to integrate AdMob into their apps. It includes code libraries and documentation to help you get started.
How do I integrate Google AdMob SDK into my app?
To integrate Google AdMob SDK into your app, you first need to create an AdMob account and register your app. Then, you can download the SDK and add it to your project. You’ll also need to create ad units in your AdMob account, which you’ll then reference in your app’s code. The SDK provides methods for displaying these ad units in your app.
What types of ads can I display with Google AdMob SDK?
Google AdMob SDK supports several types of ads, including banner ads, interstitial ads, rewarded video ads, and native ads. Each type of ad offers different opportunities for user engagement and revenue generation. You can choose the types of ads that best fit your app’s user experience.
How much can I earn with Google AdMob SDK?
The amount you can earn with Google AdMob SDK depends on several factors, including the types of ads you display, the number of users who interact with the ads, and the regions where your users are located. AdMob provides detailed reports that can help you understand your earnings.
How do I optimize my earnings with Google AdMob SDK?
To optimize your earnings with Google AdMob SDK, you should consider factors like ad placement, ad types, and user engagement. For example, placing ads in a natural break point in your app can increase user engagement. You can also use AdMob’s mediation feature to display ads from multiple networks, potentially increasing your revenue.
Can I use Google AdMob SDK with other ad networks?
Yes, Google AdMob SDK supports mediation, which allows you to display ads from multiple networks. This can help maximize your revenue by ensuring that you always display the highest-paying ad available.
What are the requirements to use Google AdMob SDK?
To use Google AdMob SDK, you need to have an app that complies with AdMob’s policies and guidelines. You also need to create an AdMob account and register your app. The SDK supports both Android and iOS platforms.
How do I troubleshoot issues with Google AdMob SDK?
If you’re experiencing issues with Google AdMob SDK, you can refer to the troubleshooting guide provided in the SDK’s documentation. You can also reach out to AdMob support for assistance.
How does Google AdMob SDK handle user privacy?
Google AdMob SDK provides features that help you comply with user privacy regulations, such as GDPR and CCPA. You can configure these features in your AdMob account settings.
Can I use Google AdMob SDK for non-monetizing purposes?
While the primary purpose of Google AdMob SDK is to generate revenue from your app, it also provides features for analytics and user segmentation. These features can help you understand your users and improve your app’s user experience.