

Image sliders are quite popular in the world of web designing. It’s a great way to showcase your imagery, and it captures the attention of your visitors instantaneously. So, today I’ll walk you through the process of designing a stylish web slider in Photoshop. We’ll use the pen tool, different shape tools, and layer styling techniques for the creation of this slider. Let’s get started!
Resources:
Still Life Painting
Androgyne Font
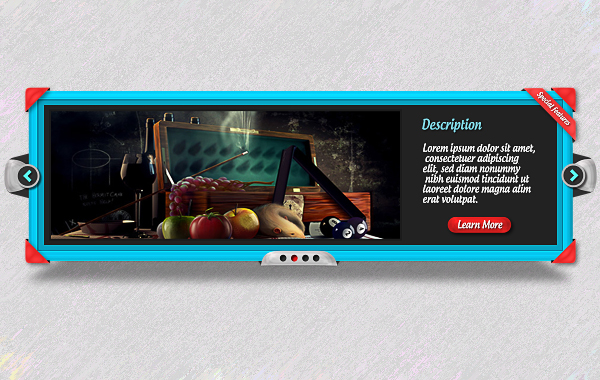
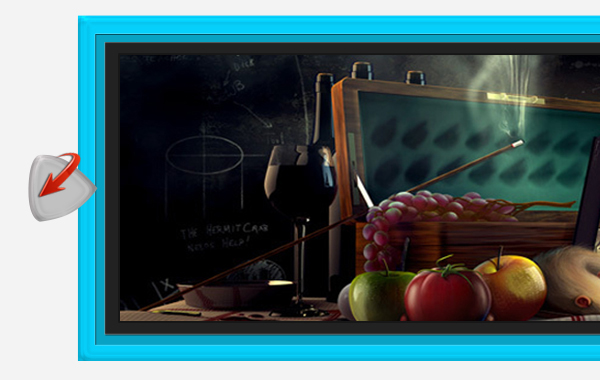
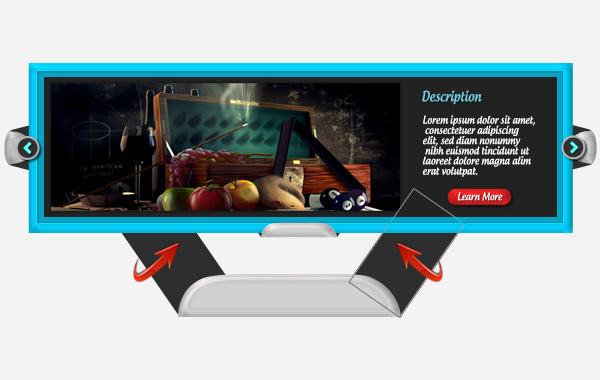
Final result:
Before we start, let’s look ahead at our end result:

Step 1
Create a new document in Photoshop with an 1100px width and a 650px height.

Step 2
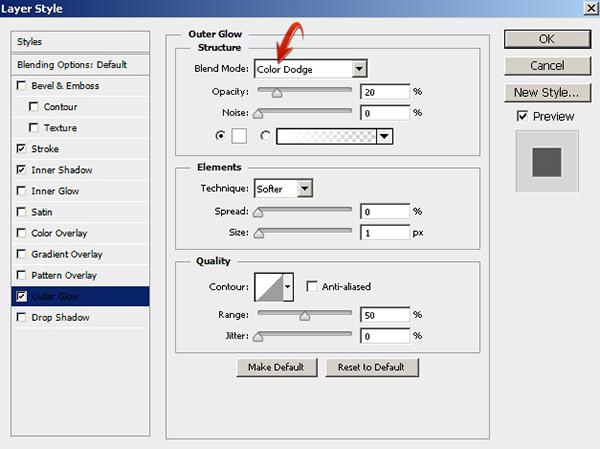
First of all, we’ll make the frame for the slider. Set #06d0fb as your foreground color and select the rectangle tool to draw a rectangle with a 960px width and a 300px height.

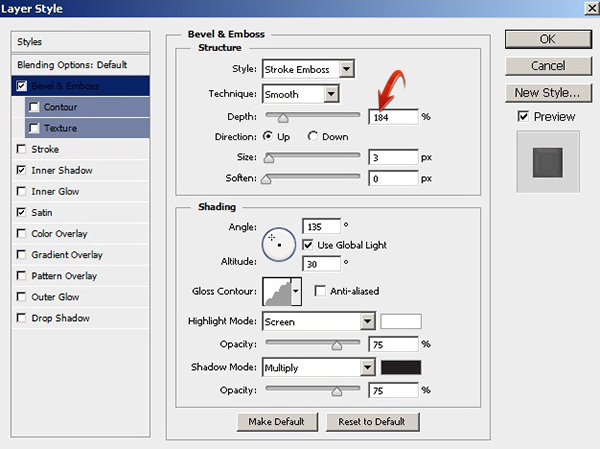
Step 3
Double-click on the rectangle layer to open the “Layer Style” window. Apply the following layer style settings.


Step 4
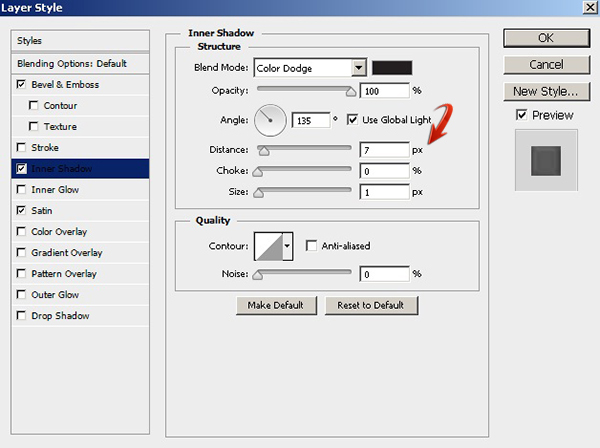
Create another rectangle with a 926px width and a 270px height. Use color #08a2c3 for this rectangle.

Apply the following layer style settings for this rectangle.


Step 5
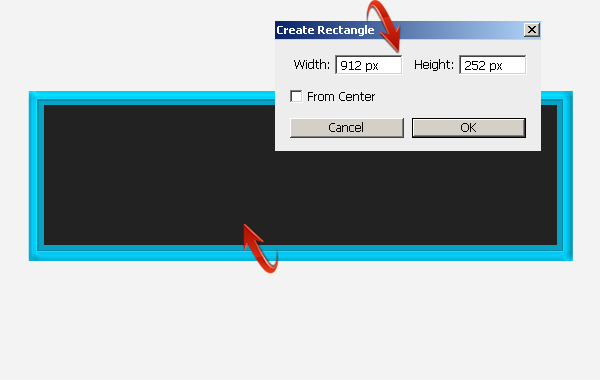
Create a third rectangle with a 912px width and a 252px height. Use color #222222 to fill the rectangle.
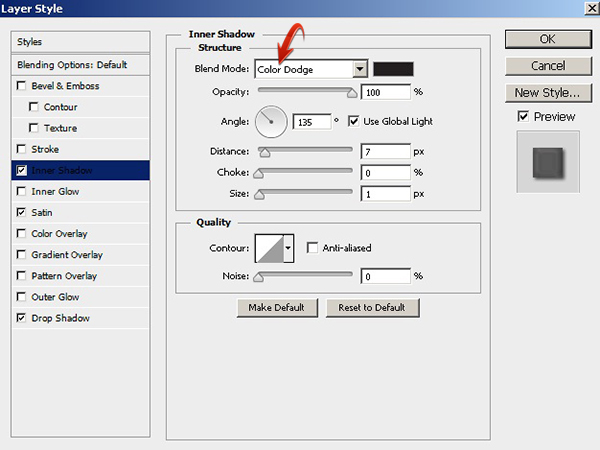
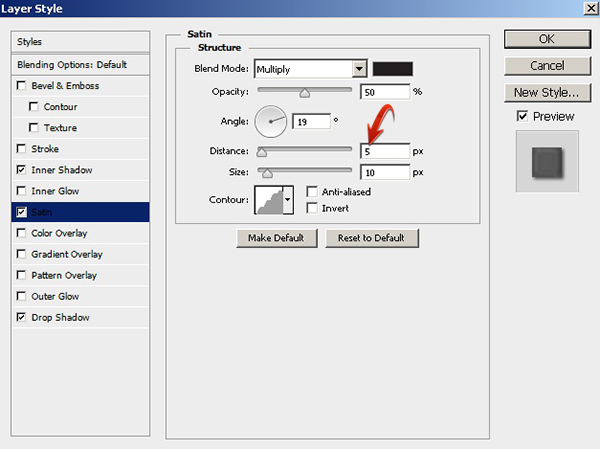
Step 6
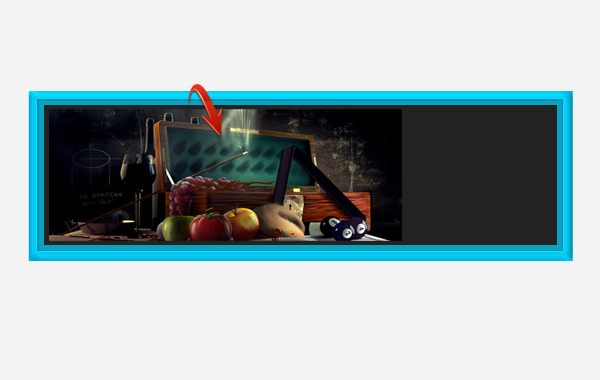
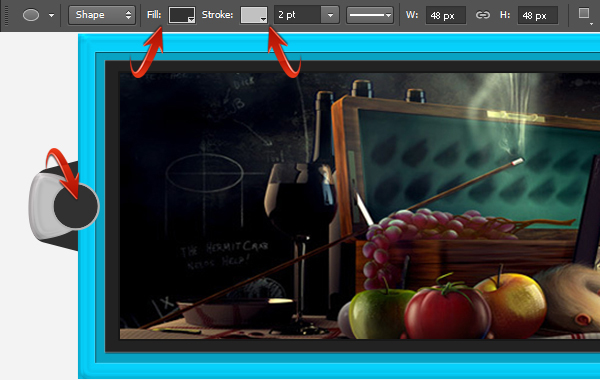
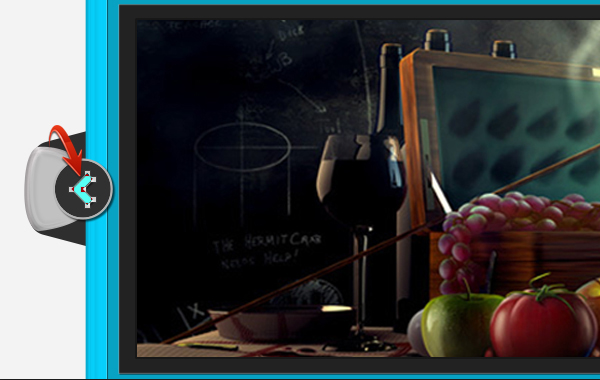
Open the image file in Photoshop, and drag it to the slider document. Resize and position it at the top of the layers using the free transform tool (Ctrl + “T”).
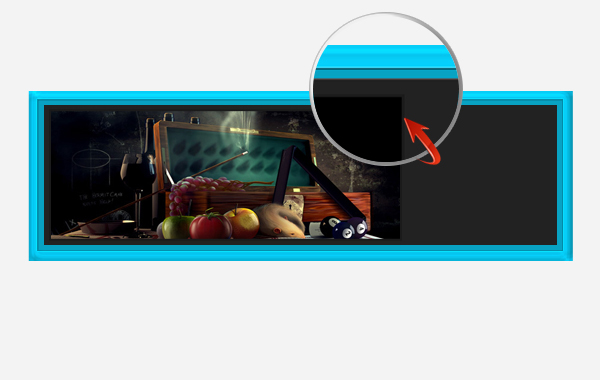
Double-click on the image layer and use the following settings to apply a stroke.

Step 7
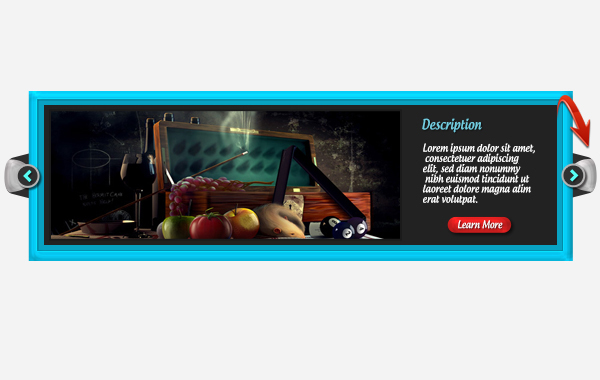
Now, select the type tool to type in text on a new layer. I am using a font called “Androgyne” here.
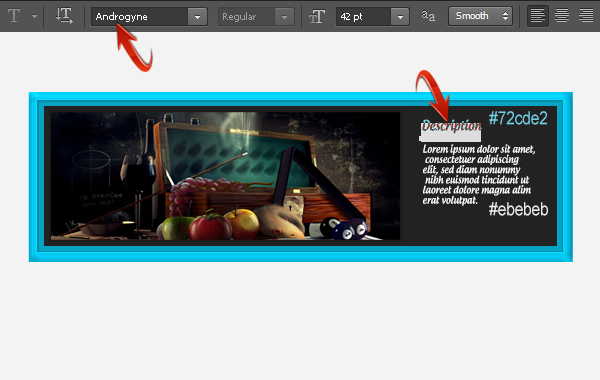
Step 8
Next, we’ll create a button. To do so, set #e32121 as your foreground color and draw a rounded rectangle using the rounded rectangle tool.

Step 9
Apply the following layer style settings on the layer containing your red button.


Step 10
Now we’ll add some text, which we want over the button. Use the following settings for to apply a drop shadow to this text.

Right-click on this red button text layer and select the option of “Copy Layer Style.” Then, right-click on the “Description” text layer and select “Paste Layer Style” to apply the same drop shadow settings.

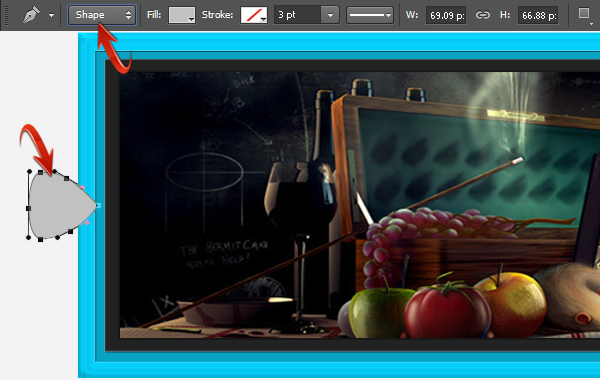
Step 11
Next, we’ll add slider controls. For that, select the pen tool to draw the shape shown below. Make sure to select the “Shape” setting in the properties bar. Use color #c1c1c1 to draw the shape.
Now, copy the layer style of the red button layer and paste it onto this newly-drawn shape layer to get the effect shown below.
Now, let’s make the backside of this new shape. Draw two rounded rectangles using color #2e2e2e, and drag them below the rest of the layers. Arrange them at an angle—as shown below—using the free transform tool (Ctrl + “T”).

Step 12
Select the ellipse tool with “Shape” tool mode to draw an ellipse at top of your layers layers. Use #313131 as a fill color and #c1c1c1 for a 2px stroke.
Apply the following settings for drop shadow.


Step 13
Now, set #57fff5 as your foreground color and draw an arrowhead using the pen tool.
Step 14
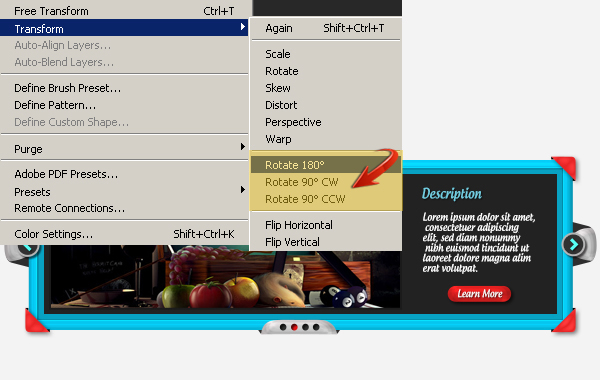
Collect the layers forming the frontmost parts of slider control into a group, and collect the backside of your slider controls into a separate group. Now, duplicate both these groups and flip them horizontally by going to “Edit” > “Transform” > “Flip Horizontal” and arranging them on the right side of slider. The result is shown below.
Step 15
Next, to make slider navigation, draw the shape shown below using the pen tool. Use color #d1d1d1.

Now, copy the layer style of the red button layer and paste it on this new navigation layer. To make its backside portion, draw two rectangles on a new layer just above the background and arrange them at an angle, as shown below.
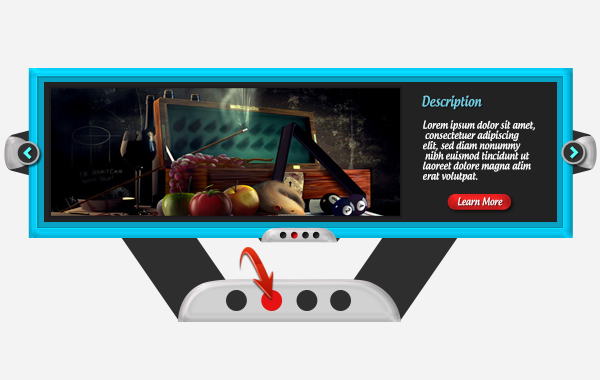
Step 16
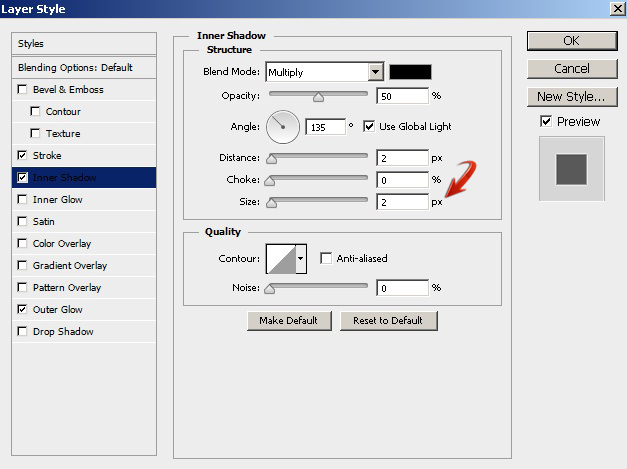
To complete the navigation, make four ellipses of equal size and arrange them as shown below.
Add an inner shadow to these four ellipses with the following values.


Step 17
The basic layout of our slider is almost ready. Now, we’ll add few more items to make it more interesting. Draw the triangular shape shown below and paste the red button layer style onto it.

Now, draw two triangles in pitch black (#000000) to complete the corner cover.

Step 18
Collect the corner cover layers into a group and duplicate it three times. Arrange these three groups at different corners by rotating them one by one at the angles and positions shown below.
Step 19
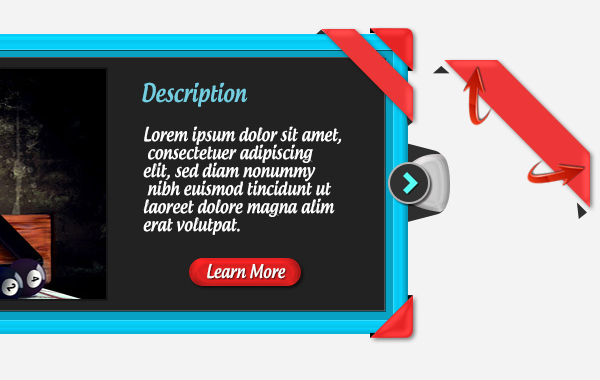
Now, make a ribbon for the top-right corner, as shown below.
 Apply the following layer style settings on this new ribbon layer.


Step 20
Add some text over the ribbon, and paste the drop shadow settings from the red button text layer onto the ribbon layer.

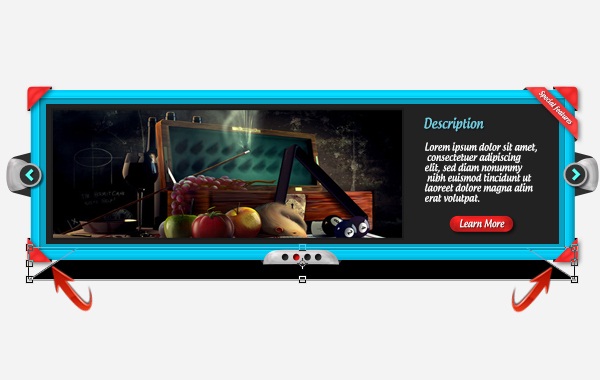
Step 21
Lastly, we’ll make shadow for the entire slider. Make a rectangle in pure black (#000000) just above the background layer and go to “Edit” > “Transform” > “Distort.” Use it to make rectangle shape like the one below.
Step 22
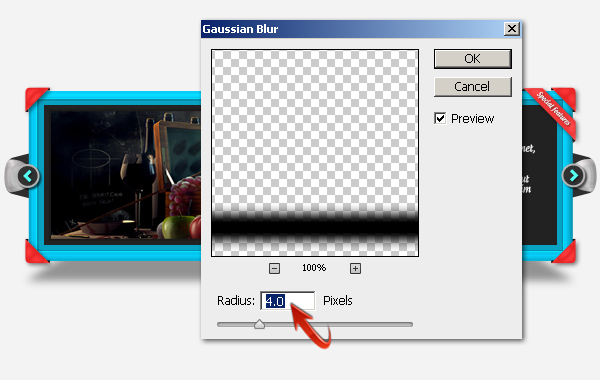
Now, right-click on the shadow layer and select the option of “Rasterize Layer,” and go to “Filter” > “Blur” > “Gaussian Blur.” Use the following values for the Gaussian blur, and reduce the opacity of this shadow layer to 40% to get the desired effect.

That’s it guys. I hope you like it and learned something useful. Let me know what you think!
Frequently Asked Questions about Designing a Colorful Image Slider in Photoshop
What are the recommended dimensions for creating an image slider in Photoshop?
The dimensions for creating an image slider in Photoshop can vary depending on the design requirements and the platform where it will be used. However, a common size for web sliders is 1920 x 1080 pixels, which fits most screen resolutions and provides a high-quality image. It’s important to note that the size can be adjusted according to your specific needs. Always ensure that the images used are of high resolution to avoid pixelation when displayed on larger screens.
How can I add transitions between slides in Photoshop?
Photoshop doesn’t inherently support transitions between slides. However, you can create the illusion of transitions by designing each slide in a way that visually connects to the next one. For instance, using consistent colors, shapes, or themes can create a smooth visual flow. For actual transitions, you would need to use a coding language like HTML, CSS, or JavaScript, or a website builder that supports slider transitions.
Can I add text to my image slider in Photoshop?
Yes, you can add text to your image slider in Photoshop. To do this, select the Text Tool from the toolbar, click on the area of the image where you want the text to appear, and start typing. You can adjust the font, size, color, and other properties from the options bar at the top of the screen.
How can I ensure my image slider is mobile-friendly?
To ensure your image slider is mobile-friendly, consider the size and resolution of the images, the amount of text, and the overall design. Images should be high-resolution but not too large in file size, as this can slow down loading times. Text should be concise and large enough to read on smaller screens. The design should be simple and clean, with clear navigation options.
How can I export my image slider from Photoshop for web use?
To export your image slider from Photoshop for web use, go to File > Export > Save for Web (Legacy). Choose the format (usually JPEG or PNG), adjust the quality if necessary, and click Save. Remember to save each slide as a separate file.
Can I use layers to create different elements of my image slider in Photoshop?
Yes, using layers in Photoshop is a great way to create different elements of your image slider. Each layer can contain an image, text, or shape that can be edited independently from the rest of the design. This allows for greater flexibility and control over your design.
How can I add navigation buttons to my image slider in Photoshop?
While you can design the appearance of navigation buttons in Photoshop, the functionality of these buttons cannot be added within the software. Photoshop is a design tool, not a coding tool. The actual functionality of the navigation buttons would need to be implemented when the slider is coded for web use.
What color schemes work best for image sliders?
The choice of color scheme for an image slider largely depends on the overall design and branding of your website. However, it’s generally recommended to use contrasting colors for the background and the text to ensure readability. Also, using a consistent color scheme across all slides can create a cohesive and professional look.
How can I optimize my image slider for SEO?
To optimize your image slider for SEO, make sure to use high-quality, relevant images and include alt text for each image. The alt text should accurately describe the image content and include relevant keywords. Also, keep the file size of your images as small as possible to improve page load speed, which is a factor in SEO.
Can I animate elements of my image slider in Photoshop?
While Photoshop does have some animation capabilities, it’s not the best tool for creating complex animations. You can create simple animations using the Timeline panel, but for more complex animations, you might need to use a dedicated animation software or add the animations during the coding process.

