

Key Takeaways
- Pagoda Box is a PaaS (Platform as a Service) specifically designed for PHP, offering a defined architecture with all elements treated as components, including databases, webservers, workers, cron jobs, and caching. This structure allows for ease in development and control over cost.
- Pagoda Box offers various components, including Web Component, Database Component (currently only MySQL), Caching Component (Redis and Memcached), Cron Job components, Shared Writable Components, and SSL. The Web Component, which holds and runs all the code, is free for one instance with 200MB.
- Setting up and deploying an application on Pagoda Box involves creating a Boxfile in the root of the project, which tells the platform what components are needed for the application. All configuration, from the number of web components to writable directories and environment variables, can be specified in this Boxfile.
- While Pagoda Box offers ease of use, especially for PHP developers, it is slightly outdated and lacks some new features. However, it offers good analytics and easy scaling. It is recommended for developers new to PaaS with PHP or those looking for a quick deployment platform for their app.
In this article, we’ll take a look at Pagoda Box, another PaaS (Platform as a Service). If you have used other PaaS in previous projects, Pagoda Box is similar to Heroku. Pagoda Box is PHP only (for now) and has a well defined architecture to start developing with PHP. Everything in PB is a component. The database is a component, the webservers, workers, cron jobs and the caching. Having such an architecture doesn’t only give you ease in development but also a control over money usage. This post will be a quick overview of this platform. We will set up a framework and look at a list of pros and cons, comparing it to Heroku.
Quick overview
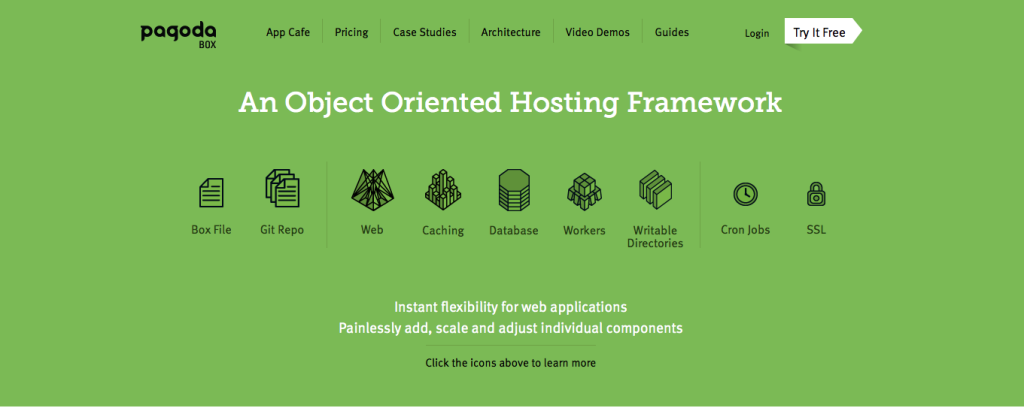
Lets have a look at the components that Pagoda Box offers.
The first and the most important component is the Web Component. This component holds all the code and runs it on each request. This is the entry point in the application. You can have up to 25 instances of Web Components. You can chose from 200MB up to 1GB of RAM for each. In total, you can have 25GB per application. One Web Component with 200MB is free.
The database component doesn’t need an introduction. The only database that you can use for now is the MySQL database. You can chose one of two flavors, Cloud MySQL and Private Cloud MySQL. Only the Cloud MySQL has a free basic plan with 10MB of RAM. It can be scaled up to 500MB for one instance and the Private Cloud MySQL goes up to 16 CPU Cores, 16 GB of RAM, and 300 GB of storage.
The Caching Component comes in Redis and Memcached flavors. Both provide a free basic plan of 10MB. Both of them have only the Cloud version – no Private Cloud.
Pagoda Box also offers Cron Job components, Shared Writable Components (with a 10MB free plan) and SSL.
Setting up the local environment
In this example, we will see how to deploy the Slim framework in Pagoda Box. To be more accurate, I have chosen Slim Skeleton as it requires directories with write permission.
The first thing I do when starting a new project is to get Homestead set up. This is not a Laravel project but is the box I prefer to use. If you’d rather use Homestead Improved, which is simpler and more multi-platform ready, see this quickstart. Otherwise, continue with the instructions below. If you aren’t familiar with Homestead already, please read their documentation. There is a good guide with more in depth information.
After configuring Homestead.yaml using homestead edit my configuration looks something like this:
ip: "192.168.10.10"

memory: 2048

cpus: 1
authorize: ~/.ssh/id_rsa.pub
keys:

    - ~/.ssh/id_rsa
folders:

    - map: ~/projects/homestead/Code

      to: /home/vagrant/Code
sites:

    - map: slim.app

      to: /home/vagrant/Code/slim-skeleton/public
databases:

    - homestead
variables:

    - key: APP_ENV

      value: local
The next thing I do is edit the hosts file on the host machine. I added the slim.app with the IP: 192.168.10.10.
192.168.10.10 slim.app
Navigate to your project folder and then clone the Slim Skeleton. My project folder is ~/projects/homestead/Code.
git clone https://github.com/codeguy/Slim-Skeleton.git slim-skeleton
After that, execute homestead up. Navigate inside the box using ssh to install dependencies using composer.
homestead ssh

cd Code

cd slim-skeleton

composer install
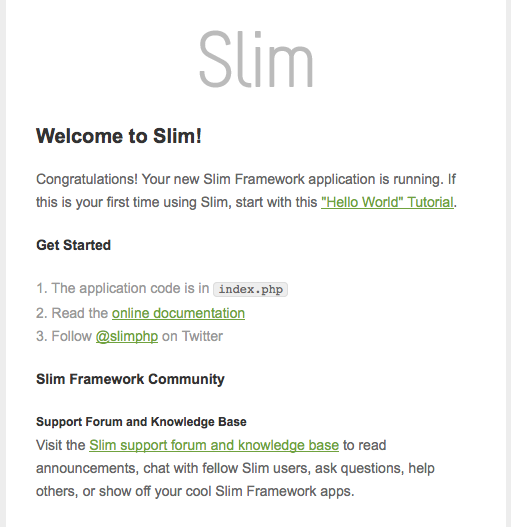
Check the browser for slim.app. You should see something like this if you did everything ok.
Deploy the first application
If you haven’t already created an account on Pagoda Box please create one first. Create a new application. You can choose to start from an existing project, from an existing repository or an empty repository. The project is stored locally so we will go with the third option. Give it a name and launch the application.
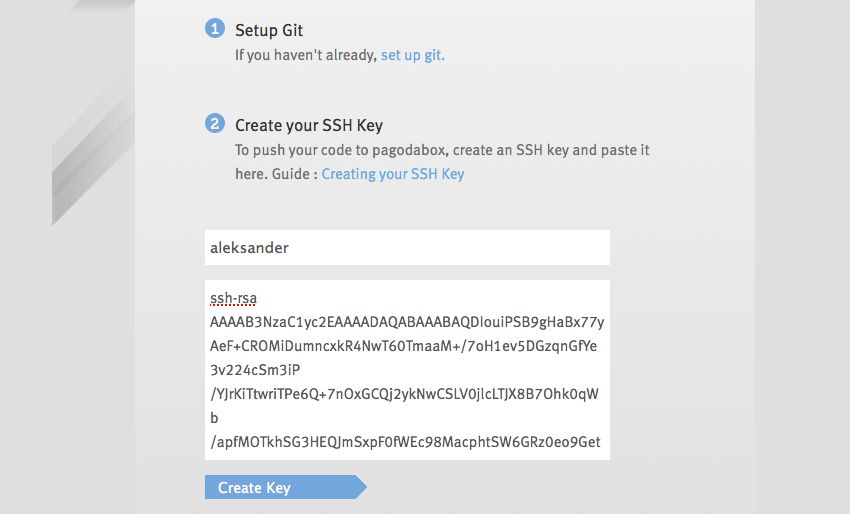
If this is the first time you created a project, you have to configure the SSH keys. In case you aren’t familiar with SSH keys , read this article from Github on generating keys.
Before executing the commands that Pagoda Box suggests, first make sure to remove the existing Git files from the slim-skeleton folder.
rm -rf .git

rm .gitignore
After removing git files execute these commands:
git init

git add .

git commit -m 'your commit message'

git remote add pagoda *your pagodabox git repository here*

git push pagoda --all
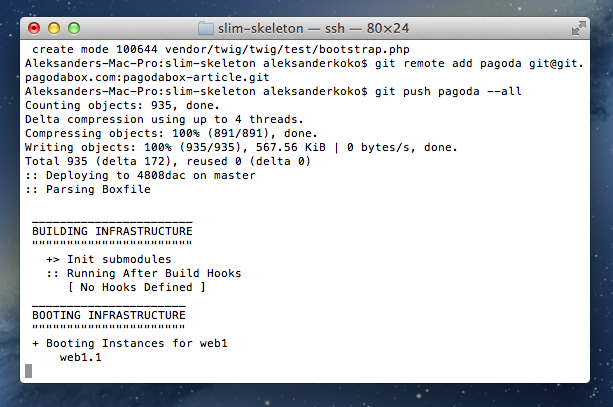
This will init a Git repo in this project, add all files, commit the changes, add a remote repository (project repo in Pagoda Box) and push everything to the server. After executing these commands click the Continue to App Dashboard button. Check your application URL in the browser to see if everything went well. If you don’t know the URL, it should be something like your-app-name.gopagoda.com. Don’t worry if you get an output like this:
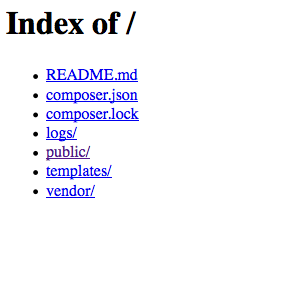
The first reason for this is that the webserver doesn’t point to the bootstrap PHP script. The starter PHP file (bootstrap) is located under the public folder. The index.php inside that folder initiates everything, as is the case in most modern PHP apps. Even if we navigate to the public folder we should see some errors. That’s because logs/ and templates/cache aren’t writable. By default, everything is read-only. We have to tell the webserver where the init file is, and that the two folders should be writable.
If you have used other PaaS platforms in the past, you may have used some configuration files. On Pagoda Box the configuration file is the Boxfile. Using this file you can tell the platform what components you want in the application. Don’t forget that every component is configurable. For example, you may want to have 3 web components, 2 private MySQL databases, 2 writable directories, maybe Redis for caching. All this can be configured via Boxfile. When you push your code onto Pagoda Box, the platform looks for a Boxfile and if one is provided, it will build the environment using the configuration within.
When we first pushed the code without the Boxfile, the platform was building the project using the default Boxfile. Components can be also configured using the dashboard but it’s recommended to use Boxfiles. Let’s say you have different versions of your application, and you want to rollback to a previous one. The platform will also scale to the scale of the previous.
Create a Boxfile in the root of the project. In this example we want 1 web component, 1 MySQL database, 2 writable directories, 1 environment variable (APP_ENV: production). If you noticed, on Homestead I used an environment variable and on Pagoda I used that same environment variable, but the value was different. So if I use this environment variable the code will work without changes in both environments. My final Boxfile looks something like this:
web1:

  shared_writable_dirs:

    - logs

    - templates/cache

  document_root: public

  php_extensions:

    - mysql
db1:

  name: slim

  type: mysql
global:

  env:

    - APP_ENV: production
Now push all changes.
git add .

git commit -m "Adding Boxfile"

git push pagoda --all
Search again for your project in the browser and you should see that everything is OK now. You now have a ready to go project.
Pros and Cons
Pagoda Box is easy to get started with. It was easier for me than with Heroku, but I must admit that it is a bit outdated and lacks a lot of new features. If you have noticed in the dashboard, they advertise the version of PHP 5.5 as a new version, when 5.6 has been out for a while. Their documentation is really good and helps you a lot. What I like the most is the analytics area and the ease of scaling. I can scale very easily if my app grows faster than I thought, but I can’t really compare to Heroku (as a leading PaaS platform) because Heroku offers a lot extensibility. I can choose different 3rd party services and use them right away. Also, Heroku has a better definition on architecture as the creator of the 12 factor-app. Pagoda Box is PHP focused, while on Heroku it is not as easy to get started with PHP. If you are new to PaaS with PHP, you should give PagodaBox a try – especially if you’re just looking for a place to quickly deploy your app on. PagodaBox makes for a perfect prototype and example host.
Conclusion
In this article we saw what Pagoda Box was, and how to get started developing locally for it using Homestead. We created a foundation app which is a good base to start your application on. But don’t stop here. The dashboard of PagodaBox has a lot of analytics tools. Experiment with the various components which you didn’t get to use throughout this article – if you don’t break things, you will never learn, and on PaaS, rarely does anything stay broken.
We want to hear from you. Would you consider Pagoda Box in your next project? Have you tried it yet? What do you think about it?
Frequently Asked Questions about Pagoda Box PaaS for PHP
What makes Pagoda Box different from other PHP PaaS providers?
Pagoda Box stands out from other PHP PaaS providers due to its unique features and functionalities. It offers a fully automated environment, which means you don’t have to worry about server management, configuration, or scaling. It also provides a wide range of services such as database, caching, and worker services, which can be easily integrated into your application. Moreover, Pagoda Box offers a flexible pricing model, allowing you to pay only for the resources you use.
How does Pagoda Box handle scaling?
Pagoda Box handles scaling automatically. It monitors your application’s performance and adjusts resources as needed to ensure optimal performance. This means you don’t have to worry about manually scaling your application, which can be a complex and time-consuming process.
Can I use Pagoda Box for hosting non-PHP applications?
No, Pagoda Box is specifically designed for PHP applications. It provides a fully managed PHP environment, with features and services tailored to PHP development. If you’re looking to host non-PHP applications, you may need to consider other PaaS providers.
How does Pagoda Box compare to Cloudways?
While both Pagoda Box and Cloudways offer PHP PaaS solutions, there are some key differences. Pagoda Box provides a fully automated environment, while Cloudways offers more control over server management. Pagoda Box also offers a flexible pricing model, while Cloudways has fixed pricing plans. Ultimately, the best choice depends on your specific needs and preferences.
Why might I choose Pagoda Box over fortrabbit?
While fortrabbit is a popular PHP PaaS provider, Pagoda Box offers some unique advantages. For example, Pagoda Box provides a fully automated environment, which can save you time and effort in server management. It also offers a flexible pricing model, allowing you to pay only for the resources you use.
What are some potential drawbacks of using Pagoda Box?
While Pagoda Box offers many benefits, it may not be the best choice for everyone. For example, it’s specifically designed for PHP applications, so it may not be suitable if you’re working with other programming languages. Additionally, while its automated environment can be a big advantage, it may not be ideal if you prefer to have more control over server management.
How does Pagoda Box’s pricing compare to other PHP PaaS providers?
Pagoda Box offers a flexible pricing model, where you pay only for the resources you use. This can be more cost-effective than fixed pricing plans offered by some other providers. However, the exact cost will depend on your specific usage and needs.
Can I use Pagoda Box for free hosting?
No, Pagoda Box does not offer free hosting. It operates on a pay-as-you-go model, where you pay for the resources you use. This ensures that you only pay for what you need, which can be more cost-effective than fixed pricing plans.
How does Pagoda Box handle database management?
Pagoda Box provides fully managed database services. This means you don’t have to worry about database setup, configuration, or maintenance. It supports a variety of database types, including MySQL, PostgreSQL, and Redis.
What kind of support does Pagoda Box offer?
Pagoda Box offers comprehensive support to its users. This includes documentation, tutorials, and a community forum where you can ask questions and share knowledge with other users. They also provide direct support via email.

