


In this tutorial, I will show how to send requests and get data from Facebook using the Graph API.
You can find the project on Github
In order to perform requests to the Graph API, the user must be logged in with the Facebook SDK for Android.
You can find the Facebook Login Integration article here
Key Takeaways
- The tutorial provides a step-by-step guide on how to integrate the Facebook Graph API in Android, starting with setting up the Android Studio project and the Facebook SDK for Android. The user must be logged in with the Facebook SDK for Android to perform requests to the Graph API.
- The tutorial covers how to add a Facebook login button to the Android app, initialize the Facebook SDK, and create a Login Result Callback. This callback will be attached to the login button along with the callbackManager, and will handle the user login process, retrieving user data from Facebook and starting a new activity if the login is successful.
- The tutorial also explains how to share content and get and share user data to Facebook using the Graph API. This involves creating a ShareDialog, making a GraphRequest to get user timeline posts, and implementing a logout method. The Facebook Graph API allows for a wide range of other functionalities beyond the simple usage demonstrated in the tutorial.
Create Project and Set up SDK
Make sure you have an up to date version of Android Studio. I am using version 2.2.3
Open Android Studio and create a New Project, naming it as you wish. Click Next, choose Minimum API level 17 and click Next again. Choose Empty Activity as the first activity, name it LoginActivity and click Finish.
Next, we add another blank activity to the project. Right Click the package and select New -> Activity -> Blank Activity. Leave its name as default and click Finish.
Open build.gradle (Project) and add mavenCentral() to both repository sections. Then open build.gradle (Module) and add the SDK library by adding this line to dependencies:
compile 'com.facebook.android:facebook-android-sdk:4.18.0'
Open strings.xml and add this line
<string name="facebook_app_id">{Your App ID here}</string>
Make sure you have given the Internet permission to your app by adding:
<uses-permission android:name="android.permission.INTERNET" />
in your AndroidManifest.xml file.
In the same file, inside the <application></application> tags, add:
<meta-data
    android:name="com.facebook.sdk.ApplicationId"
    android:value="@string/facebook_app_id" />

<activity
    android:name="com.facebook.FacebookActivity"
    android:label="@string/app_name"
    android:screenOrientation="portrait" />
Logging in
Add the Facebook Login Button inside the activity_login.xml layout:
<com.facebook.login.widget.LoginButton
            android:id="@+id/login_button"
            android:layout_width="match_parent"
            android:layout_height="wrap_content"
            android:layout_gravity="center_vertical"
            android:gravity="center"
            android:layout_margin="4dp"
            android:paddingTop="12dp"
            android:paddingBottom="12dp"/>
This is the only widget shown in the LoginActivity.
Open the LoginActivity class. First we need to initialize the Facebook SDK by adding :
FacebookSdk.sdkInitialize(this);
before the setContentView() line.
Initialize these variables before onCreate() method:
private CallbackManager callbackManager;
private AccessTokenTracker accessTokenTracker;
private ProfileTracker profileTracker;
private LoginButton loginButton;
private String firstName,lastName, email,birthday,gender;
private URL profilePicture;
private String userId;
private String TAG = "LoginActivity";
After the setContentView() method, add these lines:
callbackManager = CallbackManager.Factory.create();
Here we create a callbackManager which will be registered to our Facebook Login Button.
An instance of the Login Button will be created by adding:
loginButton = (LoginButton) findViewById(R.id.login_button);
loginButton.setHeight(100);
loginButton.setTextColor(Color.WHITE);
loginButton.setCompoundDrawablesWithIntrinsicBounds(null, null, null, null);
loginButton.setCompoundDrawablePadding(0);
Now it’s time to create the Login Result Callback. This callback will be attached to the login button together with the callbackManager we created before.
The Login Result Callback’s code is as below:
FacebookCallback<LoginResult> callback = new FacebookCallback<LoginResult>() {
            @Override
            public void onSuccess(LoginResult loginResult) {
                GraphRequest request = GraphRequest.newMeRequest(loginResult.getAccessToken(), new GraphRequest.GraphJSONObjectCallback() {
                    @Override
                    public void onCompleted(JSONObject object, GraphResponse response) {
                        Log.e(TAG,object.toString());
                        Log.e(TAG,response.toString());

                        try {
                            userId = object.getString("id");
                            profilePicture = new URL("https://graph.facebook.com/" + userId + "/picture?width=500&height=500");
                            if(object.has("first_name"))
                                firstName = object.getString("first_name");
                            if(object.has("last_name"))
                                lastName = object.getString("last_name");
                            if (object.has("email"))
                                email = object.getString("email");
                            if (object.has("birthday"))
                                birthday = object.getString("birthday");
                            if (object.has("gender"))
                                gender = object.getString("gender");

                            Intent main = new Intent(LoginActivity.this,MainActivity.class);
                            main.putExtra("name",firstName);
                            main.putExtra("surname",lastName);
                            main.putExtra("imageUrl",profilePicture.toString());
                            startActivity(main);
                            finish();
                        } catch (JSONException e) {
                            e.printStackTrace();
                        } catch (MalformedURLException e) {
                            e.printStackTrace();
                        }
                    }
                });
                //Here we put the requested fields to be returned from the JSONObject
                Bundle parameters = new Bundle();
                parameters.putString("fields", "id, first_name, last_name, email, birthday, gender");
                request.setParameters(parameters);
                request.executeAsync();
            }

            @Override
            public void onCancel() {
            }

            @Override
            public void onError(FacebookException e) {
                e.printStackTrace();
            }
        };
This callback has three Overriden methods: onSuccess(), onCancel() and onError. Each time the user logs in, only one of the methods will be called.
Inside the onSuccess() method, a new GraphRequest will be created. This request will take two arguments: the login result access token (loginResult.getAccessToken()) and a new GraphRequest with a JSONObjectCallback.
If the request is successful, a new Activity will be started
The GraphRequest response would be of type JSONObject and it will contain the required fields.
Before the onCreate() method closing tag, we need to add the loginButton read permissions.
loginButton.setReadPermissions("email", "user_birthday","user_posts");
loginButton.registerCallback(callbackManager, callback);
The last method of the LoginActivity class is:
@Override
    protected void onActivityResult(int requestCode, int responseCode, Intent intent) {
        super.onActivityResult(requestCode, responseCode, intent);
        callbackManager.onActivityResult(requestCode, responseCode, intent);
    }
Getting and Sharing data to Facebook

After the user has logged in, a new Intent will be started. The next activity is MainActivity class.
Be sure that your public class MainActivty implements View.OnClickListener.
Its layout’s xml code is:
    <LinearLayout
        android:layout_width="match_parent"
        android:layout_height="match_parent"
        android:orientation="vertical">

        <TextView
            android:text="Hello:"
            android:layout_width="wrap_content"
            android:layout_height="wrap_content"
            android:layout_marginTop="10dp"
            android:textSize="20dp"
            android:layout_gravity="center_horizontal"/>

        <TextView
            android:layout_width="wrap_content"
            android:layout_height="wrap_content"
            android:id="@+id/nameAndSurname"
            android:textSize="22dp"
            android:textStyle="bold"
            android:layout_marginTop="10dp"
            android:layout_gravity="center_horizontal"/>

        <ImageView
            android:layout_width="200dp"
            android:layout_height="200dp"
            android:id="@+id/profileImage"
            android:layout_marginTop="10dp"
            android:layout_gravity="center_horizontal"/>

        <Button
            android:layout_width="wrap_content"
            android:layout_height="wrap_content"
            android:id="@+id/share"
            android:layout_gravity="center_horizontal"
            android:onClick="onClick"
            android:text="Share Content" />

        <Button
            android:layout_width="wrap_content"
            android:layout_height="wrap_content"
            android:id="@+id/getPosts"
            android:layout_gravity="center_horizontal"
            android:onClick="onClick"
            android:text="Posts"/>


        <Button
            android:layout_width="wrap_content"
            android:layout_height="wrap_content"
            android:layout_gravity="center_horizontal"
            android:onClick="onClick"
            android:text="Logout"
            android:id="@+id/logout"/>

    </LinearLayout>
Open the MainActivity class and before the `onCreate()’ add these lines:
private ShareDialog shareDialog;
private String name, surname, imageUrl;
private String TAG = "MainActivity";
The first thing to do after the activity is created, is taking the intent extras put from the previous activity.
Bundle inBundle = getIntent().getExtras();
name = inBundle.getString("name");
surname = inBundle.getString("surname");
imageUrl = inBundle.getString("imageUrl");
We can use the name and surname variables to display the user information by using:
TextView nameView = (TextView)findViewById(R.id.nameAndSurname);
nameView.setText("" + name + " " + surname);
Since our MainActivity class is implementing a View.OnClickListener we need to @Override the onClick(View view) method:
@Override
public void onClick(View view) {
    switch (view.getId()){
        case R.id.share:
            share();
            break;

        case R.id.getPosts:
            getPosts();
            break;

        case R.id.logout:
            logout();
            break;
    }
}
This is the share() method:
private void share(){
    shareDialog = new ShareDialog(this);
    List<String> taggedUserIds= new ArrayList<String>();
    taggedUserIds.add("{USER_ID}");
    taggedUserIds.add("{USER_ID}");
    taggedUserIds.add("{USER_ID}");

    ShareLinkContent content = new ShareLinkContent.Builder()
            .setContentUrl(Uri.parse("http://www.sitepoint.com"))
            .setContentTitle("This is a content title")
            .setContentDescription("This is a description")
            .setShareHashtag(new ShareHashtag.Builder().setHashtag("#sitepoint").build())
            .setPeopleIds(taggedUserIds)
            .setPlaceId("{PLACE_ID}")
            .build();

    shareDialog.show(content);
}
The method above shares a link content. You can use the similar methods like SharePhotoContent, ShareVideoContent, ShareFeedContent, ShareMediaContent etc. The content should always be shown inside the ShareDialog.
In order to get the user timeline posts, we need to make a GraphRequest:
private void getPosts(){
        new GraphRequest(
                AccessToken.getCurrentAccessToken(), "/me/posts", null, HttpMethod.GET,
                new GraphRequest.Callback() {
                    public void onCompleted(GraphResponse response) {
                        Log.e(TAG,response.toString());
                    }
                }
        ).executeAsync();
    }
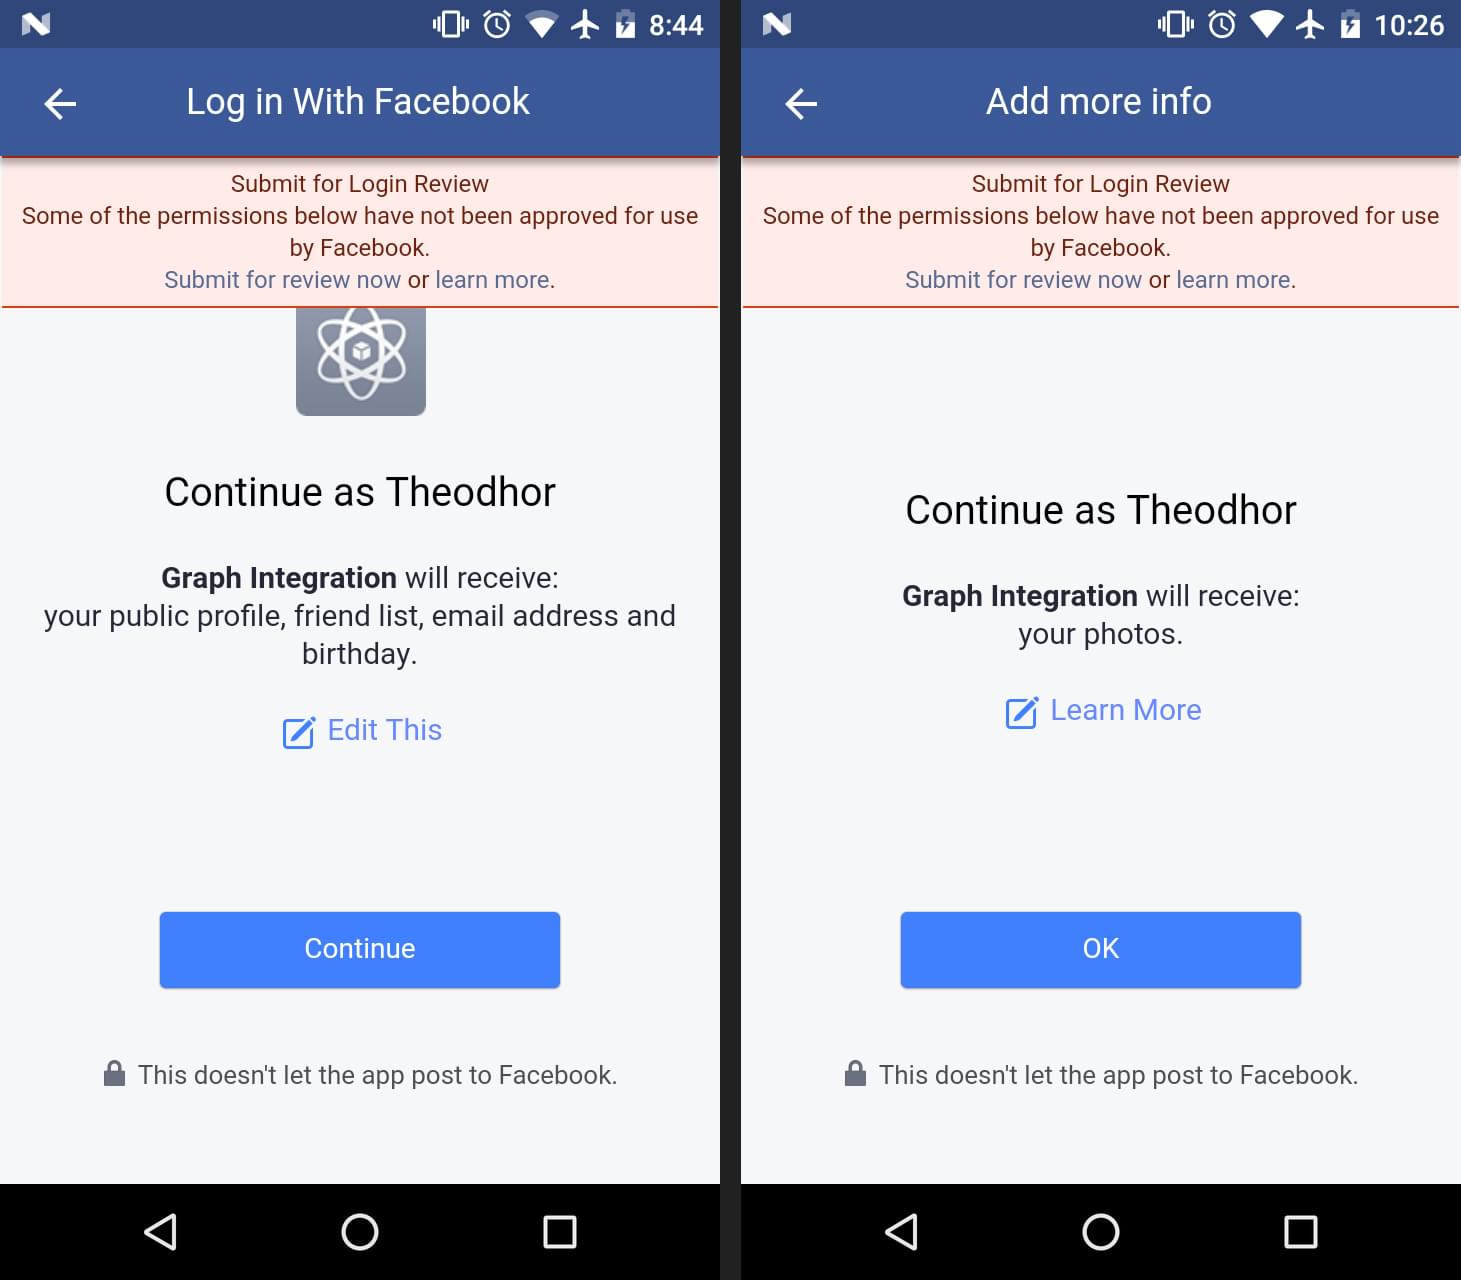
In this case, user posts are the only data we can get from the profile, because this is the only permission request on login:
loginButton.setReadPermissions(“email”, “user_birthday”,”user_posts”);
You can see the permissions below:
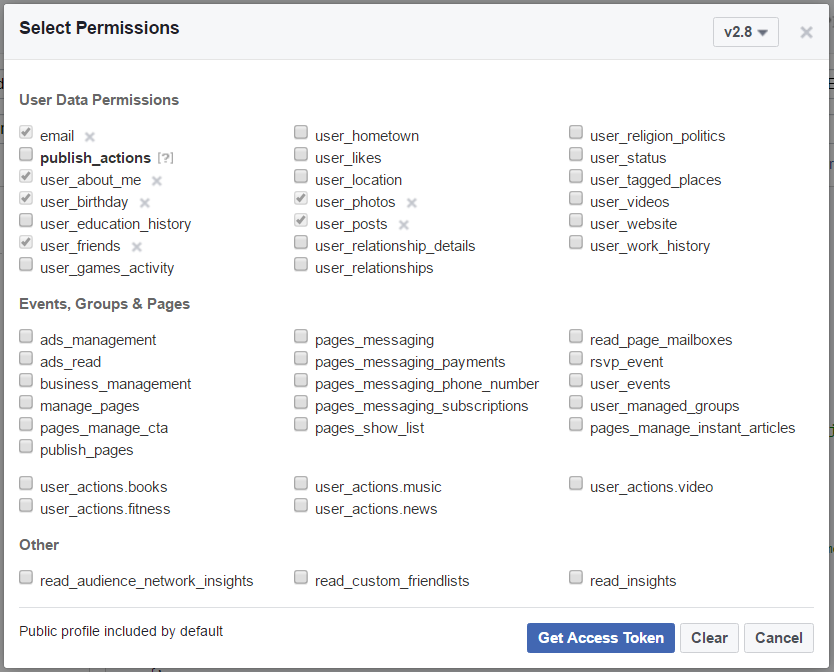
or you can try the Graph API Explorer for a better understanding how it works.
The logout() method is:
private void logout(){
        LoginManager.getInstance().logOut();
        Intent login = new Intent(MainActivity.this, LoginActivity.class);
        startActivity(login);
        finish();
    }
Conclusion
The Facebook Graph API is much more wider than that. This was just a simple use of that, purposing to show how it is implemented in Android.
If you have any questions please let me know by comments below.
Frequently Asked Questions (FAQs) about Integrating the Facebook Graph API in Android
What is the Facebook Graph API and how does it work?
The Facebook Graph API is a tool that allows developers to read from and write data into Facebook. It presents a simple, consistent view of the Facebook social graph, uniformly representing objects in the graph (e.g., people, photos, events, and pages) and the connections between them (e.g., friend relationships, shared content, and photo tags).
How do I integrate the Facebook Graph API in Android?
To integrate the Facebook Graph API in Android, you need to follow several steps. First, you need to create a Facebook Developer account and create a new app. Then, you need to add the Facebook SDK to your Android project. After that, you can use the Graph API to make requests to Facebook’s servers. This can be done using the GraphRequest and GraphResponse classes provided by the SDK.
What are the common issues faced when integrating the Facebook Graph API in Android?
Some common issues include problems with the initialization of the Facebook SDK, issues with the GraphRequest class, and difficulties in handling the GraphResponse. These issues can often be resolved by ensuring that the SDK is correctly initialized, that the correct permissions are requested, and that the response is correctly parsed.
How do I handle the GraphResponse in Android?
The GraphResponse class represents the response of a GraphRequest. You can use the getJSONObject() or getJSONArray() methods to retrieve the data from the response. You should also handle any potential errors by calling the getError() method.
How do I request user data using the Facebook Graph API in Android?
To request user data, you need to use the GraphRequest class. You can specify the fields you want to retrieve by calling the setParameters() method. You also need to specify the HTTP method (GET, POST, or DELETE) and the GraphPath (the path in the Graph API).
How do I handle permissions when using the Facebook Graph API in Android?
When using the Facebook Graph API, you need to request permissions from the user. This can be done using the LoginManager class. You should request only the permissions that your app needs and handle the possibility that the user might not grant all the requested permissions.
How do I post data to Facebook using the Graph API in Android?
To post data to Facebook, you can use the GraphRequest class. You need to specify the HTTP method as POST, the GraphPath, and the parameters (the data you want to post). Then, you can execute the request and handle the response.
How do I delete data from Facebook using the Graph API in Android?
To delete data from Facebook, you can use the GraphRequest class. You need to specify the HTTP method as DELETE, the GraphPath, and the parameters (the data you want to delete). Then, you can execute the request and handle the response.
How do I handle errors when using the Facebook Graph API in Android?
When using the Facebook Graph API, you should always handle potential errors. This can be done by calling the getError() method on the GraphResponse. You should also handle the possibility that the user might not grant all the requested permissions.
How do I test my integration with the Facebook Graph API in Android?
To test your integration, you can use the Graph API Explorer provided by Facebook. This tool allows you to make requests to the Graph API and see the responses. You can also use the Android Debug Bridge (ADB) to debug your app.

