
In this tutorial, we’ll learn how to install custom extensions on Heroku. Specifically, we’ll be installing Phalcon.
Key Takeaways
- Custom PHP extensions, such as Phalcon, can be installed on Heroku using the PHP buildpack tool, which sets up the environment for running applications on Heroku.
- The process involves creating a custom phalcon.sh file in the buildpack-php/bin directory, editing the bin/compile file to execute it, and adding the text extension=phalcon.so to the conf/php/php.ini file.
- A new application must be created on Heroku, with an empty composer.json file to indicate it is a PHP application. Heroku will enable the corresponding PHP extensions and put them in the support/build/extensions/no-debug-non-zts-20121212 folder.
- The web root must be specified in a Procfile file, and the Phalcon website cloned into the repo folder. After pushing all commits to the central repository, a running Phalconphp.com clone on Heroku will be created.
Sign-up and Set up
In order to use Heroku, you must sign up for a Heroku account. Heroku generally works with a command-line interface. To use that interface, you need to install the Heroku toolbelt package for your operating system. If you are using Linux, open up terminal and type the following command.
wget -qO- https://toolbelt.heroku.com/install.sh | sh
After installing the toolbelt, you’ll have access to the heroku command from your command shell. Authenticate using the email address and password you used when creating your Heroku account:
heroku login
Enter your Heroku credentials.

Email: fcopensuse@gmail.com

Password:

Could not find an existing public key.

Would you like to generate one? [Yn]

Generating new SSH public key.

Uploading ssh public key /home/duythien/.ssh/id_rsa.pub
Press enter at the prompt to upload your existing ssh key or create a new one, used for pushing code later on.
Phalcon is a third party extension, and thus not bundled with PHP. Phalcon requires the following components:
mbstring
mcrypt
openssl
PDO
PDO/Mysql
PDO/Postgresql
PDO/Sqlite
PDO/Oracle
mbstring and mcrypt are the main ones – mbstring is used by the templating engine (Volt), as well as some validators, the escaper and the filter, while mcrypt is used in the security component (generating secure hashes etc.)
In order to install the elements above, we will use the PHP buildpack tool. Let’s explain what that means.
According to the official Heroku documentation, buildpacks provide the magic and flexibility that make running your apps on Heroku so easy. When you push your code, the buildpack is the component that handles the setting up of your environment so that your application can run. The buildpack can install dependencies, customize software, manipulate assets, and do anything else required to run your application. Heroku didn’t always have buildpacks, they are a new component that came with the Cedar stack.
You can get more information on these three steps and more through the buildpack documentation.
To get started, we fork this code on github. Click the “Fork” button in the repository. To be able to work on the project, you will need to clone it to your local machine.
Run the following code:
git clone https://github.com/duythien/heroku-buildpack-php.git buildpack-php

cd buildpack-php
Create the phalcon.sh file in your $HOME/buildpack-php/bin directory with the following content:
#!/bin/bash

# Build Path: /app/.heroku/php/

dep_url=git://github.com/phalcon/cphalcon.git

phalcon_dir=cphalcon

echo "-----> Building Phalcon..."
### Phalcon

echo "[LOG] Downloading PhalconPHP"

git clone $dep_url -q

if [ ! -d "$phalcon_dir" ]; then

  echo "[ERROR] Failed to find phalconphp directory $phalcon_dir"

  exit

fi

cd $phalcon_dir/build
# /app/php/bin/phpize

# ./configure --enable-phalcon --with-php-config=$PHP_ROOT/bin/php-config

# make

# make install

BUILD_DIR=$1

ln -s $BUILD_DIR/.heroku /app/.heroku

export PATH=/app/.heroku/php/bin:$PATH

bash ./install

cd

echo "important extension phalcon into php.ini"

echo "extension=phalcon.so" >> /app/.heroku/php/etc/php/php.ini
This file will install Phalcon, but Heroku must be instructed to execute it. To do that, you will have to edit the bin/compile file and add the following line somewhere in there:
[...]

source $BP_DIR/bin/phalcon

[...]
In addition, you need to add the text extension=phalcon.so to the file “conf/php/php.ini“:
[....]

extension=phalcon.so

; Local Variables:

; tab-width: 4

; End:
Now we can push our new buildpack up:
git add -A

git commit -m "edit php.ini and create phalcon file"

git push origin master
Create a new application on Heroku
Create a directory for your app and change to it:
mkdir phalcon-dev

cd phalcon-dev
In addition, you need to give Heroku an indication that this application is a PHP application. To do this, create an empty file called composer.json. On a Unix system, you can create this file like so:
touch composer.json
Then, execute the following to initalize the repo for our app:
git init

git add -A

git commit -m" first commit"
To create a new Heroku application that you can push to, use the CLI’s create command:
heroku create phalcon-dev
Creating phalcon-dev... done, stack is cedar

http://phalcon-dev.herokuapp.com/ | git@heroku.com:phalcon-dev.git

Git remote heroku added
This creates the application on Heroku ready and waiting for our code, and also attaches a git remote to our local codebase. You are now ready to deploy the application, but there is no code yet. Follow the next section to add some content to your application.
Your composer.json file should be made to look like this:
{

  "require": {

    "php": "5.5.12"

  }

}
It will automatically install extensions such as mcrypt, mbstring, etc on Heroku. If you need mongodb, memcached, etc, modify the file further:
{

  "require": {

    "php": "5.5.12",

    "ext-memcached": "*",

    "ext-mongo": "*"

  }

}
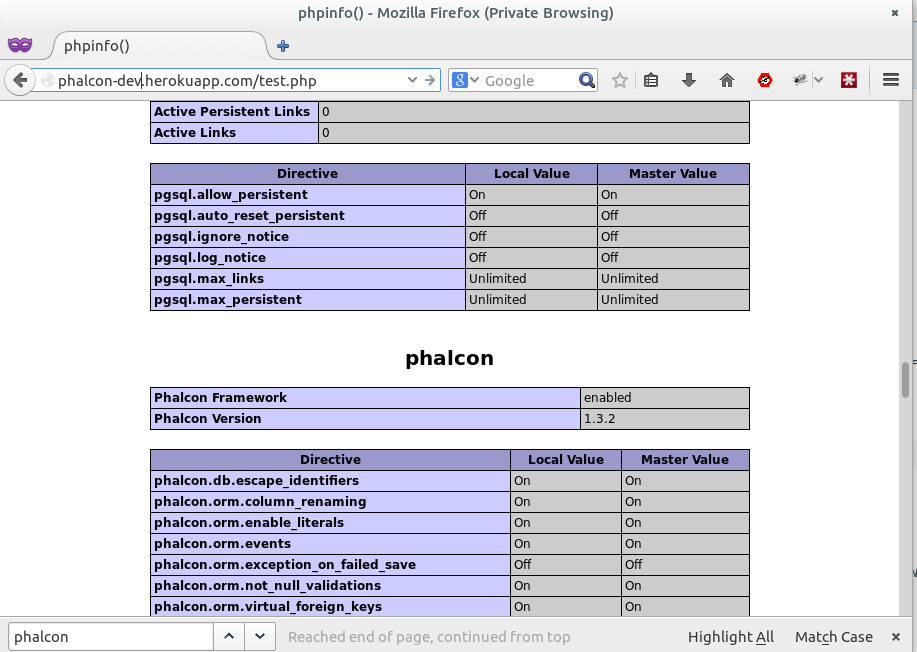
Now Heroku will enable the corresponding PHP extensions and put them into the support/build/extensions/no-debug-non-zts-20121212 folder. Next, create a test.php file with the following content:
<?php phpinfo() ; ?>
Finally, let’s deploy the Phalcon installation:
heroku config:set BUILDPACK_URL=https://github.com/duythien/heroku-buildpack-php

git add -A

git commit -am "installl phalcon"

git push heroku master
The first command means override the Heroku default buildpack by specifying a custom buildpack in the BUILDPACK_URL config var. After a few minutes, the results are as follows:
Build complete.

Don't forget to run 'make test'.
Installing shared extensions:     /app/.heroku/php/lib/php/extensions/no-debug-non-zts-20121212/
Thanks for compiling Phalcon!

Build succeed: Please restart your web server to complete the installation

important extension phalcon into php.ini

-----> Discovering process types

       Procfile declares types -> (none)

       Default types for PHP   -> web
-----> Compressing... done, 124.0MB

-----> Launching... done, v8

       http://phalcon-dev.herokuapp.com/ deployed to Heroku
To git@heroku.com:phalcon-dev1.git

   4f1d993..e0936a5  master -> master
This has taken our code, pushed it to Heroku, identified it, and run a build process against it, making it ready for deployment. Now our application is live on the Internet! To verify this, open it now:
heroku open test.php
If everything goes fine, you should see the following screen in your browser:
Configure the web root and deploy the sample site
Now comes the tricky part that is specifying the web root. Specifying the web root needs a little bit more work and background information. The Phalcon website application’s root in the git tree is /app/phalcon-website/public. For Heroku, by default, the web root is the root of the git-tree. That directory is internally mapped to /app. To change this, we need to create a so called Procfile that starts a sh-script each time the Heroku app web-node starts. That script then modifies the server configuration and includes your own config which is setting the web root to /app/phalcon-website/public. Create a Procfile file with the following content (if you’re using Apache):
web: vendor/bin/heroku-php-apache2 phalcon-website/public
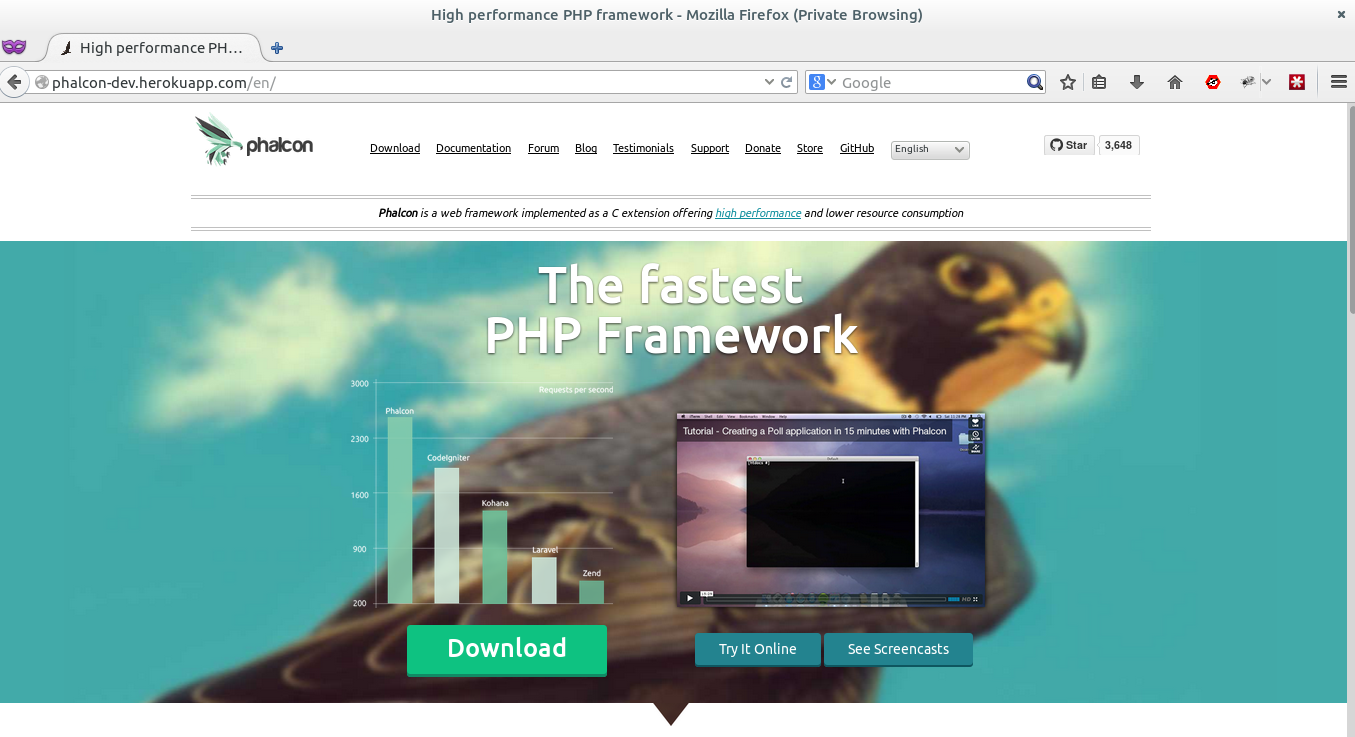
Clone the Phalcon website into the repo folder, and when it’s done, the git push command sends all of the commits on your local master to the central repository.
cd && cd phalcon-dev

git clone --depth=1 http://github.com/phalcon/website phalcon-website

git add Procfile phalcon-websiste/

git commit -am " test phalcon website"

git push heroku master
Visit the app’s public URL and voila, you have a running Phalconphp.com clone on Heroku here.
In conclusion
Installing Phalcon (or any other PHP extension) on Heroku is obviously neither easy nor simple but if you use buildpacks, it becomes much more approachable.
Leave your feedback in the comments below and, as always, please share this article if you liked it!
Frequently Asked Questions (FAQs) about Installing Custom PHP Extensions on Heroku
How can I install custom PHP extensions on Heroku?
Installing custom PHP extensions on Heroku involves a few steps. First, you need to create a file named ‘composer.json’ in your project root. This file will contain the PHP extensions you want to install. For example, if you want to install the ‘gd’ extension, your ‘composer.json’ file should look like this:{
"require": {
"ext-gd": "*"
}}
After creating the ‘composer.json’ file, you need to run the ‘composer update’ command in your terminal. This will create a ‘composer.lock’ file in your project root. You need to commit both ‘composer.json’ and ‘composer.lock’ files to your git repository. Finally, you can push your changes to Heroku using the ‘git push heroku master’ command. Heroku will automatically install the PHP extensions specified in your ‘composer.json’ file.
Why am I getting an error when trying to install a PHP extension on Heroku?
There could be several reasons why you’re getting an error when trying to install a PHP extension on Heroku. One common reason is that the extension you’re trying to install is not compatible with the PHP version you’re using. You can check the PHP version by running the ‘php -v’ command in your terminal. If the extension is not compatible with your PHP version, you need to either update your PHP version or find a version of the extension that is compatible with your PHP version.
Another common reason for getting an error is that the extension is not available in the PECL repository. Heroku uses the PECL repository to install PHP extensions. If the extension is not available in the PECL repository, you cannot install it on Heroku.
Can I use a custom PHP.ini file on Heroku?
Yes, you can use a custom PHP.ini file on Heroku. To do this, you need to create a ‘.user.ini’ file in your project root. This file will contain your custom PHP settings. For example, if you want to increase the maximum file upload size, your ‘.user.ini’ file should look like this:upload_max_filesize = 10Mpost_max_size = 10M
After creating the ‘.user.ini’ file, you need to commit it to your git repository and push your changes to Heroku. Heroku will automatically apply the settings specified in your ‘.user.ini’ file.
How can I update my PHP version on Heroku?
Updating your PHP version on Heroku involves a few steps. First, you need to specify the new PHP version in your ‘composer.json’ file. For example, if you want to update to PHP 7.4, your ‘composer.json’ file should look like this:{
"require": {
"php": "^7.4"
}}
After updating the ‘composer.json’ file, you need to run the ‘composer update’ command in your terminal. This will update the ‘composer.lock’ file. You need to commit both ‘composer.json’ and ‘composer.lock’ files to your git repository. Finally, you can push your changes to Heroku using the ‘git push heroku master’ command. Heroku will automatically update your PHP version.
Can I use a custom buildpack to install PHP extensions on Heroku?
Yes, you can use a custom buildpack to install PHP extensions on Heroku. A buildpack is a script that Heroku runs when you push your changes to the platform. It’s responsible for setting up your application’s environment and installing its dependencies.
To use a custom buildpack, you need to specify it in your ‘app.json’ file or in the Heroku dashboard. For example, if you want to use the ‘heroku/php’ buildpack, your ‘app.json’ file should look like this:{
"buildpacks": [
{
"url": "heroku/php"
}
]}
After specifying the buildpack, you can push your changes to Heroku. Heroku will automatically run the buildpack and install the PHP extensions specified in it.
How can I troubleshoot issues when installing PHP extensions on Heroku?
Troubleshooting issues when installing PHP extensions on Heroku can be challenging, but there are a few strategies you can use. First, you can check the Heroku logs for any error messages. You can access the logs by running the ‘heroku logs’ command in your terminal. The logs can give you clues about what’s causing the issue.
Second, you can use the ‘heroku run’ command to run commands directly on your Heroku app. For example, you can run the ‘php -m’ command to list all installed PHP extensions. This can help you verify whether a specific extension is installed or not.
Finally, you can use the ‘heroku config’ command to check your Heroku app’s configuration. This can help you verify whether your custom PHP.ini settings are applied or not.
Can I install PHP extensions that are not available in the PECL repository on Heroku?
Unfortunately, you cannot install PHP extensions that are not available in the PECL repository on Heroku. Heroku uses the PECL repository to install PHP extensions. If the extension is not available in the PECL repository, you cannot install it on Heroku.
However, you can use a custom buildpack to install PHP extensions that are not available in the PECL repository. A custom buildpack can include scripts to compile and install PHP extensions from source. This requires advanced knowledge of PHP and Unix shell scripting.
How can I verify whether a PHP extension is installed on Heroku?
You can verify whether a PHP extension is installed on Heroku by running the ‘php -m’ command on your Heroku app. This command lists all installed PHP extensions. You can run this command by using the ‘heroku run’ command in your terminal. For example, you can run the following command to list all installed PHP extensions:heroku run php -m
If the extension is installed, it should appear in the list of installed PHP extensions.
Can I install multiple PHP extensions on Heroku?
Yes, you can install multiple PHP extensions on Heroku. To do this, you need to specify all the extensions you want to install in your ‘composer.json’ file. For example, if you want to install the ‘gd’ and ‘mbstring’ extensions, your ‘composer.json’ file should look like this:{
"require": {
"ext-gd": "*",
"ext-mbstring": "*"
}}
After updating the ‘composer.json’ file, you need to run the ‘composer update’ command in your terminal. This will update the ‘composer.lock’ file. You need to commit both ‘composer.json’ and ‘composer.lock’ files to your git repository. Finally, you can push your changes to Heroku using the ‘git push heroku master’ command. Heroku will automatically install the PHP extensions specified in your ‘composer.json’ file.
Can I use the ‘php.ini’ file to install PHP extensions on Heroku?
No, you cannot use the ‘php.ini’ file to install PHP extensions on Heroku. Heroku does not support the ‘php.ini’ file for installing PHP extensions. Instead, you need to use the ‘composer.json’ file to specify the PHP extensions you want to install. Heroku will automatically install the PHP extensions specified in your ‘composer.json’ file when you push your changes to the platform.