


The most effective designs are those that tell a story. Storytelling resonates with customers of all kinds, and contextualizing their needs or your (client’s) products and services into such a narrative is a proven, effective strategy. Everyone likes to consider themselves the hero of their own story, which makes dramatizing ordinary imagery with stylized comic book effects a worthy option for a wide variety of projects.
Designers and artists have used the style quite heavily in advertising, and for good reason. Decades have passed since the peak of comic book popularity, but don’t let that discourage you; those who relished comic books long ago at a young age are now potential customers with far more disposable income.
Today, I will show you how to give your photos a comic strip style using Photoshop. We will use some interesting tools and filters to achieve the desired result. So let’s start!
Resources:
Ninja image by Drayke Larson
Subtle Patterns Set
Halftone brushes
Rays Brushes
Comic book Font
(Download the finished, layered PSD file.)
First, let’s have a look at our final result:

Step 1:
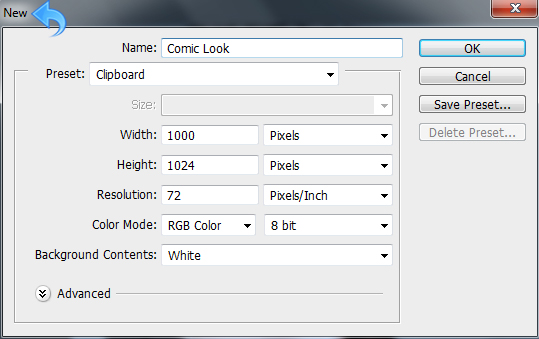
Open Photoshop and create a new file with a 1000px width and a 1024px height. You can adjust the size as you want and according to your photos.
Step 2:
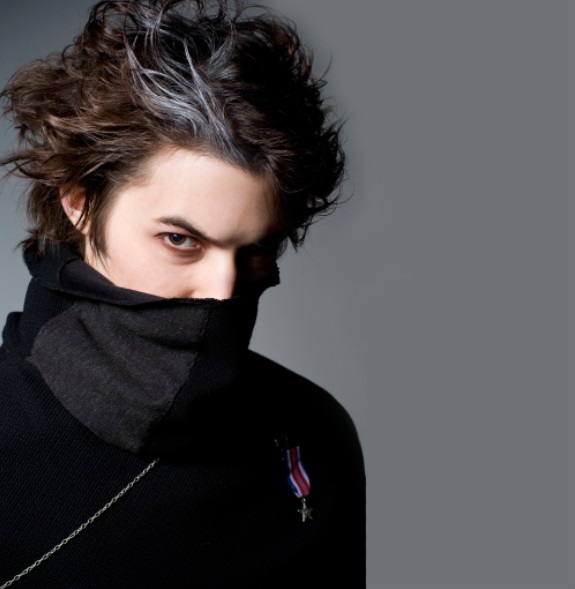
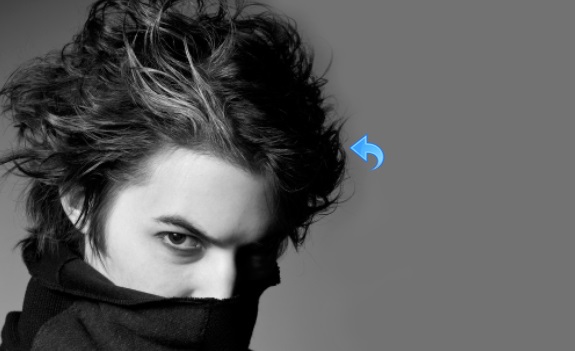
Open your image and paste it into the file.

Step 3:
As you can see, our image size is smaller than our canvas, so we will fill the empty space with the similar base color using the Paint Bucket Tool.
Step 4:
Now we will start with the effects, so duplicate the image layer by right-clicking on the image layer and selecting “Duplicate layer” (or you can press CMD/Ctrl + “J”).
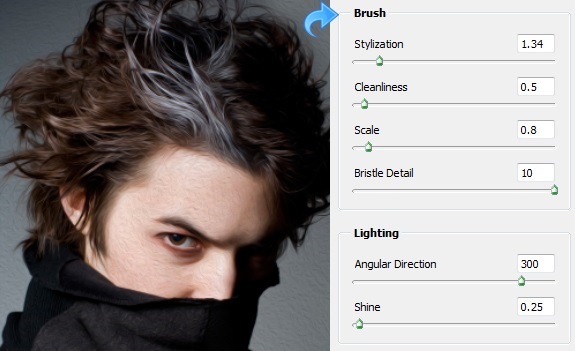
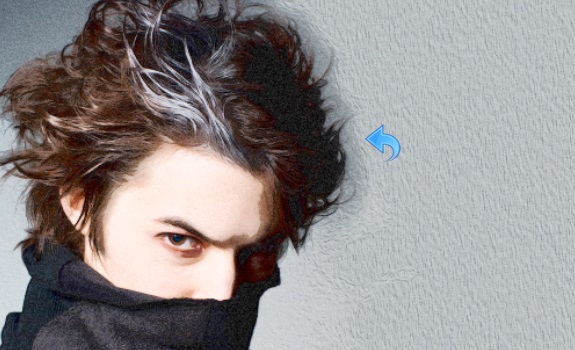
Select the image layer and click on “Filter” > “Oil Painting” and adjust the options to stylization 1.34, cleanliness 0.5, scale 0.8, bristle detail 10, direction 300, and shin 0.25. You should make additional adjustments according to your image and what suits it best.
Step 5:
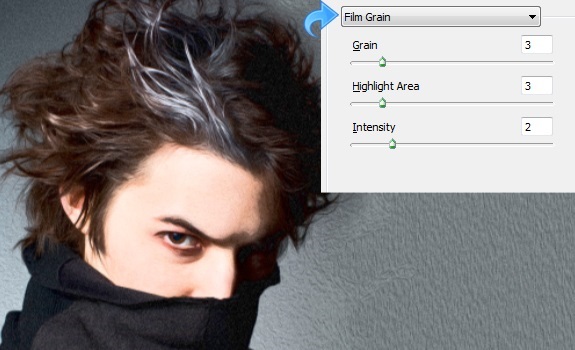
Now, click on “Filter” > “Filter Gallery” > “Artistic” > “Film Grain”. Keep the settings the same as shown in the image below.
Step 6:
Select the background image layer and duplicate it. You can accomplish this by right-clicking on the layer and selecting “Duplicate layer” or by pressing CMD/Ctrl + “J”.
Now, click on “Image” > “Adjustments” > “Black & White” and click “OK”.
Step 7:
Select the above layer and click on “Filter” > “Stylize” > “Trace contour.” Adjust the settings by setting the level at 30 and selecting “Lower edge.”
Now, change the blending mode of the layer to “Overlay” and reduce the opacity to 30%.
Step 8:
Once again, duplicate the background layer (by right-clicking on the layer and selecting “Duplicate layer” or pressing CMD/Ctrl + “J”) and place it on top. Then, select the new layer and click on “Filter” > “Filter gallery” > “Sketch” > “Bas relief” and adjust the settings with 13 for details and 1 for smoothness.
Now, change the blending mode of this layer to “Overlay.”

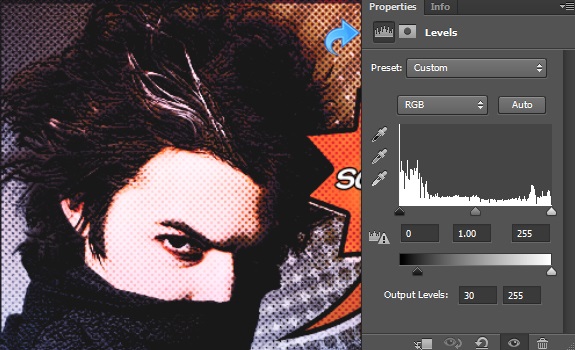
Step 9:
Select the above layer and click on “Image” > “Adjustments” > “Levels” and keep the settings the same as shown in the image below.

Step 10:
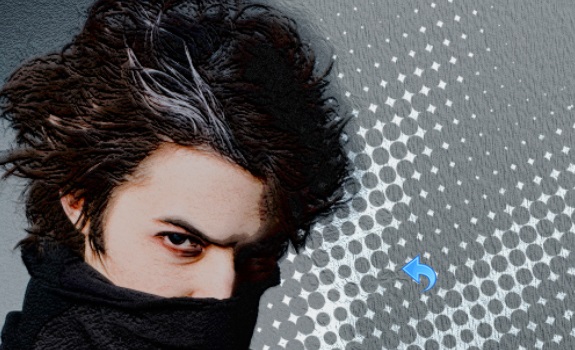
Create a new layer, click on “Layer” > “New” > “Layer” or click on the new layer option within the layer panel. Now, select one of the halftone brushes I’ve included in the resources and use it on the side with color #eaeaea. Then, change the blending mode of the layer to “Overlay.”
Step 11:
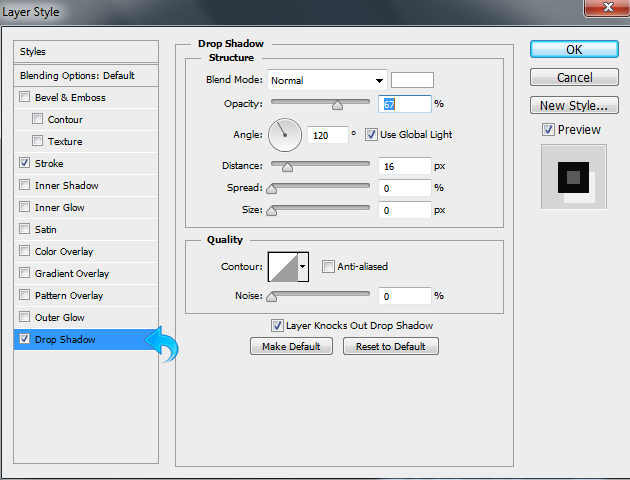
Now let’s create the text bubble and title, so select the Pen Tool and create a shape. Fill the shape with color #d5652c. Then select the layer and click on “Layer” > “Layer style” and add both Stroke and Drop Shadow. Use the settings shown in the images below.

Step 12:
Using the same technique, select thee Rectangle Tool and create a rectangle. Fill it with color #364370. Then, click on “Layer” > “New” > “Layer” (or click on the “New layer” option from the layer panel), select a halftone brush, and use on both shapes. Change the blending mode of this layer to “Soft light” and reduce the opacity to 70%.

Step 13:
Duplicate the background layer with a trace contour filter applied and place the new duplicate on top of the orignal layer. Then, click on “Filter” > “Pixelate” > “Color halftone”. Then, change the blending mode to “Overlay” and reduce the opacity to 45%.
Select the Eraser Tool and use it where you want to reduce the halftone style.

Step 14:
Create a new layer and select one of the rays brushes I’ve included in the resources above with color #ffffff. Then, change the blending mode of the layer to “Soft light.”
Now, add text to the shapes that we’ve created before and click on “Layer styles” to add a 3px stroke to the text.

Step 15:
Click on “Fill adjustment layer” > “Gradient” and add some gradients with the “Hard light” blending mode.

Step 16:
Create a “Vibrance” adjustment layer and employ the settings shown in the image below.

Once again create a “Color balance” adjustment layer and keep the settings the same as shown in the image below.

Again, create a “Level” adjustment layer and adjust the settings according to the image below.
Then, create a “Brightness & contrast” adjustment layer and adjust the settings according to the following image.

Finally, create a “Selective color” adjustment layer and adjust the settings according to the image below.

Step 17:
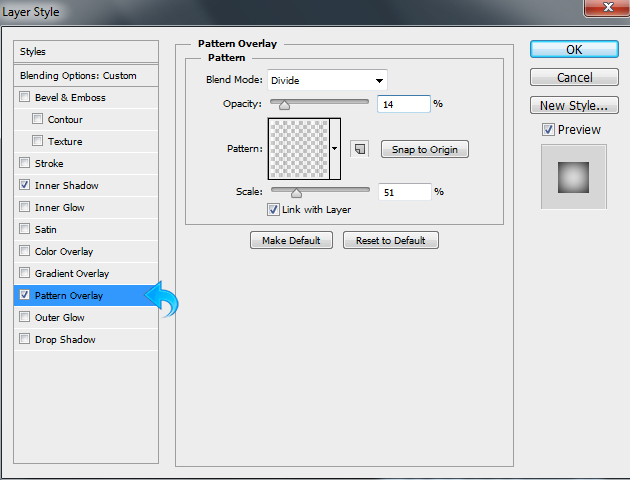
Create a new layer, reduce the fill to 0%, and click on “Layer” > “Layers” to add some inner shadow and pattern overlay.

Step 18:
Now we will create a white frame using the Line Tool. Select the Line Tool with a 5px weight and create a frame using color #ffffff. We are all done; our retro comic style is complete

I hope you guys enjoyed the tutorial. Stylized, dramatized comic book panels are timeless and they resonate with a large demographic. I hope you find a great use for the technique.
Frequently Asked Questions about Giving Your Photos a Retro Comic Look
What software do I need to give my photos a retro comic look?
To give your photos a retro comic look, you will need a photo editing software. The tutorial on our website uses Adobe Photoshop, which is a professional-grade software widely used in the industry. However, there are other alternatives available such as GIMP, which is a free and open-source image editor.
Can I use this technique on any photo?
Yes, you can use this technique on any photo. However, the results may vary depending on the quality and the content of the photo. High-resolution photos with clear subjects tend to produce better results.
How can I adjust the intensity of the comic effect?
The intensity of the comic effect can be adjusted by changing the opacity of the layers in Photoshop. Lowering the opacity will make the effect more subtle, while increasing it will make the effect more pronounced.
Can I apply this effect to a colored photo?
Yes, you can apply this effect to a colored photo. The tutorial on our website shows how to convert a colored photo into a black and white comic-style image. However, you can skip the black and white conversion step if you want to keep the colors in your photo.
How can I save my edited photo?
After you have applied the comic effect to your photo, you can save it by going to File > Save As in Photoshop. You can choose the format and the quality of the saved image.
Can I use this technique to create a comic strip?
Yes, you can use this technique to create a comic strip. You can apply the comic effect to multiple photos and arrange them in a grid to create a comic strip.
What other effects can I combine with the comic effect?
You can combine the comic effect with other effects in Photoshop to create unique images. For example, you can add text bubbles, sound effects, or other graphic elements to enhance the comic look.
Can I use this technique on a mobile device?
While the tutorial on our website is designed for desktop software, there are mobile apps available that offer similar features. Apps like Adobe Photoshop Express and Snapseed allow you to edit photos on your mobile device.
How can I improve the quality of my edited photo?
To improve the quality of your edited photo, make sure to start with a high-resolution image. Also, be careful not to overdo the effects as it can make the image look unnatural.
Can I use this technique for professional work?
Yes, you can use this technique for professional work. The comic effect can add a unique touch to your photos and make them stand out. However, make sure to use it appropriately and consider the context and the audience of your work.

