Getting Started with Rails 3: Part 2

Key Takeaways
- Utilize the “Command Prompt with Ruby and Rails” to generate a simplified URL Controller focusing on new, create, and show actions, streamlining the development process.
- Implement RESTful controllers in Rails to handle CRUD operations efficiently, using structured routes and HTTP verbs to interact with the model and view layers.
- Enhance user interaction by developing a view layer with ERb, allowing dynamic content rendering, and modifying the layout to display link generation results using flash messages.
- Address form functionality and validation within the view, ensuring user input is correctly processed and feedback is provided on errors through an intuitive UI.
- Set up the application to redirect users from the root URL to the new URL form, improving navigational flow and user experience.
Creating Your First Controller
Now that we’ve created our model (with Rails taking care of persistence and validation) it’s time to write a Controller. The Controller part of your applications handles taking the input (for example, data from the URL or the request body in the case of POST and PUT), and then interacting with the Model, as well as setting up data for the view portion.RESTful Controllers
By default, Rails emphasizes a “RESTful” approach; that is to say, it uses the given HTTP verb (for example, GET, POST, PUT, DELETE) and well-organized urls to represent resources, leading to a general structure where code goes for operations on an object. It provides tools to handle basic CRUD (Create, Read, Update, Delete) actions on your data. In Rails terminology, the actions are typically:index—An action that returns a listing of all resources; for exampleGET /urlswill hit the index action on the URLs Controller, listing the known urls.show—An action that performs a read operation for a single resource; for exampleGET /urls/1will hit the show on the URLs Controller, showing the details of the URL with id 1.new—The action to show a new object form, in our case, the new URL form; for exampleGET /urls/newwill hit the new action on the URLs Controller and show the new URL form.create—A post action to take the form data from the new action and to attempt to create a record; for examplePOST /urlswill hit the create action on the URLs Controller, typically with some associated form data.edit—Will show the form to edit a specific resource; for exampleGET /urls/1/editwill hit the edit action on the URLs Controller and show a form to edit the URL with id 1.update—Will attempt to update the given resource; for examplePUT /urls/1will hit the update action on the URLs Controller and attempt to update the URL with id 1.destroy—Will attempt to destroy a given resource; for exampleDELETE /urls/1will hit the destroy action on the URLs Controller and attempt to destroy the URL with id 1.
Generating Our Controller
In our example, we’re going to cut it back from a full CRUD Controller and implement three basic actions:new, create, and show. When the user hits the new action, it will render a new URL form. This will in turn hit the create action when we submit the form, and attempt to create the URL object.
Finally, when the user hits the show action, we will redirect them to the stored URL.
So, use the “Command Prompt with Ruby and Rails” option from the Start Menu to open the command prompt and change to the directory where you stored your code. We’ll generate a new URL Controller with a single new action by running:
rails generate controller urls newnew action (instead of new, create, and show) is because Rails automatically generates a dummy view for each action included in the generator call. In this case, we only want a dummy view for the new action, so we exclude the others.
Running the command should have created an app/controllers/urls_controller.rb file and an app/views/urls/new.HTML.erb file, as well as a few test files. For the moment, open up the Controller file and you’ll see something similar to:
class UrlsController < ApplicationController
  def new
  end

endconfig/routes.rb, you should also see it added a dummy route for us:
get "urls/new"config/routes.rb, replace the above line with:
resources :urls, :only => [:show, :new, :create]rake routes. This will print out a list of all our routes. As you can see, Rails automatically set up three urls for us—GET /urls/new, GET /urls/:id, and POST /urls pointing to the new, show, and create
actions respectively.
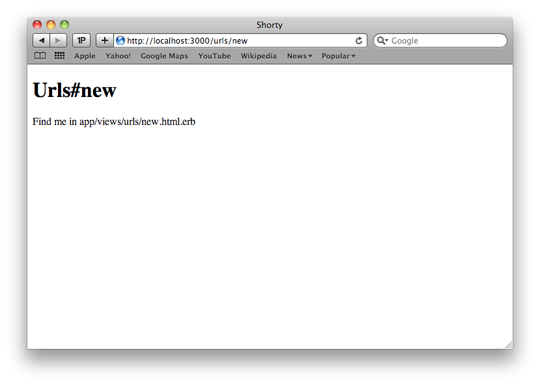
If we start the server (using rails server) and hit the URL for the new action in the browser (http://localhost:3000/urls/new), you should now see a placeholder page similar to the image below.
Writing Our Controller Logic
In this case, our Controller logic is going to be very simple:- When the user hits the new page, it will set the
@shortened_urlinstance variable to a new, unsaved URL object (we use@shortened_urlas our instance variable instead of@url, as the latter is used internally by Rails). - When the user submits the new form, we should attempt to create a new URL. If it is valid and saves, we’ll set a message telling the user the URL of their shortened link, and then we’ll redirect back to the Shorten page again.
- If the URL is invalid, we’ll re-render the new form, this time showing the errors.
- When the user hits the show action, we’ll redirect them to the URL.
appcontrollersurls_controller.rb now open in your editor, replace all of code with:
class UrlsController < ApplicationController
  def new
    @shortened_url = Url.new
  end

  def create
    @shortened_url = Url.new(params[:url])
    if @shortened_url.save
      flash[:shortened_id] = @shortened_url.id
      redirect_to new_url_url
    else
      render :action => "new"
    end
  end

  def show
    @shortened_url = Url.find(params[:id])
    redirect_to @shortened_url.url
  end

endnew_url_url). To understand what this means exactly, we just need to remember the output of rake routes. In there, we saw a route with the name new_url (among others). Rails automatically provides us with the new_url_url method (if our resources call in config/routes.rb had :posts instead of :urls, it would be new_post_url instead) as well as the _path equivalent; for example new_url_path. The difference between the two is that _url variants include the host, port, and protocol, whereas the _path variants include only the path and query string.
In the above Controller code, you may have noticed the line containing:
flash[:shortened_id] = @shortened_url.idhttp://localhost:3000/), they’re automatically redirected to the new URL form. In this case, it’s a fairly simple matter of doing two things:
- Remove the
public/index.htmlfile. This is just the default “Welcome to Rails” page, but when present it overrides our root, showing every user the “Welcome to Rails” page. - In the
config/routes.rbfile, add a new line below our resources call.
root :to => redirect('/urls/new')get '/' in our routes file), it should automatically redirect to the new URL action.
To try it out, go back to the terminal, restart the Rails server if you closed it, and then point your browser to http://localhost:3000/. If all went as expected, your browser should have automatically been redirected to http://localhost:3000/urls/new.
Writing Your View
With the Controller and Model for Shorty ready to use, it’s time to add the final layer: a View. The View is the part that is actually shown to the user. By default, our Views are written in ERb: embedded ruby. ERb lets us embed bits of ruby into our HTML to generate dynamic pages. For example, to show the value of the URL attribute on a URL object, we’d use something like this in our View:<%= @shortened_url.url %>app/views/urls/new.html.erb file and our layout, app/views/layouts/application.html.haml.
Editing Your Layout
Layouts are the Rails way of defining the general structure or layout of the page. While thenew.html.erb file is used for the HTML specific to our action (that is,for example the new action on another Controller will use another template), layouts are typically reused across several or all Actions. They are typically used to set up the general page structure; for example headers, menus, footers, and the like, while the page-specific stuff goes in your normal View.
In this case, our default application.html.erb
looks like:
<!DOCTYPE html>
<html>
<head>
  <title>Shorty</title>
  <%= stylesheet_link_tag :all %>
  <%= javascript_include_tag :defaults %>
  <%= csrf_meta_tag %>
</head>
<body>

<%= yield %>

</body>
</html><body> opening tag and above the line with yield on it, add the following:
<% if flash[:shortened_id].present? %>
  <p class='shortened-link'>
    The shortened url is available <%= link_to 'here',
url_url(flash[:shortened_id]) %>.
    (Right click and copy link to share it).
  </p>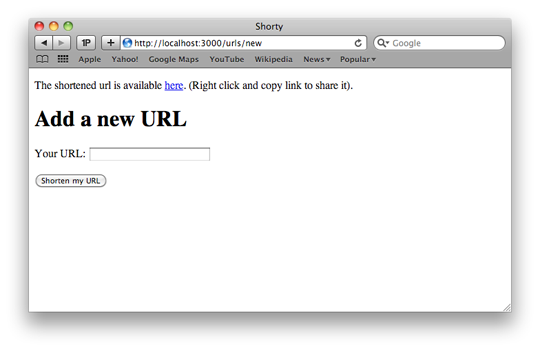
<% end %>link_to in the code is simply a call to what is known as a helper method; in this case, something Rails defines for us that generates the HTML for a link with the given text (‘here’ in this example) pointing to the given URL (in this case, something like http://localhost:3000/urls/1) when a URL has been shortened. If no :shortened_id value is present in the flash, nothing will be shown, but when one is present it will output a link to it inside a paragraph tag.
Editing Your Form
With the layout updated to show our link post shortening, we now need to set up our form. First, open upapp/views/urls/new.html.erb in your editor. By default, it should look like:
<h1>Urls#new</h1>
<p>Find me in app/views/urls/new.html.erb</p>
<h1>Add a new URL</h1>
<%= form_for @shortened_url do |form| %>

  <p>
    <%= form.label :url, "Your URL:" %>
    <%= form.text_field :url %>
  </p>

  <% if @shortened_url.errors[:url].any? %>
    <p class='error-messages'>
      The given url <%= @shortened_url.errors[:url].to_sentence %>.
    </p>
  <% end %>

  <p class='buttons'>
    <%= form.submit "Shorten my URL" %>
  </p>

<% end %>form_for method. These are classes provided by Rails to make it easier to build up complex forms by handling generating fields and such.
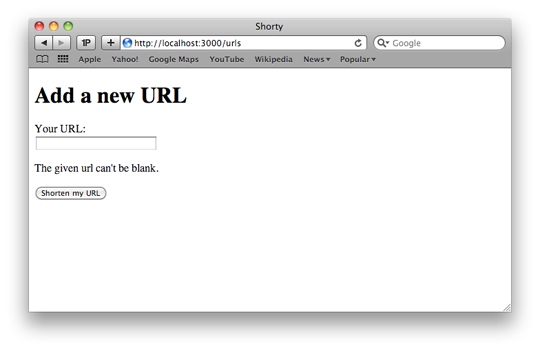
Next, we check if there are any errors on the URL field of the shortened URL object, and generate a paragraph tag with the class error-messages when there are. If the object doesn’t have any errors, it won’t output the HTML at all for this portion.
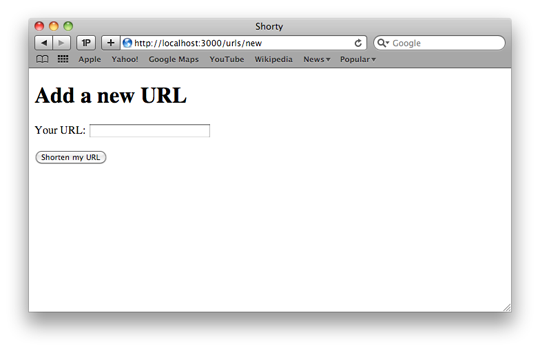
Lastly, we generate a submit tag with the text “Shorten my URL,” finishing off our form.
Testing It Out
Going back to the console and starting the Rails server again (if it’s been stopped), reloadhttp://localhost:3000/urls/new in your browser and you should see the following.
 If you click on Shorten my URL without any URLs entered into the Your URL field, you will receive the following error page.
 If you enter a valid URL into the Your URL field and click Shorten my URL (for example
 http://google.com/), you’ll see the following image.
 As a bonus, by using a form builder, Rails provides a lot of extras. For instance, it automatically sets the value of the text field so that when we go to submit it the second time (after an error), it will insert a special token to prevent cross-site request forgery. In general, it makes it very easy to build up forms.
Wrapping It All Up
As you’ve seen, with very little code we’ve been able to build a rudimentary URL shortener (whether the URLs are actually shorter depends on your domain and the input URL, but it’s the idea in general that matters). We’ve only just scratched the surface of what you can do with Rails, but we have managed to cover a decent amount of Rails in a short period of time. Of course, the application we built is not without flaws. For example, whilst we validate that a URL is actually given, we don’t validate that it is a URL (and we blindly redirect to that value); hence, this isn’t the sort of code you’d actually deploy. Likewise, the workflow itself is very rudimentary. If you’re keen on what you’ve done so far, you now have a good starting place to learn more about Ruby on Rails. For example, you might go about adding better url validation, add a way to list all urls shortened, or even better, use the routes and a custom Action that works more like existing URL shorteners. For bonus points, you could switch to an alternative form builder like formtastic,which will generate even better in-depth HTML for us (removing the need to do tasks like printing the error messages manually). There is a wealth of documentation out there for Rails beginners, some better than others, and some of it requiring payment. I strongly suggest you start with the following resources:- The Official Rails Guides—free, lots of relevant information, and a great place to start.
- The Ruby on Rails API—an API reference for the methods available from Rails.
- Railscasts—a lot (250 and counting) of free, short screencasts on performing different tasks in Rails.
- PeepCode—paid but professionally made screencasts on topics. Longer than Railscasts and generally more in depth.
- Rails Tutorial—a free book (with paid downloadable versions) that serves as an in-depth guide to Rails.
Frequently Asked Questions (FAQs) about Valid URL Formats
What are the components of a valid URL?
A valid URL, also known as a Uniform Resource Locator, consists of several components. These include the scheme, authority, path, query, and fragment. The scheme identifies the protocol to be used to access the resource on the Internet. The authority identifies the domain name or IP address where the resource is located. The path identifies the specific resource in the host that the web client wants to access. The query contains data to be passed to the software running on the server. The fragment identifies a secondary resource.
What are some examples of valid URL formats?
Valid URL formats can vary depending on the scheme. For example, an HTTP URL might look like this: http://www.example.com/path/to/myfile.html?key1=value1&key2=value2#SomewhereInTheDocument. A mailto URL, which is used for email, might look like this: mailto:user@example.com.
What characters are allowed in a URL?
In a URL, only ASCII characters are allowed. This includes digits (0-9), letters (A-Z and a-z), and a few special characters like hyphen (-), underscore (_), period (.), and tilde (~). Other characters must be encoded.
How are characters encoded in a URL?
Characters that are not allowed in a URL are encoded using percent-encoding, also known as URL encoding. In this scheme, the character is replaced by a percent sign (%) followed by two hexadecimal digits representing the ASCII code of the character. For example, the space character, which is not allowed in a URL, is encoded as %20.
What is the maximum length of a URL?
The maximum length of a URL is defined by the client software (e.g., web browser), not by the URL standard. Most web browsers support URLs up to 2048 characters long. However, some systems like Internet Explorer have a lower limit.
What happens if a URL contains invalid characters?
If a URL contains characters that are not allowed and are not properly encoded, the URL might not be correctly interpreted by some systems. This can lead to errors when trying to access the resource.
Can a URL contain non-English characters?
Yes, a URL can contain non-English characters. However, these characters must be encoded using the Internationalizing Domain Names in Applications (IDNA) system, which represents non-English characters as ASCII strings.
What is the difference between a URL and a URI?
A URL is a type of Uniform Resource Identifier (URI). While a URL specifies the location of a resource and the means of accessing it, a URI is a more general term that can also include Uniform Resource Names (URNs), which identify a resource by name rather than by location.
How can I check if a URL is valid?
There are many online tools that can check if a URL is valid. These tools can check if the URL is properly formatted, if it uses valid characters, and if it points to a reachable resource.
Can a URL point to a specific part of a document?
Yes, a URL can point to a specific part of a document. This is done using the fragment component of the URL, which is indicated by a hash sign (#). The fragment refers to an anchor within the resource, typically an HTML anchor in a web page.
Darcy Laycock is a web application developer from Perth, Western Australia. By day, he writes code for The Frontier Group and by night he's a Code Monkey for Youth Tree (A youth-oriented organisation) from Perth and avid contributor to open source ruby projects.

Published in
·Cloud·Databases·Debugging & Deployment·Development Environment·PHP·Programming·Web·February 24, 2014
Published in
·APIs·CMS & Frameworks·Meta·Miscellaneous·Patterns & Practices·PHP·Programming·Web·July 25, 2014