If you’ve heard about Rails but are yet to take the plunge, there has never been a better time to dive in. Rails 3, the most recent major release, not only marks a major landmark in maturity for the framework itself, but is also a sign of a mature community.
Today, I’m going to show you a quick example of building a simple Rails 3 application to give you an idea of what working with Rails is like. For this tutorial in two parts, we’ll be building a database-backed application: a URL shortener named “Shorty.”
In the first part, you’ll learn how to install Ruby on Rails, generate an application and create a Model. In the second part, we’ll move on to creating a Controller, writing a View and then we’ll wrap it all up.
I’m going to skim over a lot of stuff, but there’ll be links throughout to more detailed explanations, and at the end of the second part some places where you can follow up after reading this tutorial.
Things You’ll Want to Know
To get started, it’s important to understand that Rails is built on MVC architecture; that is, Model–View–Controller.
Models are responsible for handling data storage and the business logic. Views are responsible for the layer that the user deals with. Controllers act as the bridge between the Models and the Views. In other words, Views generate your HTML, Models handle your database interactions (and any logic based on that data), while Controllers tie the two together, and are where you place logic that controls where the browser is redirected and what the user can do.
Controllers are composed of Actions. Think of an Action as a discrete set of functionality: when you hit the application, Rails will work out the Action to use, based on your request. It is this architecture that helps to write clean, well-structured code that’s nice to work with.
Rails also has several other terms it introduces that it’s helpful for you to know about.
The Router essentially maps a URL to a specific action on a specific Controller, with conditions on requests. It’s how Rails knows, for example, that when you GET /urls, it should call the Index Action on the URL’s Controller class.
Next, Rails has Migrations—essentially, versioned database schema—and a set of tools to make dealing with Migrations simple. These are powerful tools that let you write code that sets up a database without having to manually deal with SQL (and more importantly, making it easy to write code that is reusable across several database engines).
Lastly, Rails uses the concept of Environments. Your Rails application can be running in Development (for when you’re working on code), Test (for running automated tests), and Production (for deploying your applications). You can also create other user-specified Environments, and you can configure your application and database based on those Environments.
Installing Ruby on Rails
The first task we’ll need to do is install a relatively recent version of Ruby (1.8.7 or higher) on your computer. One point to note is that Rails uses a very command-line-heavy set of tools. If you’re uncomfortable working in the Command Prompt on Windows or a terminal in OSX or your Linux distribution of choice, you might want to do some reading up elsewhere beforehand to get the basics down pat. If this is the case, the guides for Windows and OSX/Linux are a good place to start.
Installing Ruby and Rails on Windows
On Windows, the easiest way is to use Rails Installer, a single installer developed by Wayne Seguin that will set you up with everything you need. Just visit the link above and watch Wayne’s walk-through video, and you should have Ruby set up on your machine in no time.
Installing Ruby and Rails on a Mac or Linux
On a Linux or Mac installation, you have the option of using your distribution of choice: Ruby or, as most Ruby developers prefer, Ruby Version Manager, also written by Wayne Seguin. Since both options are liable to change and are relatively specific to distributions, I suggest googling for guides relative to your operation and reading through the RVM site.
Another more recent option, again provided by Wayne Seguin, is the bootstrap_rails_environment script. It sets up RVM and all dependencies to have Rails working for users on OSX or Linux.
To start, you’ll need to download the file at https://github.com/wayneeseguin/rvm/raw/master/contrib/bootstrap_Rails_environment to an easy to remember location on your computer. By default, this script will install Rails 3.0.3, Ruby 1.8.7, and set up a directory in ~/Sites for you. If you wish to change these values, open it up in your text editor of choice and change the lines starting with rails_version, ruby_version and sites_path as you see fit.
Once you’ve downloaded and edited the file, open up your terminal, change into the directory you installed the file and run:
chmod +x bootstrap_rails_environment
./bootstrap_rails_environment
This will first make the script executable, and then execute it. If it encounters any issues, it will let you know and tell you how to resolve them.
Generating Your First Rails Application
Now that you have Rails installed, you need to generate a basic application. Ruby on Rails uses code generation for several tasks, most typically to create a new Rails application, as well as setting up the Controller and models.
First, open up your terminal or command prompt—you’re going to need it a lot from now on. If you used Rails Installer on Windows, make sure you use the “Command Prompt with Ruby and Rails” option from the Start Menu to open it. You’ll want to keep this open while we work through each step, as I’ll refer back to it quite often.
Now, change to the directory where you want to store your code. If you used the Rails bootstrap script, wherever you set sites_path to (by default, ~/Sites) will likely be where you want to be; on Windows you’ll want to choose a place (for example, c:rails-projects) that’s easy to remember and navigate to.
Once in the directory, use the rails new command to generate a new Rails application. Since our application is called “Shorty,” to generate a Shorty project and go into it, we’ll run the following in our command prompt:
rails new shorty
cd shorty
You’ll also want to open your editor of choice inside the code directory. If you don’t have a favorite editor, or your editor doesn’t fully support Ruby, I can recommend E Text Editor on Windows, TextMate on OSX, or Komodo Edit on Linux.
On the command line again, run bundle install. This tells bundler, a library used by Rails, to fetch and install all the libraries it needs. While that’s running, take the opportunity to look around the generated Rails application.
You may notice looking over the structure of the code that one of the core values of Rails—Convention over Configuration—leads to a structured directory layout for your code. All configuration-related code goes in the config directory, application-specific code goes into the app directory, and so on. For more detail on the structure, look under point 3.2 on the official Rails Getting Started Guide.
One of the files our Rails application generated, config/database.yml, contains environment-specific database connection details. Out of the box, it uses sqlite3, since it’s easy to get started. To create the sqlite3 database file (and start the build in Rails web server), go back to your commond prompt and run:
rake db:create
rails server
The first line invokes the “db:create” task in rake, a tool (like ant, nant or make in other languages) which lets you run little bits of saved code. In this case, the “db:create” task will create our database (if you look in the config/database.yml file, you’ll see it’s going to create a file at db/development.sqlite3).
The second line then starts up the built-in web server that ships with Rails, running it on port 3000. On the command line, you should see something similar to:
=> Booting WEBrick
=> Rails 3.0.3 application starting in development on http://0.0.0.0:3000
=> Call with -d to detach
=> Ctrl-C to shutdown server
Now, if you open your browser and point it to http://localhost:3000/, you should now see a welcome page like this:
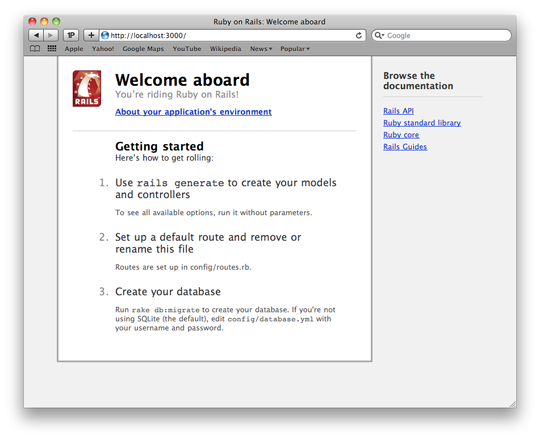
Clicking the “About your application’s environment” link will also show a list of version numbers for the different libraries Rails is built on.
Creating Your First Model
Now that we have an empty Rails application up and running, we can start developing Shorty.
Since we’re building a URL shortener, we need some way to store a record of URLs. To do this, we will generate a URL Model with a single specified field: url.
To start, we’ll use Rails generators to generate the Class and Migration for us by running the following at the command line once:
rails generate model Url url:string
This tells Rails to create a URL class for the Model, create a Migration that will form the url’s table with a single developer-specified field, url, and associated test files.
In this tutorial, we won’t cover testing, as that is a very in-depth topic. Suffice to say in real applications testing is a very good idea, and Rails makes test-driven development as simple as possible. For more details on Testing, look at the Unit testing your Models section in the official Rails guides.
Next, you’ll want to use your text editor to open up the app/models/urls.rb file that contains your URL model and the generated Migration file (inside the db/migrate folder, it will be automatically named with a timestamp followed by _create_urls.rb; for example, db/migrate/20110129184226_create_urls.rb).
The Migration should look similar to this:
class CreateUrls < ActiveRecord::Migration
  def self.up
    create_table :urls do |t|
      t.string :url
      t.timestamps
    end
  end

  def self.down
    drop_table :urls
  end
end
And your Model should look like this:
class Url < ActiveRecord::Base
end
Editing Your Migration
The Migration tells Rails that when it is applied, it should create the Urls table with a URL field (of type string, typically translating to a VARCHAR in most databases), and with two timestamp fields—created_at and updated_at—which Rails automatically sets for you as you create and update Models. Likewise, when it’s rolled back, your Migration tells Rails to drop the Urls table.
The only aspect we’ll want to change in this Migration is to tell the database not allow null URL fields. In your text editor, go to the Migration file and change:
t.string :urlto
t.string :url, :null => falseSave the file. Now, to apply your migration to the database, you simply need to switch back to the console and run:
rake db:migrateRails is smart enough to know that you only need to run the migration once. If you run the same command twice, it won’t attempt to create the table twice, hence the versioned database term I used earlier.
Editing the Model
Next, we’ll want to edit our Model to tell Rails that when we create or update a URL, there should always be a URL given. In Rails terminology, we use validations; specifically, we validate the presence of the URL field. To do this, we simply edit our Model file (as mentioned above) to look like:
class Url < ActiveRecord::Base
  validates :url, :presence => true
end
Don’t forget to save the file. For more information on validators (and ActiveRecord in general), a good reference is, as usual, the official Rails Guides.
To test this out, we’re going to introduce another tool: the Rails console. Built on IRb (interactive Ruby) it’s what is a called a REPL: a read–eval–print loop. Essentially, it’s like a terminal session specifically for testing out Ruby code. In it, we can type code (read) and it will run it (eval), outputting the return value (print).
From the command line, simply type Rails console in your terminal; this will open up the Rails console using the development environment. As a simple example, if you type in puts Rails.env, the console should print out “development,” telling you the console is running in your development environment as expected.
To test out your Model, we first initialize a new URL instance by typing:
u = Url.newThis should show:
#<Url id: nil, url: nil, created_at: nil, updated_at: nil>Next, try to save it to the database by running:
u.saveSince it isn’t valid, the console will output false. This means that the save call failed and our object wasn’t saved to the database as it was invalid. To fix this, we have two options. First, we can create a new URL by passing in the option:
u = Url.new(:url => "http://google.com/")Or, more simply, we can set the URL attribute on the existing URL:
u.url = "http://google.com/"Now, run u.save again and this time it will return true, telling us it was successfully saved to the database.
If we type p u (the p method will simply print a representation of the object given as an argument, u), we should see:
#<Url id: 1, url: "http://google.com/", created_at: "2011-01-29 19:07:34", updated_at: "2011-01-29 19:07:34">As mentioned before, it was automatically assigned an id, and also set the created_at and updated_at fields to have the correct value: the time it was created.
To test finding the record from the database, close the console (either press Ctrl-C or type exit), then reopen the console by typing Rails console and run:
u = Url.find 1This should return the URL we inserted before by fetching it from the database using our id. Along the same lines, if we now try:
u = Url.find 100000Where there is no URL with the id 100000, Rails will raise an ActiveRecord::RecordNotFound exception in Rails telling us it can’t find a URL with the id of 100000.
So now you’ve installed Ruby, generated your first application and created your first Model. In the second part of this tutorial, you will create your first Controller, write the View for your application and get it all working.
Go to Part 2.
?
 Darcy Laycock
Darcy Laycock is a web application developer from Perth, Western Australia. By day, he writes code for The Frontier Group and by night he's a Code Monkey for Youth Tree (A youth-oriented organisation) from Perth and avid contributor to open source ruby projects.


