In the first part of this tutorial we created most of the User Interface. Now we will create its logic.
Implementing functionality
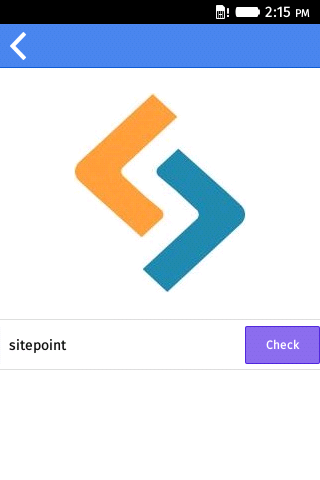
We want to know if the user entered the right name of the logo. In templates/logo.html view, delete the previous div that contained input field and the button, and replace it with this:
<div class="item item-input">
    <input type="text" name="logoName" ng-model="logo_name">
    <button class="button button-small button-royal" ng-click="check(logo_name)">
        Check
    </button>
</div>
The UI won’t change, but this code makes sure that whatever the user types into the field passes to the function check() in the controller. So we now implement this function, by appending this code at the end of LogoCtrl controller:
//check if the logo name is found
$scope.check = function(name) {
    if ( angular.isDefined(name)
        && name.toUpperCase() == $scope.logo.name.toUpperCase() )
    {
        localStorage[$scope.logo.name] = true;
        alert("Correct!");
        history.back(-1);
    }
}
When the user enters the correct name of the logo, then a variable is stored into the Local Storage that allows us to check its value later.
You may experience some issues with the on screen keyboard in the Firefox OS emulator. If so, try hitting backspace before typing, or if you’re lucky, get hold of a real device!
When the user clicks a logo they’ve already played, we don’t want him to see the same ‘input logo name’ view. So we add the $location dependency to the LogoCtrl controller and this code right after img.attr('src',$scope.logo.img); at the end of $http.get():
//this logo has been seen  before
if (localStorage[$scope.logo.name]) {
    $location.path('/level/'+ $scope.lvl.id +'/logo-found/'+$scope.logo.id);
}
But we didn’t create this app state in the first place, so we create it now, by adding this state:
state('logo-found', {
    url         : '/level/:levelId/logo-found/:logoId',
    templateUrl : 'templates/logo-found.html',
    controller  : 'LogoCtrl'
})
in the app.config. Create templates/logo-found.html file with this source code:
<ion-pane>
  <ion-header-bar class="bar-positive">
    <a ng-href="#/level/{{lvl.id}}">
    <button class="button icon-left ion-chevron-left button-clear button-white">
    </button></a>
  </ion-header-bar>

  <ion-content class="content">

    <div class="logo">
      <img src="" alt="{{logo.img}}" id="logo-img">
    </div>

    <h2>{{logo.name}}</h2>
  </ion-content>
</ion-pane>
Whenever the user clicks a logo that was found before, the app will redirect him to the templates/logo-found.html view.

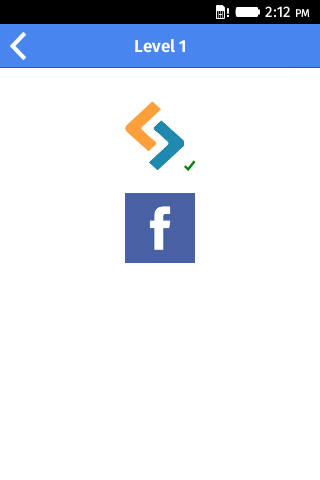
We are almost finished. All that’s left is finding a way of telling the user which logos have already been played without clicking the logo. We can do this by adding a tick at the corner of every played logo.
To achieve this, we should change a small piece of code inside the LevelCtrl controller. The part of code that made it possible to load the logo list for the level:
for (var i=0;i<$scope.lvl.content.logos.length;i++) {
    var currLogo = $scope.lvl.content.logos[i];

    cnt += '<li>'+
        '<a href="#/level/'+$scope.levelId+'/logo/'+currLogo.id+'">' +
        '<img src="'+currLogo.img+'" class="logo-img">'+
        '</a>'+
        '</li>';
}
should be changed to this:
for (var i=0;i<$scope.lvl.content.logos.length;i++) {
    var currLogo = $scope.lvl.content.logos[i];

    if (localStorage[currLogo.name]) {
        cnt += '<li>'+
            '<a href="#/level/'+$scope.levelId+'/logo/'+currLogo.id+'">' +
            '<img src="'+currLogo.img+'" class="logo-img logo-found">'+
            '<i class="ion-checkmark"></i>' +
            '</a>'+
            '</li>';
    } else {

        cnt += '<li>'+
            '<a href="#/level/'+$scope.levelId+'/logo/'+currLogo.id+'">' +
            '<img src="'+currLogo.img+'" class="logo-img">'+
            '</a>'+
            '</li>';
    }
}
Why? Because the second piece of code has the ability to tell which logo was previously played. To these logos, it adds the logo-found class, changes the state to which the application will move when this logo is clicked and also adds an icon. So let’s make the final CSS edit, by appending this to the css/style.css:
.ion-checkmark {
    color: green;
}
What next?
Even though the application works, it has only two levels and two logos per each level. It is now up to you to add many more levels and logos per level. To do this, you must add a new level (or logo) into the data/levels.json file. Levels should be specified by a unique id, the level name (Level {id}) and its contents. The contents is an object with 2 properties:
logo_num(the number of logos in the level) andlogos, an array of logos.
Logos are also objects with 3 properties:
1. Unique id of the logo
2. The name of the logo and
3. img, which holds the url of the logo image.
{
    "id"        : 1,
    "name"      : "Level 1",
    "content"   : {
        "logo_num"  : 2,
        "logos"     : [
            {
                "id"    : "sitepoint",
                "name"  : "Sitepoint",
                "img"   : "img/lvl1/sitepoint.jpg"
            },
            {
                "id"    : "fb",
                "name"  : "Facebook",
                "img"   : "img/lvl1/fb.png"
            }
        ]
    }
}
The design of the game could also be improved. Take a look at Ionic components. You might find a few useful things that you could use for a better design.
Conclusion
We created yet another logo game. There are plenty of them on other platforms (I’ve got four of them on my Android phone) but only one in the Firefox OS Marketplace.
After following this tutorial, I hope I gave you a good introduction to developing games for a new, growing platform like Firefox OS. Developing Firefox OS apps is as simple as HTML5 coding, so everyone can (and should) do it. Remember, you can find this source code on GitHub. Feel free to fork it, play with it, and then submit your (maybe first) Firefox OS game to the Firefox OS Marketplace.
 Aldo Ziflaj
Aldo is a Code-Lover and a student of Computer Engineering from Albania. His short-term goal is that of becoming a full-stack developer, focusing on Android, Ruby technologies and DevOps techniques.