Creating Custom Endpoints for the WordPress REST API


This WordPress REST API tutorial walks you through creating a custom WP-API endpoint. We’ll first create a child theme of the default “Twenty Seventeen” theme, which will allow us to add functionality to our theme, and then proceed to register our custom API endpoint.
The WordPress REST API provides you with more than just a set of built-in routes. You can also create custom routes and endpoints using the same APIs used to create default routes (for example, the register_rest_route() function and the WP_Rest_Controller class etc.). With WP-API, you’ll have the possibility to integrate WordPress with other ecosystems, which makes WordPress a powerful and modern application development platform.
You can create or register custom endpoints either in plugins or themes.
Key Takeaways
- Custom endpoints for the WordPress REST API can be created to integrate WordPress with other ecosystems, making it a powerful application development platform.
- Custom endpoints can be created or registered in plugins or themes, and can be done by creating a child theme of the default theme to add functionality.
- The WordPress REST API allows for the creation of custom routes and endpoints using the same APIs used to create default routes, such as the register_rest_route() function and the WP_Rest_Controller class.
- For more complex endpoints, it’s recommended to use the controller pattern by extending the built-in WP_REST_Controller class, which implements the base functionality needed for handling HTTP requests.
- The WordPress REST API is language-agnostic, meaning it can be used with any programming language that can send HTTP requests and handle HTTP responses.
Creating a Child Theme
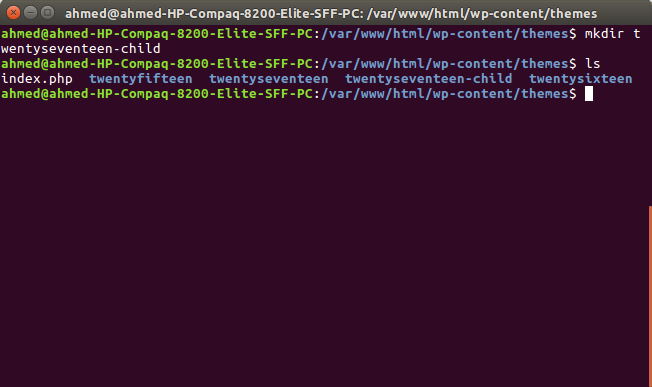
Inside your WordPress installation folder, create a folder for your child theme. Let’s call it twentyseventeen-child:
cd /var/www/html/wp-content/themes
mkdir twentyseventeen-child
Next create a style.css file:
touch style.css
And add the following header information:
/*
 Theme Name:  Twenty Seventeen Child Theme
 description: A child theme of the Twenty Seventeen WordPress theme
 Author:       Ahmed Bouchefra
 Template:     twentyseventeen
 Version:      1.0.0
*/
The Template field refers to the folder’s name of the parent theme.
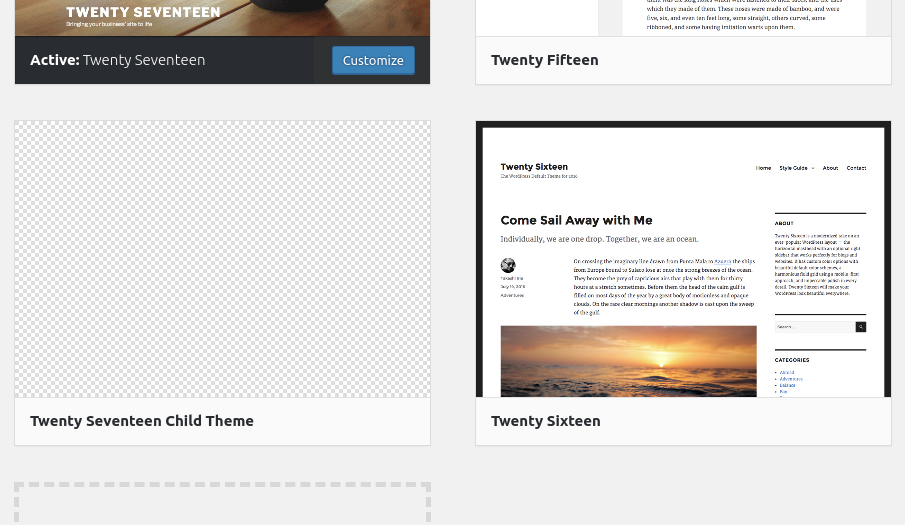
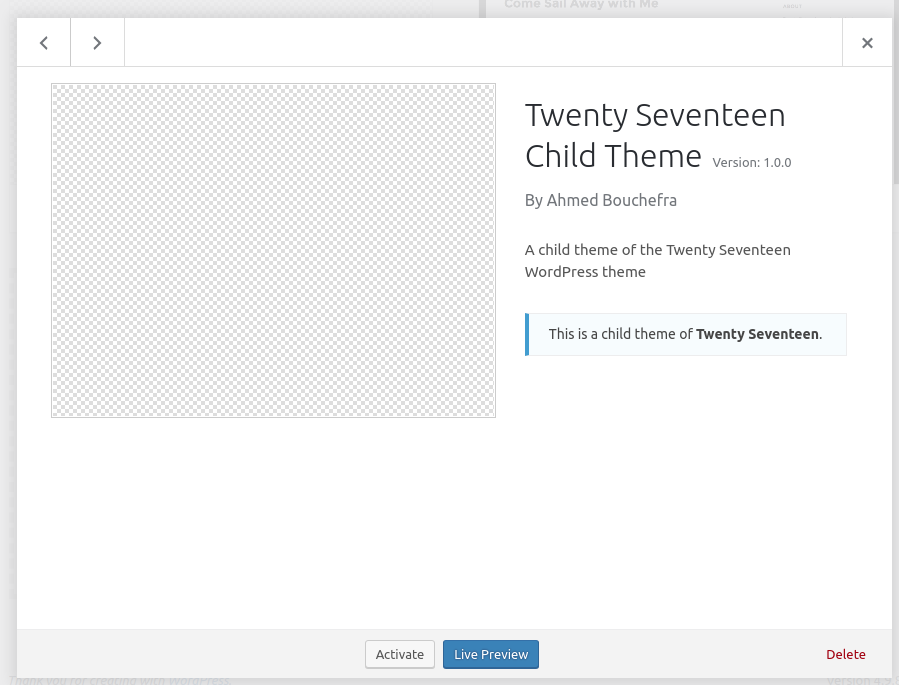
Go to Appearance -> Themes in the WordPress admin and choose your child theme:
Next, click on the Activate button to activate your child theme:
Inside the theme folder, add a functions.php file with the following initial code:
<?php
// Add code here.
Creating a Custom WP-API Endpoint
We want to create a new route that will allow us to retrieve the latest recent posts by category ID with the following format:
http://localhost/wp-json/mytwentyseventeentheme/v1/latest-posts/<CATEGORY_ID>
At this point, if we visit the above URL in our browser we’ll get a 404 error with the message “No route was found matching the URL and request method”:

This is because we don’t actually have that route. Let’s change that!
In the functions.php file of your theme, add the following code:
add_action('rest_api_init', function () {
  register_rest_route( 'mytwentyseventeentheme/v1', 'latest-posts/(?P<category_id>\d+)',array(
                'methods'  => 'GET',
                'callback' => 'get_latest_posts_by_category'
      ));
});
We’re using the register_rest_route() with the following parameters:
- a namespace,
mytwentyseventeentheme/v1 - a resource path with a regex for catching the category ID,
latest-posts/(?P<category_id>\d+) - an option array where we specify the GET method and a
get_latest_posts_by_category()callback function that handles the request.
A namespace allows two plugins or themes to use the same route paths without conflict and the clients to detect the support for your custom API by simply using the /wp-json/wp/v2 API and checking the namespaces field.
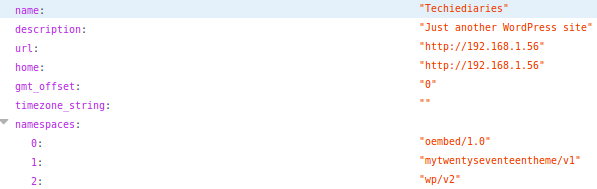
You can see from the screenshot, the mytwentyseventeentheme/v1 namespace we used for our custom route is added to the namespaces field (this screenshot is taken after we fully implement our custom endpoint; please continue below).
Notice the ?P<category_id>\d+ part. It will enable us to retrieve the category ID from the current request. It’s simply a regex, so you can use normal regex logic to create any pattern.
Implementing the Callback Function
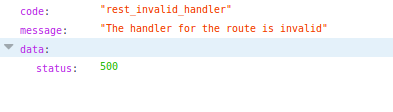
At this point, if we visit our previous URL, WordPress recognizes the route, since we’ve defined it. But we still get a 500 error with the “The handler for the route is invalid” message.

After registering the custom route and specifying the get_latest_posts_by_category() function as the callback that will be called for processing and handling the GET request, let’s actually implement it:
function get_latest_posts_by_category($request) {

    $args = array(
            'category' => $request['category_id']
    );

    $posts = get_posts($args);
    if (empty($posts)) {
    return new WP_Error( 'empty_category', 'there is no post in this category', array('status' => 404) );

    }

    $response = new WP_REST_Response($posts);
    $response->set_status(200);

    return $response;
}
We first retrieve the category_id argument from the $request parameter by direct access. Next we create an $args array with the category key set to the value of category_id that will be extracted from the route.
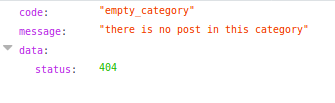
We then call the get_posts() method to query for posts with the specified category ID. If we get an empty posts array, we return an error message comprised of an empy_category code, a there is no post in this category message and 404 status code — all of which are passed to the constructor of the WP_Error class.
This is a screenshot we get if we have an empty category:
We finally create a new instance of the WP_REST_Response class; we pass in the $posts array; we set the 200 status code; and we return the REST response. We can also directly return the $posts array and it will be automatically converted to JSON.
The WP_Error and WP_REST_Response classes are used to make sure that the endpoint returns a valid JSON response.
Now, if we return to our browser and visit for example this URL:
http://<YOUR_SITE_DOMAIN>/wp-json/mytwentyseventeentheme/v1/latest-posts/1
… we’ll either get an empty array or the posts belonging to the category of ID 1.
You can also provide sanitization and validation callbacks in addition to your main callback.
You can define arguments for each route as an array with the args option just like the callback option. In the array, you can add multiple arguments. The key is the name of the argument and the value is an array of options for that argument, such as sanitize_callback or validate_callback.
validate_callbackis a callback function to validate the argument. It takes a function that will be passed the value of the argument and should return true if the value is valid or false otherwise.sanitize_callbackis a callback function used for sanitizing the value of the argument before passing it to the maincallbackfunction. The value is passed as a parameter to this function.
Sanitizing and Validating Endpoint Parameters
You can validate the parameters passed to the endpoint — in our case the category ID — using the validate_callback() function:
'args' => [
  'category_id' => array(
      'validate_callback' => function($value, $request, $param) {
              return $value >= 6;
      })
]
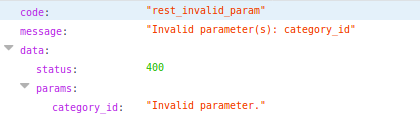
The parameter is the first argument passed to the callback. We use the $value >= 6 expression to check whether the passed category ID is greater or equal to six. If we pass a value less than six, an Invalid parameter(s): category_id error will be thrown.
Sanitization allows you to clean the parameters. For sanitizing data, you need to use the sanitize_callback() function in the following way:
'args' => [
    'category_id' => array(
      'sanitize_callback' => function($value, $request, $param) {
              if($value < 6){
         return 6;
    };
      })
],
If the category ID is less than six, we simply return six. This way, we make sure we only get an acceptable value event if the client passes a value not supported by the API. This example is a little bit artificial, since we don’t actually have any need to restrict the category ID to be greater or equal six, but just for the sake of demonstrating the two callback functions.
The validation callback will take precedence over the sanitization callback. For our example, if you use both callbacks and you submit an invalid value (<6) for the category ID, you’ll get the Invalid parameter(s): category_id error, which won’t give the sanitize_callback() the chance to be fired and to sanitize the data.
Please note that you may not need to add any validation or sanitization, because the regex pattern you use in the route can be enough. For example, in our case the ?P<category_id>\d+ defines an URL that only accepts positive numbers. Any other input will throw “The handler for the route is invalid” error.
Restricting Access to Endpoints
You can restrict access to endpoints using the permission_callback() function, which checks if the user has the required permission to do the action before the main handler callback is called. This enables you to tell the client what actions they are able to do on a specific URL without needing to attempt the request first.
The permission_callback() function should return a true or false value or an instance of the WP_Error class.
You simply need to pass the permission_callback to the register_rest_route() function, which enables you to add permissions that control access to the endpoint. For example:
add_action('rest_api_init', function () {

  register_rest_route( 'mytwentyseventeentheme/v1', 'latest-posts/(?P<category_id>\d+)',array(

      'methods'  => 'GET',
      'callback' => 'get_latest_posts_by_category',
      'permission_callback' => function() {
          return current_user_can('edit_posts');
      }

  ));

});
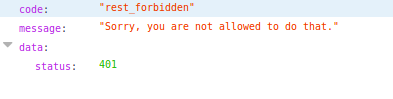
The permissions callback is calling the current_user_can() function to check if the user is authenticated and has the required capability (edit_posts) to do the action. So if the client is not authenticated, an error will be thrown.
If you don’t have the permissions, you’ll get a rest_forbidden error:
We can also just return true from the permission_callback function to allow access to everyone without any authentication.
Using the Controller Pattern
For working with complex endpoints, it’s recommended to use the controller pattern instead of defining custom routes in the way we’ve seen in the previous example.
The controller pattern simply involves extending the built-in WP_REST_Controller class, which implements the base functionality needed for handling HTTP requests and allows you to take benefit of a robust code, with best practices, used by the built-in WP-API endpoints
Using the controller pattern, you need to use the register_routes() method to register your custom routes and the get_items() , get_item(), create_item(),update_item() and delete_item() methods to implement the GET, POST, PUT and DELETE requests.
Let’s now see a simple example by converting our previous example to use the controller pattern. In the functions.php file add:
class Latest_Posts_Controller extends WP_REST_Controller {}
Next, you need to implement the register_routes() method where you would register your routes:
class Latest_Posts_Controller extends WP_REST_Controller {
  public function register_routes() {
    $namespace = 'mytwentyseventeentheme/v1';
    $path = 'latest-posts/(?P<category_id>\d+)';

    register_rest_route( $namespace, '/' . $path, [
      array(
        'methods'             => 'GET',
        'callback'            => array( $this, 'get_items' ),
        'permission_callback' => array( $this, 'get_items_permissions_check' )
            ),

        ]);
    }
}
We simply call the built-in register_rest_route() method to register a route for a GET request.
You need to override the get_items_permissions_check() and get_items() methods in you controller:
  public function get_items_permissions_check($request) {
    return true;
  }
This method checks for the required permissions for the route. We simply return true to let everyone access the route.
Next, we override the get_items() method:
  public function get_items($request) {

    $args = array(
            'category' => $request['category_id']
    );

    $posts = get_posts($args);


    if (empty($posts)) {

            return new WP_Error( 'empty_category', 'there is no post in this category', array( 'status' => 404 ) );
    }
    return new WP_REST_Response($posts, 200);
  }
This method is nearly the same as our previous get_latest_posts_by_category() function.
That’s it! These are the two methods that we need to override in our example. In more complex scenarios, you’d need to override the other methods to create a fully working CRUD system — that is, the create_item(), update_item(), delete_item() and get_item() methods.
Finally, we need to create an instance of our Latest_Posts_Controller class and call its register_routes() method in a rest_api_init action hook:
add_action('rest_api_init', function () {
     $latest_posts_controller = new Latest_Posts_Controller();
    $latest_posts_controller->register_routes();
}
In this simple example, the controller pattern may not seem very useful, but for more complex scenarios — for example, when you have a custom post type and you need to provide a custom RESTful API to read, create, update and delete items with multiple routes and endpoints — you would benefit from the OOP concepts and the controller pattern to better organize your code and take advantage of the existing classes.
Conclusion
In this tutorial, we’ve seen how to create your own custom route(s) for WP-API. This will allow you to create mobile and web clients for your WordPress website that can also interact with your custom post types, not just the built-in WordPress types (such as posts and categories etc.).
Frequently Asked Questions (FAQs) about Creating Custom Endpoints for the WordPress REST API
What is the WordPress REST API and why is it important?
The WordPress REST API is a feature of WordPress that provides a standardized way of interacting with the content and features of a WordPress site programmatically, i.e., through code rather than through the WordPress admin interface. It is important because it opens up a wide range of possibilities for developers to create custom applications, plugins, and themes that interact with WordPress in new and innovative ways. It also makes WordPress more accessible to developers who are familiar with JavaScript and other programming languages, but not necessarily with PHP, the language that WordPress is built on.
How do I create a custom endpoint in the WordPress REST API?
Creating a custom endpoint in the WordPress REST API involves registering a new route with the API. This is done using the register_rest_route() function, which is part of the WordPress REST API. This function takes three parameters: the namespace for the route, the route itself, and an array of arguments that define how the route should behave. These arguments can specify the methods that the route supports (GET, POST, etc.), the callback function that should be used to handle requests to the route, and other options.
What are some use cases for creating custom endpoints in the WordPress REST API?
There are many potential use cases for creating custom endpoints in the WordPress REST API. For example, you might create a custom endpoint to expose data from a custom post type or custom fields that are not included in the default WordPress REST API endpoints. You could also create a custom endpoint to handle form submissions, to create a custom search feature, or to provide an API for a mobile app or other external application that interacts with your WordPress site.
Can I secure my custom endpoints in the WordPress REST API?
Yes, you can secure your custom endpoints in the WordPress REST API using a variety of methods. One common method is to require authentication for certain endpoints. This can be done using the permission_callback argument when registering a route. This argument should be a function that checks whether the current user has the necessary permissions to access the endpoint.
How can I test my custom endpoints in the WordPress REST API?
There are several ways to test your custom endpoints in the WordPress REST API. One common method is to use a tool like Postman or Insomnia, which allow you to send HTTP requests to your endpoints and view the responses. You can also use the built-in WordPress REST API console, which is accessible from the WordPress admin interface.
Can I modify the behavior of existing endpoints in the WordPress REST API?
Yes, you can modify the behavior of existing endpoints in the WordPress REST API using filters and actions, which are part of the WordPress plugin API. For example, you can use the rest_prepare_post filter to modify the data that is returned when a post is retrieved via the REST API.
What are some common challenges when working with the WordPress REST API and how can I overcome them?
Some common challenges when working with the WordPress REST API include dealing with authentication, handling errors, and ensuring that your endpoints are secure. These challenges can be overcome by familiarizing yourself with the WordPress REST API documentation, using tools like Postman or Insomnia to test your endpoints, and following best practices for API development.
Can I use the WordPress REST API with other programming languages?
Yes, the WordPress REST API is language-agnostic, which means it can be used with any programming language that can send HTTP requests and handle HTTP responses. This includes JavaScript, Python, Ruby, and many others.
How can I debug issues with my custom endpoints in the WordPress REST API?
Debugging issues with your custom endpoints in the WordPress REST API can be done using a variety of tools and techniques. One common method is to use the WordPress debug log, which can be enabled in your wp-config.php file. You can also use PHP’s built-in error logging functions, or a tool like Xdebug.
Where can I find more resources to learn about the WordPress REST API?
There are many resources available to learn about the WordPress REST API. The official WordPress REST API documentation is a great place to start. There are also many tutorials, blog posts, and online courses available on websites like SitePoint, Smashing Magazine, and Udemy.
Ahmed is a technical author and web developer living in Morocco with a Master's degree in software development. He authors technical content about JavaScript, Angular and Ionic. He is also a fan of entrepreneurship, poetry, and teaching. You can contact me on my personal website and read my other articles on Techiediaries.