Using shape layers and a giant pattern, we’re going to make a single image that looks like it has been made from several photographs. It’s fairly quick and easy to do, so let’s get started.
1. Open the image that you want to create the effect on.
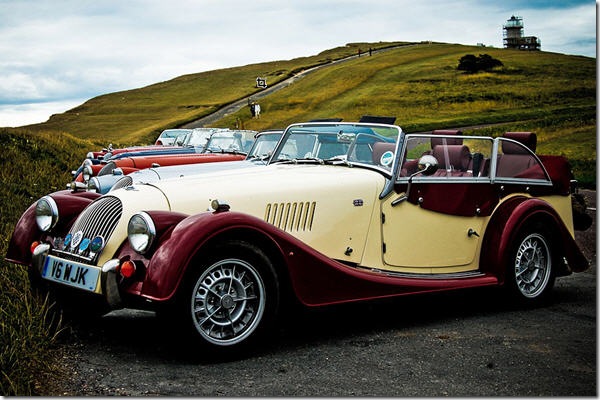 2. Make the whole image a pattern by choosing Edit > Define Pattern and give the pattern a name.
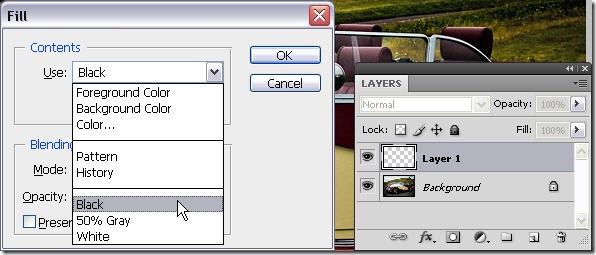
 3. Create a new layer and then press Shift + Backspace (PC) or Shift + Delete (Mac). This opens the Fill dialog. Choose Black from the Use menu and click OK to fill the new layer with black.
 4. On the toolbar, select the Rectangle tool. Then on the Options bar at the top of the screen make sure the Shape Layers icon is selected.
![]() 5. Draw out a rectangle shape on top of the black layer. It doesn’t matter what colour the rectangle is because we’ll be putting a pattern over it.
5. Draw out a rectangle shape on top of the black layer. It doesn’t matter what colour the rectangle is because we’ll be putting a pattern over it.
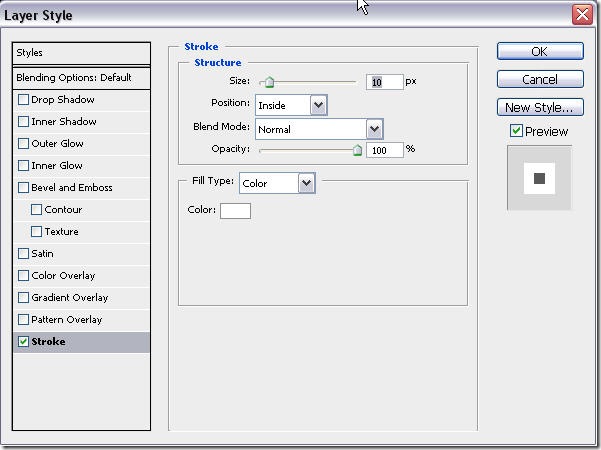
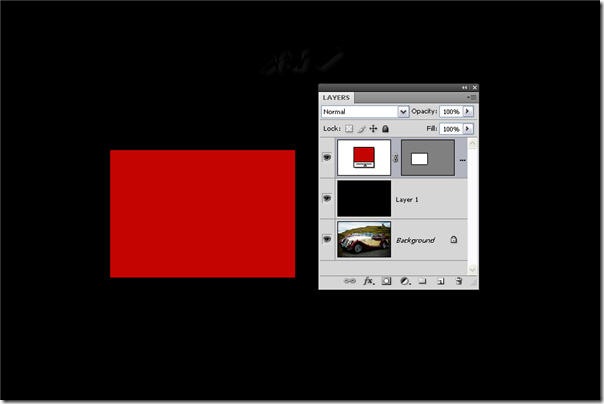 6. Add a Layer Style to the rectangle layer by clicking on the FX button on the bottom of the Layers palette and choosing Stroke. I set the size to 10 pixels, position to Inside and Fill Type Color to white. Don’t click OK yet.
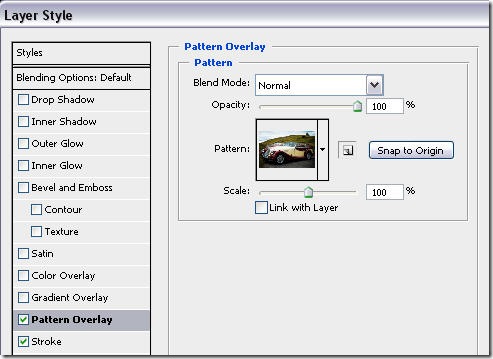
 7. Click on the words Pattern Overlay on the left hand side of the Layer Effects dialog box. Select the pattern that you made in step 2. Press the Snap To Origin button and uncheck “Link with Layer.”
 Click OK and the image should look something like this:
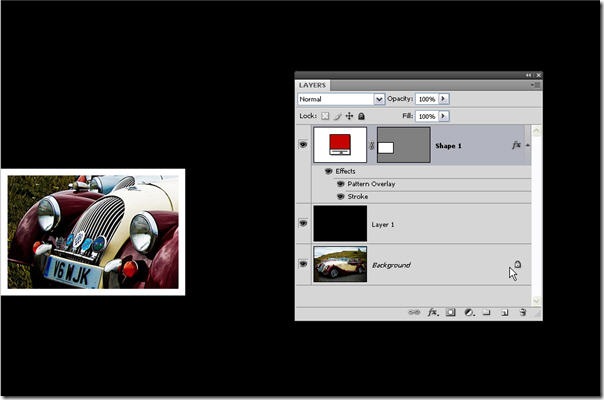 8. If you move the rectangle around the image you’ll see how the pattern stays in position, this is due to the fact we pressed “Snap To Origin” in the last step. Now you can just make duplicates of the first rectangle and scatter them throughout the image. To duplicate the rectangle, make sure the rectangle layer is selected and hit Ctrl + J (PC) or Cmd + J (Mac).
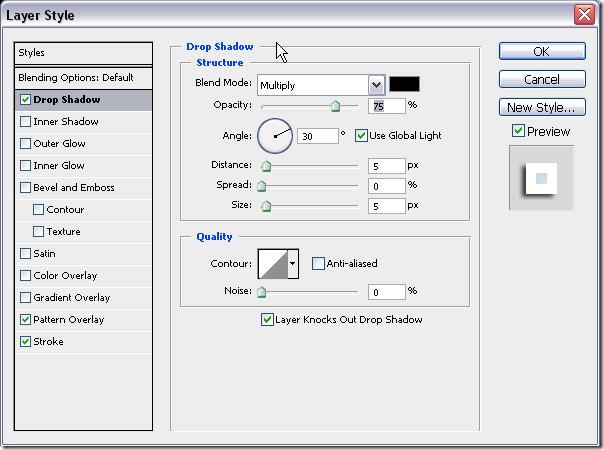
9. Drag the new rectangle to a different part of the image. Rotate the rectangle by choosing Ctrl + T or Cmd + T to free transform the object. After rotation, add a Drop Shadow effect by clicking on the FX button on the Layers palette and choosing Drop Shadow.
 The image should look a little bit like this:
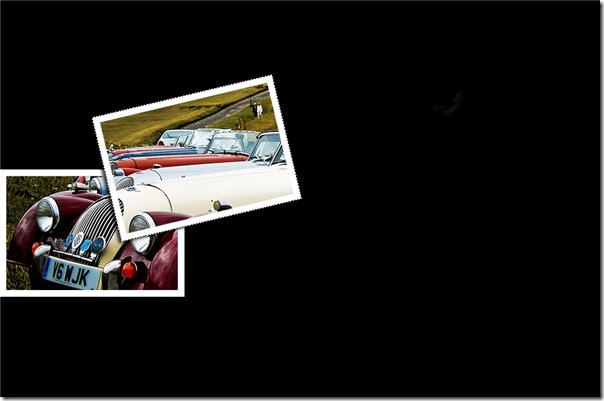 10. Continue duplicating and rotating the rectangles. Add as many rectangles as you want. You won’t need to add the Drop Shadow effect again. It will be duplicated with the layer.
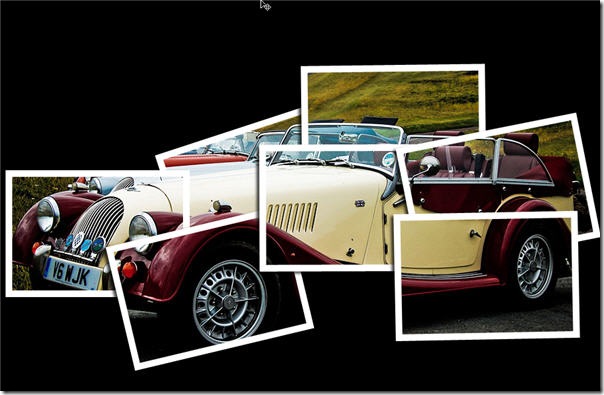 To complete the image you can play around with the stacking order of the rectangles which will change how one “photo” sits on top of another.
And there you have it.
Frequently Asked Questions about Creating a Multiple Photo Collage in Photoshop
How can I create a collage with different shapes in Photoshop?
Creating a collage with different shapes in Photoshop is a creative way to display your photos. Start by opening a new document and setting your desired dimensions. Then, select the Custom Shape Tool from the toolbar. In the options bar, click on the shape dropdown menu and select your desired shape. Draw your shape on the document. To add an image to the shape, go to File > Place Embedded and select your image. Resize and position the image as needed, then right-click on the image layer and select Create Clipping Mask. Repeat these steps for each shape in your collage.
Can I add text to my photo collage in Photoshop?
Yes, you can add text to your photo collage in Photoshop. Select the Text Tool from the toolbar, click on your document where you want the text to appear, and start typing. You can adjust the font, size, color, and other text properties in the options bar.
How can I create a collage with a specific theme in Photoshop?
Creating a themed collage in Photoshop can be achieved by carefully selecting images that fit your theme and arranging them in a visually pleasing way. You can also use Photoshop’s tools and effects to enhance the theme, such as applying a color overlay to give all the images a unified color scheme, or adding themed shapes or text.
How can I save and print my photo collage in Photoshop?
Once you’re satisfied with your collage, go to File > Save As to save your collage. Choose a format that suits your needs, such as JPEG for online sharing or TIFF for printing. To print your collage, go to File > Print, adjust your print settings as needed, and click Print.
Can I create a collage with transparent background in Photoshop?
Yes, you can create a collage with a transparent background in Photoshop. When creating a new document, set the Background Contents to Transparent. When you save your collage, choose a format that supports transparency, such as PNG.
How can I add borders to the images in my collage in Photoshop?
To add borders to your images, select the image layer, then go to Layer > Layer Style > Stroke. Adjust the size, color, and position of the stroke to create a border.
Can I edit the images in my collage in Photoshop?
Yes, you can edit the images in your collage using Photoshop’s wide range of editing tools. You can adjust the color, brightness, contrast, and more, or apply filters and effects to enhance your images.
How can I arrange the images in my collage in Photoshop?
You can arrange the images in your collage by selecting the image layer and using the Move Tool to position the image. You can also use the Free Transform command (Edit > Free Transform) to resize and rotate the image.
Can I create a collage with images of different sizes in Photoshop?
Yes, you can create a collage with images of different sizes. You can resize the images using the Free Transform command, or crop them to your desired size using the Crop Tool.
How can I create a collage with a specific number of images in Photoshop?
You can create a collage with a specific number of images by planning your layout ahead of time. Open a new document and use the Rectangle Tool to draw placeholders for each image. Then, replace each placeholder with an image using the Place Embedded command.
Jennifer Farley is a designer, illustrator and design instructor based in Ireland. She writes about design and illustration on her blog at Laughing Lion Design.
