

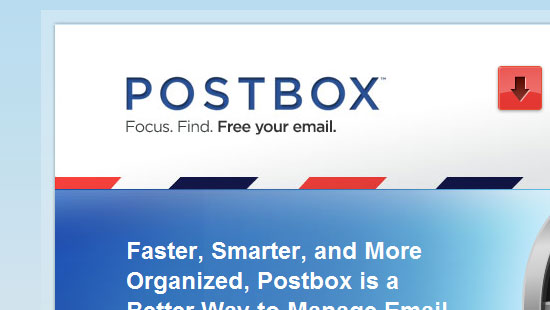
 The inset or letterpress look has been popular on the web for a while now. The logo on the Postbox site is just one example of the use of this style on the web. The effect is really easy to create and a handy one to have in your design toolbox.
The inset can look stylish, but moderation is the key. The point of this tutorial is not just to show you how to do this particular effect, but also as a starting point to creating and saving your own styles. So here’s how to create the inset or letterpress effect in Photoshop.
1. Create a new Photoshop document, 300 x 150 pixels, with a background color of blue-green #669999.

2. Using the Type tool (T), add some text to your document. I’m going to use a serif-font to give it a more of an old-style look, but this works with almost any type of font. The Postbox site uses a sans-serif font. The font here is Times New Roman, bold, size 115pt.

3. Now we’ll add the effects to make it look like the type has been pressed into paper (or the screen).
Make sure the type layer is selected, and then click on the layer styles button at the bottom of the layers palette. From the drop-down menu, choose Inner Shadow.
Set distance to 1 px, Size to 4px. You can leave the shadow color as black if you want, or for a slightly more subtle effect choose a dark green. I set the shadow color here to #002727. This effect works well with many blending modes, including Normal, but I liked how it looked when set to Linear Light. Finally set the Opacity to about 50%. Don’t click OK yet.

4. To finish off this simple effect, we’ll add a thin blue-green stroke around the type. The stroke color should be slightly lighter than the background color.
Still inside the Layer Style dialog box, click on the word Stroke on the left hand side. Set the size to 1 pixel, Opacity of 60% and Color set to #66cccc.

Your type should now look something like this.

And that’s all there is to it. You can vary the apparent depth of the inset by changing the Size in the Inner Shadow options.
Now before you click OK on the Layer Style dialog box, you can save this style and reuse again whenever you want. To save the style for future use. Click the New Style button. Give your style a name and check the Include Layer Effects and Include Layer Blending Options boxes and click OK.

Your style is now saved. Now you can click OK on the Layer Style dialog box. When you want to use it again, just open the Styles palette by choosing Window > Styles and you’ll see your style in the palette. Click on it to apply it to the currently selected layer.
Frequently Asked Questions about Creating Inset Style Type in Photoshop
What is the Inset Style Type in Photoshop?
The Inset Style Type in Photoshop is a design technique that gives text or an object a recessed or embossed look, making it appear as if it’s been pushed into the background. This effect is achieved by using a combination of layer styles such as Inner Shadow, Inner Glow, and Bevel and Emboss. It’s a popular technique used in graphic design to add depth and dimension to otherwise flat elements.
How can I adjust the depth of the Inset Style?
The depth of the Inset Style can be adjusted by modifying the settings of the Inner Shadow layer style. The ‘Distance’ parameter controls how far the shadow extends from the text, while the ‘Size’ parameter controls the softness of the shadow’s edge. By adjusting these settings, you can create a more subtle or more pronounced inset effect.
Can I apply the Inset Style to shapes as well as text?
Yes, the Inset Style can be applied to any layer in Photoshop, not just text layers. This includes shape layers, which can be given an inset effect to create the appearance of a button or other interactive element.
Why is my Inset Style not showing up on my text?
If your Inset Style isn’t visible, it could be due to a few reasons. One possibility is that the color of your text is too similar to the color of your background, making the effect hard to see. Another possibility is that your Inner Shadow settings are too subtle. Try increasing the ‘Opacity’, ‘Distance’, or ‘Size’ parameters to make the effect more pronounced.
How can I save my Inset Style to use it again later?
Once you’ve created an Inset Style that you’re happy with, you can save it as a custom layer style for future use. To do this, click on the ‘Styles’ panel, then click on the ‘New Style’ button. Give your style a name, and make sure the ‘Include Layer Effects’ box is checked. Your style will then be available in the ‘Styles’ panel whenever you need it.
Can I apply multiple layer styles to create a more complex Inset Style?
Yes, you can combine multiple layer styles to create a more complex Inset Style. For example, you could add a Gradient Overlay to give your text a metallic look, or an Outer Glow to create a neon effect. The possibilities are endless, and experimenting with different combinations of layer styles is a great way to create unique designs.
How can I create a sharper Inset Style?
To create a sharper Inset Style, you can decrease the ‘Size’ parameter in the Inner Shadow settings. This will make the shadow’s edge more defined, resulting in a sharper appearance. Alternatively, you could increase the ‘Choke’ parameter, which will also make the shadow’s edge more pronounced.
Can I use the Inset Style in other Adobe programs?
While the specific process for creating an Inset Style may vary between programs, the basic principles remain the same. Programs like Adobe Illustrator and Adobe After Effects also have layer style features that can be used to create an Inset Style.
How can I make my Inset Style look more realistic?
To make your Inset Style look more realistic, you can add a texture to your text. This can be done by using the ‘Pattern Overlay’ layer style. Choose a texture that matches the material you’re trying to emulate, such as metal or wood, and adjust the ‘Scale’ and ‘Depth’ parameters to achieve the desired effect.
Can I animate my Inset Style text?
Yes, you can animate your Inset Style text using Photoshop’s animation features. You could, for example, create a hover effect by animating the Inner Shadow settings, or make your text appear to press down when clicked by animating the Bevel and Emboss settings. This can add an extra level of interactivity to your designs.