
Online shopping is a form of electronic commerce which allows customers to directly buy products or services like e-books, software, and streaming media over the Internet using a web browser. This kind of shopping is a part of our daily lives, used by many well-known sites, such as Amazon, E-bay, or various streaming media/educational sites.
This series will build an online store from scratch. We will learn how to use Rails with some great tools, such as:
- Foundation to design responsive pages
- Redis to store shopping cart items quickly in memory
- Braintree to accept payments and provide premium plan subscriptions.
Let’s get started!
Key Takeaways
- Start with the Basics: Begin by setting up a new Rails project with MySQL and generate a basic movie scaffold for your online store.
- Responsive Design: Utilize the Foundation framework for creating responsive web pages that ensure optimal viewing across various devices.
- User Authentication: Implement user authentication using Devise to allow user registration and login capabilities.
- Shopping Cart Functionality: Develop a shopping cart using Redis to manage cart data efficiently, allowing users to add and remove items dynamically.
- Payment and Subscription Handling: Integrate Braintree for handling payments and managing subscription plans, providing users with options to upgrade or cancel subscriptions.
- Custom Styling: Customize the look and feel of your store using SASS with Foundation, and enhance user interface elements like forms and navigation bars.
Main Features
- Responsive pages: The app will be built using a responsive framework to provide optimal viewing for different devices.
- Shopping cart: Allow users to accumulate a list of items for purchase while navigating the website, then calculate the total of the order before checking out.
- Simple payment scenario: Accept payments from user’s credit cards directly without saving them into your merchant account.
- Save credit card details: Users can associate their credit cards with their accounts so they don’t have to add card details everytime they want to buy something.
- Manage credit cards: Extend payment process features by providing the ability to add and remove credit cards and choose between them when checking out.
- Subscription plans: Provide several subscription plans for users, allowing them to upgrade, downgrade, and cancel said subscriptions.
Skills Needed
- Good experience with Ruby on Rails.
- Intermediate level of HTML/CSS3.
- Basic knowledge of JS/Coffescript & AJAX
- Understanding the concepts of responsive CSS.
- Introductory-level knowledge of Redis, a key-value store.
- Overview of how online payment systems work.
Tools
- Ruby 2.1.0 – Programming language
- Rails – Back-end framework
- Foundation 5 – Front-end css framework
- Devise – User authentication
- Redis – Key-value store
- Braintree – Payment system
Note: The source code is available on this Github repository.
Step 1: Initialize The Project
Create Project
Let’s create a new Rails application and scaffold. We’re using mysql as our database:
$ rails new moviestore -d mysql

$ cd moviestore
Scaffolding
Generate a movie scaffold with some basic model attributes.
$ rails g scaffold movie title release_year:integer price:float description:text imdb_id poster_url --skip-stylesheets
Here we used the --skip-stylesheets option with the scaffold to avoid generating any stylesheets given that we’ll be using Foundation.
Now we can create & migrate our database.
$ rake db:create

$ rake db:migrate
Seeds File
We need some data to work with, so I’ve created a csv file named movies.csv which contains some movies records. I put it under db/seeds_data directory.
We’ll loop through the csv file records so we can load its rows into our database.
require 'csv'

CSV.foreach(Rails.root.join("db/seeds_data/movies.csv"), headers: true) do |row|

  Movie.find_or_create_by(title: row[0], release_year: row[1], price: row[2], description: row[3], imdb_id: row[4], poster_url: row[5])

end
After that, you can run the seeds file using rake:
$ rake db:seed
Routes Configuration
Root Route
For now, make the root route go to the index action of the movies controller:
root 'movies#index'
REST Resources
We don’t need all the endpoints provided by resource, such as create, update, etc. Restrict the available actions to index and show:
resources :movies, only: [:show, :index]
Also, delete all unnecessary files in views and useless code in MoviesController.
Finish Setup
Finally, run rails s and open localhost:3000 in the browser and you’ll see our movies list.
Well done! we just have finished the initial project setup, but the style is lacking. Let’s add some nice style using Zurb Foundation.
Step 2: Responsive Design with Foundation
Foundation is a front-end framework similar to Twitter Bootstrap, it’s built on SASS instead of LESS which can make it easier to integrate it into your Rails application.
Installation
To install Foundation, add this line to the application’s Gemfile:
gem 'foundation-rails'
and then:
$ bundle install
Configuring Foundation
Run the following command to add Foundation:
$ rails g foundation:install
This generates a few files required by Foundation, including a layout file, which asks you if you want to overwrite your existing layout file. You do.
Hint You have to restart the server after adding the foundation gem.
Override Foundation
If you look at the application.css file now, you notice that it requires a foundation_and_overrides file that was created by the foundation generator. It allows us to customize Foundation by setting variables. It contains alot of comments showing us which variables we can customize.
Foundation Icon Fonts
Naturally, we’ll need an icons set that to add meaningful sybmols to our design. Fortunately, Zurb Foundation provides icon fonts which you can download from here. Add it to your application by copying the fonts folder into your app/assets folder and moving foundation-icons.css file to app/assets/stylesheets folder.

Customize the Layout
The layout looks OK for now, but there’s a lot we can do to improve it. We’ll add some structure to the page and include a header, logo, footer, and main content.
To do this quickly, grab one of the Foundation template’s HTML code and drop it between the tags of our layout page. It’s very easy to use.
Application Template
After some customizations to one of the Foundation templates, the layout now consists of 4 main parts ( topbar, alerts, main-content and footer):
<body>
  <%= render "layouts/header" %>
  <%= render "layouts/alerts" %>
  <div id="main-content" class="row full-min-height">

    <%= yield %>

  </div>
  <footer class="row">

    <div class="large-12 columns">

      <hr> <p>© MovieStore 2014</p>

    </div>

  </footer>
  <%= javascript_include_tag "application" %>
</body>
We’ve two partials here to help organize the layout. The first one is _header, which contains the topbar menu:
<div class="row">

  <nav class="top-bar column" data-topbar>
      <ul class="title-area">

        <li class="name">

          <h1>

            <a href="/">

              <i class="fi-play-video"></i> MovieStore

            </a>

          </h1>

        </li>

        <li class="toggle-topbar"><a href="#"><span>Menu</span></a></li>

      </ul>
      <section class="top-bar-section">

        <ul class="right">

          <li><%=link_to "Register", "#" %></li>

          <li><%=link_to "Login", "#" %></li>

        </ul>

      </section>
    </nav>

</div>
The second one is _alerts, which renders any flash alerts or notices:
<%if notice.present? || alert.present? %>

  <div class="row">

    <%is_alert = alert.present? ? "alert" : ""%>

      <div data-alert class="alert-box <%=is_alert%>">

        <%=notice || alert%>

        <a href="#" class="close">×</a>

      </div>

  </div>

<%end%>
Customize CSS
CSS Helpers Classes
Create a new file named helpers.scss inside the app/stylesheets directory. We’ll define some helper classes in this file to hold the most used CSS in our application. The purpose of these classes is to make your code reusable, faster, and more efficient. This is one of the OOCSS princables, which I consider good CSS best practices. If you haven’t read about OOCSS ( object oriented CSS ) before, I encourage you to do so!
Here is the helpers stylesheet.
Foundation Variables
As explained previously, we will customize some Foundation variables to change the default colors and styles, like buttons, labels, inputs, and so on. The best way to know which variables you have to change can be found in the Foundation docs. The end of each section shows the relevant variables and how to customize them. Find these variables inside foundation_overrides.scss and change them with the values you want. You can find my customized variables here.
Custom Layout Style
We want to add more customization to the layout. To do this, create a layout.scss file and add the following:
// Custom layout styles

// Default font family

@font-face {

  font-family: 'gotham-rounded';

  src: url(gotham-rounded-medium.otf);

}

// Body background

body {

  background-image: url(body_bg.png);

  background-position: center;

  color: #fff;

}

// Logo

.title-area{

  a { padding:0 !important }

  i {

    font-size: 30px;

    position: relative;

    top: 2px;

  }

}

// Topbar items

.top-bar-section ul li { background: transparent }

// Forms

.form-container {

  padding: 3% 3%;

  .switch > div {

    position: relative;

    top: -5px;

  }

}
Style Pages
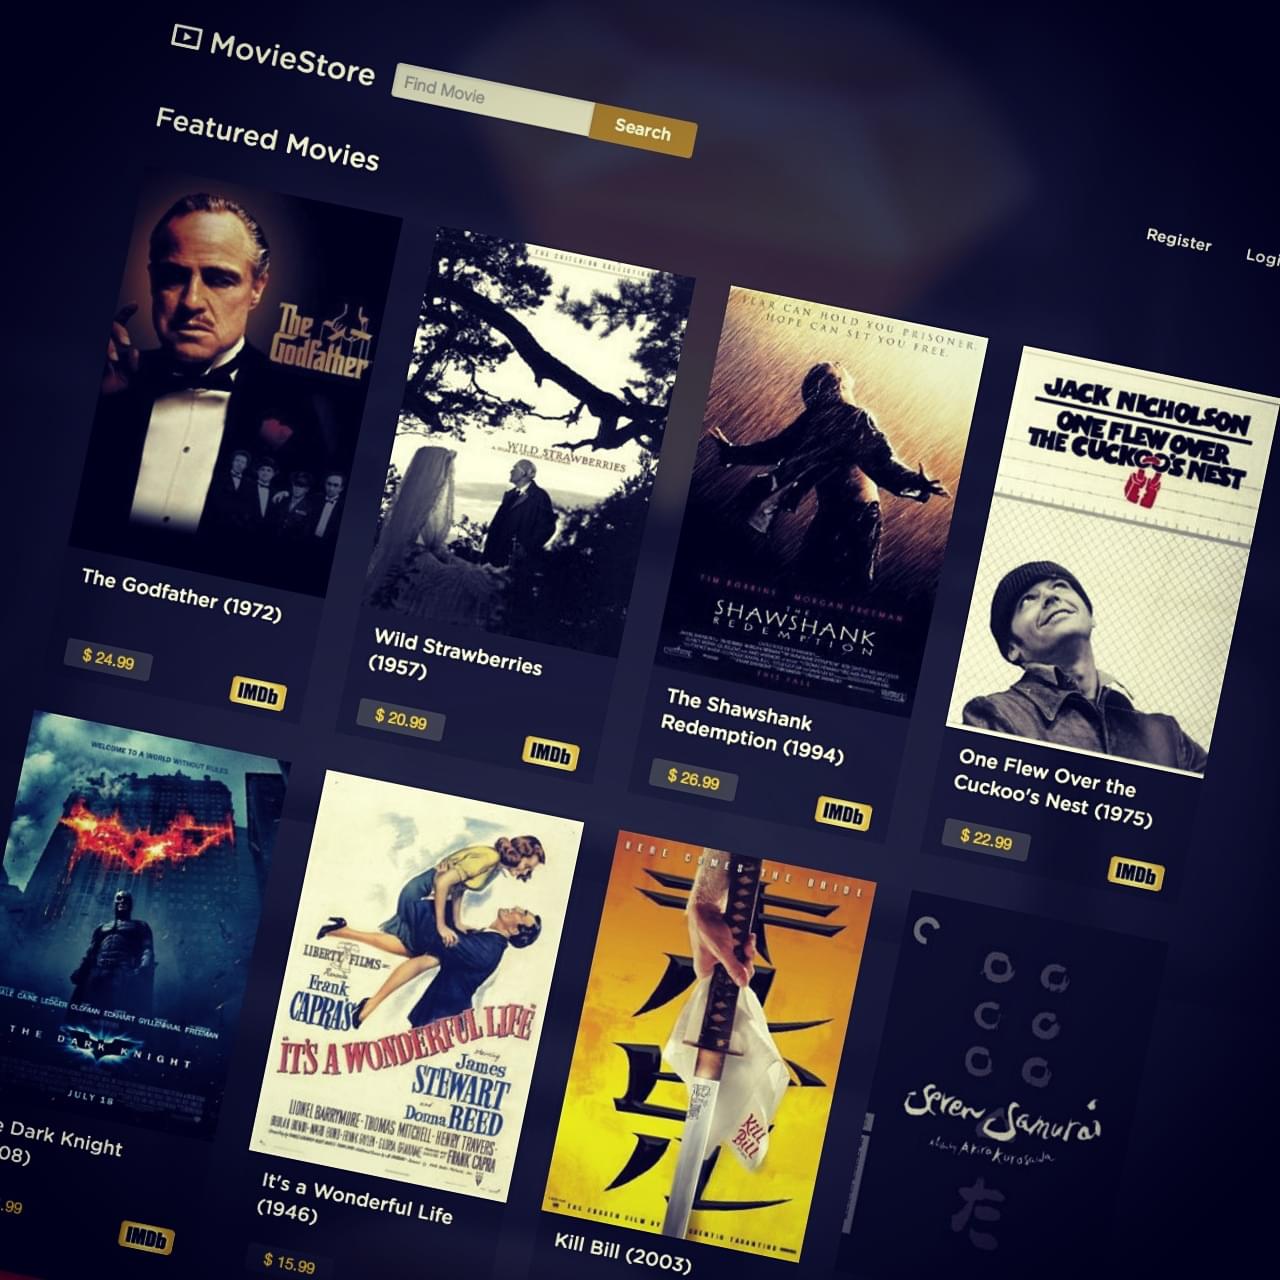
Index Page
Using a grid view will be the simplest solution to display the movies. We can do this using the Foundation Grid System which gives you a way to evenly split contents of a list within the grid. Let’s customize the index page and add the grid classes:
<h4 class="column">Featured Movies</h4>

<div class="column">

  <ul class="movies-grid no-bullet row">

    <% @movies.each do |movie| %>

      <li class="large-3 medium-4 small-12 column">

        <div class="movie-card padly">

          <%= link_to movie, class: "poster" do %>

            <%= image_tag movie.poster %>

          <% end %>

          <div class="movie-info ell glassy-bg padmy padlx">

            <div class="title">

              <h6><%= movie.title %> <span>(<%= movie.release_year %>)</span></h6>

            </div>

            <p class="left price label movie-label radius">$ <%= movie.price %></p>

            <%= link_to movie.imdb, class: "right" do %>

              <%= image_tag asset_path("imdb_logo.png") %>

            <% end %>

          </div>

        </div>

      </li>

    <% end %>

  </ul>

</div>
Foundation Grid System is based on twelve columns and we define these with CSS classes, so you can create powerful multi-device layouts quickly and easily with the default 12-column, nest-able Foundation grid.
We’ve also added some of our own CSS classes to improve the design and fix its bugs:
.movies-grid {

  .movie-card {

    width:220px;

    margin:auto;

    .poster img {

      height: 325px;

      width:100%;

    }

    .movie-info { .title { height: 4em; } }

  }

}
Notice, we call imdb and poster on @movie which aren’t attributes in the Movie model. That’s because I’ve created two instance methods which returns appropriate URLs based on other attributes.
class Movie < ActiveRecord::Base

  def poster

    "http://ia.media-imdb.com/images/M/#{poster_url}"

  end
  def imdb

    "http://www.imdb.com/title/#{imdb_id}/"

  end

end
Show Page
The last style-related task is redesign the show page based on our new layout and classes:
<div class="large-3 small-12 column">

  <%=image_tag @movie.poster%>

</div>
<div class="large-9 small-12 column">

  <h3>

    <%= @movie.title %>

    (<%= @movie.release_year %>)

    <%=link_to @movie.imdb do%>

      <%=image_tag asset_path("imdb_logo.png")%>

    <%end%>

  </h3>

  <p class="label movie-label radius mb1">$ <%= @movie.price %></p>
  <p><%= @movie.description %></p>

</div>
Perfect! You now understand how to deal with Foundation, how to override it, and how to add your own customized stylesheets.
Step 3: Devise User Model (Authentication)
In order to handle authentication in our app, we have to create User model with simple registeration and login forms. Devise is one of the easiest ways to do this.
Install Devise
First as we used, add devise gem to your Gemfile and run the bundle command to install it:
gem 'devise'
after installing Devise, run the generator to create the devise.rb initializer which describes Devise’s configuration options:
$ rails generate devise:install
Add User Model
Create the User model and associate it with Devise using its generator:
$ rails generate devise User
This will create the User model and configure it with default Devise modules. The generator also configures your config/routes.rb file to point to the Devise controller.
$ rake db:migrate
Configuring Routes
Devise provides the devise_for method in our routes.rb file, allowing us to configure devise routes path names like so:
devise_for :users, path_names: { sign_in: 'login', sign_out: 'logout', sign_up: 'register' }
Configuring Views
Devise is a complete MVC solution based on Rails engines which is based on a modularity concept: “use just what you really need”.
As you may have noticed, there are no generated views for Devise. That’s because Devise’s views are packaged inside the gem. We only need to generate a few set of views (like register & login forms) and customize them. Run the following generator and pass it a list of these modules with -v flag and it will copy the selected views into your application.
$ rails generate devise:views -v registrations sessions
Good! Now we can change the registration and login forms with our customized layout.
Registration Form
views/registrations/new.html.erb
<div class="form-container radius-box glassy-bg small-10 small-centered medium-8 large-6 columns">

  <h2>Register</h2>
  <%= form_for(resource, as: resource_name, url: registration_path(resource_name)) do |f| %>

    <%= devise_error_messages! %>
    <div class="mb1"><%= f.email_field :email, autofocus: true, placeholder: "Email", class: "radius" %></div>
    <div class="mb1"><%= f.password_field :password, autocomplete: "off", placeholder: "Password", class: "radius" %></div>
    <div class="mb1"><%= f.password_field :password_confirmation, autocomplete: "off", placeholder: "Confirm password", class: "radius" %></div>
    <div><%= f.submit "Let's Go", class: "button" %></div>

  <% end %>

  <%= render "devise/shared/links" %>

</div>
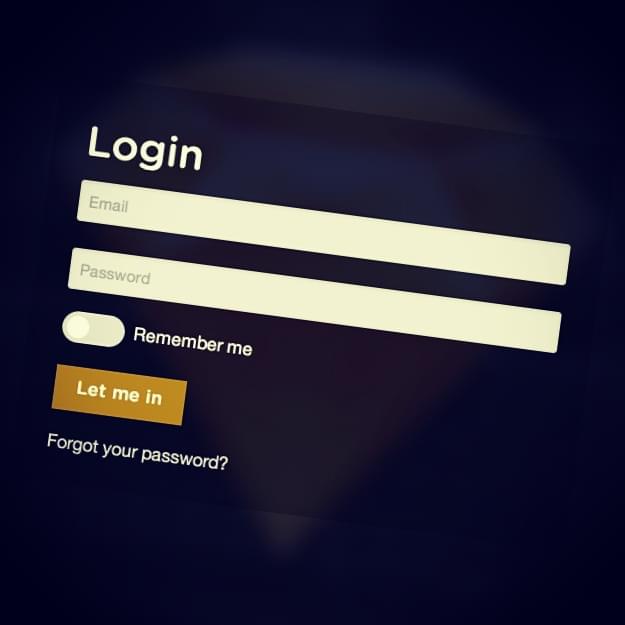
Login Form
views/sessions/new.html.erb
<div class="form-container radius-box glassy-bg small-10 small-centered medium-8 large-6 columns">

  <h2>Login</h2>
  <%= form_for(resource, as: resource_name, url: session_path(resource_name)) do |f| %>

    <div class="mb1"><%= f.email_field :email, autofocus: true, placeholder: "Email", class: "radius" %></div>
    <div class="mb1"><%= f.password_field :password, autocomplete: "off", placeholder: "Password", class: "radius" %></div>
    <% if devise_mapping.rememberable? -%>

      <div class="switch round small mb1">

        <div class="inline-block left prm"><%= f.check_box :remember_me %> <%= f.label :remember_me %></div>

        <span>Remember me</span>

      </div>

    <% end -%>
    <div class="clear"><%= f.submit "Let me in", class: "button" %></div>

  <% end %>
  <%= render "devise/shared/links" %>

</div>
Topbar User Section
Since we now have signed-in and signed-out users, edit topbar section inside layout/_header.html.erb file to show the right links depending on the Devise signed_in? helper.
<ul class="right">

  <%if signed_in?%>

    <li><%=link_to current_user.email, edit_user_registration_path%></li>

    <li><%=link_to "Logout", destroy_user_session_path, method: :delete%></li>

  <%else%>

    <li><%=link_to "Register", new_user_registration_path%></li>

    <li><%=link_to "Login", new_user_session_path%></li>

  <%end%>
Step 4: Shopping Cart
In this step, we want to add a shopping cart so users can add the movies that they want to buy to their carts. They will also have the ability to visit the cart page and browse the movies that they’ve added to cart, removing any one of them if desired.
To implement this scenario, there are some useful gems like carter & actasshopping_cart, but I prefer to build it from scratch using Redis. Redis is very fast and has some features that will meet our needs perfectly.
Redis is an open source, advanced in-memory key-value store. It is often referred to as a data structure server since keys can contain strings, hashes, lists, sets and sorted sets.
Setup Redis
Installation
If you’re running OS X the easiest way to install Redis is to use Homebrew (brew install redis).
Then, add the following gems into our Gemfile, and run bundle
gem 'redis', '~> 3.0.1'

gem 'hiredis', '~> 0.4.5'
By default, redis uses Ruby’s socket library to talk to Redis. Because we will have some large replies ( such as SMEMBERS list command which will be used in our application ), we use an alternative connection driver called hiredis which optimizes for speed, at the cost of portability.
Finally, we can then start it up by running this command:
$ redis-server

Initialize the Global Object
Create an initializer file named /config/initializers/redis.rb where we’ll set up our Redis connection. A global variable will be created to allow easy access in the rest of our app. Also, specify hiredis as the driver when instantiating the client object.
$redis = Redis.new(:driver => :hiredis)
Nice! Now we’ve setup Redis successfully and it’s ready to use in our application.
Carts Controller
First, generate a carts controller, passing in show as a parameter because it’s the only action we’ll use.
$ rails g controller carts show
Routes
Since we deal with a single cart per user, cart can be a singular resource. Add the only option with show action and define two non-RESTful routes for the add and remove actions.
resource :cart, only: [:show] do

  put 'add/:movie_id', to: 'carts#add', as: :add_to

  put 'remove/:movie_id', to: 'carts#remove', as: :remove_from

end
Controller Actions
Inside CartsController, we’ll use the SMEMBERS, SADD, and SREM Redis commands to list, add, and remove movie ids into a unique set named current_user_cart, identified with current_user.id. For more details about Redis commands, I recommend you to check out their documentation, it’s very clear and useful.
class CartsController < ApplicationController

  before_action :authenticate_user!
  def show

    cart_ids = $redis.smembers current_user_cart

    @cart_movies = Movie.find(cart_ids)

  end
  def add

    $redis.sadd current_user_cart, params[:movie_id]

    render json: current_user.cart_count, status: 200

  end
  def remove

    $redis.srem current_user_cart, params[:movie_id]

    render json: current_user.cart_count, status: 200

  end
  private
  def current_user_cart

    "cart#{current_user.id}"

  end

end
We’ve added :authenticate_user! as a before_action callback to restrict access for controller actions to signed-in users only. Also, in the add & remove actions, we respond with current_user.cart_count which is an instance method inside the User model that returns the number of movies inside the current users’s cart using the SCARD command:
def cart_count

  $redis.scard "cart#{id}"

end
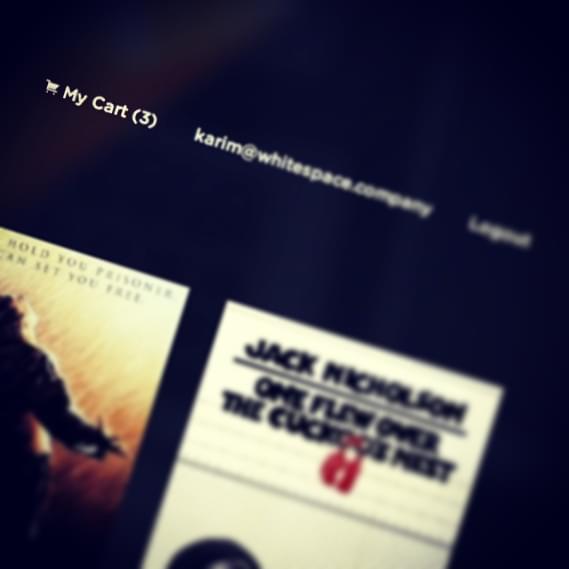
Last thing to do is add the My Cart link to the top bar menu so users can access it directly anytime. Also,
let’s present the number of movies in their carts:
<li>

  <%= link_to cart_path do%>

    <i class="fi-shopping-cart"></i>

    My Cart

    (<span class="cart-count"><%=current_user.cart_count%></span>)

  <%end%>

</li>
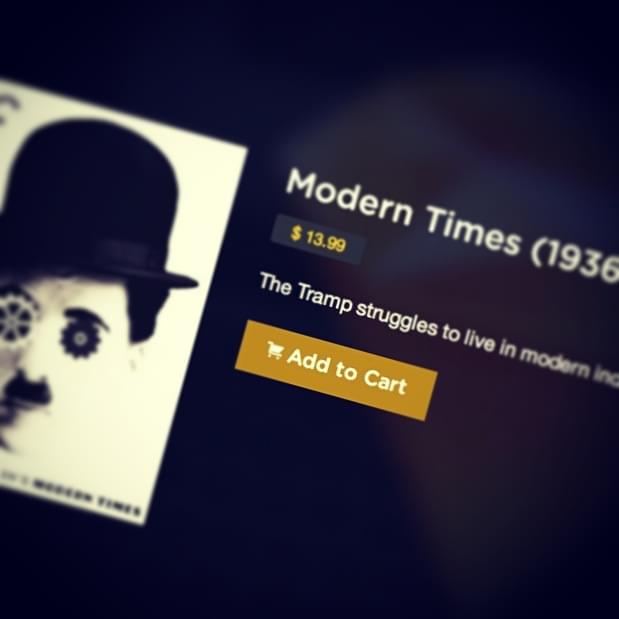
Add to Cart Button
Create an “Add to cart” button which handles the add and remove actions. We’ll add it inside movies show page:
<%if signed_in?%>

  <%=link_to "", class: "button", data: {target: @cart_action, addUrl: add_to_cart_path(@movie), removeUrl: remove_from_cart_path(@movie)} do%>

    <i class="fi-shopping-cart"></i>

    <span><%=@cart_action%></span> Cart

  <%end%>

<%end%>
We define the @cart_action instance object inside the movies#show action as:
def show

  @movie = Movie.find(params[:id])

  @cart_action = @movie.cart_action current_user.try :id

end
It calls the cart_action method on @movie, which checks if that movie is a member on the current user’s cart. It returns the appropriate text to be rendered as the button label, as well as used in our coffescript, as we will see later.
def cart_action(current_user_id)

  if $redis.sismember "cart#{current_user_id}", id

    "Remove from"

  else

    "Add to"

  end

end
Here we’ve used the SISMEMBER Redis command, which determines if a given value is a member of a set.
Add / Remove Requests
We need to hook up the “Add to cart” button using some jQuery scripts and AJAX requests.
$(window).load ->

  $('a[data-target]').click (e) ->

    e.preventDefault()

    $this = $(this)

    if $this.data('target') == 'Add to'

      url = $this.data('addurl')

      new_target = "Remove from"

    else

      url = $this.data('removeurl')

      new_target = "Add to"

    $.ajax url: url, type: 'put', success: (data) ->

      $('.cart-count').html(data)

      $this.find('span').html(new_target)

      $this.data('target', new_target)
We check the state of the current movie using the target data attribute which is set to @cart_action as we mentioned before. Consequently, we can specify the ajax url which is either add_to_cart or remove_from_cart, since we pass them to our script using the addurl & removeurl data attributes.
Upon successful completion of the ajax request, set the cart movies count which is located in the topbar menu with the new number, change the label of the button, and set the target data attribute with the new value.
Note: I’ve disabled
Turbolinks.jsso we can keep our script as simple as possible. You can do it by simply removing therequire turbolinksline from the application.js file.
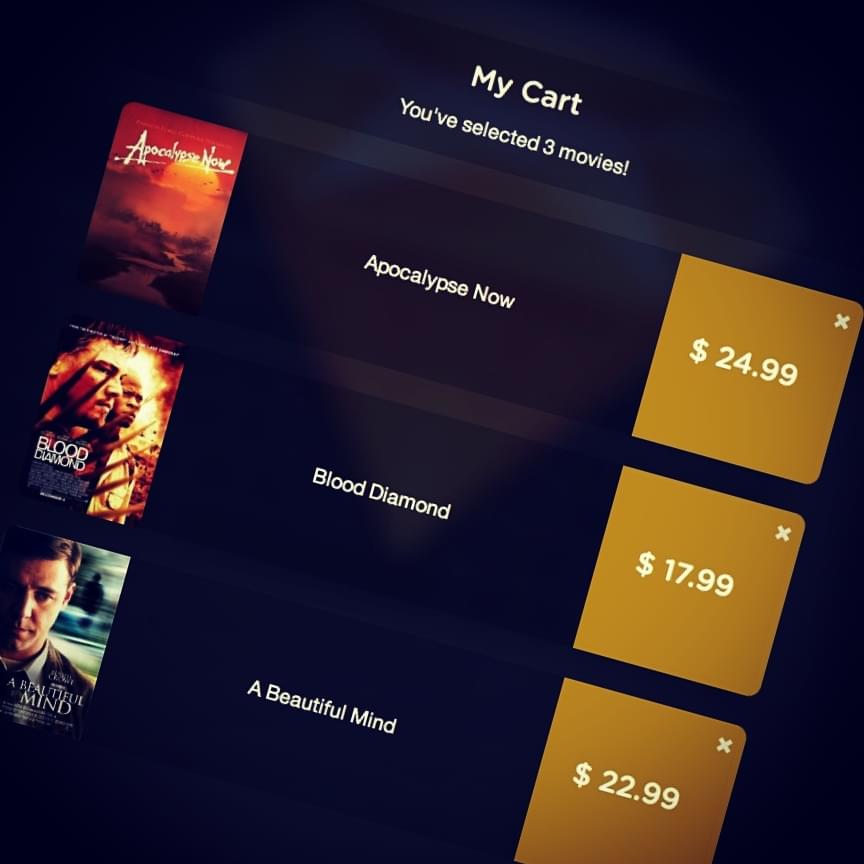
My Cart Page
Now, the final thing to do is represent the cart items on the carts/show page. Let’s add some HTML tags:
<div id="mycart" class="small-10 small-centered medium-8 large-8 column">

  <div class="p1 glassy-bg mb1 text-center radius-l1 radius-r1">

    <h4>My Cart</h4>

    <p class="mb0"> You've selected <span class="cart-count"><%=current_user.cart_count%></span> movies!</p>

  </div>
  <% @cart_movies.each do |movie|%>

  <div data-equalizer class="cart-movie large-12 column mb1">

    <div class="column large-2 text-center p0" data-equalizer-watch>

      <%=link_to movie do%>

        <%=image_tag movie.poster, class: "radius-l1"%>

      <%end%>

    </div>

    <div class="column large-7 glassy-bg text-center" data-equalizer-watch>

        <p class="scale ptm"> <%= movie.title %> </p>

    </div>

    <div class="column large-3 primary-bg text-center radius-r1" data-equalizer-watch>

      <%=link_to "" , data: {targetUrl: remove_from_cart_path(movie)} do%>

        <i class="fi-x right"></i>

      <%end%>

      <h4 class="scale">$ <%= movie.price %></h4>

    </div>

  </div>

  <%end%>

</div>
Equalizer, provided by Foundation, is a great way to create equal height content on your page. You can find more details about how it works here.
Give it a little special styling inside the carts.scss file:
#mycart {

  .scale {

    position: relative;

    top: 35%;

    transform: translateY(-35%);

  }

  .fi-x {

    position: relative;

    top: 10px;

    right: -5px;

  }

}
Finally, write a similar script to activate the remove icon functionality.
$(window).load ->

  $('#mycart .fi-x').click (e) ->

    e.preventDefault()

    $this = $(this).closest('a')

    url = $this.data('targeturl')

    $.ajax url: url, type: 'put', success: (data) ->

      $('.cart-count').html(data)

      $this.closest('.cart-movie').slideUp()
Wow, it seems that everything is working smoothly now. Great job!
Still More to Do
There is still more work before we can say our online store is complete. In my next article, I’ll cover integrating Braintree with our application to accept payments. Thanks for reading!
Frequently Asked Questions (FAQs) about Building an Online Store with Rails
What are the prerequisites for building an online store with Rails?
Before you start building an online store with Rails, you need to have a basic understanding of Ruby on Rails, HTML, CSS, and JavaScript. You should also be familiar with databases and SQL. It’s also beneficial to have a basic understanding of e-commerce and how online stores work.
How can I add a shopping cart feature to my Rails online store?
Adding a shopping cart feature to your Rails online store involves creating a Cart model that associates with the Product model. This allows the cart to hold multiple products. You can use the has_many and belongs_to associations in Rails to achieve this. You can also use sessions to store cart data temporarily.
How can I implement user authentication in my Rails online store?
User authentication is crucial for an online store. You can use the Devise gem in Rails, which provides a flexible authentication solution. It includes features like sign up, sign in, password reset, and more. You can also customize it to fit your needs.
How can I add a payment gateway to my Rails online store?
Integrating a payment gateway into your Rails online store can be achieved using various gems like Stripe, PayPal, or Braintree. These gems provide APIs that you can use to process payments securely. You’ll need to sign up for an account with these services, get your API keys, and integrate them into your Rails application.
How can I ensure the security of my Rails online store?
Security is paramount in an online store. Rails has several built-in features to help secure your application, such as CSRF protection and SQL injection prevention. You can also use SSL to encrypt data between the user’s browser and your server. Regularly updating your Rails application and gems can also help keep your application secure.
How can I optimize the performance of my Rails online store?
Performance optimization in Rails can be achieved in several ways. You can use caching to reduce database queries, use background jobs for long-running tasks, and use a CDN to serve static assets faster. You can also optimize your code by following best practices and using performance testing tools.
How can I make my Rails online store mobile-friendly?
Making your Rails online store mobile-friendly involves responsive web design. You can use CSS media queries to adjust the layout based on the screen size. You can also use Bootstrap or other front-end frameworks that provide responsive design features.
How can I add product search functionality to my Rails online store?
Adding product search functionality to your Rails online store can be achieved using the Ransack gem. This gem provides a simple and intuitive way to create search forms. You can search for products based on various attributes like name, description, price, etc.
How can I handle shipping in my Rails online store?
Handling shipping in your Rails online store involves calculating shipping costs based on factors like weight, size, and destination. You can use APIs provided by shipping companies like UPS, FedEx, or USPS to calculate shipping costs. You can also offer different shipping options to your customers.
How can I handle taxes in my Rails online store?
Handling taxes in your Rails online store can be complex due to different tax rates in different regions. You can use gems like ‘money-rails’ to handle money and currency conversion. You can also use APIs provided by tax calculation services to calculate taxes based on the customer’s location.