
Key Takeaways
- FOSUserBundle is a library built on top of Symfony’s security system, providing functionality such as registration, login, and password resets. It supports MongoDB and ORMs such as Doctrine and Propel.
- FOSUserBundle can be easily integrated into Symfony projects with minimal configuration and code changes. It requires the creation of a User entity that needs to be persisted into the database.
- Symfony’s powerful templating system allows easy extension and overriding of templates that come with bundles. This enables customization of the user registration and login system to suit specific project needs.
- FOSUserBundle provides several features for user management, including registration confirmation through email, password resetting, and profile editing. It also supports Symfony’s role-based security for handling user roles.
Symfony has a very powerful authentication and authorization system, which can cater to a lot of our needs out of the box. FOSUserBundle is a library built on top of Symfony’s security system, which provides functionality such as registration, login, password resets, etc. It has built in support for MongoDB, as well as ORMs such as Doctrine, Propel, etc.
We will use Homestead Improved for our demo.
Let’s add a new site in the Homestead.yml file.
sites:
    - map: symfonylogin.app
      to: /home/vagrant/Code/SymfonyLogin/web
      type: symfony
databases:
    - symfony
This will set up a new site in the VM that points to the web folder of the Symfony application. When type: symfony is specified, it will pick an Nginx configuration that is specifically created for Symfony applications.
We should also add 192.168.10.10 symfonylogin.app into the main operating system’s /etc/hosts file. Now we can boot the VM with vagrant up.
Before we begin, let’s quickly set up the Symfony application using Symfony’s installer, a command line tool for installing Symfony projects. To install the installer, we enter the VM using vagrant ssh and run the following commands.
curl -LsS http://symfony.com/installer > symfony
sudo mv symfony /usr/local/bin/symfony
chmod a+x /usr/local/bin/symfony
The first command downloads the installer from the Symfony website to the current directory. Then, we move it to the bin directory and make it executable.
Now let’s create a Symfony application inside the VM.
cd Code
symfony new SymfonyLogin
This will create a Symfony skeleton application and install all the dependencies from Packagist. Once it’s finished, we can go to the app/config folder and update parameters.yml with our database and email configuration values.
We can now open http://symfonylogin.app in the browser to see the skeleton application running.
Symfony restricts the development environment’s access to the IP 127.0.0.1. When using Vagrant, you might need to update the app_dev.php file to add your host IP to the list.
Basic Usage
FOSUserBundle can be easily plugged into Symfony projects with minimal configuration and code changes. Let’s see how we can do that in ours.
Installing the bundle
First, we will install the package:
composer require friendsofsymfony/user-bundle "~2.0@dev"
Configuration
Before we can use FOSUserBundle, we should register the bundle in AppKernel.
class AppKernel extends Kernel
{
    public function registerBundles()
    {
        $bundles = array(
            ...
            new FOS\UserBundle\FOSUserBundle(),
        );
        ...
        return $bundles;
    }
FOSUserBundle uses the Symfony translation component for displaying form labels and errors. By default, it is disabled in the configuration, and we need to make the following modification in config.yml.
translator: { fallbacks: ["%locale%"] }
Now let us configure the security in security.yml.
security:
    encoders:
        AppBundle\Entity\User: bcrypt

    role_hierarchy:
        ROLE_ADMIN:       ROLE_USER
        ROLE_SUPER_ADMIN: ROLE_ADMIN

    providers:
        fos_userbundle:
            id: fos_user.user_provider.username
    firewalls:
        main:
            pattern: ^/
            form_login:
                provider: fos_userbundle
                csrf_provider: security.csrf.token_manager
            logout:       true
            anonymous:    true
    access_control:
        - { path: ^/login$, role: IS_AUTHENTICATED_ANONYMOUSLY }
        - { path: ^/register, role: IS_AUTHENTICATED_ANONYMOUSLY }
        - { path: ^/resetting, role: IS_AUTHENTICATED_ANONYMOUSLY }
        - { path: ^/admin/, role: ROLE_ADMIN }
Symfony’s security component provides a number of configuration options which will let us configure pretty much every aspect. Here we have specified the only options that we need to change and left everything else at the default value. Let’s see what we have changed.
encoders:
    AppBundle\Entity\User: bcrypt
encoders will tell the application which algorithm to use to encode passwords for the User object. This is our User entity class which we will create in the steps below.
providers:
    fos_userbundle:
        id: fos_user.user_provider.username
This will register the user provider where fos_user.user_provider.username is the ID of the service FOS\UserBundle\Security\UserProvider registered in FOS User Bundle.
firewalls in Symfony is analogous to the firewalls that we are familiar with. We have created one firewall named main. The pattern key specifies the url patterns to which this firewall should match. The key form_login specifies that we will be using a login form to authenticate users and we want to use our fos_userbundle as the user provider.
access_control limits access to URLs based on user roles. Login, Registration and Resetting pages should be accessible publicly, so they require the IS_AUTHENTICATED_ANONYMOUSLY role, which is given by default to anyone accessing any page.
The User class
FOSUserBundle requires us to create a User entity that needs to be persisted into the database. The bundle already provides an abstract base class with most of the fields that we need. We just need to create the entity that extends this base class.
<?php
// src/AppBundle/Entity/User.php
namespace AppBundle\Entity;

use FOS\UserBundle\Model\User as BaseUser;
use Doctrine\ORM\Mapping as ORM;

/**
 * User
 *
 * @ORM\Table("fos_user")
 * @ORM\Entity
 */
class User extends BaseUser
{
    /**
     * @var integer
     *
     * @ORM\Column(name="id", type="integer")
     * @ORM\Id
     * @ORM\GeneratedValue(strategy="AUTO")
     */
    protected $id;


    /**
     * Get id
     *
     * @return integer
     */
    public function getId()
    {
        return $this->id;
    }
}
The base class doesn’t have an ID field, so we should have that in our Entity along with any other fields that we need for our application.
After creating the Entity, we need to tell the application to use this as the user class. There are three fields required by FOSUserBundle that we should specify in config.yml. We should add the following settings to the end of config.yml.
fos_user:
    db_driver: orm
    firewall_name: main
    user_class: AppBundle\Entity\User
db_driver : orm will tell the bundle to use Doctrine.
firewall_name : main specifies the name of the firewall to use.
user_class: AppBundle\Entity\User tells the application that we want to use AppBundle\Entity\User as the user class.
Update Schema
Once we create the Entity, we can also generate the user table using Symfony’s CLI.
php app/console doctrine:schema:update --force
This will create a table named fos_user in our database, with the fields available from FOSUserBundle. If you need any additional fields, you can specify them in the User entity before you generate the schema.
Import routes
Symfony doesn’t import vendor routes by itself. Instead, we need to manually add them in app/config/routing.yml.
fos_user:
    resource: "@FOSUserBundle/Resources/config/routing/all.xml"
This will import all the routes available in FOSUserBundle.
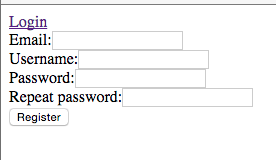
Now that we have set up the bundle and configured everything, we can check if it is working. If we go to http://symfonylogin.app/register/, we should see a registration form like this one.
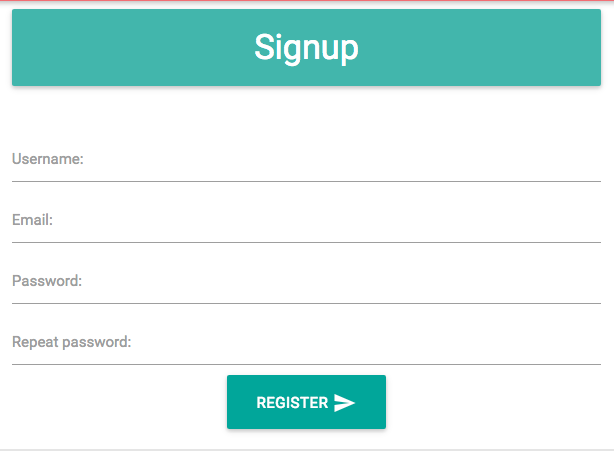
Customizing Templates
We now have a working but basic user registration and login system. The form looks too naive for use in any real projects. Next, we will see how we can customize the templates to look better.
Symfony’s powerful templating system allows us to easily extend and override templates that come with bundles. In order to override the bundle templates, we must create a directory under app/Resources and give it the name of the bundle. Then, we create a views directory and place any templates that do overriding in there.
If we check the location vendor/friendsofsymfony/user-bundle/Resources/views, we will find all the templates used by FOSUserBundle. We need to create the directory structure FOSUserBundle/views/ under app/Resources/ and place our template files there. Let’s copy the Registration directory from FOSUserBundle to this location. Now, our app/Resources directory should look something like this.
// ProjectRoot/app/Resources
├── FOSUserBundle
│   └── views
│       └── Registration
│           ├── checkEmail.html.twig
│           ├── confirmed.html.twig
│           ├── email.txt.twig
│           ├── register.html.twig
│           └── register_content.html.twig
└── views
    ├── base.html.twig
    └── default
        └── index.html.twig
Now we can update register.html.twig based on our requirements.
{% extends "base.html.twig" %}
{% block body %}
    <div class="row">
        <div class="col s12 m8 offset-m2">
            <h4 class="card-panel teal lighten-2 white-head">Signup</h4>
        </div>
    </div>
    <div class="row">
        <div class="col s12 m8 offset-m2">
            {% include "FOSUserBundle:Registration:register_content.html.twig" %}
        </div>
    </div>
{% endblock body %}
Here I assume you already have a layout file base.html.twig for your application, with body content rendered into the body block.
We will also change register_content.html.twig so that we can display the form elements as we wish.
{% trans_default_domain 'FOSUserBundle' %}
{{form_start(form, {'method': 'POST', 'attr':{'class': 'register'}})}}
  <div class="row">
    <div class="input-field col s12">
      {{ form_label(form.username) }}
      {{ form_widget(form.username) }}
    </div>
    {{ form_errors(form.username) }}
  </div>
  <div class="row no-padding">
    <div class="input-field col s12">
      {{ form_label(form.email) }}
      {{ form_widget(form.email) }}
    </div>
    {{ form_errors(form.email) }}
  </div>
  <div class="row no-padding">
    <div class="input-field col s12">
      {{ form_label(form.plainPassword.first) }}
      {{ form_widget(form.plainPassword.first) }}
    </div>
    {{ form_errors(form.plainPassword.first) }}
  </div>
  <div class="row no-padding">
    <div class="input-field col s12">
      {{ form_label(form.plainPassword.second) }}
      {{ form_widget(form.plainPassword.second) }}
    </div>
    {{ form_errors(form.plainPassword.second) }}
  </div>
  <div align="center" class="button-wrap">
    <button class="btn-large waves-effect waves-light" type="submit" name="action">
      {{ 'registration.submit'|trans }}
      <i class="material-icons">send</i>
    </button>
  </div>
{{ form_end(form) }}
form_start will open a form tag with the given attributes and form_end will close that form. If we check the actual template, we will see {{ form_widget(form) }} only, which will render the entire form. But since we need our own styles for form elements, we are rendering individual form elements using form_label and form_widget. If any element fails the validation when the form is submitted, form_errors will render the error message for the corresponding field.
We can customize all the other templates to match rest of the application.
Likewise, if we want to customize the labels and other messages, we can copy the translations directory from FOSUserBundle and place it in our app/Resources/FOSUserBundle directory. Then, we edit FOSUserBundle.en.yml and change any values we need.
Registration Confirmation
In most cases, we need the user to confirm their email address before completing the registration process. This can be easily done by updating the fos_user configuration in config.yml. Now it should look something like this.
fos_user:
    db_driver: orm
    firewall_name: main
    user_class: AppBundle\Entity\User
    from_email:
        address:     admin@example.com
        sender_name:    Example.com
    registration:
        confirmation:
            enabled:    true
            template:   FOSUserBundle:Registration:email.txt.twig
Notice the new registration key we have added here. enabled: true for confirmation will enable the confirmation process and we are using FOSUserBundle:Registration:email.txt.twig template for the email content.
Also note the from_email key that we have added. It will tell the bundle to use this email as the from address for all emails we are sending.
Now, users trying to register will get a confirmation email with a link to confirm their email address.
For sending emails from Symfony, make sure you have a working smtp configuration in the parameters.yml file.
Login
So far, we have seen how to set up the registration form and customize the templates. Logging in doesn’t need any additional setup, the built in functionality is enough for any application. If we navigate to http://symfonylogin.app/login, we will see the login form. If we are already logged in, we will also see a logout link in the default template.
Symfony’s security system intercepts the login form submission and tries to authenticate the user using the authentication provider that we have specified in the security configuration. Most of this is done by Symfony’s security component itself, documented here.
Forgot Password
FOSUserBundle also provides the ability to reset a password. Users can navigate to http://symfonylogin.app/resetting/request and provide their username or email to reset their password. If that user exists, the application will send an email to the registered email address.
User Profile
FOSUserBundle comes with a basic profile page. Once logged in, if we navigate to http://symfonylogin.app/profile/, we will see the default profile page. Of course, this page also needs to be customized for use in any non-default projects.
{% trans_default_domain 'FOSUserBundle' %}
{% extends "base.html.twig" %}

{% block body %}
    <div class="fos_user_user_show">
        <p>{{ 'profile.show.username'|trans }}: {{ user.username }}</p>
        <p>{{ 'profile.show.email'|trans }}: {{ user.email }}</p>
    </div>
    <a href="{{ path('fos_user_profile_edit') }}">Edit Profile</a>
{% endblock body %}
The user object holds the details of the currently logged in user. Right now, we have only the username and email available in the database.
We can also update the profile from the profile edit page (http://symfonylogin.app/profile/edit). For added security, the user should provide the current password to update the profile.
Summary
FOSUserBundle is a plug-in for user registration and management in Symfony applications. Built on top of Symfony’s security system, this bundle takes care of most if not all the complexity of Symfony’s security when implementing user registration and login.
For more information, check out the extensive documentation to learn more about this Bundle.
The code for this tutorial is available on Github. Let us know if you have any questions or comments!
Frequently Asked Questions about Basic User Management in Symfony2 with FOSUserBundle
How do I install FOSUserBundle in Symfony2?
To install FOSUserBundle in Symfony2, you need to use Composer, a dependency management tool in PHP. Run the command composer require friendsofsymfony/user-bundle "~2.0" in your project directory. This will download the bundle and its dependencies. After that, enable the bundle in the kernel by adding new FOS\UserBundle\FOSUserBundle(), to the $bundles array in the AppKernel.php file.
How do I configure FOSUserBundle?
After installing FOSUserBundle, you need to configure it in the config.yml file. You should specify the user class, firewall name, and other parameters. Also, import FOSUserBundle routing files in the routing.yml file. Remember to update your database schema to reflect the new User entity.
How do I override FOSUserBundle templates?
FOSUserBundle provides default templates that you can override to customize the look and feel of your application. To override a template, create a new template file in your application in the app/Resources/FOSUserBundle/views directory. The new template file should have the same name and directory structure as the original one in the FOSUserBundle.
How do I use FOSUserBundle to manage users?
FOSUserBundle provides several features for user management, such as registration, password resetting, and profile editing. You can use these features by accessing the corresponding routes, like /register, /login, /resetting, and /profile.
How do I customize FOSUserBundle forms?
You can customize FOSUserBundle forms by overriding the form type classes. Create a new form type class in your application and override the getParent() method to return the FOSUserBundle form type you want to customize. Then, define your custom fields in the buildForm() method.
How do I handle user roles with FOSUserBundle?
FOSUserBundle supports Symfony’s role-based security. You can assign roles to users and check for these roles in your controllers and templates. The User entity has a roles field that stores the roles of a user.
How do I translate FOSUserBundle into other languages?
FOSUserBundle uses Symfony’s translation component for internationalization. You can translate it into other languages by creating translation files in the app/Resources/translations directory. The translation files should be named according to the format FOSUserBundle.locale.format.
How do I handle user authentication with FOSUserBundle?
FOSUserBundle integrates with Symfony’s security component for user authentication. You can configure the security component in the security.yml file to use FOSUserBundle’s user provider and firewall.
How do I extend FOSUserBundle’s User entity?
You can extend FOSUserBundle’s User entity by creating a new User entity in your application and extending the FOS\UserBundle\Model\User class. You can then add your custom fields and methods to the new User entity.
How do I upgrade FOSUserBundle to a newer version?
To upgrade FOSUserBundle to a newer version, you need to update the version constraint in your composer.json file and run the composer update friendsofsymfony/user-bundle command. Be sure to check the upgrade notes for any changes that may affect your application.