


This article is featured in our book, 6 JavaScript Projects. Build projects that will get you intimately familiar with Modern JavaScript development.
With the advent of WebRTC and the increasing capacity of browsers to handle peer-to-peer communications in real time, it’s easier than ever to build real-time applications. In this tutorial, we’ll take a look at SimpleWebRTC and how it can make our lives easier when implementing WebRTC. Throughout the article, we’ll be building a WebRTC video chat app with messaging features.
If you need a bit of a background regarding WebRTC and peer-to-peer communication, I recommend reading The Dawn of WebRTC and Introduction to the getUserMedia API.
Key Takeaways
- SimpleWebRTC is a JavaScript library that simplifies the implementation of WebRTC, making it easier to create real-time video and audio applications that work across different browsers without needing to write browser-specific code.
- The tutorial demonstrates building a video chat application using SimpleWebRTC, which involves setting up a single-page application on an Express server, and requires Node.js and npm for dependency management.
- Key dependencies include SimpleWebRTC, Semantic UI CSS for styling, jQuery for DOM manipulation, Handlebars for templating, and Express as the web server.
- The application supports creating and joining chat rooms, sending messages, and handling multiple video streams, showcasing the capability of SimpleWebRTC to manage complex peer-to-peer communication scenarios.
- Deployment of the application can be easily done using the `now` CLI tool from Zeit, allowing for quick setup and public sharing of the app.
- The tutorial provides a comprehensive guide on how to use SimpleWebRTC for building a feature-rich real-time communication app, emphasizing the ease of use and cross-browser compatibility of the library.
What is SimpleWebRTC
Before we move on, it’s important that we understand the main tool that we’ll be using. SimpleWebRTC is a JavaScript library that simplifies WebRTC peer-to-peer data, video, and audio calls.
SimpleWebRTC acts as a wrapper around the browser’s WebRTC implementation. As you might already know, browser vendors don’t exactly agree on a single way of implementing different features, which means that for every browser there’s a different implementation for WebRTC. As the developer, you’d have to write different code for every browser you plan to support. SimpleWebRT acts as the wrapper for that code. The API that it exposes is easy to use and understand, which makes it a really great candidate for implementing cross-browser WebRTC.
Building the WebRTC Video Chat App
Now it’s time to get our hands dirty by building the app. We’ll build a single page application that runs on top of an Express server.
Please note that you can download the code for this tutorial from our GitHub repo. To run it, or to follow along at home, you’ll need to have Node and npm installed. If you’re not familiar with these, or would like some help getting them installed, check out our previous tutorials:
You also need a PC or laptop that has a webcam. If not, you’ll need to get yourself a USB webcam that you can attach to the top of your monitor. You’ll probably need a friend or a second device to test remote connections.
Dependencies
We’ll be using the following dependencies to build our project:
- SimpleWebRTC — the WebRTC library
- Semantic UI CSS — an elegant CSS framework
- jQuery — used for selecting elements on the page and event handling.
- Handlebars — a JavaScript templating library, which we’ll use to generate HTML for the messages
- Express — NodeJS server.
Project Setup
Go to your workspace and create a folder simplewebrtc-messenger. Open the folder in VSCode or your favorite editor and create the following files and folder structure:
simplewebrtc-messenger
├── public
│   ├── images
│   │   └── image.png
│   ├── index.html
│   └── js
│       └── app.js
├── README.md
└── server.js
Or, if you prefer, do the same via the command line:
mkdir -p simplewebrtc-messenger/public/{images,js}
cd simplewebrtc-messenger
touch public/js/app.js public/index.html .gitignore README.md server.js
Open README.md and copy the following content:
# Simple WebRTC Messenger

A tutorial on building a WebRTC video chat app using SimpleWebRTC.
Add the line node_modules to the .gitignore file if you plan to use a git repository. Generate the package.json file using the following command:
npm init -y
You should get the following output:
{
  "name": "simplewebrtc-messenger",
  "version": "1.0.0",
  "description": "A tutorial on building a WebRTC video chat app using SimpleWebRTC.",
  "main": "server.js",
  "scripts": {
    "test": "echo \"Error: no test specified\" && exit 1",
    "start": "node server.js"
  },
  "keywords": [],
  "author": "",
  "license": "ISC"
}
Now let’s install our dependencies:
npm install express handlebars jquery semantic-ui-css simplewebrtc
As the installation proceeds, copy this code to server.js:
const express = require('express');

const app = express();
const port = 3000;

// Set public folder as root
app.use(express.static('public'));

// Provide access to node_modules folder from the client-side
app.use('/scripts', express.static(`${__dirname}/node_modules/`));

// Redirect all traffic to index.html
app.use((req, res) => res.sendFile(`${__dirname}/public/index.html`));

app.listen(port, () => {
  console.info('listening on %d', port);
});
The server code is pretty standard. Just read the comments to understand what’s going on.
Next, let’s set up our public/index.html file:
<!DOCTYPE html>
<html lang="en">
<head>
  <meta charset="UTF-8">
  <meta name="viewport" content="width=device-width, initial-scale=1.0">
  <meta http-equiv="X-UA-Compatible" content="ie=edge">
  <link rel="stylesheet" href="scripts/semantic-ui-css/semantic.min.css">
  <title>SimpleWebRTC Demo</title>
  <style>
    html { margin-top: 20px; }
    #chat-content { height: 180px;  overflow-y: scroll; }
  </style>
</head>
<body>
  <!-- Main Content -->
  <div class="ui container">
    <h1 class="ui header">Simple WebRTC Messenger</h1>
    <hr>
  </div>

  <!-- Scripts -->
  <script src="scripts/jquery/dist/jquery.min.js"></script>
  <script src="scripts/semantic-ui-css/semantic.min.js"></script>
  <script src="scripts/handlebars/dist/handlebars.min.js "></script>
  <script src="scripts/simplewebrtc/out/simplewebrtc-with-adapter.bundle.js"></script>
  <script src="js/app.js"></script>
</body>
</html>
Next, let’s set up our base client-side JavaScript code. Copy this code to public/js/app.js:
window.addEventListener('load', () => {
  // Put all client-side code here
});
Finally, download this image from our GitHub repository and save it inside the public/images folder.
Now we can run our app:
npm start
Open the URL localhost:3000 in your browser and you should see the following:
Markup
Let’s now work on public/index.html. For the sake of simplicity (especially if you’re already familiar with Handlebars) you can copy the entire markup code from our GitHub repository. Otherwise, let’s go through things step by step. First off, copy this code and place it after the <hr> tag within the ui container div:
<div class="ui two column stackable grid">

  <!-- Chat Section -->
  <div class="ui ten wide column">
    <div class="ui segment">
      <!-- Chat Room Form -->
      <div class="ui form">
        <div class="fields">
          <div class="field">
            <label>User Name</label>
            <input type="text" placeholder="Enter user name" id="username" name="username">
          </div>
          <div class="field">
            <label>Room</label>
            <input type="text" placeholder="Enter room name" id="roomName" name="roomName">
          </div>
        </div>
        <br>
        <div class="ui buttons">
          <div id="create-btn" class="ui submit orange button">Create Room</div>
          <div class="or"></div>
          <div id="join-btn" class="ui submit green button">Join Room</div>
        </div>
      </div>
      <!-- Chat Room Messages -->
      <div id="chat"></div>
    </div>
  </div>
  <!-- End of Chat Section -->

  <!-- Local Camera -->
  <div class="ui six wide column">
    <h4 class="ui center aligned header" style="margin:0;">
      Local Camera
    </h4>
    <img id="local-image" class="ui large image" src="images/image.png">
    <video id="local-video" class="ui large image hidden" autoplay></video>
  </div>

</div>

<!-- Remote Cameras -->
<h3 class="ui center aligned header">Remote Cameras</h3>
<div id="remote-videos" class="ui stackable grid">
  <div class="four wide column">
    <img class="ui centered medium image" src="images/image.png">
  </div>
  <div class="four wide column">
    <img class="ui centered medium image" src="images/image.png">
  </div>
  <div class="four wide column">
    <img class="ui centered medium image" src="images/image.png">
  </div>
  <div class="four wide column">
    <img class="ui centered medium image" src="images/image.png">
  </div>
</div>
Go through the markup code and read the comments to understand what each section is for. Also check out the Semantic UI documentation if you’re unfamiliar with the CSS library. Refresh your browser. You should have the following view:
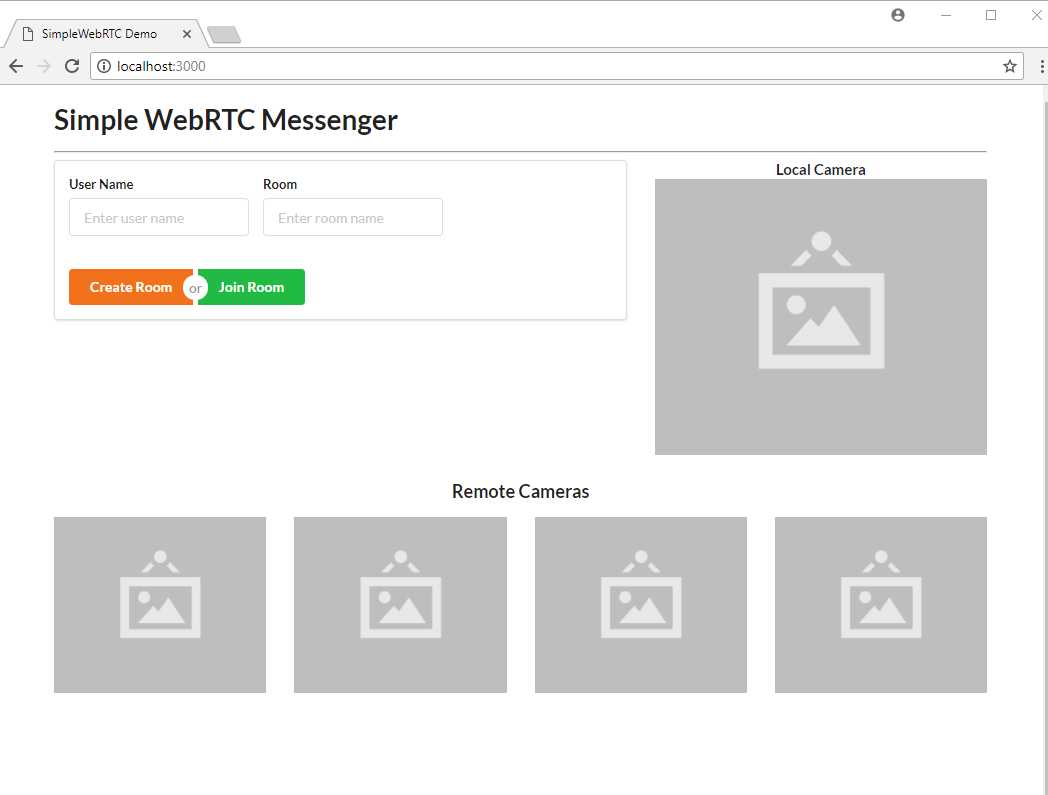
We’re using a blank image as a placeholder to indicate where the camera location will stream to on the web page. Take note that this app will be able to support multiple remote connections, provided your internet bandwidth can handle it.
Templates
Now let’s add the three Handlebar templates that will make our web page interactive.
Place the following markup right after the ui container div (although the location doesn’t really matter). We’ll start off with the chat container, which simply is made up of:
- Room ID
- empty chat messages container (to be populated later via JavaScript)
- input for posting messages.
<!-- Chat Template -->
<script id="chat-template" type="text/x-handlebars-template">
  <h3 class="ui orange header">Room ID -> <strong>{{ room }}</strong></h3>
  <hr>
  <div id="chat-content" class="ui feed"> </div>
  <hr>
  <div class="ui form">
    <div class="ui field">
      <label>Post Message</label>
      <textarea id="post-message" name="post-message" rows="1"></textarea>
    </div>
    <div id="post-btn" class="ui primary submit button">Send</div>
  </div>
</script>
Next, add the following template, which will be used to display user chat messages:
<!-- Chat Content Template -->
<script id="chat-content-template" type="text/x-handlebars-template">
  {{#each messages}}
    <div class="event">
      <div class="label">
        <i class="icon blue user"></i>
      </div>
      <div class="content">
        <div class="summary">
          <a href="#"> {{ username }}</a> posted on
          <div class="date">
            {{ postedOn }}
          </div>
        </div>
        <div class="extra text">
          {{ message }}
        </div>
      </div>
    </div>
  {{/each}}
</script>
Finally, add the following template, which will be used to display streams from a remote camera:
<!-- Remote Video Template -->
<script id="remote-video-template" type="text/x-handlebars-template">
  <div id="{{ id }}" class="four wide column"></div>
</script>
The markup code is hopefully pretty self-explanatory, so let’s move on to writing the client-side JavaScript code for our application.
Main App Script
Open the file public/js/app.js and add this code:
// Chat platform
const chatTemplate = Handlebars.compile($('#chat-template').html());
const chatContentTemplate = Handlebars.compile($('#chat-content-template').html());
const chatEl = $('#chat');
const formEl = $('.form');
const messages = [];
let username;

// Local Video
const localImageEl = $('#local-image');
const localVideoEl = $('#local-video');

// Remote Videos
const remoteVideoTemplate = Handlebars.compile($('#remote-video-template').html());
const remoteVideosEl = $('#remote-videos');
let remoteVideosCount = 0;

// Add validation rules to Create/Join Room Form
formEl.form({
  fields: {
    roomName: 'empty',
    username: 'empty',
  },
});
Here we’re initializing several elements that we plan to manipulate. We’ve also added validation rules to the form so that a user can’t leave either of the fields blank.
Next, let’s initialize our WebRTC code:
// create our WebRTC connection
const webrtc = new SimpleWebRTC({
  // the id/element dom element that will hold "our" video
  localVideoEl: 'local-video',
  // the id/element dom element that will hold remote videos
  remoteVideosEl: 'remote-videos',
  // immediately ask for camera access
  autoRequestMedia: true,
});

// We got access to local camera
webrtc.on('localStream', () => {
  localImageEl.hide();
  localVideoEl.show();
});
Now you know why it’s called SimpleWebRTC. That’s all we need to do to initialize our WebRTC code. Noticed we haven’t even specified any ICE servers or STUN servers. It just works. However, you can use other TURN services such as Xirsys. You’ll need to set up a local SignalMaster server for handling WebRTC signaling.
Let’s do a quick refresh of the web page to confirm the new code is working:
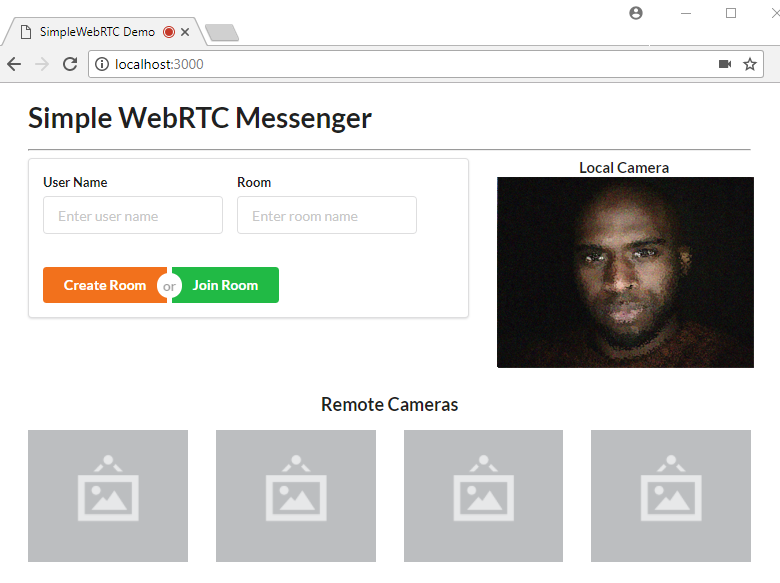
The page should request access to your camera and microphone. Just click Accept and you should get the above view.
Chat Room Script
Now let’s make the form functional. We need to write logic for creating and joining a room. In addition, we need to write additional logic for displaying the chat room. We’ll use the chat-room-template for this. Let’s start by attaching click handlers to the form’s buttons:
$('.submit').on('click', (event) => {
  if (!formEl.form('is valid')) {
    return false;
  }
  username = $('#username').val();
  const roomName = $('#roomName').val().toLowerCase();
  if (event.target.id === 'create-btn') {
    createRoom(roomName);
  } else {
    joinRoom(roomName);
  }
  return false;
});
Next, we need to declare the createRoom and joinRoom functions. Place the following code before the click handler code:
// Register new Chat Room
const createRoom = (roomName) => {
  console.info(`Creating new room: ${roomName}`);
  webrtc.createRoom(roomName, (err, name) => {
    showChatRoom(name);
    postMessage(`${username} created chatroom`);
  });
};

// Join existing Chat Room
const joinRoom = (roomName) => {
  console.log(`Joining Room: ${roomName}`);
  webrtc.joinRoom(roomName);
  showChatRoom(roomName);
  postMessage(`${username} joined chatroom`);
};
Creating or joining a room is a simple as that: just use SimpleWebRTC’s createRoom and joinRoom methods.
You may also have noticed that we have showChatroom and postMessage functions that we haven’t defined yet. Let’s do that now by inserting the following code before the calling code:
// Post Local Message
const postMessage = (message) => {
  const chatMessage = {
    username,
    message,
    postedOn: new Date().toLocaleString('en-GB'),
  };
  // Send to all peers
  webrtc.sendToAll('chat', chatMessage);
  // Update messages locally
  messages.push(chatMessage);
  $('#post-message').val('');
  updateChatMessages();
};

// Display Chat Interface
const showChatRoom = (room) => {
  // Hide form
  formEl.hide();
  const html = chatTemplate({ room });
  chatEl.html(html);
  const postForm = $('form');
  // Post Message Validation Rules
  postForm.form({
    message: 'empty',
  });
  $('#post-btn').on('click', () => {
    const message = $('#post-message').val();
    postMessage(message);
  });
  $('#post-message').on('keyup', (event) => {
    if (event.keyCode === 13) {
      const message = $('#post-message').val();
      postMessage(message);
    }
  });
};
Take some time to go through the code to understand the logic. You’ll soon come across another function we haven’t declared, updateChatMessages. Let’s add it now:
// Update Chat Messages
const updateChatMessages = () => {
  const html = chatContentTemplate({ messages });
  const chatContentEl = $('#chat-content');
  chatContentEl.html(html);
  // automatically scroll downwards
  const scrollHeight = chatContentEl.prop('scrollHeight');
  chatContentEl.animate({ scrollTop: scrollHeight }, 'slow');
};
The purpose of this function is simply to update the Chat UI with new messages. We need one more function that accepts messages from remote users. Add the following function to app.js:
// Receive message from remote user
webrtc.connection.on('message', (data) => {
  if (data.type === 'chat') {
    const message = data.payload;
    messages.push(message);
    updateChatMessages();
  }
});
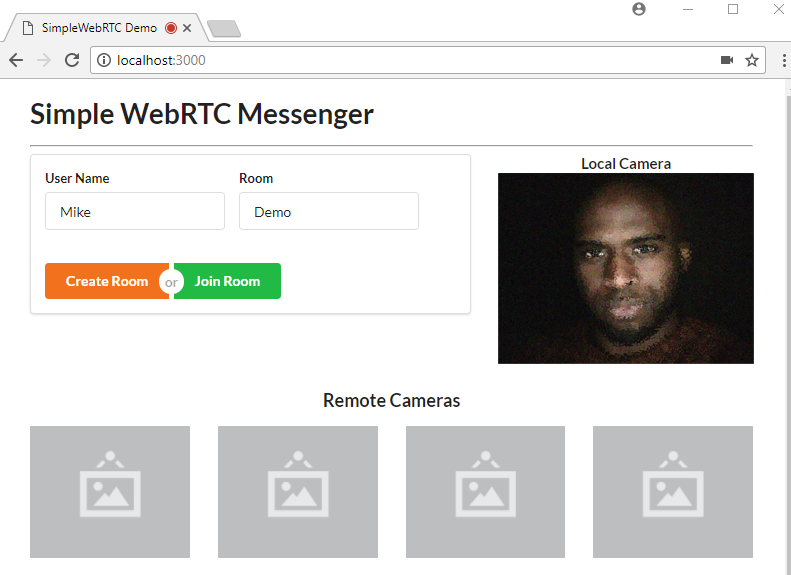
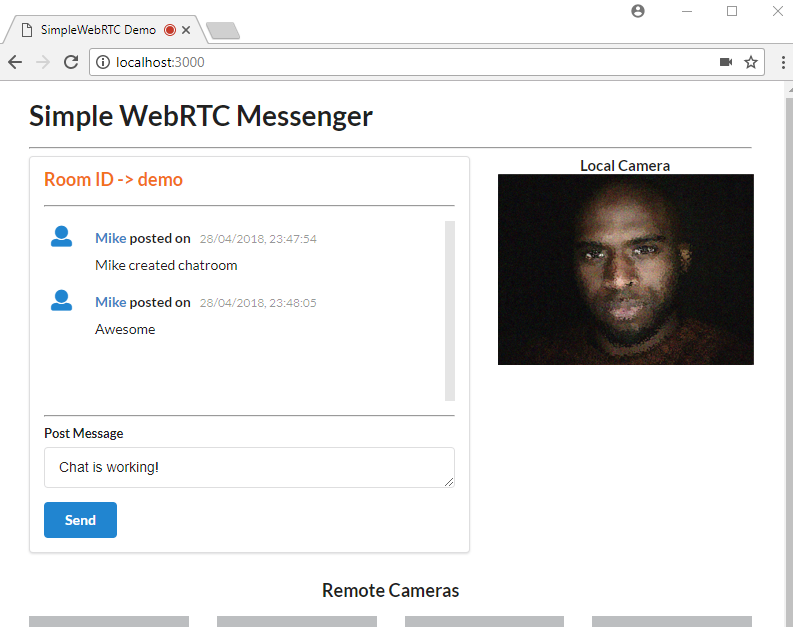
That’s all the logic we need to have the chat room work. Refresh the page and log in:
Hit the Create Room button. You’ll be taken to this view. Post some messages to confirm the chat room is working.
Once you’ve confirmed it’s working, move on to the next task.
Remote Video Camera
As mentioned earlier, SimpleWebRTC supports multiple peers. Here’s the code for adding remote video streams when a new user joins a room:
// Remote video was added
webrtc.on('videoAdded', (video, peer) => {
  const id = webrtc.getDomId(peer);
  const html = remoteVideoTemplate({ id });
  if (remoteVideosCount === 0) {
    remoteVideosEl.html(html);
  } else {
    remoteVideosEl.append(html);
  }
  $(`#${id}`).html(video);
  $(`#${id} video`).addClass('ui image medium'); // Make video element responsive
  remoteVideosCount += 1;
});
That’s it. I’m sorry if you were expecting something more complicated. What we did is simply add an event listener for videoAdded, the callback of which receives a video element that can be directly add to the DOM. It also receives a peer object that contains useful information about our peer connection, but in this case, we’re only interested in the DOM element’s ID.
Unfortunately, testing this bit of code isn’t possible without running it on an HTTPS server. Theoretically, you can generate a self-signed certificate for your Express server in order to run the app within your internal network. But the bad news is that browsers won’t allow you to access the webcam if the certificate isn’t from a trusted authority.
The simplest solution to testing the above code is to deploy it to a public server that supports the HTTPS protocol.
Deployment
This method that we’re about to perform is one of the easiest ways to deploy a NodeJS app. All we have to do is first register an account with now.sh.
Simply choose the free plan. You’ll need to provide your email address. You’ll also need to verify your email address for your account to activate. Next, install now CLI tool on your system:
npm install -g now
After installation is complete, you can deploy the application. Simply execute the following command at the root of your project folder:
now --public
If this is the first time you’re running the command, you’ll be asked to enter your email address. You’ll then receive an email that you’ll need in order to verify your login. After verification has been done, you’ll need to execute the command now --public again. After a few seconds, your app will be up and running at a specified URL that will be printed out on the terminal.
If you’re using the VSCode integrated terminal, simply press ALT and click to open the URL in your browser.
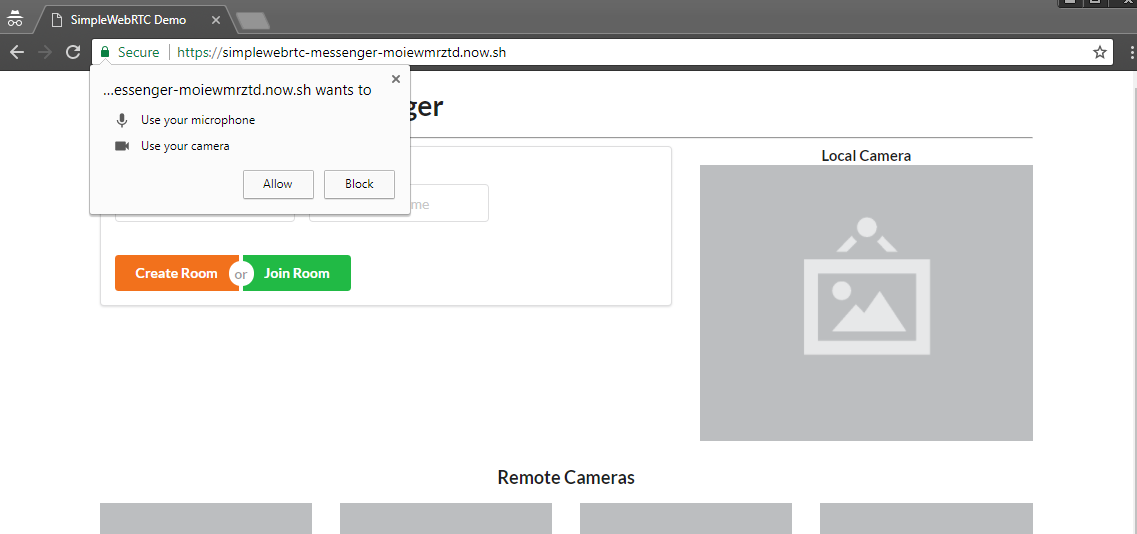
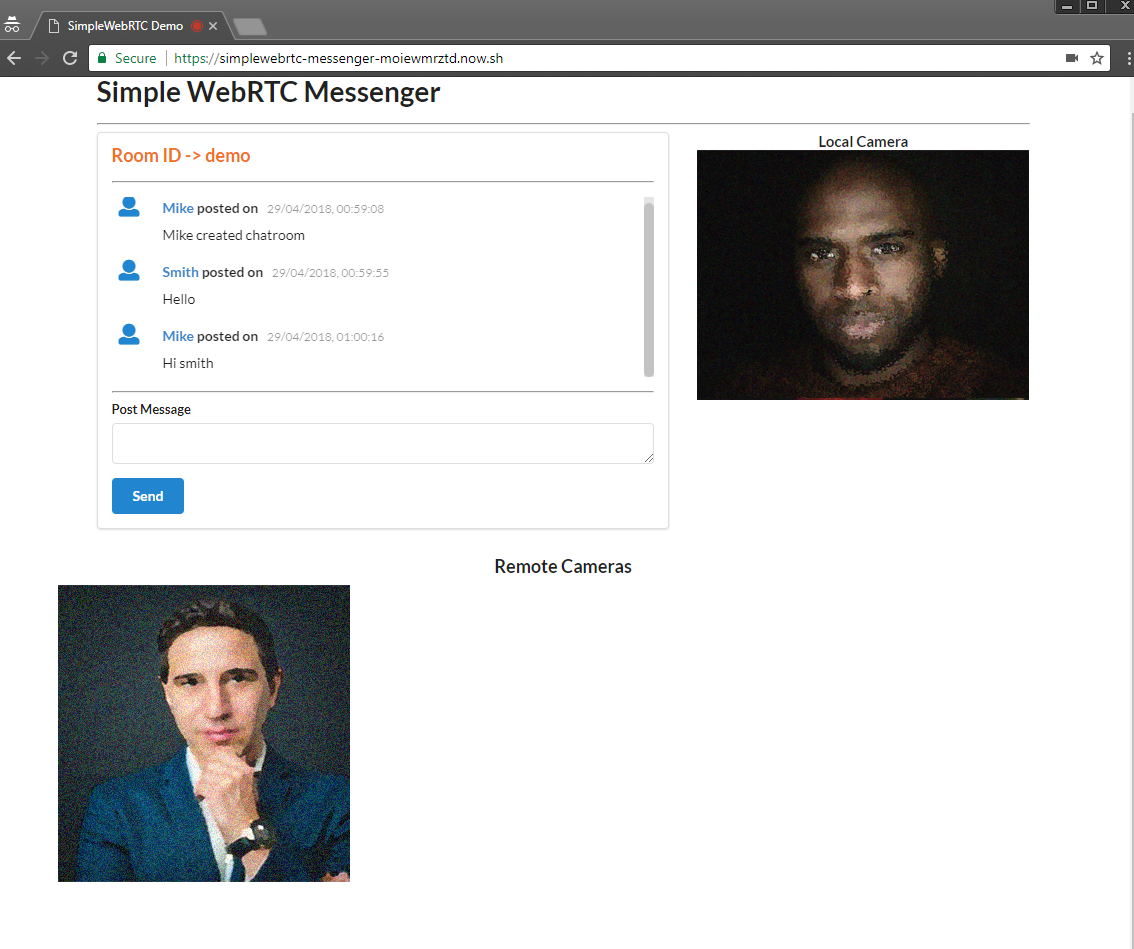
You’ll need to allow the page to access your camera and microphone. Next create a room just like before. After you’ve signed in, you need to access another device — such as another laptop or smartphone with a front-facing camera. You could also ask a friend with an internet connection to help you with this. Simply access the same URL, and enter a new username and the same room name. The remote user will have to hit the Join Room button. Within a few seconds, both devices should be connected to the chat room. If a device doesn’t have a camera, that’s okay, as the chat functionality will still work.
Conclusion
In this tutorial, you’ve learned about SimpleWebRTC and how you can use it to create real-time apps. Specifically we’ve created a messaging application that allows the user to send text and make a video call to a remote peer. SimpleWebRTC is a really great cross-browser library for painlessly implementing WebRTC in web applications.
Don’t forget that the code used in this tutorial is available on GitHub. Clone it, make something cool, and have fun!
Frequently Asked Questions (FAQs) about SimpleWebRTC
What is the difference between SimpleWebRTC and WebRTC?
SimpleWebRTC is a JavaScript library that simplifies the process of building your own WebRTC application. It provides a set of easy-to-use APIs that abstract away the complexities of the underlying WebRTC technology. On the other hand, WebRTC (Web Real-Time Communication) is an open-source project that provides web browsers and mobile applications with real-time communication via simple APIs. It allows audio and video communication to work inside web pages by allowing direct peer-to-peer communication, eliminating the need to install plugins or download native apps.
How can I start using SimpleWebRTC in my project?
To start using SimpleWebRTC in your project, you need to install it via npm. You can do this by running the command npm install simplewebrtc. After installation, you can import it into your project using import SimpleWebRTC from 'simplewebrtc'. Then, you can create a new SimpleWebRTC instance and start using its methods and events.
Can I use SimpleWebRTC for group video chats?
Yes, SimpleWebRTC supports group video chats. It provides a simple API for creating a room and inviting others to join. It also handles all the complexities of managing multiple peer connections, making it easy to create a group video chat application.
How secure is SimpleWebRTC?
SimpleWebRTC uses the security features provided by the underlying WebRTC technology. This includes secure RTP protocol (SRTP) for encryption and authentication of data, and Datagram Transport Layer Security (DTLS) for secure communication between peers. However, it’s important to note that the security of your application also depends on how you implement and use SimpleWebRTC.
Does SimpleWebRTC support data channels?
Yes, SimpleWebRTC supports data channels. Data channels allow you to send any kind of data directly between peers, making it possible to build applications that require real-time data exchange, such as multiplayer games or collaborative tools.
Can I use SimpleWebRTC on mobile devices?
Yes, SimpleWebRTC can be used on mobile devices. However, the support for WebRTC and hence SimpleWebRTC varies across different mobile browsers. It’s recommended to check the compatibility of the mobile browser before implementing a SimpleWebRTC application.
How can I troubleshoot issues with SimpleWebRTC?
SimpleWebRTC provides various events that you can listen to for debugging and troubleshooting. For example, the readyToCall event is fired when the library is ready to make calls, and the videoAdded event is fired when a video stream is added.
Can I customize the UI of SimpleWebRTC?
SimpleWebRTC does not provide a UI. It is a library that provides the functionality for real-time communication. The UI of your application is entirely up to you. This gives you the flexibility to create a UI that fits your application’s needs and style.
Does SimpleWebRTC support screen sharing?
Yes, SimpleWebRTC supports screen sharing. You can use the shareScreen method to start sharing your screen, and the stopScreenShare method to stop sharing.
How can I contribute to SimpleWebRTC?
SimpleWebRTC is an open-source project, and contributions are welcome. You can contribute by reporting issues, suggesting new features, or submitting pull requests. Before contributing, it’s recommended to read the project’s contribution guidelines.