

Front-end frameworks are great. They abstract away much of the complexity of building a single-page application (SPA) and help you organize your code in an intelligible manner as your project grows.
However, there’s a flip side: these frameworks come with a degree overhead and can introduce complexity of their own.
That’s why, in this tutorial, we’re going to learn how to build an SPA from scratch, without using a client-side JavaScript framework. This will help you evaluate what these frameworks actually do for you and at what point it makes sense to use one. It will also give you an understanding of the pieces that make up a typical SPA and how they’re wired together.
Let’s get started …
Key Takeaways
- Building an SPA without a framework allows for deeper understanding and control over your application, but requires solid knowledge of JavaScript and related technologies.
- Utilize Node.js and Express to handle server-side operations, including serving the SPA and managing API keys securely.
- Implement client-side routing using Vanilla Router to manage navigation within the SPA without page reloads.
- Handlebars templates are used to render HTML based on data, which helps in maintaining a clean separation between your application logic and markup.
- Leverage external APIs like Fixer.io for currency rates and conversion, but ensure to handle API limitations and key security on the server side.
- Error handling on both client and server sides is crucial to provide feedback to the user and manage unexpected issues smoothly.
- Consider performance and organization drawbacks as the application scales, acknowledging the benefits frameworks might offer in handling these aspects efficiently.
Prerequisites
For this tutorial, you’ll need a fundamental knowledge of modern JavaScript and jQuery. Some experience using Handlebars, Express and Axios will come handy, though it’s not strictly necessary. You’ll also need to have the following setup in your environment:
You can find the completed project on our GitHub repository.
Building the Project
We’re going to build a simple currency application that will provide the following features:
- display the latest currency rates
- convert from one currency to another
- display past currency rates based on a specified date.
We’ll make use of the following free online REST APIs to implement these features:
Fixer is a well-built API that provides a foreign exchange and currency conversion JSON API. Unfortunately, it’s a commercial service and the free plan doesn’t allow currency conversion. So we’ll also need to use the Free Currency Converter API. The conversion API has a few limitations, which luckily won’t affect the functionality of our application. It can be accessed directly without requiring an API key. However, Fixer requires an API key to perform any request. Simply sign up on their website to get an access key for the free plan.
Ideally, we should be able to build the entire single-page application on the client side. However, since we’ll be dealing with sensitive information (our API key) it won’t be possible to store this in our client code. Doing so will leave our app vulnerable and open to any junior hacker to bypass the app and access data directly from our API endpoints. To protect such sensitive information, we need to put it in server code. So, we’ll set up an Express server to act as a proxy between the client code and the cloud services. By using a proxy, we can safely access this key, since server code is never exposed to the browser. Below is a diagram illustrating how our completed project will work.
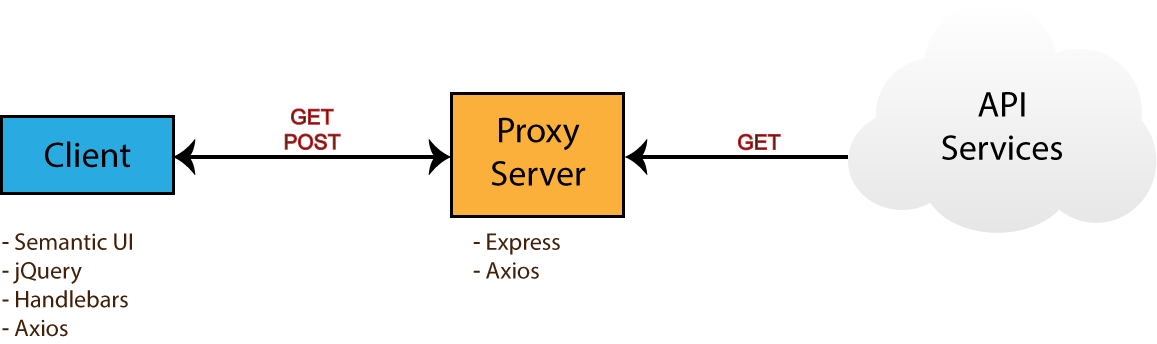
Take note of the npm packages that will be used by each environment — i.e. browser (client) and server. Now that you know what we’ll be building, head over to the next section to start creating the project.
Project Directories and Dependencies
Head over to your workspace directory and create the folder single-page-application. Open the folder in VSCode or your favorite editor and create the following files and folders using the terminal:
touch .env .gitignore README.md server.js
mkdir public lib
mkdir public/js
touch public/index.html
touch public/js/app.js
Open .gitignore and add these lines:
node_modules
.env
Open README.md and add these lines:
# Single Page Application

This is a project demo that uses Vanilla JS to build a Single Page Application.
Next, create the package.json file by executing the following command inside the terminal:
npm init -y
You should get the following content generated for you:
{
  "name": "single-page-application",
  "version": "1.0.0",
  "description": "This is a project demo that uses Vanilla JS to build a Single Page Application.",
  "main": "server.js",
  "directories": {
    "lib": "lib"
  },
  "scripts": {
    "test": "echo \"Error: no test specified\" && exit 1",
    "start": "node server.js"
  },
  "keywords": [],
  "author": "",
  "license": "ISC"
}
See how convenient the npm command is? The content has been generated based on the project structure. Let’s now install the core dependencies needed by our project. Execute the following command in your terminal:
npm install jquery semantic-ui-css handlebars vanilla-router express dotenv axios
After the packages have finished installing, head over to the next section to start building the base of the application.
Application Base
Before we start writing our front-end code, we need to implement a server–client base to work from. That means a basic HTML view being served from an Express server. For performance and reliability reasons, we’ll inject front-end dependencies straight from the node_modules folder. We’ll have to set up our Express server in a special way to make this work. Open server.js and add the following:
require('dotenv').config(); // read .env files
const express = require('express');

const app = express();
const port = process.env.PORT || 3000;

// Set public folder as root
app.use(express.static('public'));

// Allow front-end access to node_modules folder
app.use('/scripts', express.static(`${__dirname}/node_modules/`));

// Listen for HTTP requests on port 3000
app.listen(port, () => {
  console.log('listening on %d', port);
});
This gives us a basic Express server. I’ve commented the code, so hopefully this gives you a fairly good idea of what’s going on. Next, open public/index.html and enter:
<!DOCTYPE html>
<html lang="en">
<head>
  <meta charset="UTF-8">
  <meta name="viewport" content="width=device-width, initial-scale=1.0">
  <meta http-equiv="X-UA-Compatible" content="ie=edge">
  <link rel="stylesheet" href="scripts/semantic-ui-css/semantic.min.css">
  <title>SPA Demo</title>
</head>
<body>
  <div class="ui container">
    <!-- Navigation Menu -->
    <div class="ui four item inverted orange menu">
      <div class="header item">
        <i class="money bill alternate outline icon"></i>
        Single Page App
      </div>
      <a class="item" href="/">
        Currency Rates
      </a>
      <a class="item" href="/exchange">
        Exchange Rates
      </a>
      <a class="item" href="/historical">
        Historical Rates
      </a>
    </div>

    <!-- Application Root -->
    <div id="app"></div>
  </div>

  <!-- JS Library Dependencies -->
  <script src="scripts/jquery/dist/jquery.min.js"></script>
  <script src="scripts/semantic-ui-css/semantic.min.js"></script>
  <script src="scripts/axios/dist/axios.min.js"></script>
  <script src="scripts/handlebars/dist/handlebars.min.js"></script>
  <script src="scripts/vanilla-router/dist/vanilla-router.min.js"></script>
  <script src="js/app.js"></script>
</body>
</html>
We’re using Semantic UI for styling. Please refer to the Semantic UI Menu documentation to understand the code used for our navigation bar. Go to your terminal and start the server:
npm start
Open localhost:3000 in your browser. You should have a blank page with only the navigation bar showing:

Let’s now write some view templates for our app.
Front-end Skeleton Templates
We’ll use Handlebars to write our templates. JavaScript will be used to render the templates based on the current URL. The first template we’ll create will be for displaying error messages such as 404 or server errors. Place this code in public/index.html right after the the navigation section:
<!-- Error Template -->
<script id="error-template" type="text/x-handlebars-template">
  <div class="ui {{color}} inverted segment" style="height:250px;">
    <br>
    <h2 class="ui center aligned icon header">
      <i class="exclamation triangle icon"></i>
      <div class="content">
        {{title}}
        <div class="sub header">{{message}}</div>
      </div>
    </h2>
  </div>
</script>
Next, add the following templates that will represent a view for each URL path we specified in the navigation bar:
<!-- Currency Rates Template -->
<script id="rates-template" type="text/x-handlebars-template">
  <h1 class="ui header">Currency Rates</h1>
  <hr>
</script>

<!-- Exchange Conversion Template -->
<script id="exchange-template" type="text/x-handlebars-template">
  <h1 class="ui header">Exchange Conversion</h1>
  <hr>
</script>

<!-- Historical Rates Template -->
<script id="historical-template" type="text/x-handlebars-template">
  <h1 class="ui header">Historical Rates</h1>
  <hr>
</script>
Next, let’s compile all theses templates in public/js/app.js. After compilation, we’ll render the rates-template and see what it looks like:
window.addEventListener('load', () => {
  const el = $('#app');

  // Compile Handlebar Templates
  const errorTemplate = Handlebars.compile($('#error-template').html());
  const ratesTemplate = Handlebars.compile($('#rates-template').html());
  const exchangeTemplate = Handlebars.compile($('#exchange-template').html());
  const historicalTemplate = Handlebars.compile($('#historical-template').html());

  const html = ratesTemplate();
  el.html(html);
});
Take note that we’re wrapping all JavaScript client code inside a load event. This is just to make sure that all dependencies have been loaded and that the DOM has completed loading. Refresh the page and see what we have:

We’re making progress. Now, if you click the other links, except Currency Rates, the browser will try to fetch a new page and end up with a message like this: Cannot GET /exchange.
We’re a building a single page application, which means all the action should happen in one page. We need a way to tell the browser to stop fetching new pages whenever the URL changes.
Client-side Routing
To control routing within the browser environment, we need to implement client-side routing. There are many client-side routing libraries that can help out with this. For our project, we’ll use vanilla router, which is a very easy-to-use routing package.
If you recall, we had earlier included all the JavaScript libraries we need in index.html. Hence we can call the Router class right away. Remove the last two statements you added to app.js and replace them with this code:
// Router Declaration
const router = new Router({
  mode: 'history',
  page404: (path) => {
    const html = errorTemplate({
      color: 'yellow',
      title: 'Error 404 - Page NOT Found!',
      message: `The path '/${path}' does not exist on this site`,
    });
    el.html(html);
  },
});

router.add('/', () => {
  let html = ratesTemplate();
  el.html(html);
});

router.add('/exchange', () => {
  let html = exchangeTemplate();
  el.html(html);
});

router.add('/historical', () => {
  let html = historicalTemplate();
  el.html(html);
});

// Navigate app to current url
router.navigateTo(window.location.pathname);

 // Highlight Active Menu on Refresh/Page Reload
const link = $(`a[href$='${window.location.pathname}']`);
link.addClass('active');

$('a').on('click', (event) => {
  // Block browser page load
  event.preventDefault();

  // Highlight Active Menu on Click
  const target = $(event.target);
  $('.item').removeClass('active');
  target.addClass('active');

  // Navigate to clicked url
  const href = target.attr('href');
  const path = href.substr(href.lastIndexOf('/'));
  router.navigateTo(path);
});
Take some time to go through the code. I’ve added comments in various sections to explain what’s happening. You’ll notice that, in the router’s declaration, we’ve specified the page404 property to use the error template. Let’s now test the links:

The links should now work. But we have a problem. Click either the /exchange or historical link, then refresh the browser. We get the same error as before — Cannot GET /exchange. To fix this, head over to server.js and add this statement right before the listen code:
// Redirect all traffic to index.html
app.use((req, res) => res.sendFile(`${__dirname}/public/index.html`));
You’ll have to restart the the server using Ctrl + C and executing npm start. Go back to the browser and try to refresh. You should now see the page render correctly. Now, let’s try entering a non-existent path in the URL like /exchanges. The app should display a 404 error message:
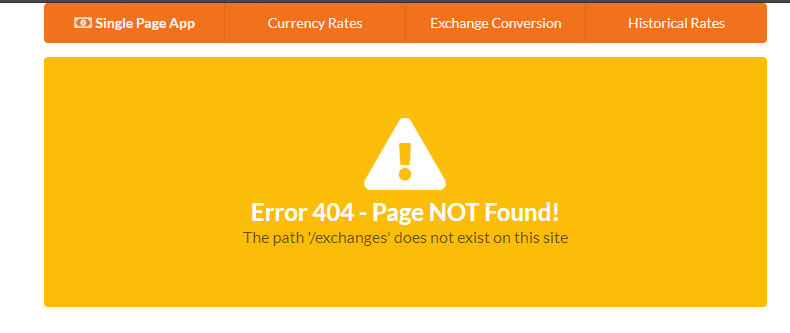
We’ve now implemented the necessary code to create our single-page-app skeleton. Let’s now start working on listing the latest currency rates.
Latest Currency Rates
For this task, we’ll make use of the Fixer Latest Rates Endpoint. Open the .env file and add your API key. We’ll also specify the timeout period and the symbols we’ll list on our page. Feel free to increase the timeout value if you have a slower internet connection:
API_KEY=<paste key here>
PORT=3000
TIMEOUT=5000
SYMBOLS=EUR,USD,GBP,AUD,BTC,KES,JPY,CNY
Next create the file lib/fixer-service.js. This is where we’ll write helper code for our Express server to easily request information from Fixer. Copy the following code:
require('dotenv').config();
const axios = require('axios');

const symbols = process.env.SYMBOLS || 'EUR,USD,GBP';

// Axios Client declaration
const api = axios.create({
  baseURL: 'http://data.fixer.io/api',
  params: {
    access_key: process.env.API_KEY,
  },
  timeout: process.env.TIMEOUT || 5000,
});

// Generic GET request function
const get = async (url) => {
  const response = await api.get(url);
  const { data } = response;
  if (data.success) {
    return data;
  }
  throw new Error(data.error.type);
};

module.exports = {
  getRates: () => get(`/latest&symbols=${symbols}&base=EUR`),
};
Again, take some time to go through the code to understand what’s happening. If you’re unsure, you can also check out the documentation for dotenv, axios and read up on module exports. Let’s now do a quick test to confirm the getRates() function is working.
Open server.js and add this code:
const { getRates } = require('./lib/fixer-service');

...
// Place this block at the bottom
const test = async() => {
  const data = await getRates();
  console.log(data);
}

test();
Run npm start or node server. After a few seconds, you should get the following output:
{
  success: true,
  timestamp: 1523871848,
  base: 'EUR',
  date: '2018-04-16',
  rates: {
    EUR: 1,
    USD: 1.23732,
    GBP: 0.865158,
    AUD: 1.59169,
    BTC: 0.000153,
    KES: 124.226892,
    JPY: 132.608498,
    CNY: 7.775567
  }
}
If you get something similar to the above, it means the code is working. The values will of course be different, since the rates change every day. Now comment out the test block and insert this code right before the statement that redirects all traffic to index.html:
// Express Error handler
const errorHandler = (err, req, res) => {
  if (err.response) {
    // The request was made and the server responded with a status code
    // that falls out of the range of 2xx
    res.status(403).send({ title: 'Server responded with an error', message: err.message });
  } else if (err.request) {
    // The request was made but no response was received
    res.status(503).send({ title: 'Unable to communicate with server', message: err.message });
  } else {
    // Something happened in setting up the request that triggered an Error
    res.status(500).send({ title: 'An unexpected error occurred', message: err.message });
  }
};

// Fetch Latest Currency Rates
app.get('/api/rates', async (req, res) => {
  try {
    const data = await getRates();
    res.setHeader('Content-Type', 'application/json');
    res.send(data);
  } catch (error) {
    errorHandler(error, req, res);
  }
});
As we can see, there’s a custom error handler function that’s designed to handle different error scenarios, which can occur during execution of server code. When an error occurs, an error message is constructed and sent back to the client.
Let’s confirm this bit of code is working. Restart the Express server and navigate your browser to this URL: localhost:3000/api/rates. You should see the same JSON result that was displayed in the console. We can now implement a view that will display this information in a neat, elegant table.
Open public/index.html and replace the rates-template with this code:
<!-- Currency Rates Template -->
<script id="rates-template" type="text/x-handlebars-template">
  <h1 class="ui header">Currency Rates</h1>
  <hr>
  <div class="ui loading basic segment">
    <div class="ui horizontal list">
      <div class="item">
        <i class="calendar alternate outline icon"></i>
        <div class="content">
          <div class="ui sub header">Date</div>
          <span>{{date}}</span>
        </div>
      </div>
      <div class="item">
        <i class="money bill alternate outline icon"></i>
        <div class="content">
          <div class="ui sub header">Base</div>
          <span>{{base}}</span>
        </div>
      </div>
    </div>

    <table class="ui celled striped selectable inverted table">
      <thead>
        <tr>
          <th>Code</th>
          <th>Rate</th>
        </tr>
      </thead>
      <tbody>
        {{#each rates}}
        <tr>
          <td>{{@key}}</td>
          <td>{{this}}</td>
        </tr>
        {{/each}}
      </tbody>
    </table>
  </div>
</script>
Remember we’re using Semantic UI to provide us with styling. I’d like you to pay close attention to the Segment loading component. This will be an indication to let users know that something is happening as the app fetches the data. We’re also using the Table UI to display the rates. Please go though the linked documentation if you’re new to Semantic.
Now let’s update our code in public/js/app.js to make use of this new template. Replace the the first route.add('/') function with this code:
// Instantiate api handler
const api = axios.create({
  baseURL: 'http://localhost:3000/api',
  timeout: 5000,
});

// Display Error Banner
const showError = (error) => {
  const { title, message } = error.response.data;
  const html = errorTemplate({ color: 'red', title, message });
  el.html(html);
};

// Display Latest Currency Rates
router.add('/', async () => {
  // Display loader first
  let html = ratesTemplate();
  el.html(html);
  try {
    // Load Currency Rates
    const response = await api.get('/rates');
    const { base, date, rates } = response.data;
    // Display Rates Table
    html = ratesTemplate({ base, date, rates });
    el.html(html);
  } catch (error) {
    showError(error);
  } finally {
    // Remove loader status
    $('.loading').removeClass('loading');
  }
});
The first code block instantiates an API client for communicating with our proxy server. The second block is a global function for handling errors. Its work is simply to display an error banner in case something goes wrong on the server side. The third block is where we get rates data from the localhost:3000/api/rates endpoint and pass it to the rates-template to display the information.
Simply refresh the browser. You should now have the following view:
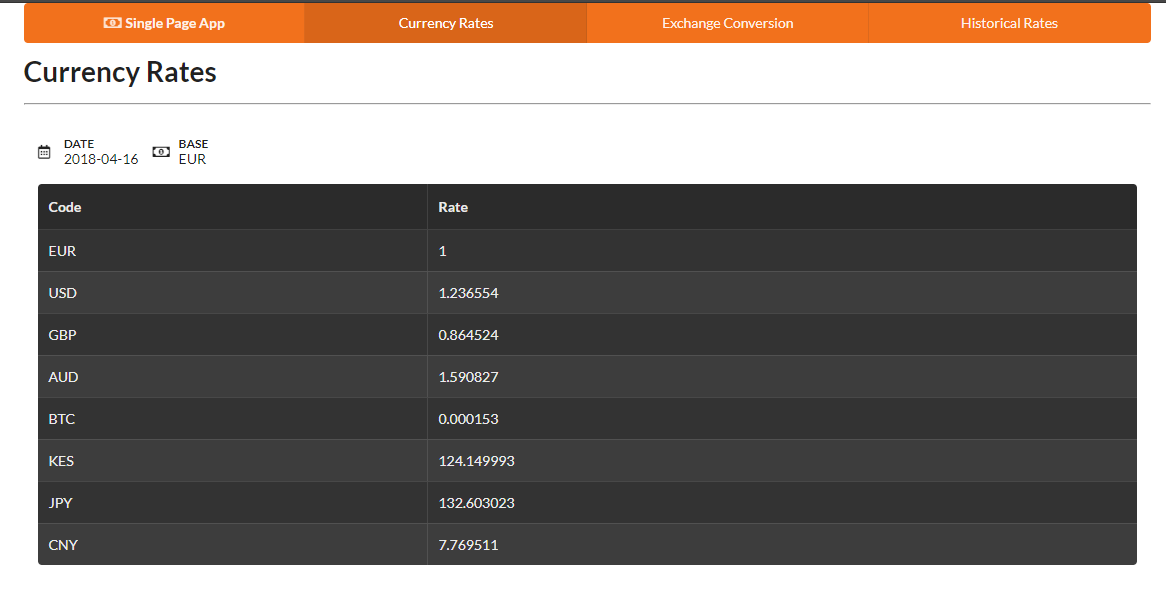
Next we’ll build an interface for converting currencies.
Exchange Conversion
For the currency conversion, we’ll use two endpoints:
We need the symbols endpoint to get a list of supported currency codes. We’ll use this data to populate the dropdowns that the users will use to select which currencies to convert. Open lib/fixer-service.js and add this line right after the getRates() function:
getSymbols: () => get('/symbols'),
Create another helper file, lib/free-currency-service.js, and add the following code:
require('dotenv').config();
const axios = require('axios');

const api = axios.create({
  baseURL: 'https://free.currencyconverterapi.com/api/v5',
  timeout: process.env.TIMEOUT || 5000,
});

module.exports = {
  convertCurrency: async (from, to) => {
    const response = await api.get(`/convert?q=${from}_${to}&compact=y`);
    const key = Object.keys(response.data)[0];
    const { val } = response.data[key];
    return { rate: val };
  },
};
This will help us get the conversion rate from one currency to another for free. In the client code, we’ll have to calculate the conversion amount by multiplying amount by rate. Now let’s add these two service methods to our Express server code. Open server.js and update accordingly:
const { getRates, getSymbols, } = require('./lib/fixer-service');
const { convertCurrency } = require('./lib/free-currency-service');
...
// Insert right after get '/api/rates', just before the redirect statement

// Fetch Symbols
app.get('/api/symbols', async (req, res) => {
  try {
    const data = await getSymbols();
    res.setHeader('Content-Type', 'application/json');
    res.send(data);
  } catch (error) {
    errorHandler(error, req, res);
  }
});

// Convert Currency
app.post('/api/convert', async (req, res) => {
  try {
    const { from, to } = req.body;
    const data = await convertCurrency(from, to);
    res.setHeader('Content-Type', 'application/json');
    res.send(data);
  } catch (error) {
    errorHandler(error, req, res);
  }
});
Now our proxy server should be able to get symbols and conversion rates. Take note that /api/convert is a POST method. We’ll use a form on the client side to build the currency conversion UI. Feel free to use the test function to confirm both endpoints are working. Here’s an example:
// Test Symbols Endpoint
const test = async() => {
  const data = await getSymbols();
  console.log(data);
}

// Test Currency Conversion Endpoint
const test = async() => {
  const data = await convertCurrency('USD', 'KES');
  console.log(data);
}
You’ll have to restart the server for each test. Remember to comment out the tests once you’ve confirmed the code is working so far. Let’s now work on our currency conversion UI. Open public/index.html and update the exchange-template by replacing the existing code with this:
<script id="exchange-template" type="text/x-handlebars-template">
  <h1 class="ui header">Exchange Rate</h1>
  <hr>
  <div class="ui basic loading segment">
    <form class="ui form">
      <div class="three fields">
        <div class="field">
          <label>From</label>
          <select class="ui dropdown" name="from" id="from">
            <option value="">Select Currency</option>
            {{#each symbols}}
              <option value="{{@key}}">{{this}}</option>
            {{/each}}
          </select>
        </div>
        <div class="field">
          <label>To</label>
          <select class="ui dropdown" name="to" id="to">
            <option value="">Select Currency</option>
            {{#each symbols}}
              <option value="{{@key}}">{{this}}</option>
            {{/each}}
          </select>
        </div>
        <div class="field">
          <label>Amount</label>
          <input type="number" name="amount" id="amount" placeholder="Enter amount">
        </div>
      </div>
      <div class="ui primary submit button">Convert</div>
      <div class="ui error message"></div>
    </form>
    <br>
    <div id="result-segment" class="ui center aligned segment">
      <h2 id="result" class="ui header">
        0.00
      </h2>
    </div>
  </div>
</script>
Take your time to go through the script and understand what’s happening. We’re using Semantic UI Form to build the interface. We’re also using Handlebars notation to populate the dropdown boxes. Below is the JSON format used by Fixer’s Symbols endpoint:
{
  "success": true,
  "symbols": {
    "AED": "United Arab Emirates Dirham",
    "AFN": "Afghan Afghani",
    "ALL": "Albanian Lek",
    "AMD": "Armenian Dram",
  }
}
Take note that the symbols data is in map format. That means the information is stored as key {{@key}} and value {{this}} pairs. Let’s now update public/js/app.js and make it work with the new template. Open the file and replace the existing route code for /exchange with the following:
// Perform POST request, calculate and display conversion results
const getConversionResults = async () => {
  // Extract form data
  const from = $('#from').val();
  const to = $('#to').val();
  const amount = $('#amount').val();
  // Send post data to Express(proxy) server
  try {
    const response = await api.post('/convert', { from, to });
    const { rate } = response.data;
    const result = rate * amount;
    $('#result').html(`${to} ${result}`);
  } catch (error) {
    showError(error);
  } finally {
    $('#result-segment').removeClass('loading');
  }
};

// Handle Convert Button Click Event
const convertRatesHandler = () => {
  if ($('.ui.form').form('is valid')) {
    // hide error message
    $('.ui.error.message').hide();
    // Post to Express server
    $('#result-segment').addClass('loading');
    getConversionResults();
    // Prevent page from submitting to server
    return false;
  }
  return true;
};

router.add('/exchange', async () => {
  // Display loader first
  let html = exchangeTemplate();
  el.html(html);
  try {
    // Load Symbols
    const response = await api.get('/symbols');
    const { symbols } = response.data;
    html = exchangeTemplate({ symbols });
    el.html(html);
    $('.loading').removeClass('loading');
    // Validate Form Inputs
    $('.ui.form').form({
      fields: {
        from: 'empty',
        to: 'empty',
        amount: 'decimal',
      },
    });
    // Specify Submit Handler
    $('.submit').click(convertRatesHandler);
  } catch (error) {
    showError(error);
  }
});
Refresh the page. You should now have the following view:
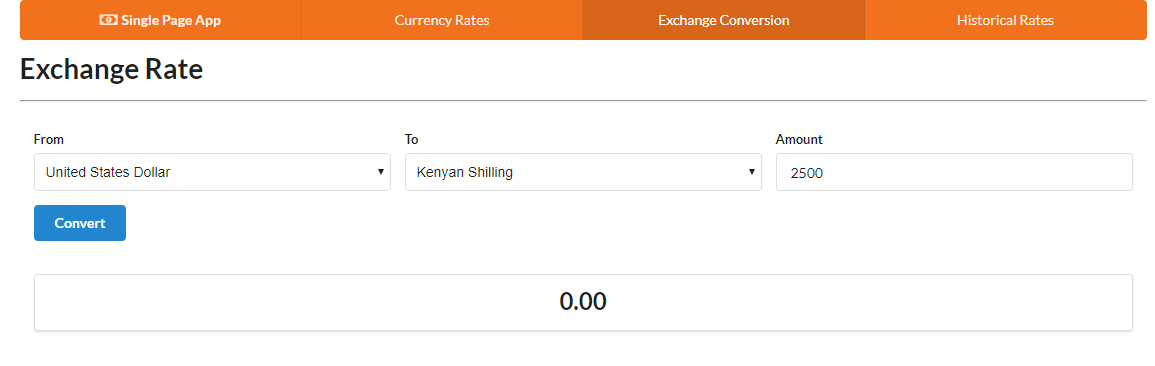
Select some currencies of your choosing and enter an amount. Then hit the Convert button:
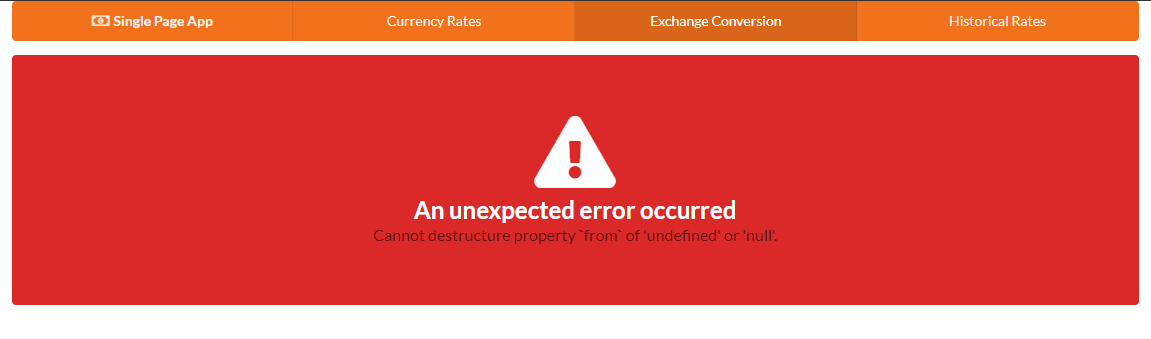
Oops! We just hit an error scenario. At least we know our error handling code is working. To figure out why the error is occurring, go back to the server code and look at the /api/convert function. Specifically, look at the line that says const { from, to } = req.body;.
It seems Express is unable to read properties from the request object. To fix this, we need to install middleware that can help out with this:
npm install body-parser
Next, update the server code as follows:
const bodyParser = require('body-parser');
...

/** Place this code right before the error handler function **/

// Parse POST data as URL encoded data
app.use(bodyParser.urlencoded({
  extended: true,
}));

// Parse POST data as JSON
app.use(bodyParser.json());
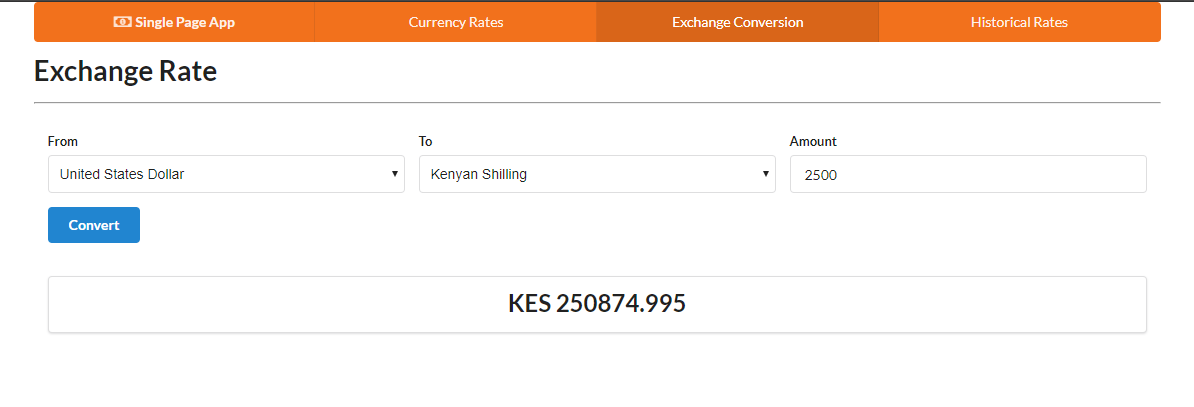
Start the server again and refresh the browser. Try doing another conversion. It should now work.
Let’s now focus on the final bit — historical currency rates. Let’s start with the views.
Historical Currency Rates
Implementing this feature will be like combining the tasks from the first and second pages. We’re going to build a tiny form where the user will be expected to input a date. When the user clicks submit, the currency rates for the specified date will be displayed in table format. We’ll use the Historical Rates Endpoint from Fixer API to achieve this. The API request looks like this:
https://data.fixer.io/api/2013-12-24
    ? access_key = API_KEY
    & base = GBP
    & symbols = USD,CAD,EUR
And the response will look like this:
{
  "success": true,
  "historical": true,
  "date": "2013-12-24",
  "timestamp": 1387929599,
  "base": "GBP",
  "rates": {
    "USD": 1.636492,
    "EUR": 1.196476,
    "CAD": 1.739516
  }
}
Open lib/fixer-service.js and the Historical Rates Endpoint like this:
...
  /** Place right after getSymbols **/
  getHistoricalRate: date => get(`/${date}&symbols=${symbols}&base=EUR`),
...
Open server.js and add this code:
...
const { getRates, getSymbols, getHistoricalRate } = require('./lib/fixer-service');
...
/** Place this after '/api/convert' post function **/

// Fetch Currency Rates by date
app.post('/api/historical', async (req, res) => {
  try {
    const { date } = req.body;
    const data = await getHistoricalRate(date);
    res.setHeader('Content-Type', 'application/json');
    res.send(data);
  } catch (error) {
    errorHandler(error, req, res);
  }
});
...
If you’re in any doubt as to how the code is arranged, please refer to the complete server.js file on GitHub. Feel free to write a quick test to confirm the historical endpoint is working:
const test = async() => {
  const data = await getHistoricalRate('2012-07-14');
  console.log(data);
}

test();
Do remember to comment out the test block once you confirm everything’s working. Now let’s now work on the client code.
Open index.html. Delete the existing historical-template we used as a placeholder, and replace it with the following:
<script id="historical-template" type="text/x-handlebars-template">
  <h1 class="ui header">Historical Rates</h1>
  <hr>
  <form class="ui form">
    <div class="field">
      <label>Pick Date</label>
      <div class="ui calendar" id="calendar">
        <div class="ui input left icon">
          <i class="calendar icon"></i>
          <input type="text" placeholder="Date" id="date">
        </div>
      </div>
    </div>
    <div class="ui primary submit button">Fetch Rates</div>
    <div class="ui error message"></div>
  </form>

  <div class="ui basic segment">
    <div id="historical-table"></div>
  </div>
</script>
Take a look at the form first. One thing I’d like to point out is that Semantic UI doesn’t officially have a date input. However, thanks to Michael de Hoog’s contribution, we have the Semantic-UI-Calendar module available to us. Simply install it using npm:
npm install semantic-ui-calendar
Go back to public/index.html and include it within the scripts section:
...
<script src="scripts/semantic-ui-css/semantic.min.js"></script>
<script src="scripts/semantic-ui-calendar/dist/calendar.min.js"></script>
....
To display the historical rates, we’ll simply reuse the rates-template. Next open public/js/app.js and update the existing route code for /historical:
const getHistoricalRates = async () => {
  const date = $('#date').val();
  try {
    const response = await api.post('/historical', { date });
    const { base, rates } = response.data;
    const html = ratesTemplate({ base, date, rates });
    $('#historical-table').html(html);
  } catch (error) {
    showError(error);
  } finally {
    $('.segment').removeClass('loading');
  }
};

const historicalRatesHandler = () => {
  if ($('.ui.form').form('is valid')) {
    // hide error message
    $('.ui.error.message').hide();
    // Indicate loading status
    $('.segment').addClass('loading');
    getHistoricalRates();
    // Prevent page from submitting to server
    return false;
  }
  return true;
};

router.add('/historical', () => {
  // Display form
  const html = historicalTemplate();
  el.html(html);
  // Activate Date Picker
  $('#calendar').calendar({
    type: 'date',
    formatter: { //format date to yyyy-mm-dd
      date: date => new Date(date).toISOString().split('T')[0],
    },
  });
  // Validate Date input
  $('.ui.form').form({
    fields: {
      date: 'empty',
    },
  });
  $('.submit').click(historicalRatesHandler);
});
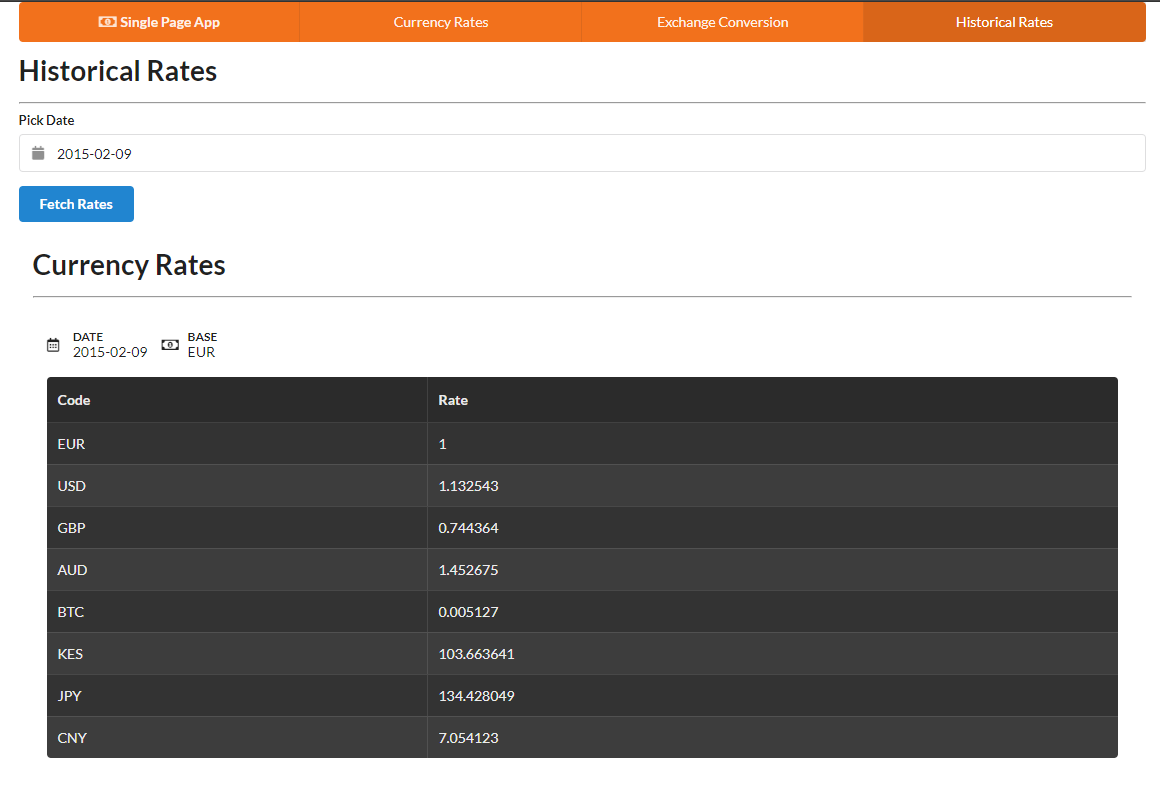
Once again, take time to read the comments and understand the code and what it’s doing. Then restart the server, refresh the browser and navigate to the /historical path. Pick any date before the year 1999 then click Fetch Rates. You should have something like this:
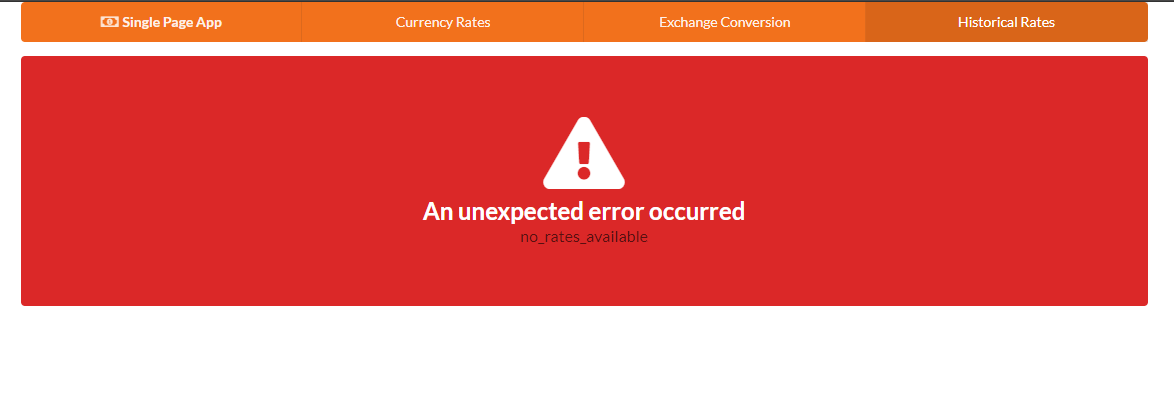
If you pick a date before the year 1999 or a date in the future, an error banner will be displayed when you submit the form.
Summary
Now that we’ve come to the end of the tutorial, you should see that it’s not that difficult to build a single-page application powered by REST APIs without using a framework. But there are a few things we should be concerned with:
-
DOM Performance. In our client-side code, we’re directly manipulating the DOM. This can soon get out of hand as the project grows, causing the UI to become sluggish.
-
Browser Performance. There are quite a number of front-end libraries that we’ve loaded as scripts in
index.html, which is okay for development purposes. For production deployment, we need a system for bundling all scripts such that the browsers use a single request for loading the necessary JavaScript resources. -
Monolithic Code. For the server code, it’s easier to break down code into modular parts since it runs within a Node environment. However, for client-side code, it’s not easy to organize in modules unless you use a bundler like webpack.
-
Testing. So far we’ve been doing manual testing. For a production-ready application, we need to set up a testing framework like Jasmine, Mocha or Chai to automate this work. This will help prevent recurring errors.
These are just a few of the many issues you’ll face when you approach project development without using a framework. Using something such as Angular, React or Vue will help you alleviate a lot of these concerns. I hope this tutorial has been helpful and that it will aid you in your journey to becoming a professional JavaScript developer.
Frequently Asked Questions (FAQs) about Single Page Applications (SPAs)
What are the key differences between Single Page Applications (SPAs) and traditional web applications?
Traditional web applications typically involve loading entire new pages from the server whenever a user interacts with the interface. This can lead to slower performance and a less smooth user experience. On the other hand, SPAs load a single HTML page and dynamically update that page as the user interacts with the app. This results in a more fluid user experience, similar to a desktop application. However, SPAs can be more complex to develop and may have issues with SEO and initial load times.
How does a Single Page Application improve user experience?
SPAs provide a seamless user experience by eliminating the need for page refreshes. All necessary code (HTML, JavaScript, and CSS) is retrieved with a single page load, or the appropriate resources are dynamically loaded and added to the page as necessary, usually in response to user actions. This results in a smoother, faster interaction for the user, similar to a desktop or mobile app.
Are there any SEO implications when using Single Page Applications?
Yes, there can be SEO implications when using SPAs. Traditional search engine crawlers may have difficulty interpreting and indexing the content of SPAs, which can impact search engine rankings. However, modern search engines like Google have improved their ability to crawl and index JavaScript-generated content. It’s also possible to implement strategies like server-side rendering or pre-rendering to improve SEO for SPAs.
What are some popular frameworks for building Single Page Applications?
There are several popular JavaScript frameworks and libraries that are commonly used to build SPAs. These include Angular, React, and Vue.js. These tools provide robust features and structures to help developers build complex SPAs more efficiently.
Can Single Page Applications be built without a framework?
Yes, it’s possible to build SPAs without a framework. This can provide more flexibility and control over the application, but it also requires a deeper understanding of JavaScript and web development concepts. It can also be more time-consuming and complex to build and maintain an SPA without a framework.
What are the potential drawbacks of Single Page Applications?
While SPAs can provide a smoother user experience, they also have potential drawbacks. These include longer initial load times, as all the necessary code for the entire application must be loaded upfront. SPAs can also be more complex to develop and maintain, and they may have issues with SEO and compatibility with older browsers.
How does routing work in a Single Page Application?
In a SPA, routing is handled client-side, rather than server-side. This means that when a user clicks a link or button in the application, the URL changes but the page does not refresh. Instead, the application dynamically updates the page content based on the new URL. This is typically handled using a JavaScript library or framework.
How can I improve the performance of my Single Page Application?
There are several strategies to improve the performance of SPAs. These include code splitting, which involves breaking up the JavaScript bundle into smaller chunks that can be loaded on demand, and server-side rendering or pre-rendering, which can improve initial load times and SEO. Caching and optimizing API calls can also improve performance.
How can I handle SEO in a Single Page Application?
There are several strategies to improve SEO for SPAs. These include server-side rendering or pre-rendering, which can make the content of the application more accessible to search engine crawlers. Using semantic HTML and ensuring that the application is accessible and user-friendly can also improve SEO.
How can I test a Single Page Application?
Testing a SPA can be more complex than testing a traditional web application, due to the dynamic nature of SPAs. However, there are tools and strategies that can help. These include unit testing individual components or functions, end-to-end testing to simulate user interactions, and performance testing to ensure the application loads and runs efficiently.