
This article was peer reviewed by Deji Akala. Thanks to all of SitePoint’s peer reviewers for making SitePoint content the best it can be!
In this tutorial, you’re going to get started with developing Shopify apps. You’re going to create a simple app that lists out products from a Shopify store. The full source code of the app is available on Github.
![]()
Key Takeaways
- Utilize the HTTP API to extend the functionality of Shopify stores, enabling a range of operations like adding customers or fetching product lists.
- Sign up for a Shopify Partner Account to access development stores for testing apps without affecting live environments.
- Create and set up a development store to experiment with app features, including adding products and testing purchases.
- Develop Shopify apps by creating an app in the Shopify partners website, handling user authentication, and managing app authorization processes.
- Use Guzzle, a PHP HTTP client, to make API requests, handle user authentication, and interact with the Shopify API more efficiently.
- Implement OAuth for secure user authentication and ensure the app can make authorized API requests to the Shopify store on behalf of the user.
What are Shopify Apps?
Shopify apps are a way of extending the functionality of a Shopify store or to provide ecommerce capabilities to websites or mobile apps. Here’s a list of approaches to do this:
- HTTP API – gives web apps the ability to perform different operations in a Shopify store. Things like adding a customer, getting a list of products, or listening for different events. This is done by means of webhooks.
- JavaScript Buy SDK – allows you to fetch product information, add items to a cart and checkout either from a website or hybrid mobile apps such as those built with Cordova.
- Embedded App SDK – allows you to embed your web app directly into the Shopify admin interface. This is useful for apps that have an admin settings page. Instead of the user having to access it on a separate website, the web app will be loaded as an iframe.
- iOS and Android Buy – used for integrating Shopify checkout into your iOS or Android app.
- Shopify POS App SDK – allows you to embed your web apps directly inside the Shopify POS.
In this tutorial, you’re going to learn about the HTTP API.
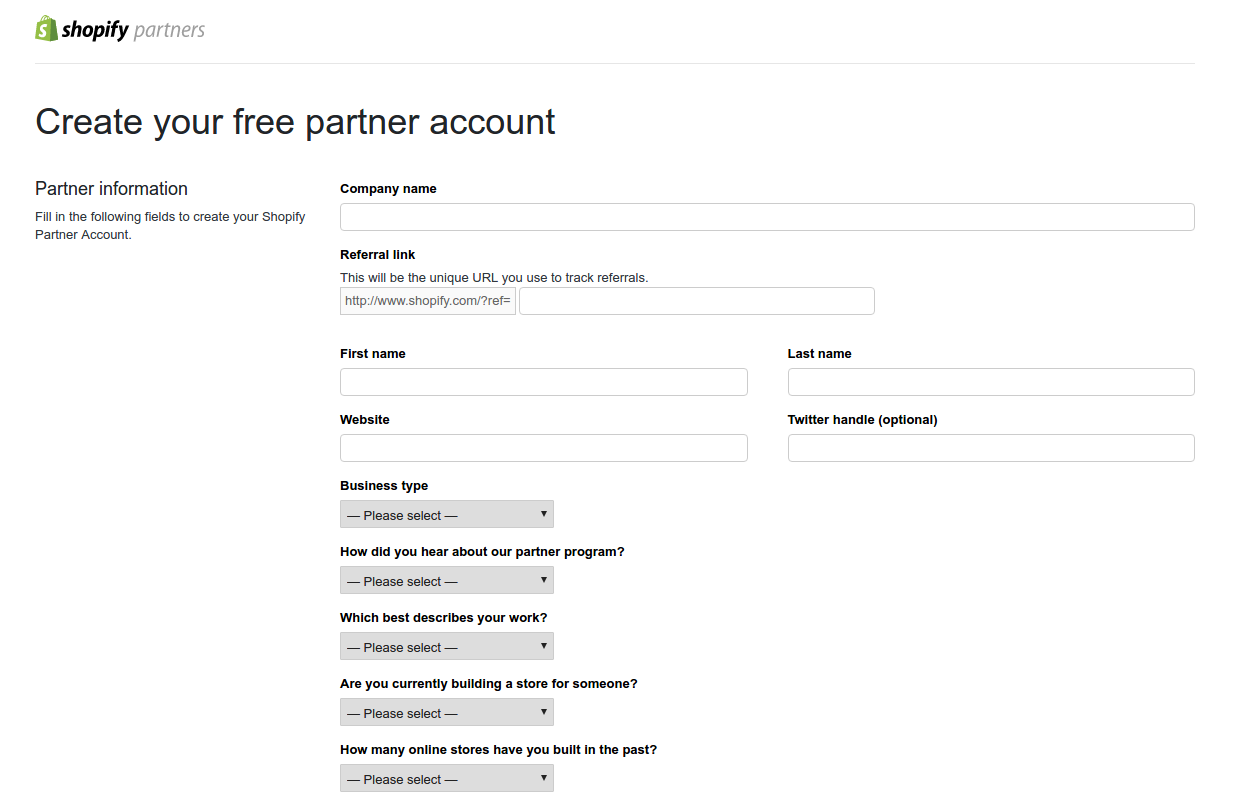
Sign up for a Shopify Partner Account
The first thing that you need to do is to sign up for a Shopify Partner Account. This allows you to create a development store for testing a Shopify app. You will be asked to fill out a form with things like your company name, business type, email address, website, password and other relevant information.
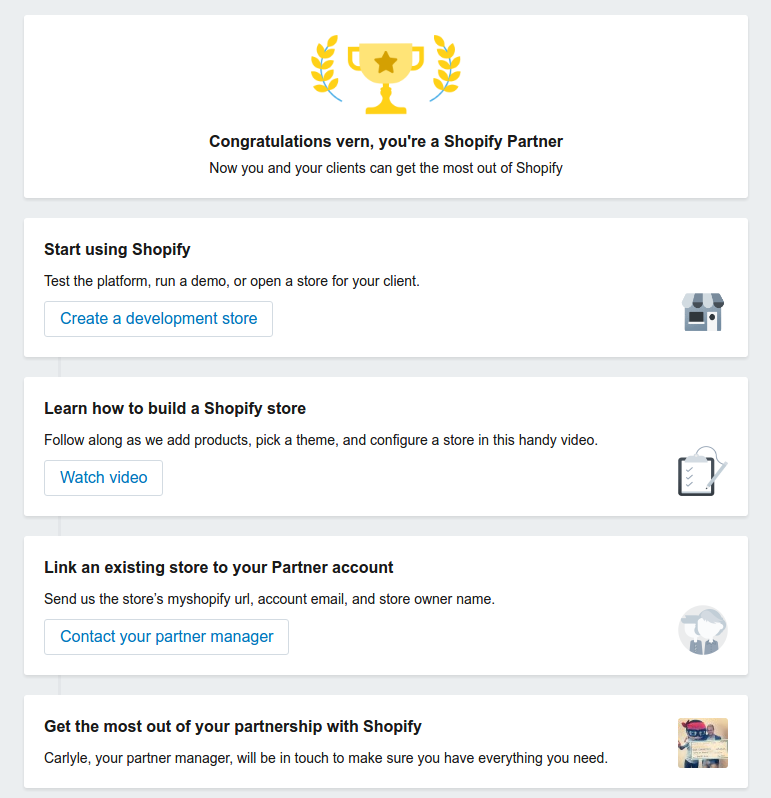
If all the information you provided is valid, you should be greeted with the following page:
Create a Development Store
The next step is creating a development store which is like a Shopify store. You can add products, store HTML and CSS code for themes, and test purchases through a bogus payment gateway. The only limitation is that you can’t add a custom domain or charge customers in a development store.
Click the Create a development store button and you will be redirected to the following page:
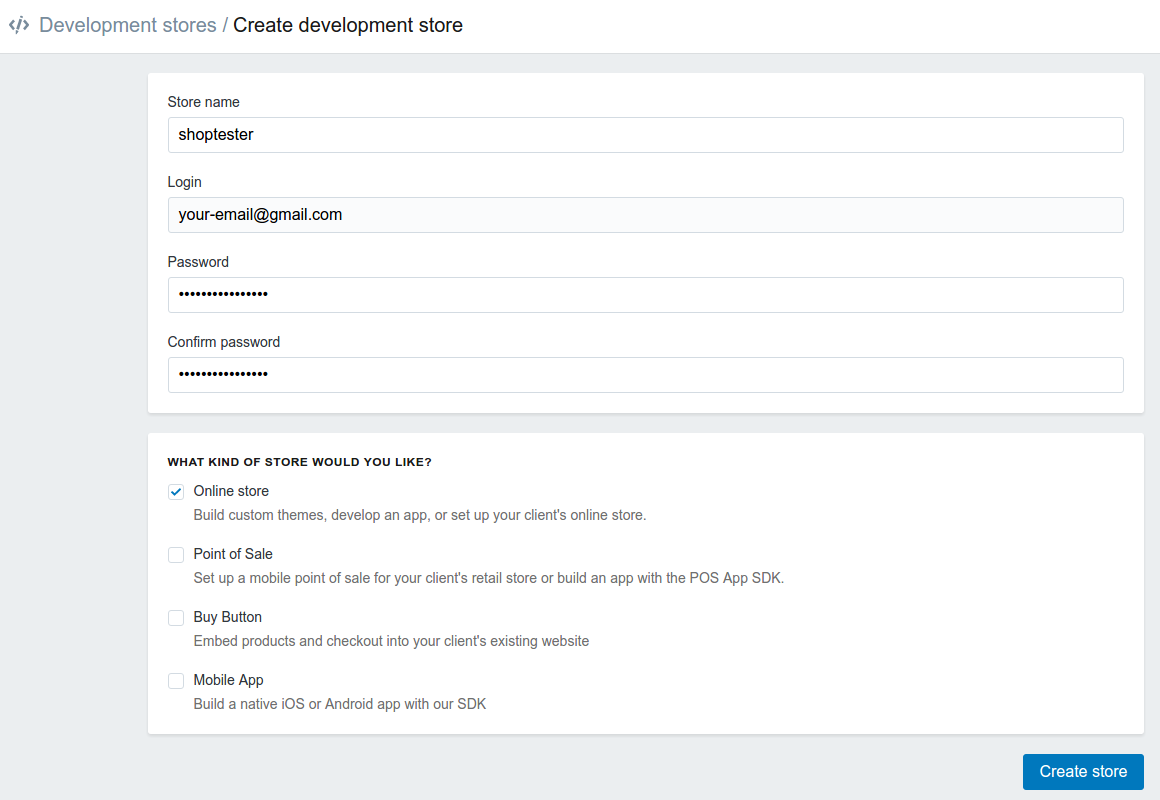
Add the store name, the password for logging in to the store (your Shopify partner email address is the login email), and the kind of store to create. Stick with an Online store for now. This gives you the ability to build custom themes, develop an app, or set up your client’s online store. Once you’re done with filling the form, click the Create Store button to create the development store.
Setting up the Development Store
Once the development store is created, you can click the login link in the success alert message to log into the store. You’ll be greeted with the following page once logged in:
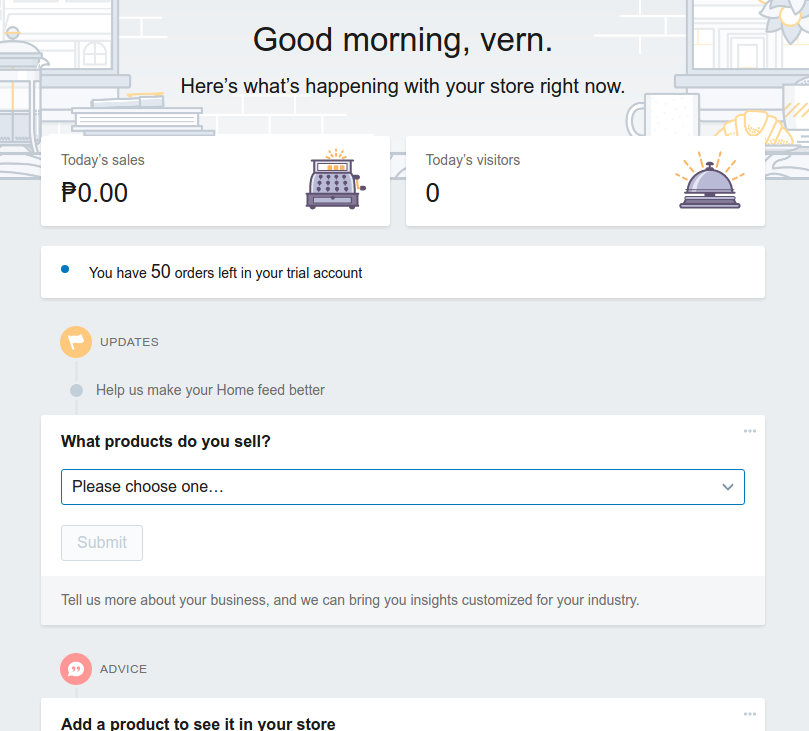
You can start by selecting a product category. I’ve selected Electronics & Gadgets for mine.
The next thing you can do is add products and customers to the store. You can do this by clicking either on the Products or Customers link in the side-menu. Adding those details will give you some data to work with once you start using the Shopify API.
The final step in setting up the development store is launching it. If you haven’t already noticed, Shopify doesn’t immediately make your store available to the rest of the world. If you go to https://{your-storename}.myshopify.com you’ll see an opening soon page. You can fix this by clicking on the Online Store link in the side-menu in the admin page. Then, click the select a free theme button to show the free themes that you can use. Select a theme from the list that shows up, then click the Publish theme button to use the theme for your store.
Creating an App
Now you’re ready to create a new Shopify app. Head over to the Shopify partners website and in the side menu, click on Apps, then click the Create a new app button. This will show you the following interface:
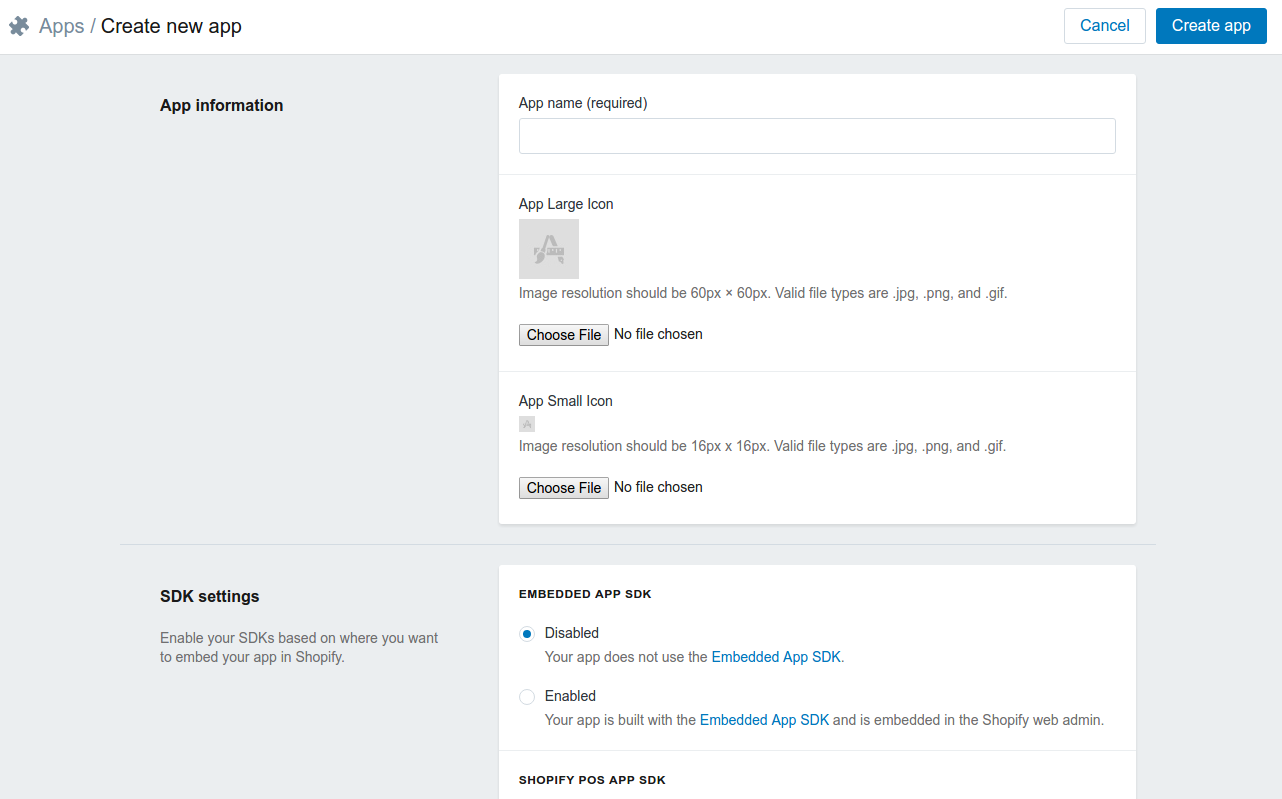
Enter the app name, the app URL and the redirect URL. The app URL and redirect URL can be a localhost path. Here’s an example:
http://localhost/shopify-tester
http://localhost/shopify-tester/login
You can leave all the other fields at their default values, as you won’t really be touching on those in this tutorial. If you’re wondering about the Embedded App SDK and Shopify POS App SDK, you can leave those disabled since you will only be using the HTTP API.
Once the app is created, it should show you the app dashboard where the API key and secret are displayed. Take note of these because you’ll be using them later when making API requests.
Authenticating Users
Now that you have created an app and a development store to test on, it’s time to authenticate users so they can use your app. You might be thinking, why do I need to authenticate if I own the development store and the app? Well, a development store represents a real-world store owned by any Shopify user. This means they won’t have access to your app unless they install it. And in order to install it, they have to go through the OAuth authorization process first. This is pretty much the same as any authorization process for sites like Facebook or Google whenever you install a third-party app.
The first step in the authorization process is for the user to install the app. Apps can be found on the Shopify App Store. You can only get your app listed once Shopify approves it. You can submit your app for approval by clicking the Edit App Store listing button on the app page. You won’t really go through that in this tutorial, so you’ll just directly access the install URL in the browser. Here’s the actual authorization process for an app that’s already listed in the app store:
- User installs the app from the app store.
- User gets redirected to the app install page. This is a page in the app, which means it is managed by you. The page asks for the name of the store (e.g. test-shop.myshopify.com).
- User clicks install.
- The app generates a unique string and saves it in the database along with the store name.
- The app constructs the Shopify app authorization URL and redirects the user to it. This is the page where the user can see the name of the app and the list of permissions it’s asking for. From there, the user can click the Install app button.
- Shopify redirects the user to the redirect URL that you have specified in your app settings. The access code, hmac, state, and timestamp are passed along to the redirect URL as query parameters.
- The app verifies that the request is valid.
- If the request is valid, the app requests the permanent access token from the Shopify API.
- Save the access token along with the other important details to the app database.
Demo App
We’ll now proceed with going through each of the steps, only step 1 will be replaced with accessing the install page directly in the browser. This page is responsible for initializing an app install request.
Installing the Dependencies
composer require twig/twig guzzlehttp/guzzle nesbot/carbon vlucas/phpdotenv ircmaxell/random-lib
Install Page
Create an install.php file and add the following code:
<?php
require 'vendor/autoload.php';

$dotenv = new Dotenv\Dotenv(__DIR__);
$dotenv->load();

$db = new Mysqli(getenv('MYSQL_HOST'), getenv('MYSQL_USER'), getenv('MYSQL_PASS'), getenv('MYSQL_DB'));

if (!empty($_POST)) {

    $store = $_POST['store'];

    $factory = new RandomLib\Factory;
    $generator = $factory->getMediumStrengthGenerator();
    $nonce = $generator->generateString(20);

    $api_key = getenv('SHOPIFY_APIKEY');
    $scopes = getenv('SHOPIFY_SCOPES');
    $redirect_uri = urlencode(getenv('SHOPIFY_REDIRECT_URI'));

    if ($query = $db->prepare('INSERT INTO installs SET store = ?, nonce = ?, access_token = ""')) {
        $query->bind_param('ss', $store, $nonce);
        $query->execute();
        $query->close();
        $url = "https://{$store}/admin/oauth/authorize?client_id={$api_key}&scope={$scopes}&redirect_uri={$redirect_uri}&state={$nonce}";
        header("Location: {$url}");
    }

} else {
    $loader = new Twig_Loader_Filesystem('templates');
    $twig = new Twig_Environment($loader, [
        'cache' => 'cache',
        'debug' => true
    ]);

    $template = $twig->loadTemplate('install.html');
    echo $template->render([]);
}
Breaking down the code above, we first connect to the MySQL database. You can find the schema in the Github repo.
$db = new Mysqli(getenv('MYSQL_HOST'), getenv('MYSQL_USER'), getenv('MYSQL_PASS'), getenv('MYSQL_DB'));
This uses phpdotenv to load the configuration from the .env file at the root of the working directory. The .env file contains the following:
MYSQL_HOST=localhost
MYSQL_DB=shopifytester
MYSQL_USER=YOUR_DB_USER
MYSQL_PASS=YOUR_DB_PASSWORD
SHOPIFY_APIKEY="YOUR SHOPIFY APP API KEY"
SHOPIFY_SECRET="YOUR SHOPIFY APP SECRET"
SHOPIFY_SCOPES="read_products,read_customers"
SHOPIFY_REDIRECT_URI="http://localhost/shopify-tester/login.php"
Go ahead and replace the placeholder values with your own values. You can also replace the SHOPIFY_REDIRECT_URI if you used a different redirect URL.
Next, check if the user has submitted the form. If not, return the install page:
if (!empty($_POST)) {
    ...
} else {
    $loader = new Twig_Loader_Filesystem('templates');
    $twig = new Twig_Environment($loader, [
        'cache' => 'cache',
        'debug' => true
    ]);

    $template = $twig->loadTemplate('install.html');
    echo $template->render([]);
}
The install page is located at templates/install.html and contains the following:
<!DOCTYPE html>
<html lang="en">
<head>
    <meta charset="UTF-8">
    <title>Install</title>
    <link rel="stylesheet" href="https://cdnjs.cloudflare.com/ajax/libs/picnic/6.1.1/picnic.min.css">
    <link rel="stylesheet" href="https://cdnjs.cloudflare.com/ajax/libs/picnic/6.1.1/plugins.min.css">
    <link rel="stylesheet" href="css/style.css">
</head>
<body>

    <nav>
      <a href="#" class="brand">
        <span>Shopify App</span>
      </a>
    </nav>

    <main>
        <form method="POST">
            <fieldset class="flex one">
              <label>
                Store Name
                <input type="text" name="store" placeholder="e.g. test-shop.myshopify.com">
              </label>
            </fieldset>
            <button>Install</button>
        </form>
    </main>

</body>
</html>
As you can see, it’s a pretty standard HTML page with a form asking for the store name.
picnic.css is used to beautify the page but there’s also the css/style.css file for adding the styles for the main content:
main {
    width: 500px;
    margin: 0 auto;
    padding-top: 150px;
}
Going back to the install.php file, below is the code that is executed once the form is submitted. First, it generates a random string. This is used later on as an additional check if the authorization request is valid:
$factory = new RandomLib\Factory;
$generator = $factory->getMediumStrengthGenerator();
$nonce = $generator->generateString(20);
Insert the store name along with the random string into the database, then redirect the user to the Shopify authorization page:
$api_key = getenv('SHOPIFY_APIKEY');
$scopes = getenv('SHOPIFY_SCOPES');
$redirect_uri = urlencode(getenv('SHOPIFY_REDIRECT_URI'));

if ($query = $db->prepare('INSERT INTO installs SET store = ?, nonce = ?, access_token = ""')) {
    $query->bind_param('ss', $store, $nonce);
    $query->execute();
    $query->close();
    $url = "https://{$store}/admin/oauth/authorize?client_id={$api_key}&scope={$scopes}&redirect_uri={$redirect_uri}&state={$nonce}";
    header("Location: {$url}");
}
The authorization page URL needs the store, client_id, scope, redirect_uri, and state. The store is the name of the Shopify store (e.g. test-shop.myshopify.com), the client_id is the API key of your app and the redirect_uri is the redirection URL that you supplied to your app settings.
If you decided to use a different redirection URL, you can always update the app settings to reflect the changes. The scope are the data you want the app to have access to. Here is the list of scopes that you can supply. For this tutorial, you’ll only be using the read_products and read_customers scopes. Each scope can be separated by a comma like so: read_products,read_customers. Lastly, the state is the random string that you have generated.
Once the values are substituted, the authorization URL should look something like this:
https://yourshopifystore.myshopify.com/admin/oauth/authorize?client_id=your_api_key&scope=read_products,read_customers&redirect_uri=http://localhost/shopify-tester/login.php&state=your_unique_key
The user is redirected to that URL and they will see the following screen:
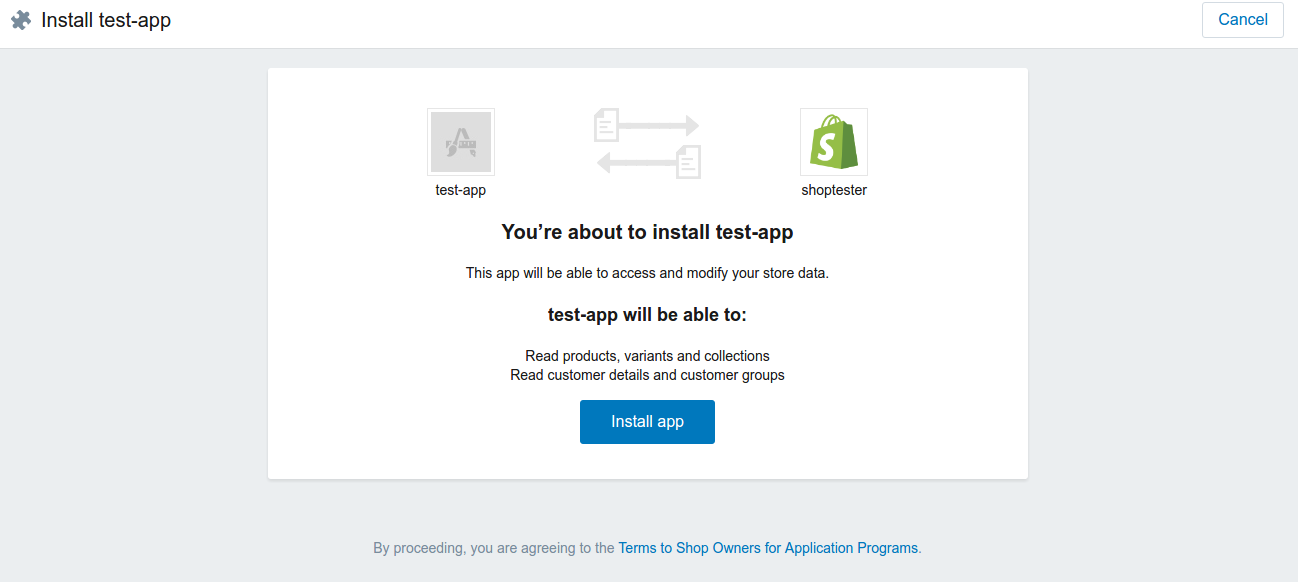
The user can verify that the page is showing the correct app name and the scopes that you’ve asked for. If correct, the user can click the Install app button to install the app.
From there, Shopify generates the access code and the HMAC (Keyed-hash message authentication code). Those are passed along with the shop, timestamp and the state to your redirect URL. In the app, you can use this information to verify that the request is valid.
Authorization Page
Once Shopify redirects to the redirect URL, you’re responsible for verifying that the request is valid. If it is valid, make a request for the access token. Create an auth.php file at the root of your working directory and add the following code:
<?php
require 'vendor/autoload.php';

use Carbon\Carbon;
use GuzzleHttp\Client;

$dotenv = new Dotenv\Dotenv(__DIR__);
$dotenv->load();

$db = new Mysqli(getenv('MYSQL_HOST'), getenv('MYSQL_USER'), getenv('MYSQL_PASS'), getenv('MYSQL_DB'));

$api_key = getenv('SHOPIFY_APIKEY');
$secret_key = getenv('SHOPIFY_SECRET');

$query = $_GET;
if (!isset($query['code'], $query['hmac'], $query['shop'], $query['state'], $query['timestamp'])) {
    exit; //or redirect to an error page
}

$one_minute_ago = Carbon::now()->subSeconds(60)->timestamp;
if ($query['timestamp'] < $one_minute_ago) {
    exit; //or redirect to an error page
}

$hmac = $query['hmac'];
$store = $query['shop'];
unset($query['hmac']);

foreach ($query as $key => $val) {
    $params[] = "$key=$val";
}

asort($params);
$params = implode('&', $params);

$calculated_hmac = hash_hmac('sha256', $params, $secret_key);
if($hmac == $calculated_hmac){

    $client = new Client();

    $response = $client->request(
        'POST',
        "https://{$store}/admin/oauth/access_token",
        [
            'form_params' => [
                'client_id' => $api_key,
                'client_secret' => $secret_key,
                'code' => $query['code']
            ]
        ]
    );

    $data = json_decode($response->getBody()->getContents(), true);
    $access_token = $data['access_token'];

    $nonce = $query['state'];

    if ($select = $db->prepare("SELECT id FROM installs WHERE store = ? AND nonce = ?")) {

        $select->bind_param('ss', $store, $nonce);
        $select->execute();
        $select->bind_result($id);
        $select->fetch();
        $select->close();

        if ($id > 0) {
            $db->query("UPDATE installs SET access_token = '$access_token' WHERE id = '$id'");
        }
    }

}
Breaking down the code above, first check if all the parameters that you’re expecting are passed along in the URL:
$query = $_GET;
if (!isset($query['code'], $query['hmac'], $query['shop'], $query['state'], $query['timestamp'])) {
    exit; //or redirect to an error page
}
Save the value of the hmac to a variable because you need to unset it from the query parameters array. Then loop through the remaining parameters to construct an array containing a key-value pair.
$hmac = $query['hmac'];
unset($query['hmac']);

$params = [];
foreach ($query as $key => $val) {
    $params[] = "$key=$val";
}
Sort the resulting array and convert it to a string:
asort($params);
$params = implode('&', $params);
Calculate the hmac based on the parameters and the Shopify app secret key:
$calculated_hmac = hash_hmac('sha256', $params, $secret_key);
If the value of the generated hmac is the same as the one that was passed in as query parameter, you’re sure that the request came from Shopify. From there, make a request for the permanent access token from Shopify API and store it in the database:
$store = $query['shop'];
if($hmac === $calculated_hmac){

    $client = new Client();

    $response = $client->request(
        'POST',
        "https://{$store}/admin/oauth/access_token",
        [
            'form_params' => [
                'client_id' => $api_key,
                'client_secret' => $secret_key,
                'code' => $query['code']
            ]
        ]
    );

    $data = json_decode($response->getBody()->getContents(), true);
    $access_token = $data['access_token'];

    $nonce = $query['state'];

    if ($select = $db->prepare("SELECT id FROM installs WHERE store = ? AND nonce = ?")) {
        $select->bind_param('ss', $store, $nonce);
        $select->execute();
        $select->bind_result($id);
        $select->fetch();
        $select->close();

        if ($id > 0) {
            $db->query("UPDATE installs SET access_token = '$access_token' WHERE id = '$id'");
        }
    }
}
Making Requests to the API
Now that you have acquired an access token, you can make API requests on behalf of the user. The access token is like a key to the user’s shop. It gives you read and write access to any of the endpoints listed in the API reference page as long as it is part of the permissions that you asked for when the user installed the app.
Also note that endpoints with a “Shopify Plus” label are only available for use by Shopify Plus merchants. This means that it’s only accessible to the app if the user who installed it is a Shopify Plus merchant.
To demonstrate how to make requests to the Shopify API, you’re going to create a page that shows the list of products that you’ve added to the store. Start by creating a products.php file and add the following code:
<?php
require 'vendor/autoload.php';

use GuzzleHttp\Client;

$dotenv = new Dotenv\Dotenv(__DIR__);
$dotenv->load();

$db = new Mysqli(getenv('MYSQL_HOST'), getenv('MYSQL_USER'), getenv('MYSQL_PASS'), getenv('MYSQL_DB'));

$store = 'test-shop.myshopify.com';
$select = $db->query("SELECT access_token FROM installs WHERE store = '$store'");
$user = $select->fetch_object();
$access_token = $user->access_token;

$client = new Client();

$response = $client->request(
    'GET',
    "https://{$store}/admin/products.json",
    [
        'query' => [
            'fields' => 'id,images,title,variants',
            'access_token' => $access_token
        ]
    ]
);

$result = json_decode($response->getBody()->getContents(), true);

$loader = new Twig_Loader_Filesystem('templates');
$twig = new Twig_Environment($loader, [
    'cache' => 'cache',
    'debug' => true
]);

$template = $twig->loadTemplate('products.html');
echo $template->render(['products' => $result['products']]);
Breaking down the code above, first get the access token from the database. To quickly demonstrate things, the name of the Shopify store is hard-coded. For Shopify apps that display data from a Shopify store, the domain name of the website used for displaying the data is usually used.
$store = 'test-shop.myshopify.com';
$select = $db->query("SELECT access_token FROM installs WHERE store = '$store'");
$user = $select->fetch_object();
$access_token = $user->access_token;
Next, make a request to the products endpoint. Note that the base URL is the store name: https://test-shop.myshopify.com. This means that the base URL is different for every store, which is why it’s important to save the store name in the database so you can refer to it later on. When making requests to the API, you always need to supply the access_token. For GET requests, you can supply it as a query parameter. For POST requests, add it as a form_params.
The products endpoint doesn’t require anything to be supplied as a query parameter, though below, the fields parameter is supplied to specify the fields that you want to return. If you don’t specify the fields parameter, it will return all the product fields (e.g. title, images, description). You can also filter and limit the results by supplying any of these parameters.
$client = new Client();

$response = $client->request(
    'GET',
    "https://{$store}/admin/products.json",
    [
        'query' => [
            'fields' => 'id,images,title,variants',
            'access_token' => $access_token
        ]
    ]
);

$result = json_decode($response->getBody()->getContents(), true);
This gives the following result when printed out:
Array
(
    [products] => Array
        (
            [0] => Array
                (
                    [id] => 6664000769
                    [title] => Arduino Uno
                    [images] => Array
                        (
                            [0] => Array
                                (
                                    [id] => 12780821761
                                    [product_id] => 6664000769
                                    [position] => 1
                                    [created_at] => 2016-06-21T07:31:02-04:00
                                    [updated_at] => 2016-06-21T07:31:02-04:00
                                    [src] => https://cdn.shopify.com/s/files/1/1354/0873/products/uno.jpg?v=1466508662
                                    [variant_ids] => Array
                                        (
                                        )

                                )

                        )

                )

            [1] => Array
                (
                    [id] => 6663985537
                    [title] => Raspberry Pi 3 Model B Motherboard
                    [images] => Array
                        (
                            [0] => Array
                                (
                                    [id] => 12780794177
                                    [product_id] => 6663985537
                                    [position] => 1
                                    [created_at] => 2016-06-21T07:29:10-04:00
                                    [updated_at] => 2016-06-21T07:29:10-04:00
                                    [src] => https://cdn.shopify.com/s/files/1/1354/0873/products/berry.jpg?v=1466508550
                                    [variant_ids] => Array
                                        (
                                        )

                                )

                        )

                )

        )

)
But you won’t really be printing the result out – you’re passing the result data to the template and rendering the page instead:
$loader = new Twig_Loader_Filesystem('templates');
$twig = new Twig_Environment($loader, [
    'cache' => 'cache',
    'debug' => true
]);

$template = $twig->loadTemplate('products.html');
echo $template->render(['products' => $result['products']]);
Here are the contents of the template (templates/products.html):
<!DOCTYPE html>
<html lang="en">
<head>
    <meta charset="UTF-8">
    <title>Products</title>
    <link rel="stylesheet" href="https://cdnjs.cloudflare.com/ajax/libs/picnic/6.1.1/picnic.min.css">
    <link rel="stylesheet" href="https://cdnjs.cloudflare.com/ajax/libs/picnic/6.1.1/plugins.min.css">
    <link rel="stylesheet" href="css/style.css">
</head>
<body>

    <nav>
      <a href="#" class="brand">
        <span>Shopify App</span>
      </a>
    </nav>

    <main>
        <h1>Products</h1>
        <div class="flex two">
          {% for prod in products %}
          <div>
            <article class="card">
              <img src="{{ prod.images[0].src }}">
              <section>
                <h3>{{ prod.title }}</h3>
                <strong>{{ prod.variants[0].price }} PHP</strong>
              </section>
            </article>
          </div>
          {% endfor %}
        </div>
    </main>

</body>
</html>
Conclusion
That’s it! In this tutorial, you’ve learned the basics of developing a Shopify app. As you have seen, developing a Shopify app is very similar to developing a standard PHP app. The only difference is that you make use of the Shopify API in order to manipulate data from a Shopify store, rather than directly from the database.
In a future post, we’ll make things more interesting by building a more complex app, and by utilizing a framework for some proper code structure.
Do you use Shopify? How has it been working out for you?
Frequently Asked Questions on Shopify App Development
What are the prerequisites for developing a Shopify app?
Before you start developing a Shopify app, you need to have a basic understanding of web development concepts. This includes knowledge of HTML, CSS, JavaScript, and a server-side language like Ruby, PHP, or Python. You also need to be familiar with RESTful API concepts, as Shopify uses a REST API. Additionally, you’ll need a Shopify Partner account, which is free to create and provides you with access to a development store for testing your app.
How can I create a Shopify Partner account?
To create a Shopify Partner account, visit the Shopify Partners website and click on ‘Join Now’. You’ll need to provide some basic information about yourself or your business, and then you can start creating and managing your Shopify apps.
What is a Shopify development store and how do I create one?
A Shopify development store is a free Shopify store that you can use to test your apps. You can create one through your Shopify Partner dashboard. Once you’ve created a development store, you can install your app on it for testing before you submit it to the Shopify App Store.
How do I use the Shopify API?
The Shopify API is a powerful tool that allows you to interact with Shopify stores programmatically. You can use it to read and write data to a store, create new products, manage orders, and much more. To use the Shopify API, you’ll need to create an API key and password in your Shopify Partner dashboard. You can then use these credentials to make authenticated requests to the API.
How do I submit my app to the Shopify App Store?
Once you’ve developed and tested your app, you can submit it to the Shopify App Store through your Shopify Partner dashboard. You’ll need to provide some information about your app, including its name, description, pricing, and screenshots. After you submit your app, it will be reviewed by the Shopify team before it’s published in the App Store.
How can I monetize my Shopify app?
There are several ways to monetize a Shopify app. You can charge a one-time fee for the app, a recurring subscription fee, or a usage-based fee. You can also offer a free app and monetize it through in-app purchases or advertising.
What are the best practices for Shopify app development?
Some best practices for Shopify app development include using the Shopify API responsibly, providing clear and detailed documentation for your app, testing your app thoroughly before submitting it to the App Store, and providing excellent customer support.
How can I ensure my app is secure?
Ensuring your app is secure is crucial. You should always use secure, encrypted connections when transmitting data, and you should store any sensitive data securely. You should also regularly update your app to fix any security vulnerabilities and comply with Shopify’s security requirements.
How can I improve the performance of my Shopify app?
There are several ways to improve the performance of your Shopify app. You can optimize your code, use caching to reduce the number of requests your app makes to the Shopify API, and use pagination to limit the amount of data your app retrieves at once.
How can I get support while developing my Shopify app?
Shopify provides a number of resources to support app developers. You can use the Shopify API documentation, the Shopify Developer Forum, and the Shopify Help Center. You can also contact the Shopify support team for assistance.