Remix: Develop Smart Contracts for the Ethereum Blockchain

Remix is a Solidity IDE that’s used to write, compile and debug Solidity code. Solidity is a high-level, contract-oriented programming language for writing smart contracts. It was influenced by popular languages such as C++, Python and JavaScript.
IDE stands for Integrated Development Environment and is an application with a set of tools designed to help programmers execute different tasks related to software development such as writing, compiling, executing and debugging code.
Before you begin using Remix to develop smart contracts, make sure you’re familiar with some basic concepts. In particular, give these articles about blockchain and Ethereum a read.
Key Takeaways
- Remix IDE is a Solidity-based tool for developing, compiling, and debugging smart contracts for the Ethereum blockchain, with an interface accessible via web browser.
- The Remix IDE includes various panels such as a file explorer, a Solidity code editor, a terminal, and a tabs panel, each with unique functionalities to aid in the development and deployment of smart contracts.
- Remix IDE provides different execution environments including JavaScript VM, Injected Web3, and Web3 Provider, which emulate real blockchain networks for testing transactions.
- Alternatives to Remix for developing and deploying smart contracts include Truffle, Embark, MetaMask, and Dapp, as well as plugins for popular IDEs that support Solidity.
What’s a Smart Contract/Dapp?
A smart contract is a trust-less agreement between two parties that makes use of blockchain technology, to enforce the parties to adhere to the terms, rather than relying on the traditional ways such as trusting a middleman or using laws to handle disputes.
Using the Ethereum blockchain, you can create smart contracts with the Solidity language (among others). Ethereum is not the only platform that can be used to create smart contacts, but it’s the most popular choice, as it was designed from the start to support building them.
Dapp stands for decentralized application and is a web3 application that can have a front-end written in traditional languages such as JavaScript, HTML, CSS and a smart contract (as back-end code) which runs on the blockchain. So you can simply think of a Dapp as the front end plus the associated blockchain smart contract(s).
Unlike the smart contract deployed on the blockchain itself, the front end of a Dapp can be either hosted on a centralized server like a CDN or on decentralized storage like Swarm.
Accessing the Remix IDE
You can access the Remix IDE in different ways: online, via a web browser like Chrome, from a locally installed copy, or from Mist (the Ethereum Dapp browser).
Using the In-Browser Remix IDE
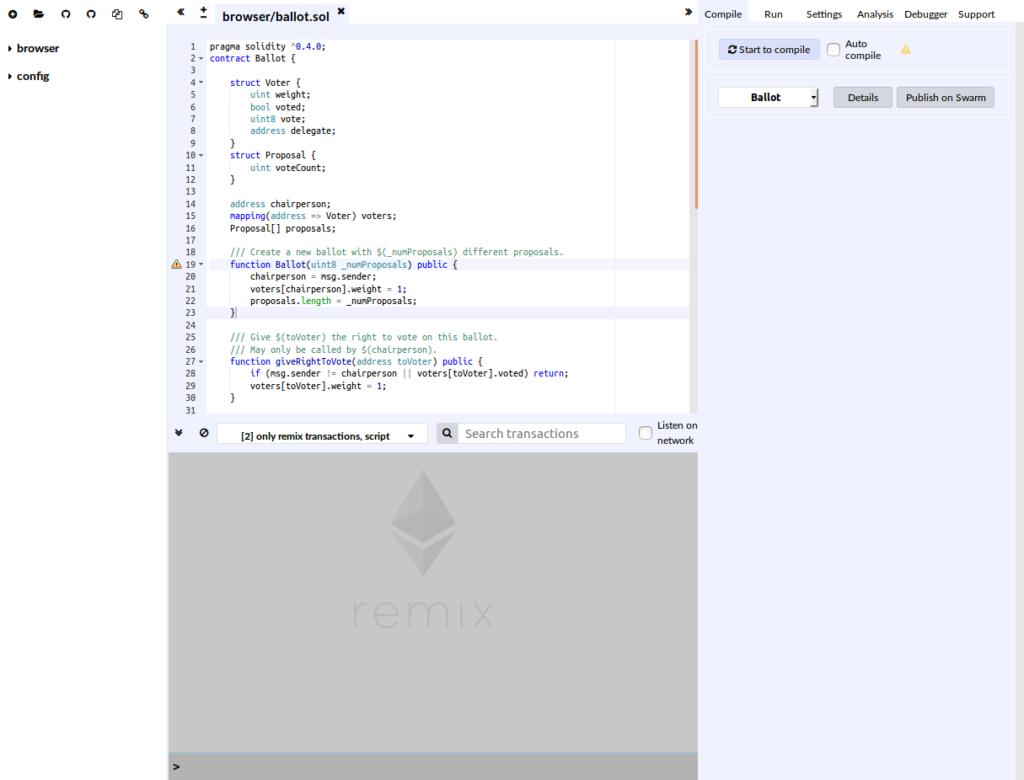
You can access the Remix IDE from your web browser without any special installation. Visit https://remix.ethereum.org/ and you’ll be presented with a complete IDE with a code editor and various panels for compiling, running and debugging your smart contracts. You’ll have a default example Ballot contract that you can play with.
Starting Remix IDE from Mist
You can start the Remix IDE from Mist by clicking on Develop, then Open Remix IDE. Remix will be opened in a new window. If this is your first time running the IDE, you’ll be presented with a simple example Ballot contract.
To get familiar with Mist, please see this article.
Running your Own Copy of Remix IDE
You can also run your own copy of Remix IDE by executing the following commands:
npm install remix-ide -g
remix-ide
You need to have Node.js and npm installed. Check this GitHub repository for more information.
Remix Panels
After seeing how to open the Remix IDE, let’s now see the various panels composing the IDE.
File Explorer
The file explorer provides a view with the created files stored in the browser’s storage. You can rename or delete any file by right-clicking on it, then choosing the right operation from the context menu.
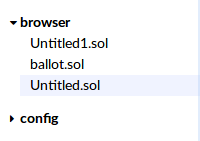
Please note that the file explorer uses the browser’s local storage by default, which means you can lose all your files if you clear or the operating system automatically clears the storage. For advanced work, it’s recommended to use Remixd — a Node.js tool (available from npm npm install -g remixd) which allows the Remix IDE to access your computer’s file system.
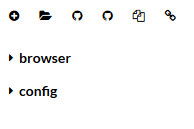
Now let’s see the different actions that you can perform using the buttons at the top of the explorer.
![]()
Creating/Opening Files in Remix
You can create a new file in the browser local storage using the first button with the + icon on the top left. You can then provide a name in the opened dialog and press OK.
Using the second button from top left, you can open an existing Solidity file from your computer file system into the Remix IDE. The file will also be stored in the browser’s local storage.
Publishing Explorer Files as GitHub Gists
Using the third and fourth buttons from top left, you can publish files from the IDE as a public GitHub gist.
Copying Files to Another Instance of Remix IDE
Using the fifth button from top left, you can copy files from the local storage to another instance of Remix by providing the URL of the instance.
Connecting to the Local File System
The last button can be used to connect the Remix IDE to your local file system if you’re running the Remixd tool.
Solidity Code Editor
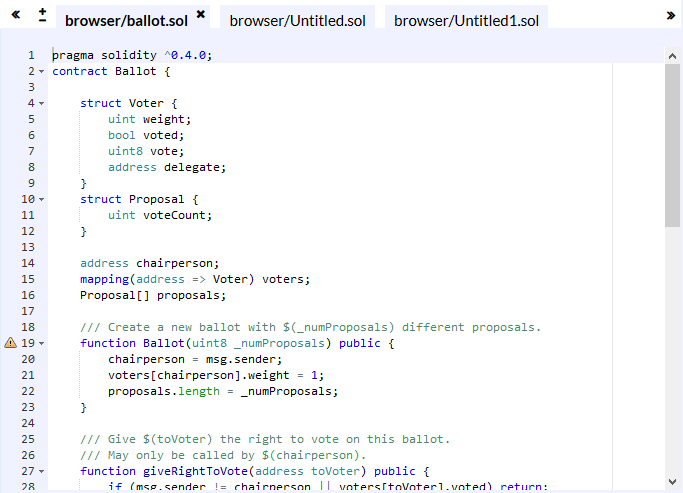
The Solidity code editor provides the interface where you can write your code with many features such as syntax highlighting, auto-recompling, auto-saving etc. You can open multiple tabs and also increase/decrease the font size using the +/- button in the top-left corner.
Terminal
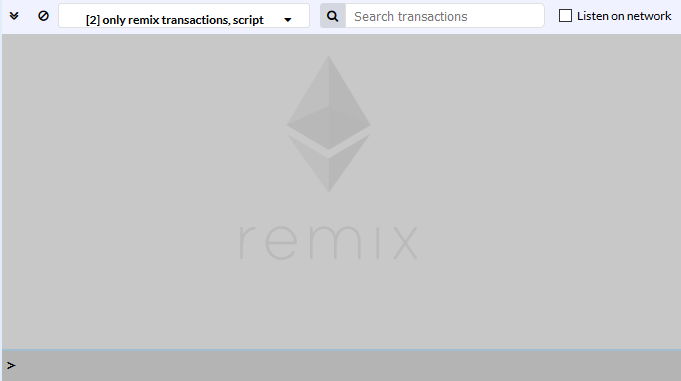
The terminal window below the editor integrates a JavaScript interpreter and the web3 object. You can execute JavaScript code in the current context, visualize the actions performed from the IDE, visualize all network transactions or transactions created from the Remix IDE etc. You can also search for data in the terminal and clear the logs.
Tabs Panel
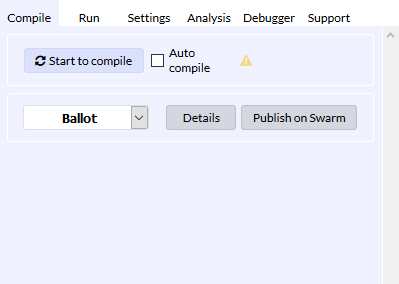
The Tabs panel provides many tabs for working with the IDE:
the Compile tab: used for compiling a smart contract and publishing on Swarm
the Run tab: used for sending transactions to the configured environment
the Settings tab: used for updating settings like the compiler version and many general settings for the editor
the Debugger tab: used for debugging transactions
the Analysis tab: used for getting information about the latest compilation
the Support tab: used for connecting with the Remix community.
Remix Execution Environments
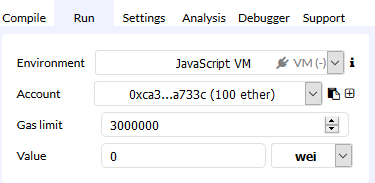
The Remix IDE provides many environments for executing the transactions:
JavaScript VM: a sandbox blockchain implemented with JavaScript in the browser to emulate a real blockchain.
Injected Web3: a provider that injects web3 such as
MistandMetamask, connecting you to your private blockchain.Web3 Provider: a remote node with geth, parity or any Ethereum client. Can be used to connect to the real network, or to your private blockchain directly without MetaMask in the middle.
Using Remix IDE to Compile and Deploy a Smart Contract
For the sake of demonstrating what we can achieve using Remix IDE, we’ll use an example contract and we’ll see how we can:
- compile the contract in Remix IDE
- see some warnings emitted by the compiler when best practices aren’t followed
- deploy the contract on the JavaScript EVM (Ethereum Virtual Machine)
- make transactions on the deployed contract
- see example reads and writes in the terminal IDE.
We’ll use the following example contract from this tutorial which implements a blockchain raffle:
pragma solidity ^0.4.20;

contract Blocksplit {

    address[] public players;
    mapping (address => bool) public uniquePlayers;
    address[] public winners;

    address public charity = 0xc39eA9DB33F510407D2C77b06157c3Ae57247c2A;

    function() external payable {
        play(msg.sender);
    }

    function play(address _participant) payable public {
        require (msg.value >= 1000000000000000 && msg.value <= 100000000000000000);
        require (uniquePlayers[_participant] == false);

        players.push(_participant);
        uniquePlayers[_participant] = true;
    }

}
The contract declares some variables, such as:
- The
playersarray variable, which holds the addresses of the raffle participants. - The
uniquePlayersmapping, which is used to save unique players so players don’t participate multiple times from the same address. (An address will be mapped to a boolean, true or false, value indicating if the participant has already participated or not.) - The
winnersarray variable, which will hold the addresses of the winners. - The
charityvariable, which holds a hardcoded address of a charity where profits will go.
It also declares:
- A fallback function marked as
payable, which enables the smart contract to accept payments. - A
play()function that enables participants to enter the raffle by providing an address.
You can read more details about this contract from this tutorial where all the code is explained in detail.
Now, go ahead and open the Remix IDE from remix.ethereum.org.
Next, create a new file by clicking on the button with the + icon.
A new dialog will pop up Enter a name for your file (blocksplit.sol), then press OK:

A new tab will be opened in the code editor where you can start writing your contract. So just copy and paste the previous contract code in there.
First start by compiling the contract. From the Compile tab click Start to compile button.
We’re getting a message box with two warnings raised by Static Analysis of the code.
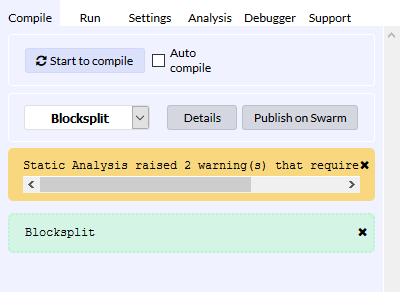
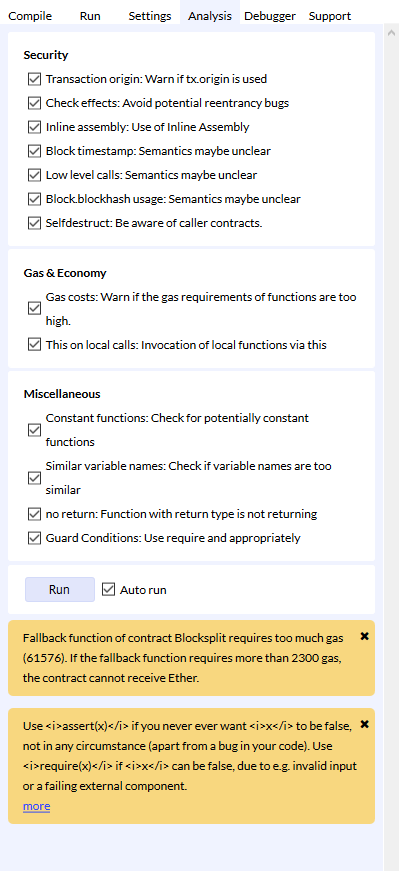
If you click on the message box you’ll be taken to the Analysis tab, which provides more information about the warnings:
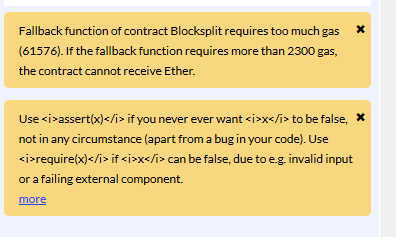
The first warning is raised if the gas requirements of functions are too high, and the second one is raised if the require() or assert() functions are not used appropriately.
You can also use the checkboxes in the Analysis tab to determine when you want the compiler to emit warnings.
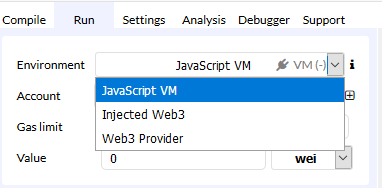
Next, let’s deploy the contract with our JavaScript VM. Switch to the Run tab, and select JavaScript VM from the dropdown menu.
Next, click the Deploy button below the contract name.
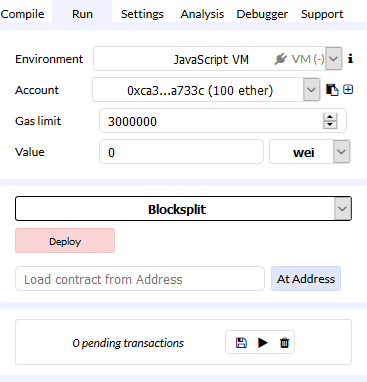
Once the contract is deployed successfully on the JavaScript VM, a box will be opened on the bottom of the Run tab.
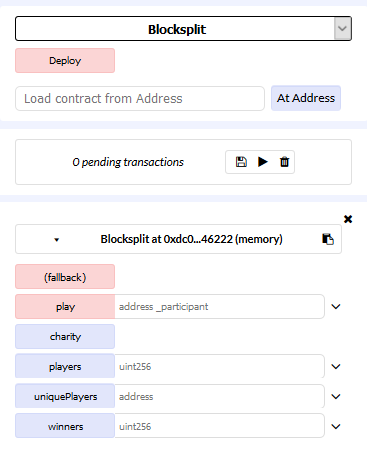
Under the name and address of the deployed contract, we have some buttons with red and blue colors. Red buttons refer to actions that cause a write to the blockchain (in our case the fallback and play functions) and need a transaction, where blue buttons refer to reading from blockchain (charity, players, uniquePlayers and winners public variables we defined in the contract’s code).
You’ll also see a similar message to the following screenshot in the IDE terminal.
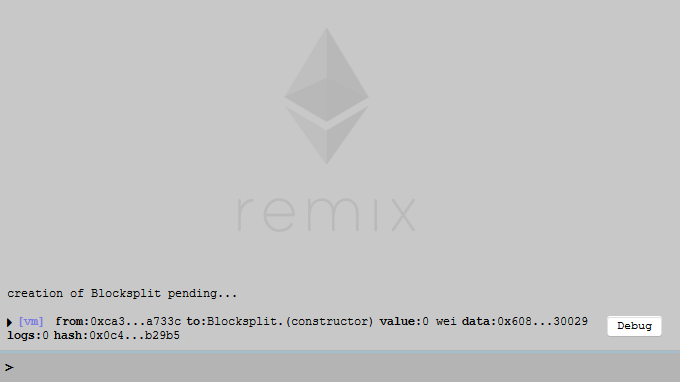
For now, the only variable that holds a value is the charity variable, because the address is hardcoded in the code so if you click on the corresponding button you’ll get the value of that address.

The contract is built to allow a participant to enter the raffle by just sending ether to the address (using a payable callback function) or also call the play() function with the address of the participant.
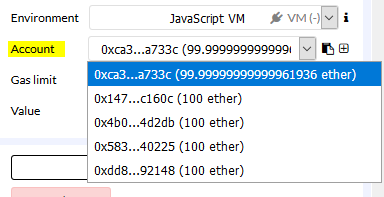
The JavaScript VM provides five fake accounts with 100 ether each, which we can use to test the contract. You can select a current account from the dropdown menu with the name Account below the Environment dropdown.
Now, to send money to the contract, we first set the Value variable (between 0.001 and 0.1) and the unit (ether) from the dropdown menu. Then we call the fallback function by simply clicking on its corresponding red button.
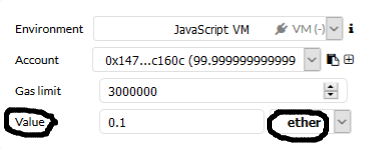
That’s it. We’ve sent money to the contract. The address of the selected account should be added to the players array. To check that, simply click on the blue players button.
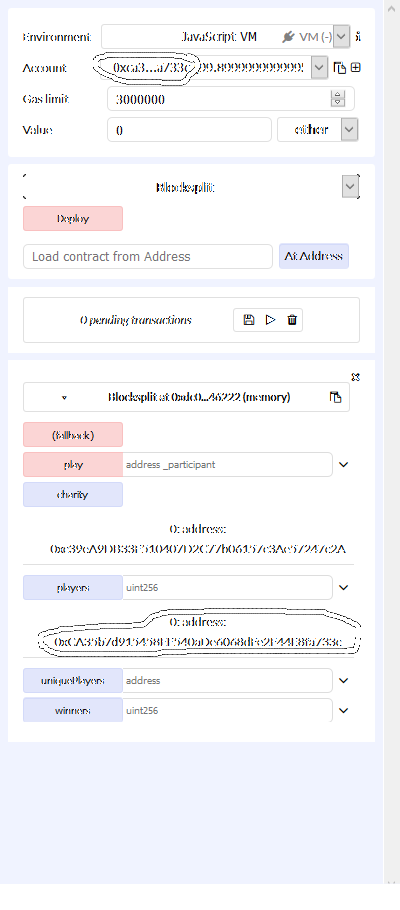
You can add other participants by selecting a new account and repeat the previous process (to check if an account is added to the array simply enter the index, from 0 to 4, for that account in the text-box next to players button).
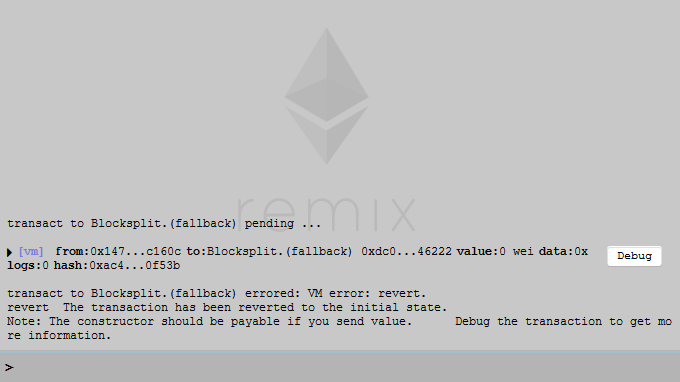
If you add an account that has already participated, you should get a warning in the terminal and the transaction will fail with a message like the following:
Remix Alternatives
There are many alternatives for easy development and deployment of smart contracts, such as:
Truffle: advertised as the Ethereum Swiss army knife and claims to be the most popular development framework for Ethereum with a mission to make your life a whole lot easier. We’ll be working with Truffle a lot in upcoming tutorials.
Embark: a framework that allows you to easily develop and deploy Decentralized Applications (DApps).
MetaMask: a bridge that allows you to visit the distributed web of tomorrow in your browser today. It allows you to run Ethereum DApps right in your browser without running a full Ethereum node. For how to develop with MetaMask, check this faq.
Dapp: Dapp is a simple command line tool for smart contract development.
different plugins for adding Solidity support to popular IDEs such as this Visual Code plugin and this Atom plugin etc.
Conclusion
We’ve introduced you to the Remix IDE for developing smart contracts for the Ethereum blockchain. You can find more detailed information in the docs.
With a basic introduction behind you, feel free to dive in deeper and experiment with changing the code and exploring the different functions and tabs the editor offers.
Frequently Asked Questions (FAQs) about Remix and Ethereum Blockchain
What is the Remix IDE and how does it work?
Remix IDE is an open-source tool that allows developers to write, test, debug, and deploy smart contracts written in Solidity language for Ethereum blockchain. It provides a user-friendly interface and a powerful environment for developing smart contracts. It works in your web browser, meaning you don’t need to install any software on your computer. You can write your code, compile it, and then deploy it on the Ethereum blockchain, all from within the same tool.
How can I install and use the Remix IDE?
As a web-based application, Remix IDE doesn’t require any installation. You can access it directly from your web browser by visiting https://remix.ethereum.org. To use it, you simply need to write your Solidity code in the text editor, then compile and deploy your smart contract using the buttons provided.
What are the main features of Remix IDE?
Remix IDE comes with a range of features designed to aid developers in creating, testing, and deploying smart contracts. These include a text editor for writing code, a compiler for turning your Solidity code into Ethereum bytecode, a debugger for finding and fixing errors, and a deploy & run module for deploying your contracts to the Ethereum blockchain.
How can I debug a smart contract in Remix?
Remix IDE provides a powerful debugger for smart contracts. After deploying your contract, you can use the debugger to step through your code, inspect the values of variables, and understand how your contract is executing. This can be invaluable for finding and fixing any issues with your contract.
Can I use Remix IDE for developing dApps?
Yes, Remix IDE is a great tool for developing decentralized applications (dApps). It allows you to write, test, and deploy the smart contracts that form the backend of your dApp. However, for the frontend of your dApp, you’ll need to use other tools and technologies such as HTML, CSS, JavaScript, and Web3.js.
What is the Remix Project?
The Remix Project is the community-driven organization behind Remix IDE. It’s an open-source project, meaning anyone can contribute to its development. The project’s goal is to provide a powerful, user-friendly, and accessible tool for developing Ethereum smart contracts.
How secure is Remix IDE?
Remix IDE is designed with security in mind. It includes features such as static analysis, which can help you identify potential security issues in your code. However, as with any tool, it’s important to follow best practices for secure coding and to thoroughly test your contracts before deploying them.
Can I use Remix IDE offline?
Yes, Remix IDE can be used offline. You can download the source code from the GitHub repository and run it locally on your computer. This can be useful if you want to develop smart contracts without an internet connection.
What is Solidity and why is it used in Remix IDE?
Solidity is a programming language specifically designed for writing smart contracts on the Ethereum blockchain. It’s used in Remix IDE because it’s the most widely used language for Ethereum smart contract development. Solidity’s syntax is similar to JavaScript, making it relatively easy to learn for developers with a background in web development.
How can I learn more about using Remix IDE?
There are many resources available for learning about Remix IDE. The official documentation is a great place to start, as it provides a comprehensive guide to the tool’s features. There are also many tutorials and guides available online, both free and paid. Additionally, the Remix Project community is very active and can be a great source of help and advice.
Ahmed is a technical author and web developer living in Morocco with a Master's degree in software development. He authors technical content about JavaScript, Angular and Ionic. He is also a fan of entrepreneurship, poetry, and teaching. You can contact me on my personal website and read my other articles on Techiediaries.


