Bolt is a lightweight CMS built on Silex with Symfony components that’s fast, easy, and fun to develop with. My recent affinity for Bolt has turned it into my CMS of choice as I make a conscious effort to choose wisely and step away from bloated frameworks. Previously, I gave a very detailed insight into what it’s like developing with Bolt.
Today, we’re going to break down a very popular task into steps in order to accomplish it with ease. Here’s what we’ll be doing:
- We’ll create a content type for news articles to include a title, excerpt, featured image, and body.
- We’ll retrieve the news articles, and display them “blog” style, including pagination.
- Each news article in the feed will link to its dedicated page, where the full article will be displayed.
- On the full article page, we’ll generate links to previous and next articles.
Before we dive in, let’s outline the path we’ll take to make it all happen. First, we’ll grab a fresh install of Bolt via Git and Composer. We’ll be using an SQLite file-based database, as it’s ready to go out of the box and requires no configuration. For quick front-end templating, we’ll pull in a free Boostrap theme from Bootswatch. Bolt leverages Twig, which is a modern templating engine for PHP, so we’ll build a quick theme from scratch using Twig markup. Once we’re all set up, we’ll create our content type, add in some dummy data, and output it onto a page. We’ll keep adding dummy data until we have enough to apply paging, then we’ll link to individual articles and generate previous and next links. Without further ado, let’s dive in!
Installation
As an environment, we’ll be using our own Homestead Improved but you’re free to use your own local configuration. This post will continue under the assumption that you have Composer installed globally, and have pointed a virtualhost to the appropriate folder generated by the commands below.
To install, we execute:
git clone git://github.com/bolt/bolt bolt
cd bolt
git checkout v2.0.6
composer install
At the time of writing, version 2.0.6 is the stable branch. If you see any permission errors, you’ll need to reset a few directories by running the following command:
chmod -R 777 files/ app/database/ app/cache/ app/config/ theme/ extensions/If you visit the CMS’ interface in the browser now, you should be presented with the “create user” screen. This will register the first user in the database and grant you access to the admin portal, where we can edit configuration files, set up content types, add content, and switch themes. Create that user, and log into the admin portal by going to /bolt. Check out the front end too – you should see Bolt’s default theme being displayed. Let’s move on to setting up and building our own theme.
A Quick Theme Setup
Since we’re not going to focus much on the overall visual appearance of our test site, I won’t go in depth with front end stuff. What we will do, however, is create our own theme quickly using the Cosmo Bootstrap theme from Bootswatch, and break some of our files up into reusable partials. Inside the theme directory, create a new directory called my-theme, and create a new file called index.twig. Let’s leave it blank for now, and hop into the admin end of things.
Navigate to Configuration -> Main configuration, and take a look around. A lot of your site’s options can be tweaked here. As mentioned before, we’re using SQLite out of the box, so there’s no need to change the database settings. Feel free to edit the site name and payoff, but switching the theme name is more important to us right now. Scroll down to the theme section, and switch it to my-theme. That’s all we’ll need to do in our main configuration file, so save it, and let’s get back to our index.twig file.
Using some of Bootstrap’s classes, here’s what I came up with to get us started (don’t use this code just yet – we need to break it up):
<!DOCTYPE html>
<html lang="en">
<head>
  <meta charset="UTF-8">
  <meta name="viewport" content="width=device-width, initial-scale=1">
  <title>My Site</title>
  <link rel="stylesheet" href="https://bootswatch.com/cosmo/bootstrap.min.css">
</head>
<body>

<header>
  <nav class="navbar navbar-default">
    <div class="container-fluid">
      <div class="navbar-header">
        <button type="button" class="navbar-toggle collapsed" data-toggle="collapse" data-target="#bs-example-navbar-collapse-1">
          <span class="sr-only">Toggle navigation</span>
          <span class="icon-bar"></span>
          <span class="icon-bar"></span>
          <span class="icon-bar"></span>
        </button>
        <a class="navbar-brand" href="#">My Site</a>
      </div>
      <div class="collapse navbar-collapse" id="bs-example-navbar-collapse-1">
        <ul class="nav navbar-nav navbar-right">
          <li><a href="#">Home</a></li>
          <li><a href="#">News</a></li>
        </ul>
      </div>
    </div>
  </nav><!-- /nav -->
</header><!-- /header -->

<main>
<div class="container">
<h1>Welcome to my site</h1>
<p class="lead">All the latest news, tips, and tricks for Bolt CMS.</p>
<hr>
<p>Lorem ipsum dolor sit amet, consectetur adipisicing elit. Quae ratione veniam esse earum, voluptatem itaque in aut reprehenderit nostrum aspernatur minus. Iste iusto, id expedita esse? Dolorem, iusto, ipsam. Incidunt.</p>
</div>
</main><!-- /main -->
<hr>
<footer>
<div class="container">
© 2015, My Site
</div>
</footer><!-- /footer -->
</body>
</html>Of course, this isn’t really reusable. We’re going to want to break this up into partials so that we can include the main chunks in other templates. Because our site is simple, we’ll only need two:
_header.twig_footer.twig
You’re free to name your partials whatever you want, but the Bolt convention is to underscore names to represent partials. Here’s what our _header.twig partial will look like:
<!DOCTYPE html>
<html lang="en">
<head>
<meta charset="UTF-8">
<meta name="viewport" content="width=device-width, initial-scale=1">
<title>My Site</title>
<link rel="stylesheet" href="https://bootswatch.com/cosmo/bootstrap.min.css">
</head>
<body>
<header>
<nav class="navbar navbar-default">
<div class="container-fluid">
<div class="navbar-header">
<button type="button" class="navbar-toggle collapsed" data-toggle="collapse" data-target="#bs-example-navbar-collapse-1">
<span class="sr-only">Toggle navigation</span>
<span class="icon-bar"></span>
<span class="icon-bar"></span>
<span class="icon-bar"></span>
</button>
<a class="navbar-brand" href="#">My Site</a>
</div>
<div class="collapse navbar-collapse" id="bs-example-navbar-collapse-1">
<ul class="nav navbar-nav navbar-right">
<li><a href="#">Home</a></li>
<li><a href="#">News</a></li>
</ul>
</div>
</div>
</nav><!-- /nav -->
</header><!-- /header -->
<main>
<div class="container">And here’s the footer.twig partial:
</div>
</main><!-- /main -->
<hr>
<footer>
<div class="container">
© 2015, My Site
</div>
</footer><!-- /footer -->
</body>
</html>Now, we can restructure our index.twig file and any future templates to include the partials like this:
{% include '_header.twig' %}

<h1>Welcome to my site</h1>
<p class="lead">All the latest news, tips, and tricks for Bolt CMS.</p>
<hr>
<p>Lorem ipsum dolor sit amet, consectetur adipisicing elit. Quae ratione veniam esse earum, voluptatem itaque in aut reprehenderit nostrum aspernatur minus. Iste iusto, id expedita esse? Dolorem, iusto, ipsam. Incidunt.</p>

{% include '_footer.twig' %}
Refresh your browser, and you’ll notice that all is still intact – only we’re now using partials. Before we continue, you should take note that there are two ways to generate templates using Twig:
- The first is using includes, like we’ve done above. This is the default method in the Bolt documentation.
- The second is using template inheritance, which allows you to build base skeletons and have other template files extend it, injecting content into various blocks.
For this tutorial, we’ll stick with the default includes method, but I do recommend reading and learning about template inheritance, as it’s quite powerful. Let’s move on to creating content types.
Creating Content Types (contenttypes)
Contenttypes are at the heart of any Bolt website or application. They allow us to build up a content structure just how we want it, add as many entries as we want, store them in our database, retrieve them, sort them, search for them, and so on. In our app, we’re only going to need one contenttype: News. This will allow us to add multiple news articles that follow a particular format.
Under Configuartion -> Contenttypes, you’ll notice that Bolt already comes packed with three content types to get you started. Let’s get rid of all three for now, so we can focus on building our own. For now, just note that we’ll want the following associated with each news article:
- A title
- An excerpt
- A featured image
- A body
We’ll also want a specific template to be used when viewing a single news article, and another template for retrieving all the news articles. These settings are defined by the following two parameters respectively:
record_templatelisting_template
Here’s what our Contenttypes configuration now looks like:
# News

news:
    name: News
    singular_name: News Item
    slug: news
    singular_slug: news
    listing_template: news.twig
    record_template: newsitem.twig
    default_status: published
    fields:
        title:
            type: text
            class: large
        slug:
            type: slug
            uses: title
        image:
            type: image
        excerpt:
            type: textarea
            height: 150px
        body:
            type: html
            height: 300px
At this point, we’ll need to update the database to reflect the changes, so head to Configuration -> Check database and hit the update button. You should now see News in the sidebar. Before we continue, let’s add a bunch of dummy articles. I added 20 – a process, I know, but it will be handy for paging. I just used lorem ipsum text, and a 120 by 120 pixel dummy image.
Retrieving All The Records
As we defined above, we’ll be using the news.twig template file to retrieve all our news items. Create that file in your theme directory, and include the partials like before:
{% include '_header.twig' %}

<h1>News</h1>
<p class="lead">View all the news articles here.</p>
<hr>

{% include '_footer.twig' %}
This template is now accessible via the URL /news, so we can hardcode that into our navigation (menus are beyond the scope of this tutorial). In Bolt, pages that are used for listings always have the {{ records }} variable available. However, because we will be paging content, we want a little bit more control. Instead, we’ll make use of the super important setcontent tag, which allows us to append little queries and rules to the content we intend on retrieving. Let’s loop over all our news articles, and output them with some Bootstrap classes:
{% include '_header.twig' %}

<h1>News</h1>
<p class="lead">View all the news articles here.</p>
<hr>

{% setcontent news = 'news' %}

{% for newsitem in news %}

<article class="media">
  <div class="media-left">
    <a href="#">
      <img src="{{ image(newsitem.image) }}" alt="{{ newsitem.title }}">
    </a>
  </div>
  <div class="media-body">
    <h2 class="media-heading">{{ newsitem.title }}</h2>
    <p class="media-excerpt">{{ newsitem.excerpt }}</p>
    <a href="#" class="btn btn-primary btn-sm">Read Full Article</a>
  </div>
</article>

{% endfor %}

<hr>

pagination

{% include '_footer.twig' %}
Notice how we fetched the content based on the field names defined in the contenttype configuration. It doesn’t get much easier than that. We haven’t included any links to single news items just yet though. Let’s do that now. Bolt offers a helper function to fetch the link to the contenttype’s single record. We can use it and implement it like this:
<a href="{{ newsitem.link }}">
  <img src="{{ image(newsitem.image) }}" alt="{{ newsitem.title }}">
</a>
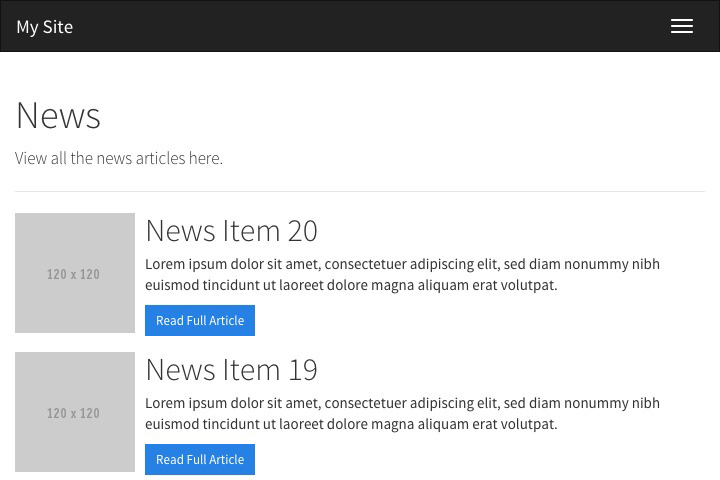
We can now update all our href attributes in the loop to have working links to each single record. Here’s a screenshot of what the listing should look like by now.

Before we develop the single news item template though, let’s page our records.
Paging The Records
Paging records does not get any easier than this. No more confusing functions that break depending on your URL structure, nothing of the sort. In our template file, we first want to limit the number of news items per page to 5. Then, we want to output pagination links. To start with, we’ll need to update the setcontent tag to reflect our needs:
{% setcontent news = 'news/latest/5' allowpaging %}Down below in our template, we can use the pager tag to output the pagination links. With the changes implemented, our template should now resemble this:
{% setcontent news = 'news/latest/5' allowpaging %}

{% for newsitem in news %}

<!-- output loop here -->

{% endfor %}

{{ pager() }}
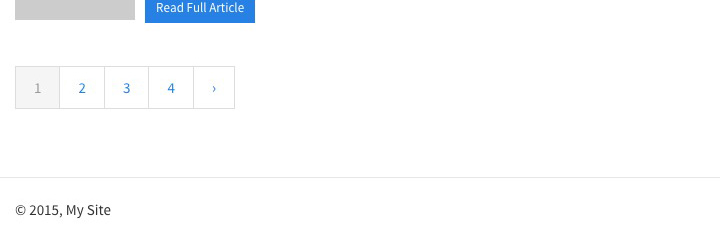
Luckily for us, Bootstrap’s pagination styles play nicely with the HTML that’s output from Bolt’s pager function, so if all was successful, you should have a simple, working pagination output. Here’s a screenshot of the pagination in action.

Simple, and beautiful. Let’s move on.
Retrieving & Outputting A Single Record
By now, you should be getting the hang of the way Bolt runs. You’d be right then to assume that we need to create a newsitem.twig file in our theme directory. If you remember correctly, this is the file we specified in the contenttype configuration. Let’s create that, and pull in our partials like before:
{% include '_header.twig' %}

{% include '_footer.twig' %}
Before, I mentioned that certain variables are available by default in record or listing templates. Since we’re viewing a single record here, we have the {{ record }} variable available to us. With that in mind, we don’t need to use the setcontent tag, because it’s already accessible. We can extract the data we need very easily, and output it into our template. Using some Bootstrap classes and a touch of inline CSS for the sake of efficiency, here’s what I came up with:
{% include '_header.twig' %}

<article>
  <header class="article__header">
    <h1>{{ record.title }}</h1>
    <p class="lead">{{ record.excerpt }}</p>
    <hr>
  </header>
  <div class="article__body">
    <img src="{{ image(record.image) }}" alt="{{ record.title }}" class="pull-left" width="120" height="120" style="margin-right: 12px;">
    {{ record.body }}
  </div>
</article>

{% include '_footer.twig' %}
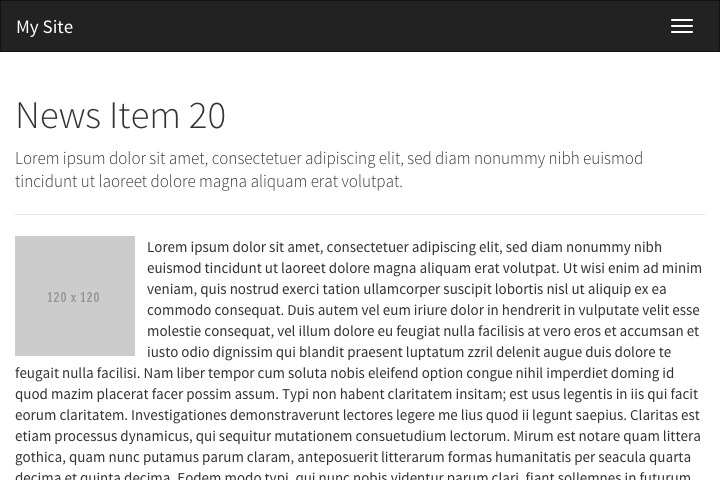
Head to the browser, and navigate to any of your news articles. You should now see them being displayed in a consistent manner, in accordance with your template. Awesome! How easy was that? Check out the screenshot below for a visual of the single record listing.

We have one final piece of the puzzle to solve, and you guessed it, it’s a breeze.
Adding Previous & Next Links
Adding previous and next links to your news articles is probably something you’ll want to do. It encourages users to continue clicking through your site, ultimately engaging them easily in more content and keeping them around longer. Before we jump in, let’s set up a quick navigation section below our article for previous and next links. Again, I’ll use some Bootstrap styles to make it look nice. Here’s the edited template:
{% include '_header.twig' %}

<article>
  <!-- article loop here -->
</article>

<hr>

<nav class="row">
  <div class="col-md-6">
    <a href="#">Previous</a>
  </div>
  <div class="col-md-6 text-right">
    <a href="#">Next</a>
  </div>
</nav>

{% include '_footer.twig' %}
Now we need to fetch those links. Bolt, as you may have guessed, offers functions to fetch previous and next records out of the box. All we have to do is this:
{% set prev = record.previous() %}
{% set next = record.next() %}
This now gives us full access to the previous and next records’ content. As a result, we can update our navigation to output the links like this:
<nav class="row">
<div class="col-md-6">
<a href="{{ prev.link }}">« {{ prev.title }}</a>
</div>
<div class="col-md-6 text-right">
<a href="{{ next.link }}">{{ next.title }} »</a>
</div>
</nav>We’re so close to completion, but we have one important thing to consider. On the first news item page, there will be no “next” record. Likewise, on the last one, there will be no previous record. Let’s just run a condition to check for this:
<nav class="row">
<div class="col-md-6">
{% if (prev) %}
<a href="{{ prev.link }}">« {{ prev.title }}</a>
{% endif %}
</div>
<div class="col-md-6 text-right">
{% if (next) %}
<a href="{{ next.link }}">{{ next.title }} »</a>
{% endif %}
</div>
</nav>For the sake of completion, and showing off the ease in which we can develop templates and output content with Bolt, here’s the final newsitem.twig template:
{% include '_header.twig' %}
<article>
<header class="article__header">
<h1>{{ record.title }}</h1>
<p class="lead">{{ record.excerpt }}</p>
<hr>
</header>
<div class="article__body">
<img src="{{ image(record.image) }}" alt="{{ record.title }}" class="pull-left" width="120" height="120" style="margin-right: 12px;">
{{ record.body }}
</div>
</article>
<hr>
{% set prev = record.previous() %}
{% set next = record.next() %}
<nav class="row">
<div class="col-md-6">
{% if (prev) %}
<a href="{{ prev.link }}">« {{ prev.title }}</a>
{% endif %}
</div>
<div class="col-md-6 text-right">
{% if (next) %}
<a href="{{ next.link }}">{{ next.title }} »</a>
{% endif %}
</div>
</nav>
{% include '_footer.twig' %}Nice. We should be able to navigate through all our news articles now using the previous and next links. Here’s a screenshot of the previous and next links in action.

Wrapping Up
As the web continues to evolve in size, scope, complexity, and viewership, efficiency and speed play larger roles. We have to make an effort to strip away excess bloat as much as possible in order to keep our applications trim and lean. Aside from being a lightweight and solid CMS that lets you dictate the flow and operation of your site, Bolt also offers front-end and back-end developers a smooth, easy workflow when developing themes, contenttypes, and more. In this tutorial, we’ve seen how quickly and easily we can set up and access content just the way we want to. Before you begin your next project, ask yourself seriously if the need for a powerhouse feature-rich CMS is really necessary, or if you can keep it light with Bolt. Personally, I highly endorse Bolt, and am using it on all current personal projects that warrant a CMS. Feedback? Comments? Let us know!
Frequently Asked Questions on Record Retrieval and Pagination in Bolt CMS
What is Bolt CMS and why should I use it for my website?
Bolt CMS is a powerful, open-source Content Management System (CMS) that is built on PHP. It is designed to be simple, flexible, and user-friendly, making it an excellent choice for both beginners and experienced developers. Bolt CMS offers a wide range of features, including easy content management, robust search functionality, and a responsive design that ensures your website looks great on all devices. Moreover, it supports a variety of database systems, including SQLite, MySQL, and PostgreSQL, providing you with the flexibility to choose the one that best suits your needs.
How does record retrieval work in Bolt CMS?
Record retrieval in Bolt CMS is a straightforward process. Bolt CMS uses a database to store all the content of your website. When a user requests a page, Bolt CMS retrieves the relevant records from the database and displays them on the page. This process is fast and efficient, ensuring that your website loads quickly and provides a smooth user experience.
What is pagination and why is it important in Bolt CMS?
Pagination is a technique used in web design to split large amounts of content into multiple pages. In Bolt CMS, pagination is used to manage the display of records. Instead of displaying all records on a single page, which can be overwhelming and slow to load, pagination allows you to display a set number of records per page. This not only improves the user experience by making your website easier to navigate, but also enhances the performance of your website by reducing the load time.
How can I implement pagination in Bolt CMS?
Implementing pagination in Bolt CMS is relatively easy. Bolt CMS provides built-in functions for pagination that you can use in your templates. You can specify the number of records you want to display per page, and Bolt CMS will automatically generate the necessary navigation links for you. This makes it easy to implement pagination on your website, even if you’re not an experienced developer.
Can I customize the pagination in Bolt CMS?
Yes, you can customize the pagination in Bolt CMS to suit your needs. Bolt CMS provides a variety of options for customizing the appearance and behavior of the pagination. For example, you can change the number of records displayed per page, customize the text of the navigation links, and even add custom CSS classes to the pagination elements. This gives you complete control over the look and feel of the pagination on your website.
What are the benefits of using Bolt CMS for record retrieval and pagination?
Using Bolt CMS for record retrieval and pagination offers several benefits. First, Bolt CMS provides a simple and efficient way to manage your website’s content. You can easily add, edit, and delete records, and Bolt CMS will automatically update the website for you. Second, Bolt CMS’s built-in pagination functionality makes it easy to split large amounts of content into manageable chunks, improving the user experience and the performance of your website. Finally, Bolt CMS is open-source and highly customizable, allowing you to tailor it to your specific needs.
How does Bolt CMS handle search functionality?
Bolt CMS has a robust search functionality that allows users to easily find the content they’re looking for. When a user performs a search, Bolt CMS retrieves the relevant records from the database and displays them on the search results page. You can customize the search functionality to suit your needs, such as by specifying which fields should be searchable and how the search results should be sorted.
Can I use Bolt CMS with other database systems?
Yes, Bolt CMS is designed to be flexible and can work with a variety of database systems. By default, Bolt CMS uses SQLite, but it also supports MySQL and PostgreSQL. This means you can choose the database system that best suits your needs, whether you’re looking for simplicity, performance, or advanced features.
Is Bolt CMS suitable for large websites?
Yes, Bolt CMS is suitable for websites of all sizes. It is designed to be scalable and can handle large amounts of content without sacrificing performance. Moreover, Bolt CMS’s record retrieval and pagination features make it easy to manage large amounts of content, ensuring that your website remains fast and responsive even as it grows.
How secure is Bolt CMS?
Bolt CMS takes security seriously and includes several features to help protect your website. For example, it uses secure password hashing to protect your user data, and it includes built-in protection against common web attacks like SQL injection and cross-site scripting. Moreover, because Bolt CMS is open-source, it is regularly updated and improved by a community of developers, ensuring that it stays up-to-date with the latest security practices.
I'm a web designer & developer from Trinidad & Tobago, with a degree in Mechanical Engineering. I love the logical side of the web, and I'm an artist/painter at heart. I endorse progressive web techniques, and try to learn something every day. I try to impart my knowledge as much as possible on my personal blog, callmenick.com. I love food, I surf every weekend, and I have an amazing creative partnership with fellow mischief maker Elena. Together, we run SAYSM.


