


CanJS is a collection of front-end libraries that make it easier to build complex and innovative web apps that are maintainable over a long period of time. It’s broken up into dozens of individual packages, so you can pick-and-choose what you’d like in your application without being bogged down by a huge 100kb+ dependency.
CanJS promotes the MVVM (Model-View-ViewModel) architecture with the following key packages:
- can-component for custom elements
- can-connect for communicating with APIs
- can-define for observables
- can-stache for Handlebars-like templating
In this tutorial, we’re going to make a to-do list app that uses a GitHub repository’s issue list as its source. Our app will update in real-time thanks to GitHub’s Webhook API and we’ll be able to reorder issues thanks to jQuery UI’s sortable interaction.
You can find the finished source code for this app on GitHub. Here’s what the final app will look like:

If you’re interested in taking your JavaScript skills to the next level, sign up for SitePoint Premium and check out our latest book, Modern JavaScript
Key Takeaways
- Utilize CanJS to create a dynamic to-do list application that integrates real-time GitHub issue tracking using GitHub’s Webhook API and jQuery UI for interactive features.
- Learn how CanJS supports the MVVM architecture through packages like can-component, can-connect, can-define, and can-stache to manage components, APIs, observables, and templating.
- Set up a local server using Node.js and the github-issue-server npm module to handle GitHub Webhook events and manage issue data with real-time updates.
- Develop a custom CanJS component to display and manage GitHub issues, enabling features such as adding new issues and real-time updates directly from GitHub.
- Implement interactive drag-and-drop functionality for reordering GitHub issues within the UI, with changes persisting in real-time through local server updates.
- Explore further CanJS capabilities and configurations by accessing the complete source code provided on GitHub, enhancing both understanding and practical JavaScript skills.
MVVM in CanJS
Before we start our project for this tutorial, let’s dive into what MVVM means within a CanJS application.
Data Models
The “Model” in MVVM is for your data model: a representation of the data within your application. Our app deals with individual issues and a list of issues, so these are the data types that we have in our model.
In CanJS, we use can-define/list/list and can-define/map/map to represent arrays and objects, respectively. These are observable types of data that will automatically update the View or ViewModel (in MVVM) when they change.
For example, our app will have an Issue type like this:
import DefineMap from 'can-define/map/map';
const Issue = DefineMap.extend('Issue', {
  id: 'number',
  title: 'string',
  sort_position: 'number',
  body: 'string'
});
Each instance of Issue will have four properties: id, title, sort_position, and body. When a value is set, can-define/map/map will convert that value to the type specified above, unless the value is null or undefined. For example, setting the id to the string "1" will give the id property the number value 1, while setting it to null will actually make it null.
We’ll define a type for arrays of issues like this:
import DefineList from 'can-define/list/list';
Issue.List = DefineList.extend('IssueList', {
  '#': Issue
});
The # property on a can-define/list/list will convert any item in the list to the specified type, so any item in an Issue.List will be an Issue instance.
View Templates
The “view” in a web application is the HTML user interface with which users interact. CanJS can render HTML with a few different template syntaxes, including can-stache, which is similar to Mustache and Handlebars.
Here’s a simple example of a can-stache template:
<ol>
  {{#each issues}}
    <li>
      {{title}}
    </li>
  {{/each}}
</ol>
In the above example, we use {{#each}} to iterate through a list of issues, then show the title of each issue with {{title}}. Any changes to the issues list or the issue titles will cause the DOM to be updated (e.g. an li will be added to the DOM if a new issue is added to the list).
View Models
The ViewModel in MVVM is the glue code between the Model and View. Any logic that can’t be contained within the model but is necessary for the view is provided by the ViewModel.
In CanJS, a can-stache template is rendered with a ViewModel. Here’s a really simple example:
import stache from 'can-stache';
const renderer = stache('{{greeting}} world');
const viewModel = {greeting: 'Hello'};
const fragment = renderer(viewModel);
console.log(fragment.textContent);// Logs “Hello world”
Components
The concept that ties all of these things together is a component (or custom element). Components are useful for grouping functionality together and making things reusable across your entire app.
In CanJS, a can-component is made up of a view (can-stache file), a view-model (can-define/map/map), and (optionally) an object that can listen for JavaScript events.
import Component from 'can-component';
import DefineMap from 'can-define/map/map';
import stache from 'can-stache';

const HelloWorldViewModel = DefineMap.extend('HelloWorldVM', {
  greeting: {value: 'Hello'},
  showExclamation: {value: true}
});

Component.extend({
  tag: 'hello-world',
  view: stache('{{greeting}} world{{#if showExclamation}}!{{/if}}'),
  ViewModel: HelloWorldViewModel,
  events: {
    '{element} click': () => {
      this.viewModel.showExclamation = !this.viewModel.showExclamation;
    }
  }
});

const template = stache('hello-world');
document.body.appendChild(template);
In the example above, our template will either show “Hello world!” or just “Hello world” (no exclamation mark), depending on whether the user has clicked our custom element.
These four concepts are all you need to know to build a CanJS app! Our example app will use these four ideas to build a full-fledged MVVM app.
Prerequisites for this tutorial
Before getting started, install a recent version of Node.js. We’ll use npm to install a backend server that will handle the communication with GitHub’s API.
Additionally, if you don’t already have a GitHub account, sign up for one. You can also get the GitHub CLI should you wish to save time by performing GitHub actions alongside your Git commands in the command line.
Set up our local project
Let’s start by creating a new directory for our project and switching to that new directory:
mkdir canjs-github
cd canjs-github
Now let’s create the files we’ll need for our project:
touch app.css app.js index.html
We’ll use app.css for our styles, app.js for our JavaScript, and index.html for the user interface (UI).
CanJS Hello World
Let’s get coding! First, we’re going to add this to our index.html file:
<!DOCTYPE html>
<html>
<head>
  <meta charset="utf-8">
  <title>CanJS GitHub Issues To-Do List</title>
  <link rel="stylesheet" href="https://maxcdn.bootstrapcdn.com/bootstrap/3.3.7/css/bootstrap.min.css">
  <link rel="stylesheet" href="app.css">
</head>
<body>

<script type="text/stache" id="app-template">
  <div class="container">
    <div class="row">
      <div class="col-md-8 col-md-offset-2">
        <h1 class="page-header text-center">
          {{pageTitle}}
        </h1>
      </div>
    </div>
  </div>
</script>

<script type="text/stache" id="github-issues-template">
</script>

<script src="https://unpkg.com/jquery@3/dist/jquery.min.js"></script>
<script src="https://code.jquery.com/ui/1.12.1/jquery-ui.js"></script>
<script src="https://unpkg.com/can@3/dist/global/can.all.js"></script>
<script src="/socket.io/socket.io.js"></script>
<script src="app.js"></script>
</body>
</html>
This has a bunch of different parts, so let’s break it down:
- The two
linkelements in theheadare the stylesheets for our project. We’re using Bootstrap for some base styles and we’ll have some customizations inapp.css - The first
scriptelement (withid="app-template") contains the root template for our app - The second
scriptelement (withid="github-issues-template") will contain the template for thegithub-issuescomponent we will create later in this tutorial - The
scriptelements at the end of the page load our dependencies: jQuery, jQuery UI, CanJS, Socket.io, and our app code
In our app, we’ll use jQuery UI (which depends on jQuery) to sort the issues with drag and drop. We’ve included can.all.js so we have access to every CanJS module; normally, you would want to use a module loader like StealJS or webpack, but that’s outside the scope of this article. We’ll use Socket.io to receive events from GitHub to update our app in real-time.
Next, let’s add some styles to our app.css file:
form {
  margin: 1em 0 2em 0;
}

.list-group .drag-background {
  background-color: #dff0d8;
}

.text-overflow {
  overflow: hidden;
  text-overflow: ellipsis;
  white-space: nowrap;
}
Lastly, let’s add some code to our app.js file:
var AppViewModel = can.DefineMap.extend('AppVM', {
  pageTitle: {
    type: "string",
    value: "GitHub Issues",
  }
});

var appVM = new AppViewModel();
var template = can.stache.from('app-template');
var appFragment = template(appVM);
document.body.appendChild(appFragment);
Let’s break the JavaScript down:
can.DefineMapis used for declaring custom observable object typesAppViewModelis the observable object type that will serve as the root view-model for our apppageTitleis a property of allAppViewModelinstances that defaults to the valueGitHub IssuesappVMis a new instance of our app’s view-modelcan.stache.fromconverts the contents of ascripttag into a function that renders the templateappFragmentis a document fragment of the rendered template with theappVMdatadocument.body.appendChildtakes a DOM node and appends it to the HTML body
Note: The
can.all.jsscript in our page makes acanglobal variable that we can use to access any CanJS module. For example, thecan-stachemodule is available to our script ascan.stache.
If you open index.html in your browser, you’ll see something like this:
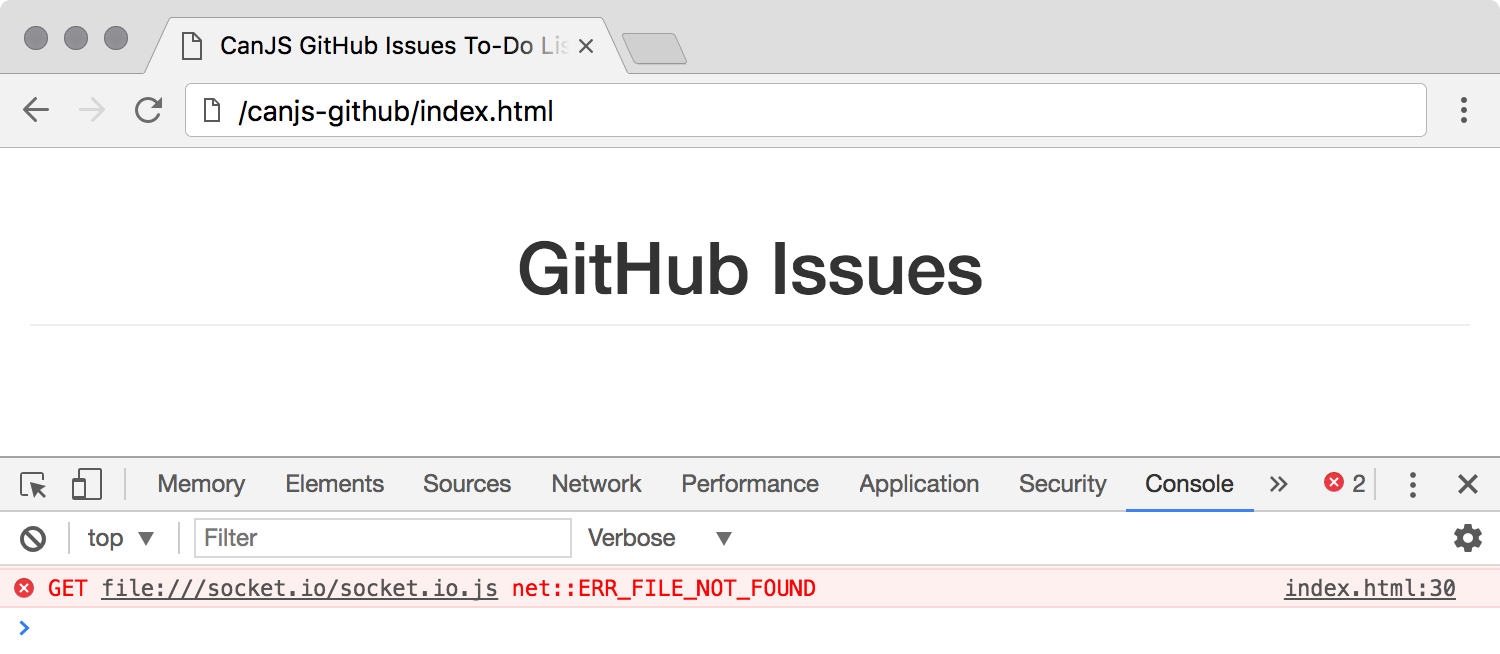
There’s one error in the console because we haven’t set up our real-time Socket.io server yet. Let’s do that next.
Set up our server
GitHub’s Webhooks API can send server notifications whenever something changes within a repository. Instead of spending time writing the server code, I’ve made the github-issue-server npm module that will:
- Set up a ngrok server to receive the GitHub Webhook events
- Make authenticated requests to the GitHub API when we create issues in our UI
- Use Socket.io for real-time communication with our UI
- Serve the files in our project directory
- Add a
sort_positionproperty to every issue - Persist the list of our issues and their
sort_positionto a localissues.jsonfile
In order for the server to communicate with GitHub through authenticated requests, we need to create a personal access token:
- Go to github.com/settings/tokens/new
- Enter a Token description (I called mine “CanJS GitHub Issue To-do List”)
- Select the
public_reposcope - Click on Generate token
- On the next page, click the Copy Token clipboard icon next to the token
Now we can install the server. We’ll use npm to create a package.json and install the github-issue-server:
npm init -y
npm install github-issue-server
To start our server, run the following command, replacing ACCESS_TOKEN with the personal access token that you copied from GitHub:
node node_modules/github-issue-server/ ACCESS_TOKEN
Your server will start up and say something like:
Started up server, available at:
  http://localhost:8080/
Started up ngrok server, webhook available at:
  https://829s1522.ngrok.io/api/webhook
The ngrok server address will have a different subdomain that is unique to you.
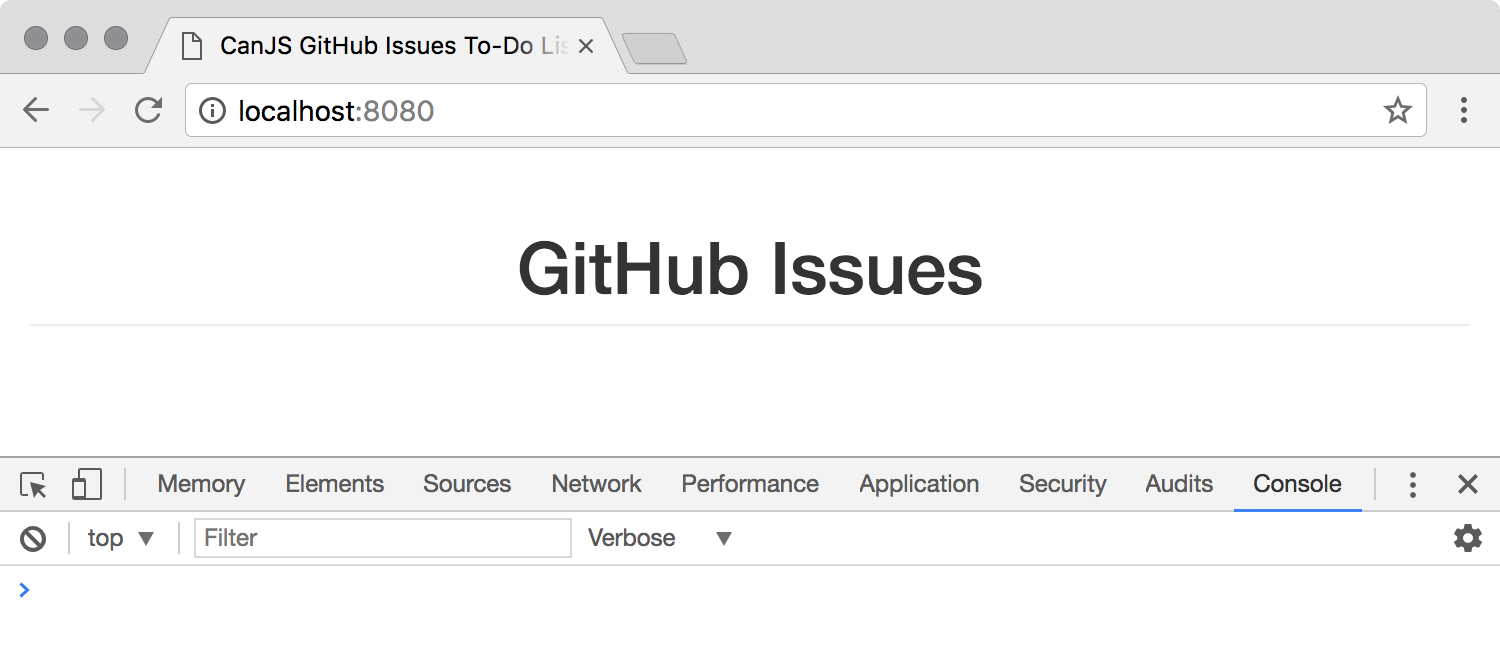
Now, if we open the localhost or ngrok.io addresses in our browser, we’ll see the same home page as before, except this time there won’t be any errors in our console:
Create a GitHub Issues Component
In CanJS, a component is a custom element that has a view (a stache template) and a view model (which connects your data model to the view). Components are useful for grouping functionality together and making it reusable across your entire app.
Let’s create a github-issues component that will be used to list all our GitHub issues and add new ones!
First, we’ll add this to the top of our app.js file:
var GitHubIssuesVM = can.DefineMap.extend('GitHubIssuesVM', {
  pageTitle: 'string'
});

can.Component.extend({
  tag: 'github-issues',
  view: can.stache.from('github-issues-template'),
  ViewModel: GitHubIssuesVM
});
GitHubIssuesVM is defined as the view-model for our component. Each instance of the component will have its own pageTitle property which will be rendered in the HTML view.
Second, let’s define the template for the github-issues element:
<script type="text/stache" id="github-issues-template">
  <h1 class="page-header text-center">
    {{pageTitle}}
  </h1>
</script>
Notice the {{pageTitle}} syntax, which renders the pageTitle in our view-model to the template.
Lastly, let’s replace the header we have in our HTML:
<h1 class="page-header text-center">
  {{pageTitle}}
</h1>
…with our new custom element:
<github-issues {page-title}="pageTitle" />
In the above code, we’re passing the pageTitle property from our app’s view-model to the github-issues component. The {page-title} syntax is one-way binding from the parent template to the child component, which means that any changes in the parent will be propagated to the child, but no changes in the child will affect the parent. CanJS supports both one-way and two-way data binding. We’ll look at examples of two-way data binding later.
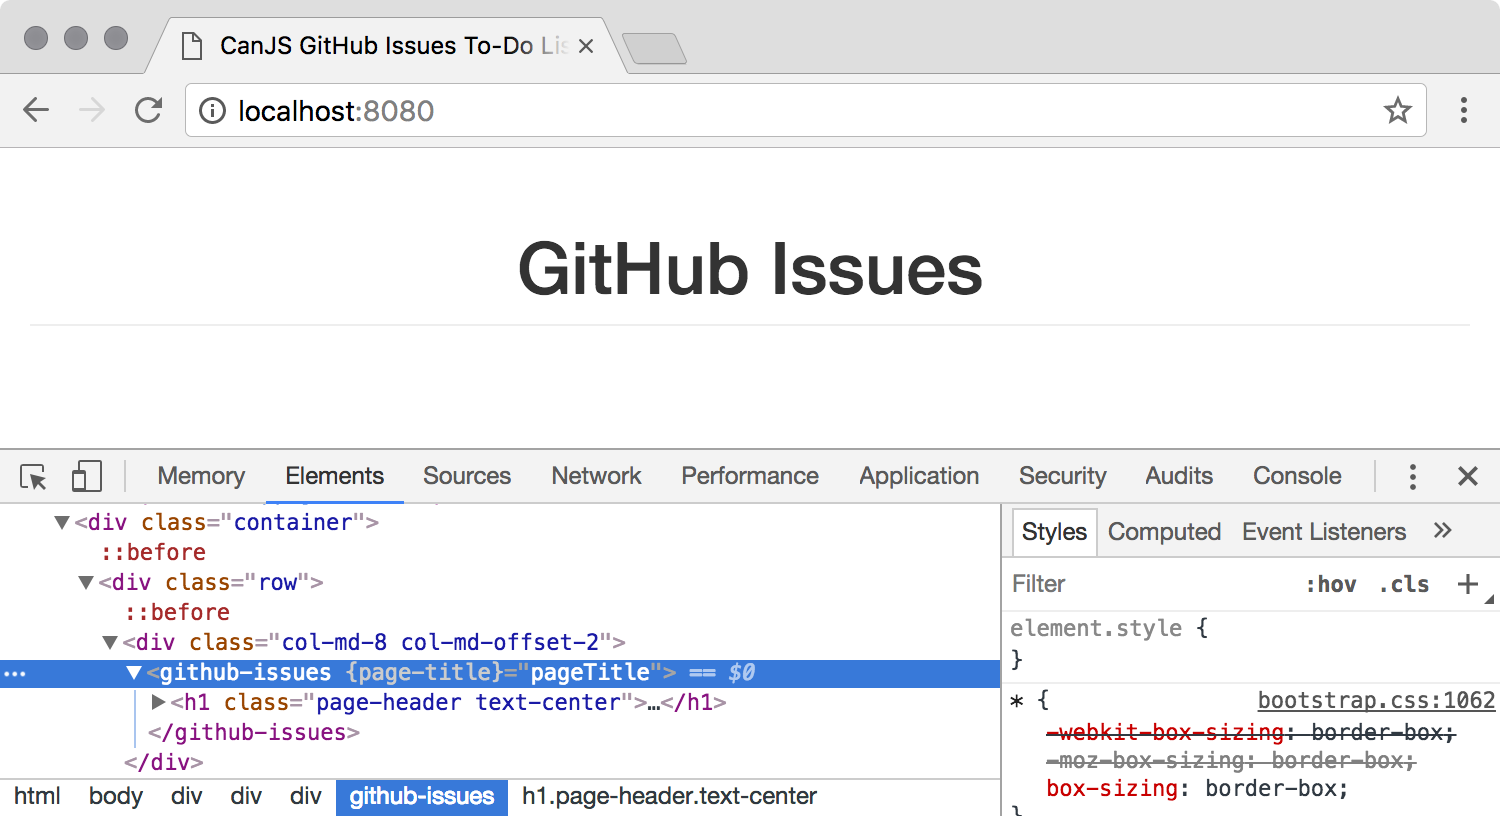
Our page should look exactly the same as before, except now it has this HTML structure:
Set up the GitHub repo
Our app is going to make a to-do list out of the issues within a GitHub repository (repo), so we’ll need to configure a GitHub repo for our app.
If you already have a repo you want to use, great! Otherwise, create one now.
Now that we have a repo, go to its Settings page, click on Webhooks, then click on Add webhook. After authenticating, you can fill out the form:
- Copy the
ngrokserver address from your local server to the Payload URL field (the address is something likehttps://829s1522.ngrok.io/api/webhook) - Select
application/jsonas the Content type - Click on Let me select individual events and select the Issues checkbox
- gfgf
- Click the Add webhook button to finish the process
Now, whenever the list of issues in your repo changes, your local server will receive those Webhook events. Let’s test it out!
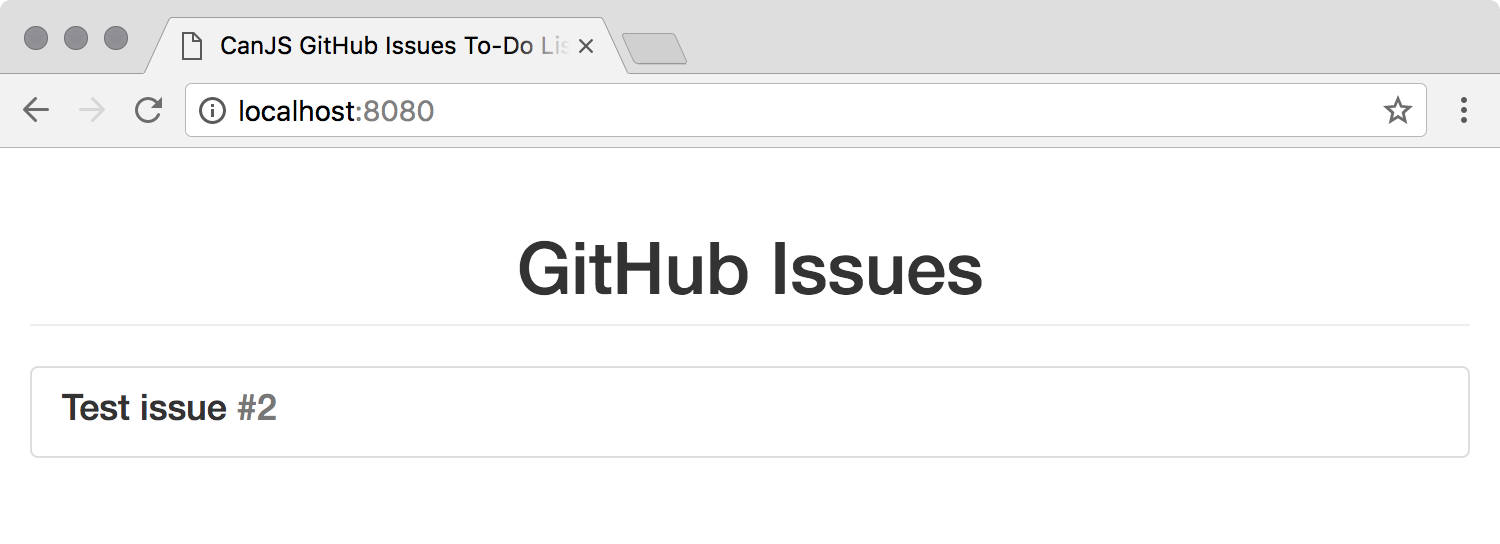
Create an issue in your GitHub repo by going to the Issues tab in GitHub. If you create an issue called “Test issue”, you’ll see the following message in your command-line interface:
Received “opened” action from GitHub for issue “Test issue”

List the GitHub Issues
Now that we have some issues in our GitHub repository, let’s show those issues in our UI!
First, we’ll create an observable Issue type that will be the model for our issue data. Add this to the top of your app.js file:
var Issue = can.DefineMap.extend('Issue', {
  seal: false
}, {
  id: 'number',
  title: 'string',
  sort_position: 'number',
  body: 'string'
});
Each Issue instance will have id, title, sort_position, and body properties. Because GitHub issues have a lot of other properties than just the ones we’re modeling here, we’ll set seal to false so errors aren’t thrown when other properties come through the GitHub API.
Second, let’s create a can.DefineList type for arrays of issues:
Issue.List = can.DefineList.extend('IssueList', {
  '#': Issue
});
Third, we’ll configure a can-set.Algebra so can-connect knows about two special properties: id is a unique identifier for each issue and we’ll use sort with Issue.getList to retrieve the issues in a particular order.
Issue.algebra = new can.set.Algebra(
  can.set.props.id('id'),
  can.set.props.sort('sort')
);
Last, we’ll connect the Issue and Issue.List types to our server endpoint. Make sure you replace GITHUB_ORG/GITHUB_REPO with the info for your repo:
Issue.connection = can.connect.superMap({
  url: '/api/github/repos/GITHUB_ORG/GITHUB_REPO/issues',
  Map: Issue,
  List: Issue.List,
  name: 'issue',
  algebra: Issue.algebra
});
When we call can.connect.superMap, some CRUD (create, read, update, and delete) methods are added to our Issue object. Included in those methods is getList, which can be called to get a list of all the instances for that type.
In our app, we’ll use Issue.getList to fetch all the issues from our server. Let’s update our GitHubIssuesVM to have an issuesPromise property:
var GitHubIssuesVM = can.DefineMap.extend('GitHubIssuesVM', {
  issuesPromise: {
    value: function() {
        return Issue.getList({
          sort: 'sort_position'
        });
    }
  },
  issues: {
    get: function(lastValue, setValue) {
      if (lastValue) {
        return lastValue;
      }
      this.issuesPromise.then(setValue);
    }
  },
  pageTitle: 'string'
});
The issuesPromise property is the Promise returned by Issue.getList; we specify sort_position as the sort property so the list stays sorted by that property. The issues property will be the value of the Promise after it resolves.
Now let’s modify the github-issues-template in index.html:
  <div class="list-group">
    {{#if issuesPromise.isPending}}
      <div class="list-group-item list-group-item-info">
        <h4>Loading…</h4>
      </div>
    {{/if}}
    {{#if issuesPromise.isRejected}}
      <div class="list-group-item list-group-item-danger">
        <h4>Error</h4>
        <p>{{issuesPromise.reason}}</p>
      </div>
    {{/if}}
    {{#if issuesPromise.isResolved}}
      {{#if issues.length}}
        <ol class="list-unstyled">
          {{#each issues}}
            <li class="list-group-item">
              <h4 class="list-group-item-heading">
                {{title}} <span class="text-muted">#{{number}}</span>
              </h4>
              <p class="list-group-item-text text-overflow">
                {{body}}
              </p>
            </li>
          {{/each}}
        </ol>
      {{else}}
        <div class="list-group-item list-group-item-info">
            <h4>No issues</h4>
        </div>
      {{/if}}
    {{/if}}
  </div>
In can-stache templates, we can use {{#if}} for conditionals, so we have three main blocks for whether the Promise for our issues list isPending, isRejected, or isResolved. In the isResolved case, we will iterate through the array of issues with {{#each}}, or we’ll show a message that are are no issues.
Now when you reload your page, you’ll see the same list of issues!
Creating GitHub Issues
Let’s add a form for creating a new issue with a title and description. We’ll then create a new issue through GitHub’s API.
First, let’s add a form under the h1 in our github-issues-template template in index.html:
  <form ($submit)="send()">
    <div class="form-group">
      <label for="title" class="sr-only">Issue title</label>
      <input class="form-control" id="title" placeholder="Issue title" type="text" {($value)}="title" />
    </div>
    <div class="form-group">
      <label for="body" class="sr-only">Issue description</label>
      <textarea class="form-control" id="body" placeholder="Issue description" {($value)}="body"></textarea>
    </div>
    <button class="btn btn-primary" type="submit">Submit issue</button>
  </form>
The above snippet of code uses a few CanJS features we haven’t talked about:
($submit)is a DOM event listener that will call thesend()function in our view-model whenever the form is submitted{($value)}="title"and{($value)}="body"are both two-way-bound values: when thevalueof theinputchanges, the view-model will update, and vice-versa
Second, let’s update GitHubIssuesVM in app.js to have three new properties:
var GitHubIssuesVM = can.DefineMap.extend('GitHubIssuesVM', {
  issuesPromise: {
    value: function() {
        return Issue.getList({
          sort: 'sort_position'
        });
    }
  },
  issues: {
    get: function(lastValue, setValue) {
      if (lastValue) {
        return lastValue;
      }
      this.issuesPromise.then(setValue);
    }
  },
  pageTitle: 'string',
  title: 'string',
  body: 'string',
  send: function() {
    var firstIssue = (this.issues) ? this.issues[0] : null;
    var sortPosition = (firstIssue) ? (Number.MIN_SAFE_INTEGER + firstIssue.sort_position) / 2 : 0;

    new Issue({
        title: this.title,
        body: this.body,
        sort_position: sortPosition
    }).save().then(function() {
        this.title = this.body = '';
    }.bind(this));
  }
});
In addition to the body and title properties for the new issue, we’ve added a send() method that creates a new issue. It accepts the issues list so it can calculate a sort_position for the new issue: we want it to be before the first issue. Once we have all of the values for the new issue, we call new Issue() to create it, .save() to POST it to our server, and then wait for the Promise to resolve; if it succeeds, we reset title and body so the form is cleared!
Last, let’s update the github-issues component in app.js to have a new events object:
can.Component.extend({
  tag: 'github-issues',
  view: can.stache.from('github-issues-template'),
  ViewModel: GitHubIssuesVM,
  events: {
    '{element} form submit': function(element, event) {
      event.preventDefault();
    }
  }
});
The events property of can-component is used to listen for the form’s submit event to be fired. We don’t want the page to be reloaded when the user submits the form, so we call preventDefault() to cancel the default form submission behavior.
Now we can add an issue and see it show up in the GitHub UI! Even more than that, the issue appears at the bottom of our issue list, which is pretty fantastic thanks to set algebra!
Adding Real-Time Updating
Our app can send new issues to GitHub, but changes from GitHub don’t update our app. Let’s add some real-time updating with Socket.IO!
In app.js, let’s add the following code after where we set up Issue.connection:
var socket = io();
socket.on('issue created', function(issue) {
  Issue.connection.createInstance(issue);
});
socket.on('issue removed', function(issue) {
  Issue.connection.destroyInstance(issue);
});
socket.on('issue updated', function(issue) {
  Issue.connection.updateInstance(issue);
});
Our local server emits three different events when issues are created, removed, or updated. Our event listeners then call createInstance, destroyInstance, or updateInstance to modify the Issue data model. Because each instance of Issue is observable and Issue.List is observable, CanJS will automatically update any parts of our app that reference anything in the Issue model!
When we reload the page and make changes through GitHub’s UI, we’ll see those same changes in our UI!
Reordering Issues
Now let’s add some drag-and-drop functionality for us to organize our issues! Our local server is set up to save an issues.json file to our project directory whenever our issue list’s order changes, so all we need to do is update our app to have some controls for reordering the issues and some logic for assigning them a new sort_position.
After the Socket.IO code we added in the section above, let’s add the following:
can.view.callbacks.attr('sortable-issues', function(element) {
  $(element).sortable({
    containment: 'parent',
    handle: '.grab-handle',
    revert: true,
    start: function(event, ui) {
      var draggedElement = ui.item;
      draggedElement.addClass('drag-background');
    },
    stop: function(event, ui) {
      var draggedElement = ui.item;
      draggedElement.removeClass('drag-background');
    },
    update: function(event, ui) {
      var draggedElement = ui.item[0];
      var draggedIssue = can.data.get.call(draggedElement, 'issue');
      var nextSibling = draggedElement.nextElementSibling;
      var previousSibling = draggedElement.previousElementSibling;
      var nextIssue = (nextSibling) ? can.data.get.call(nextSibling, 'issue') : {sort_position: Number.MAX_SAFE_INTEGER};
      var previousIssue = (previousSibling) ? can.data.get.call(previousSibling, 'issue') : {sort_position: Number.MIN_SAFE_INTEGER};
      draggedIssue.sort_position = (nextIssue.sort_position + previousIssue.sort_position) / 2;
      draggedIssue.save();
    }
  });
});
Whew! Let’s break it down:
- can.view.callbacks is for registering a callback whenever a new attribute or element is added to the DOM. In our code, our function will be called whenever the
sortable-issuesattribute is added to an element. - We’re using jQuery UI’s sortable interaction to handle the dragging and dropping of DOM elements. We’ve configured it with the containment, handle, and revert options.
- Whenever an issue starts to be dragged by the user, the start function will be fired, which will add a class to the DOM element.
- Whenever an issue has been dropped by the user, the stop function will be fired, which will remove the class we added in
start. - update will be called once sorting has completely stopped and the DOM has been updated. Our function gets the
Issuemodel data for the issue that was dragged, as well as for the issues that come immediately before and after, so it can recalculate asort_positionthat is between the two issues. After we assign thesort_positionproperty, we call save() to PUT the updated issue data to our local server.
Now let’s update the <ol> of issues in index.html:
        <ol class="list-unstyled" sortable-issues>
          {{#each issues}}
            <li class="list-group-item" {{data('issue', this)}}>
              {{^is issues.length 1}}
                <span class="glyphicon glyphicon-move grab-handle pull-right text-muted" aria-hidden="true"></span>
              {{/is}}
              <h4 class="list-group-item-heading">
                {{title}} <span class="text-muted">#{{number}}</span>
              </h4>
              <p class="list-group-item-text text-overflow">
                {{body}}
              </p>
            </li>
          {{/each}}
        </ol>
We’ve added a few new things:
- The
sortable-issuesattribute will cause the callback we defined inapp.jsto be called as soon as the list is in the DOM. {{data('issue', this)}}will attach the issue data to the DOM element so we can get it in oursortable-issuescallback.- The
{{^is issues.length 1}}section will add a grab-handle to move the issue if there is more than one issue in the list.
Now when we reload the page, we’ll see the grab-handles on each issue and we can pick them up to reorder the issues!
Further Reading
We’ve succeeded in building a real-time to-do list for GitHub issues with CanJS! If I’ve whet your appetite for learning more about CanJS, check out some of the guides below on CanJS.com:
Thank you for taking the time to go through this tutorial. If you need any help, please don’t be afraid to ask questions on Gitter, on the CanJS forums, tweet at me, or leave a comment below!
This article was peer reviewed by Camilo Reyes. Thanks to all of SitePoint’s peer reviewers for making SitePoint content the best it can be!
Frequently Asked Questions (FAQs) about Real-Time GitHub Issue List with CanJS
How does CanJS integrate with GitHub for real-time issue tracking?
CanJS integrates with GitHub through the use of GitHub’s API. This allows CanJS to fetch data from GitHub in real-time, providing users with up-to-date information about issues. The CanJS application makes requests to the GitHub API, which returns data in JSON format. This data is then processed and displayed in the CanJS application. This integration allows for real-time tracking and management of GitHub issues, making it a powerful tool for project management and collaboration.
What are the benefits of using CanJS for real-time issue tracking on GitHub?
CanJS offers several benefits for real-time issue tracking on GitHub. Firstly, it provides real-time updates, ensuring that users always have the most current information. Secondly, CanJS is highly customizable, allowing users to tailor the application to their specific needs. Thirdly, CanJS is built with a focus on simplicity and ease of use, making it accessible to users of all skill levels. Lastly, CanJS is open-source, meaning it’s free to use and can be modified to suit unique requirements.
How can I set up CanJS for real-time issue tracking on GitHub?
Setting up CanJS for real-time issue tracking on GitHub involves a few steps. First, you need to install CanJS and its dependencies. Then, you need to create a new CanJS application and configure it to use the GitHub API. This involves setting up the API endpoints and authentication. Once this is done, you can start using CanJS to track issues on GitHub in real-time.
Can I use CanJS to track issues on other platforms besides GitHub?
CanJS is primarily designed to work with GitHub. However, since it’s an open-source framework, it can potentially be modified to work with other platforms that have similar APIs. This would require some programming knowledge and understanding of the platform’s API.
What kind of data can I track with CanJS on GitHub?
With CanJS, you can track a wide range of data related to issues on GitHub. This includes the issue title, description, labels, comments, and status (open or closed). You can also track the user who created the issue, the date it was created, and the date it was last updated. This comprehensive data tracking allows for effective project management and collaboration.
How does CanJS handle authentication with GitHub?
CanJS handles authentication with GitHub through the use of access tokens. These tokens are generated by GitHub and are used to authenticate requests made to the GitHub API. This ensures that only authorized users can access the data.
Can I customize the data displayed by CanJS?
Yes, CanJS is highly customizable. You can choose which data fields to display, how they are displayed, and even apply filters to the data. This allows you to tailor the application to your specific needs and preferences.
Is CanJS suitable for large projects with many issues?
Yes, CanJS is designed to handle projects of all sizes. It can efficiently fetch and display data for a large number of issues without performance degradation. This makes it suitable for both small and large projects.
Can multiple users use CanJS to track issues on the same GitHub repository?
Yes, multiple users can use CanJS to track issues on the same GitHub repository. Each user would need their own access token for authentication.
How does CanJS handle errors and exceptions?
CanJS has robust error handling capabilities. It can catch and handle exceptions, display error messages, and even recover from certain errors. This ensures that the application remains stable and usable even when unexpected issues occur.