Pimp My Text: Bling Bling With Photoshop
 Last week I was watching the opening credits of “I’m a Celebrity, Get Me Out of Here” and I noticed the titles consist of bling bling text getting dropped into the jungle. I’ve also noticed quite a few ads on TV using bling text as Christmas approaches. So today we’ll have a look at how to produce some sparkling silver and diamonds (or diamante) text in Photoshop using layer effects, blending modes and filters.
1. Start off with a new canvas (size 600 x 300 pixels in this example) with a dark gray background. I’m going down the gangsta route here and pimping out SitePoint using a Blackletter font called Divine set in white. The bling effect works best with fairly thick heavy fonts.

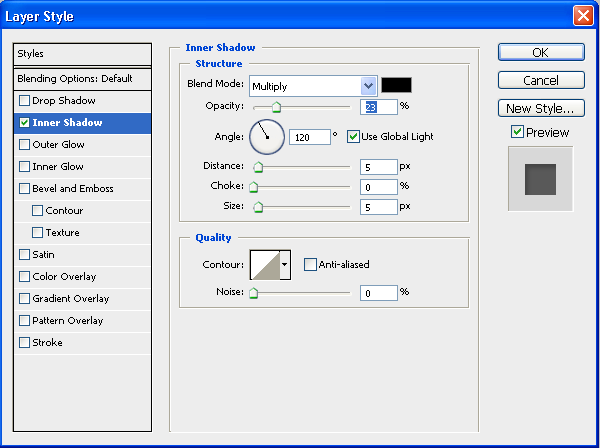
2. We’ll use layer styles now to make our text look like it’s made from silver. Click on the layer effects button on the bottom of the Layer palette and choose Inner Shadow and use the same (or similar) settings to what I have below. Notice that the opacity is fairly low. Don’t click OK yet.

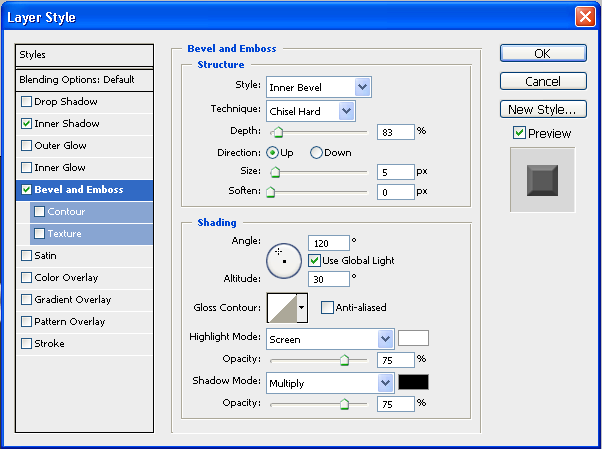
3. Click on the words Bevel and Emboss on the left hand side and use the following settings. Don’t click OK yet.

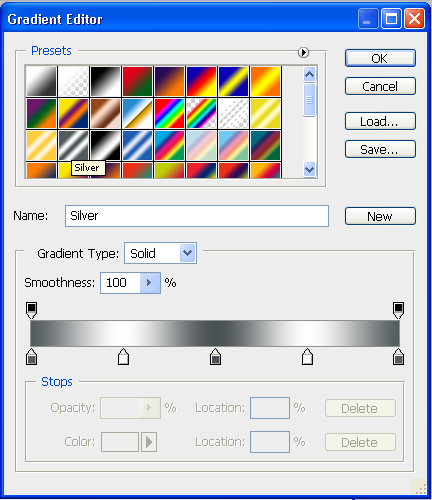
4. Now click on the word Stroke and use the following settings. Set the stroke position to center and change the Fill Type from Solid to Gradient.
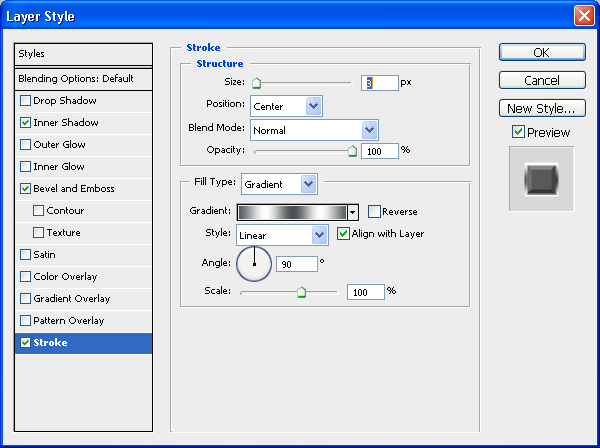
Double click on the Gradient to open the Gradient Editor, then choose Silver from the list of gradients. If you can’t see Silver listed then click on the arrow in the top right corner to load the additional gradients that come with Photoshop and choose Metals from the drop down menu.

So that’s our silver text in place. Now we want to add loads of diamonds to show that we are extra classy!
5. Ctrl + Click (Win) or Cmd + Click (Mac) on the text thumbnail in the Layers palette to select the contents of the layer.
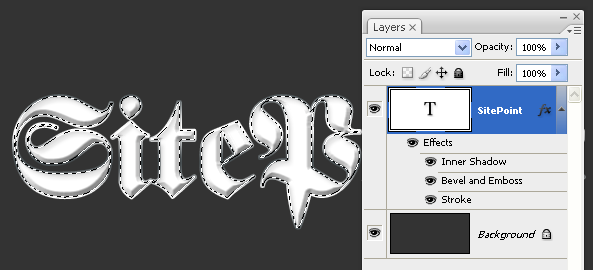
6. Choose Select > Modify > Contract by 2 pixels.

7. Don’t deselect yet, but add a new layer. Name the layer diamonds.
8. Make sure your default colors are black and white (Press D to reset them), then choose Filter > Render > Clouds. This adds a dark cloudy texture to the selected area.
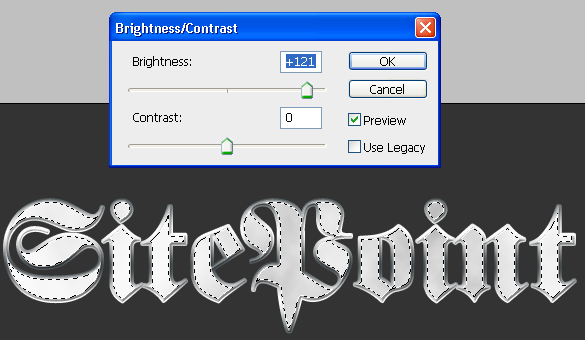
9. The clouds are a bit too dark, so choose Image > Adjustment > Brightness/Contrast and drag the Brightness slider to the right to lighten up the selection. Click OK.
10. And now for the diamonds. Choose Filter > Distort > Glass. The Filter dialog box opens up now and you’ll see a preview of your layer on the left hand side. For texture choose Tiny Lens and use the Distortion, Scaling and Smoothness settings as below. It’s actually quite difficult to see the preview because it’s sitting on the checkerboard pattern so you might have a bit of trial and error when you’re playing with the settings.
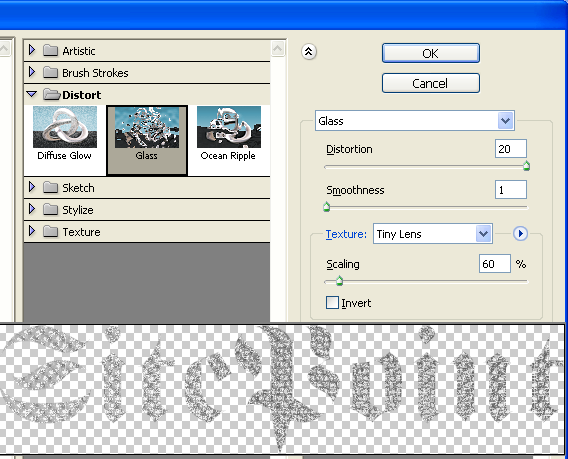
Click OK and your new fancy diamonds will be added to the layer. You can now deselect the selection by pressing Ctrl + D or Cmd + D. Your type should now look a little bit like this:

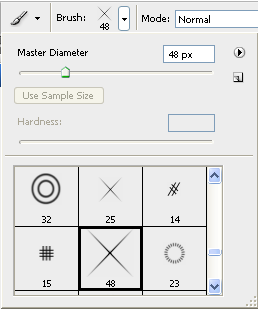
11. The final step is to add a little bit of sparkle. Add a new layer and name is Sparkles. Select the Paintbrush tool and in the options bar choose the large sparkle brush. If you can’t see this brush, click on the arrow in the top right corner and choose Assorted Brushes from the drop down menu. Set the foreground color to white and paint in a few sparkles on the text. Vary the size of the brush as you paint.
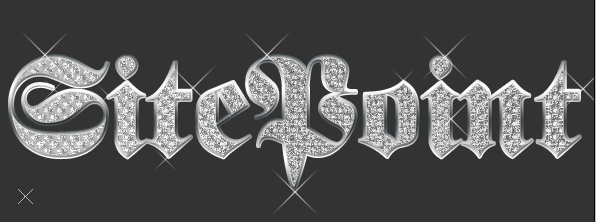
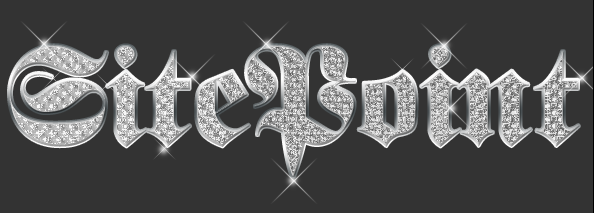
12. Finally, take a very soft small round brush and paint a light blur on top of each of the sparkles. Et voila!
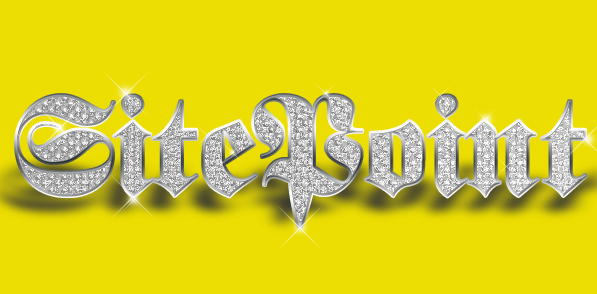
(Optional). If you want to change the background to a lighter color, you can then add a visible drop shadow.
This is one way to produce the bling effect. Photoshop being Photoshop, I’m sure there are numerous other ways to get here, but the main thing is to have fun trying.
Frequently Asked Questions about Bling Text in Photoshop
How can I create my own bling font in Photoshop?
Creating your own bling font in Photoshop is a fun and creative process. Start by opening a new document and selecting the Text tool. Type your text and choose a bold, chunky font that will show off the bling effect well. Next, apply a gradient overlay in the Layer Style panel. Choose colors that mimic the look of shiny metal or gemstones. Then, apply a Bevel & Emboss effect to give the text a 3D look. Finally, add a pattern overlay with a glitter or jewel texture. Adjust the scale and opacity until you achieve the desired bling effect.
Can I use bling fonts in other applications besides Photoshop?
Yes, once you’ve created your bling font in Photoshop, you can save it as an image file and use it in other applications. This could include graphic design software, word processors, or even social media platforms. Just remember to check the specific application’s guidelines for uploading custom fonts or images.
Are there any free resources for bling textures and patterns?
There are many online resources where you can find free textures and patterns to use in your bling font designs. Websites like Freepik, Vecteezy, and Adobe Stock offer a wide range of free and premium resources. Always make sure to check the licensing terms before using any resources in your projects.
How can I add more realism to my bling text?
To add more realism to your bling text, consider using advanced Photoshop techniques like adding shadows and reflections. You can also experiment with different layer blending modes to achieve more complex lighting effects.
Can I animate my bling text in Photoshop?
Yes, Photoshop has built-in animation capabilities that you can use to animate your bling text. This could involve making the text sparkle, rotate, or even change colors over time. Check out Photoshop’s timeline panel and animation presets to get started.
How can I make my bling text stand out against different backgrounds?
To make your bling text stand out, consider adding a drop shadow or stroke effect in the Layer Style panel. You can also experiment with different background colors and textures to see what works best with your bling text.
Can I use bling text in my logo design?
Bling text can be a fun and eye-catching element in a logo design. However, it’s important to consider the overall style and message of your brand. If a flashy, glamorous look fits your brand, then bling text could be a great choice.
How can I save and share my bling text designs?
Once you’re happy with your bling text design, you can save it as a Photoshop file to keep all your layers and effects intact. To share your design, save it as a JPEG or PNG file. These formats are widely supported and will preserve the quality of your design.
Are there any mobile apps for creating bling text?
Yes, there are several mobile apps available that allow you to create bling text. These apps often have a more simplified interface compared to Photoshop, making them a good option for quick, on-the-go designs.
Can I use bling text in my web design?
While bling text can be a fun element in web design, it’s important to use it sparingly and consider its impact on readability and overall design aesthetics. Too much bling can be distracting and make text difficult to read, especially on smaller screens.
Jennifer Farley is a designer, illustrator and design instructor based in Ireland. She writes about design and illustration on her blog at Laughing Lion Design.
