Photoshop offers endless design possibilities. You can transform anything into a beautiful art piece, especially when it comes to typography. There are so many different typography styles and effects that you can employ in your projects. Working with specialized typography is not only a way to flex your creativity muscles, it’s also a way to hone your Photoshop speed and prowess.
So, today I am going to show you how to create an denim and zipper text effect in Photoshop. We will learn how to use and manipulate some interesting techniques to achieve the desired effect. We’ll use a variety of textures and blending options. Let’s start designing!
Resources:
Fabric Textures
Jeans Textures
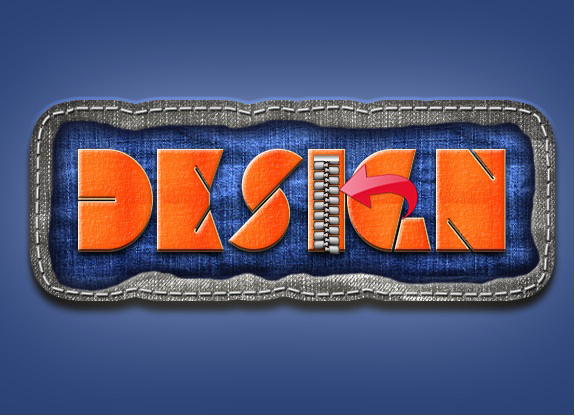
Final Result:
 Step 1
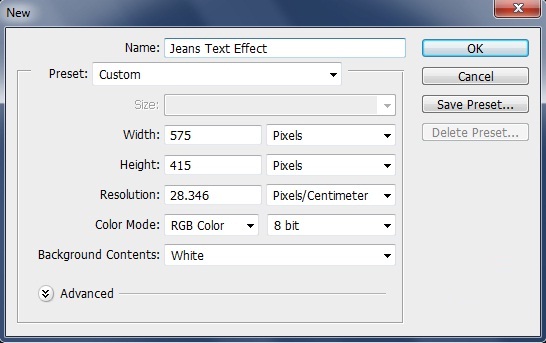
Open Photoshop and create a new file with a 575px width and a 415px height.
Step 1
Open Photoshop and create a new file with a 575px width and a 415px height.
 Step 2:
Select the paint bucket tool and fill the background with color #2a4176.
Step 2:
Select the paint bucket tool and fill the background with color #2a4176.
 Step 3:
Open the dark jeans texture and paste it into your document. Now, click on “Image” > “Adjustments” > “Hue/Saturation” and make it a bit grey.
Step 3:
Open the dark jeans texture and paste it into your document. Now, click on “Image” > “Adjustments” > “Hue/Saturation” and make it a bit grey.
 Step 4:
Select the pen tool and draw a rough shape, as shown below.
Step 4:
Select the pen tool and draw a rough shape, as shown below.
 Step 5:
Now, right-click on the path and select “Make Selection.” Then, simply copy and paste the selected area.
Step 5:
Now, right-click on the path and select “Make Selection.” Then, simply copy and paste the selected area.
 Step 6:
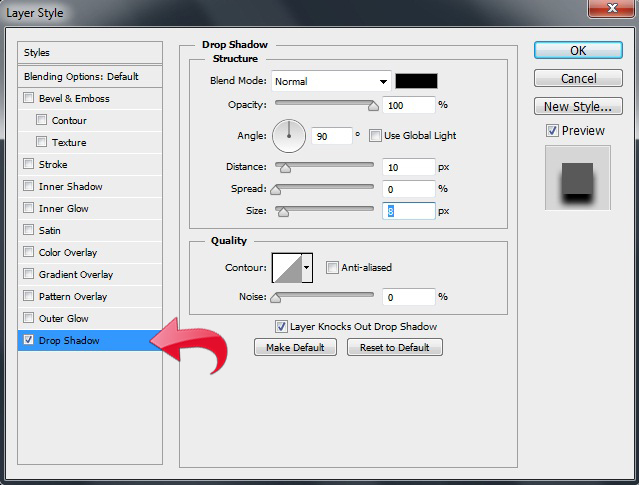
Now we will add some drop shadow and bevel and emboss to our dark jeans layer. Click on “Layer” > “Layer style” and add a drop shadow using the following settings.
Step 6:
Now we will add some drop shadow and bevel and emboss to our dark jeans layer. Click on “Layer” > “Layer style” and add a drop shadow using the following settings.
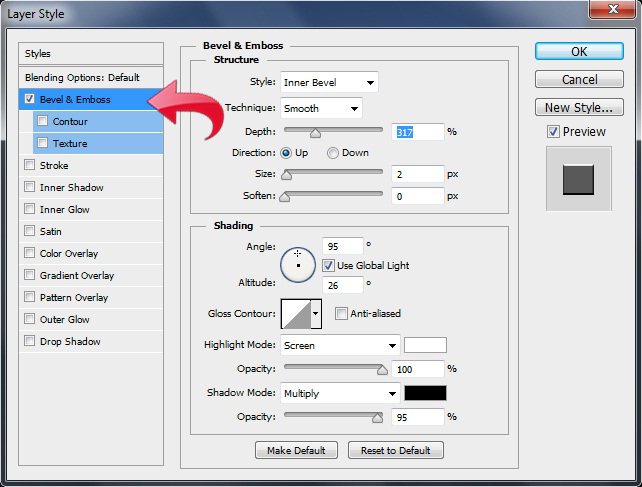
 Now, add a Bevel & Emboss layer using the settings found below.
 Step 7:
Now, open the blue jeans texture and select it using the pen tool, the same way that we did before.
Step 7:
Now, open the blue jeans texture and select it using the pen tool, the same way that we did before.
 Step 8:
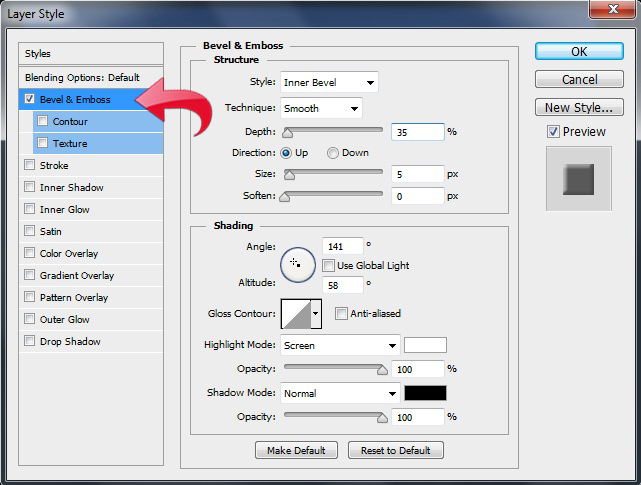
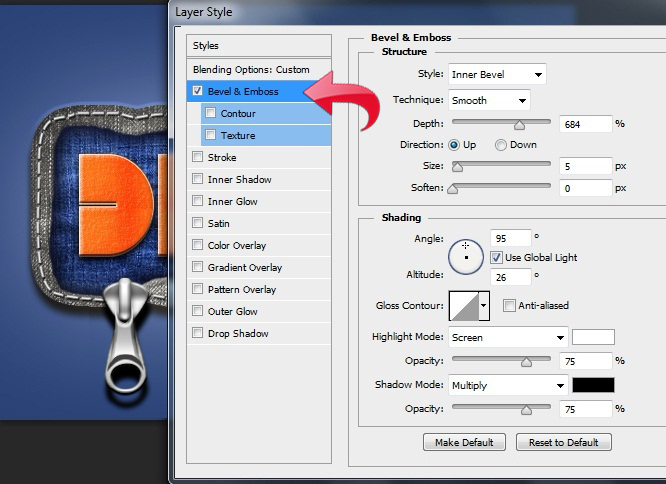
Click on “Layer” > “Layer style” > “Bevel & Emboss.”
Step 8:
Click on “Layer” > “Layer style” > “Bevel & Emboss.”
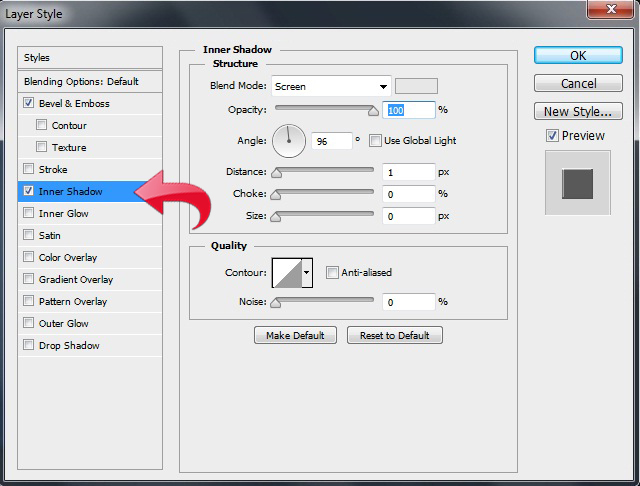
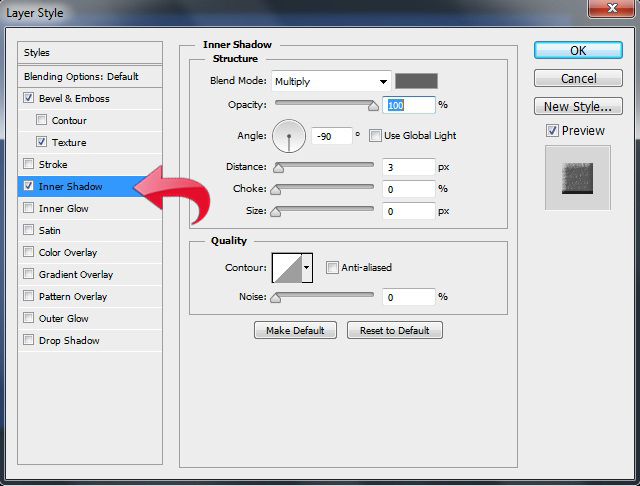
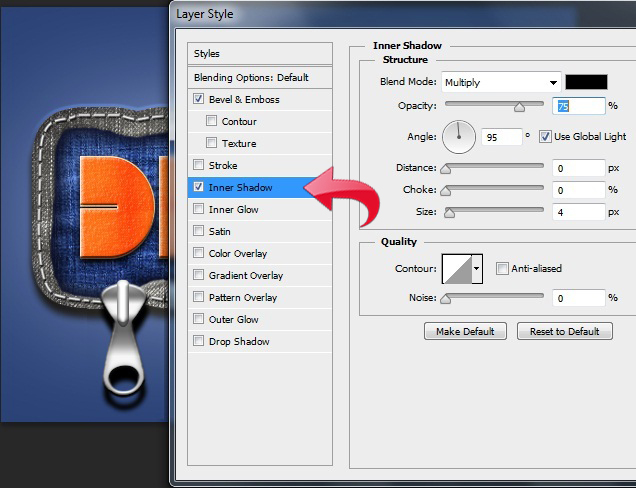
 Add an “Inner shadow” using color #131530. Use the following settings.
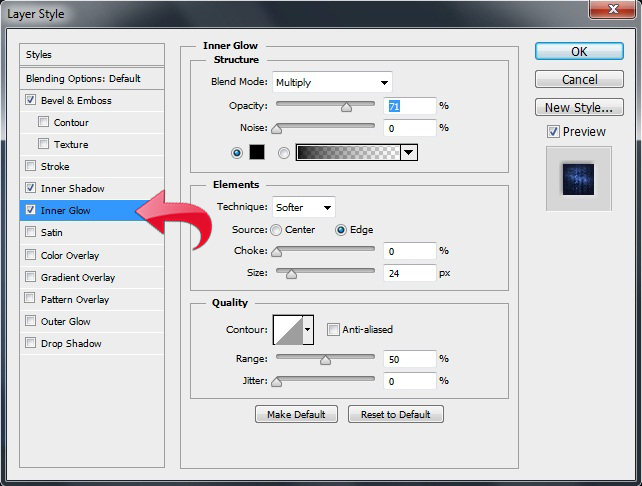
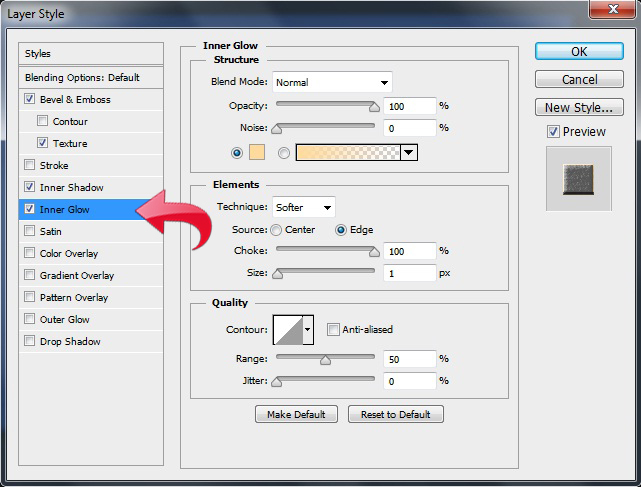
 Add an “Inner Glow” with color #000000.
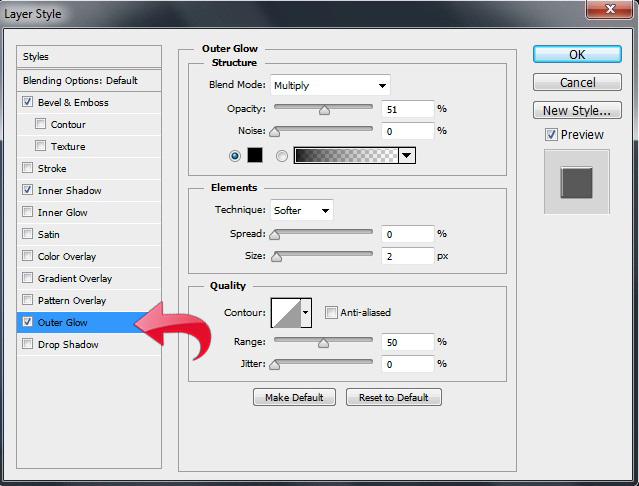
 Lastly, add some outer glow with color #ffffff.
 Step 9:
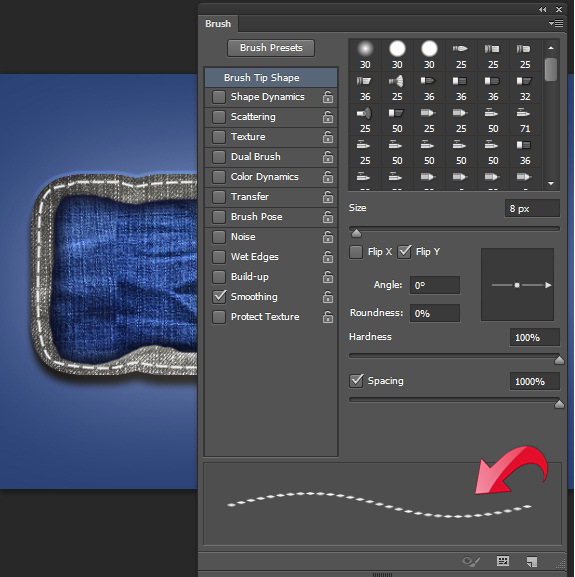
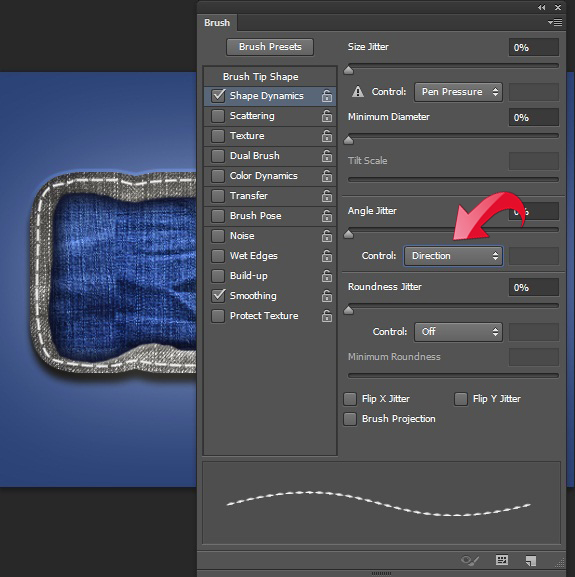
Now, we’ll add the stitches. So open up your brush panel and adjust the brush tip size and spacing using the following guidelines.
Step 9:
Now, we’ll add the stitches. So open up your brush panel and adjust the brush tip size and spacing using the following guidelines.
 Now, click on “Shape dynamics,” adjust the settings, and use this brush around our blue jeans area.
 Step 10:
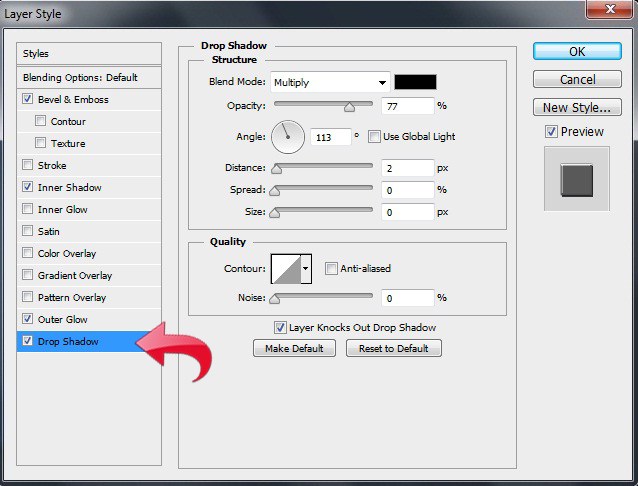
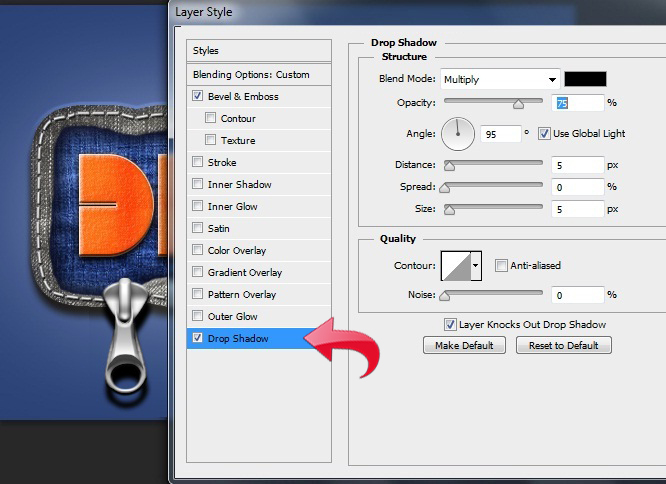
Now, add some drop shadow, inner shadow, outer glow, and bevel & emboss. Below are settings for all four.
Step 10:
Now, add some drop shadow, inner shadow, outer glow, and bevel & emboss. Below are settings for all four.

 Step 11:
Select the text tool and add the main text in the center using color #ff6c13.
Step 11:
Select the text tool and add the main text in the center using color #ff6c13.
 Step 12:
Before we start styling our text, we need to create some patterns using denim textures. So for this, simply open up the jeans image and click on “Edit” > “Define Pattern.”
Step 12:
Before we start styling our text, we need to create some patterns using denim textures. So for this, simply open up the jeans image and click on “Edit” > “Define Pattern.”
 Step 13:
Now click on “Layer” > “Layer style” > “Bevel & Emboss.”
Step 13:
Now click on “Layer” > “Layer style” > “Bevel & Emboss.”
 Then, add an inner shadow using the following settings.
 Add an inner glow.
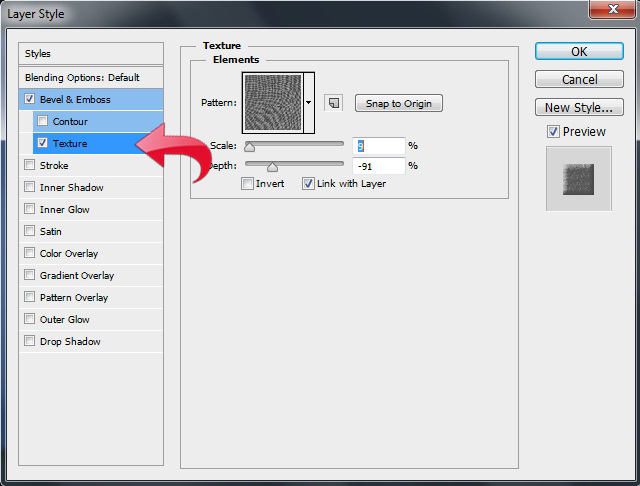
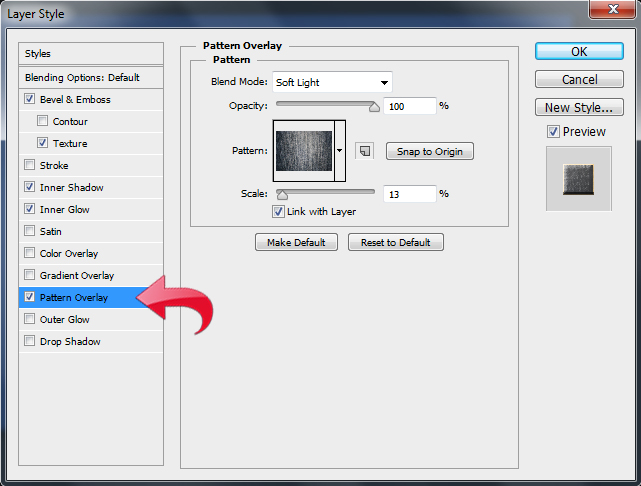
 Click on “Pattern Overlay” and add a pattern.
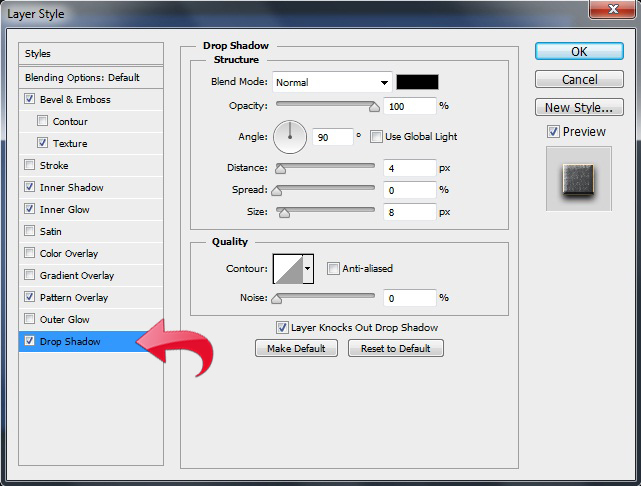
 Then, add a drop shadow with the following settings.
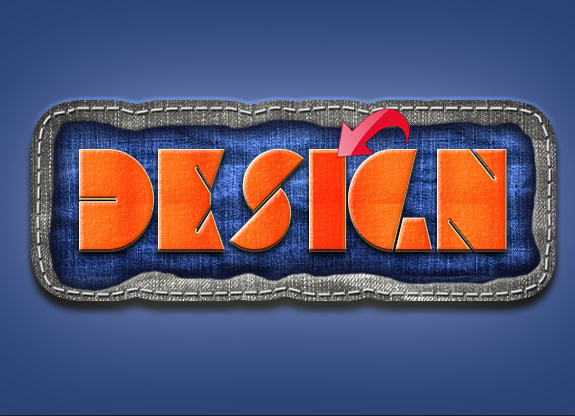
 Step 14:
Now, the let’s start building the zipper for our text effect. Select the rectangle tool, create a small rectangle, fill it with #383838, and change the blending mode to “Overlay.”
Step 14:
Now, the let’s start building the zipper for our text effect. Select the rectangle tool, create a small rectangle, fill it with #383838, and change the blending mode to “Overlay.”
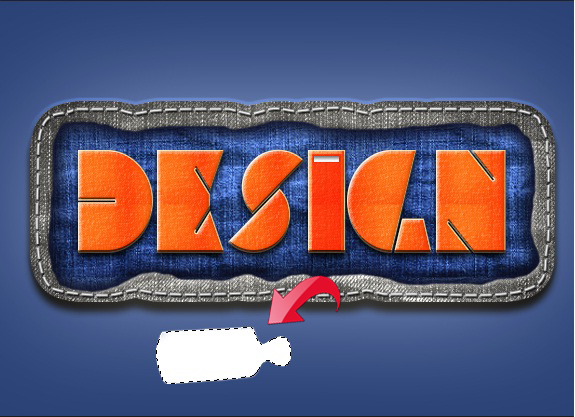
 Step 15:
Create a small rectangle and click on “Layer” >”Layer styles” > “Gradient Overlay.”
Step 15:
Create a small rectangle and click on “Layer” >”Layer styles” > “Gradient Overlay.”
 Now select the pen tool to create a rough shape and fill it with color #ffffff.
 Add a stroke and a gradient using the following values.
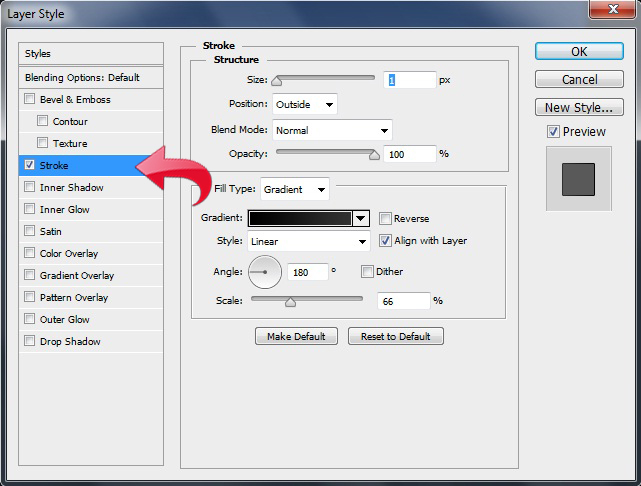
 Now, simply copy the above layer as many times as needed to get the zipper effect. Keep the stoke angle at 180 for the left zipper teeth ones and 0 for the right zipper teeth.
 Step 16
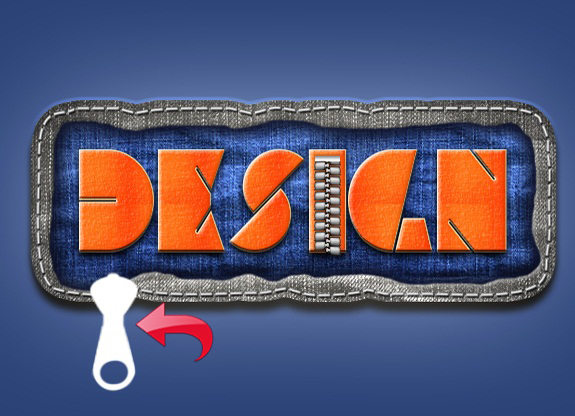
Let’s start with the handle or hook of our zipper. Select the pen tool, create the following basic shape, and fill it with color #ffffff.
Step 16
Let’s start with the handle or hook of our zipper. Select the pen tool, create the following basic shape, and fill it with color #ffffff.
 Now click on “Layer” > “Layer Style” > “Bevel & Emboss.”
 Add an inner shadow using the following settings.
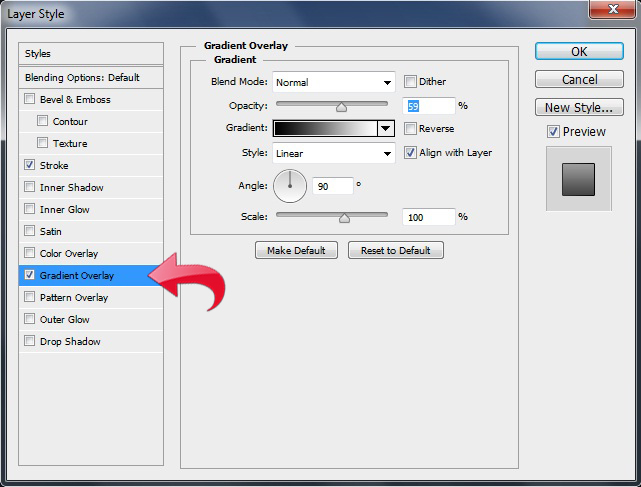
 Then, add a gradient overlay.
 Select the rounded rectangle tool, create a small rectangle in the middle, and fill it with color #ffffff. Then, add bevel & emboss, inner shadow, gradient overlay, and drop shadow. Below are settings for all four layer styles.


 Now, create another shape with the pen tool and fill it with #e8e8e8. Then, add bevel & emboss and drop shadow using the values shown below.
 Now, simply re-size the handle and place it where it belongs on the end of the zipper.
 That’s it. Our denim and zipper text effect is all done. I hope you guys enjoyed it.
Frequently Asked Questions about Creating Denim and Zippers in Photoshop
How can I create a realistic denim texture in Photoshop?
Creating a realistic denim texture in Photoshop involves several steps. First, create a new document and fill it with a blue color that resembles denim. Then, apply a noise filter to give it a grainy texture. Next, use the motion blur filter to create the illusion of woven fabric. Finally, adjust the brightness and contrast to give it a worn-out look. Remember, the key to creating a realistic texture is to experiment with different settings until you achieve the desired effect.
How can I create a zipper in Photoshop?
To create a zipper in Photoshop, start by drawing the shape of the zipper using the pen tool. Then, use the brush tool to add details such as the teeth and the pull tab. You can also use layer styles to give the zipper a metallic look. Finally, use the transform tool to adjust the size and position of the zipper on your design.
How can I add shadows and highlights to my denim texture?
Adding shadows and highlights to your denim texture can make it look more realistic. To do this, create a new layer and use the brush tool to paint in the shadows and highlights. Then, adjust the opacity of the layer to blend it with the denim texture. You can also use the dodge and burn tools to enhance the shadows and highlights.
How can I create a worn-out effect on my denim texture?
To create a worn-out effect on your denim texture, use the eraser tool to remove parts of the texture. Then, use the brush tool to paint in the worn-out areas with a lighter color. You can also use the smudge tool to blend the worn-out areas with the rest of the texture.
How can I create a stitching effect on my denim design?
To create a stitching effect on your denim design, use the brush tool to draw the stitches. Then, apply a bevel and emboss layer style to give the stitches a 3D effect. You can also use the warp tool to adjust the shape of the stitches to match the contours of your design.
How can I create a button on my denim design?
To create a button on your denim design, use the ellipse tool to draw the shape of the button. Then, use the brush tool to add details such as the holes and the rim. You can also use layer styles to give the button a metallic look.
How can I create a pocket on my denim design?
To create a pocket on your denim design, use the pen tool to draw the shape of the pocket. Then, use the brush tool to add details such as the stitching and the shadow. You can also use the warp tool to adjust the shape of the pocket to match the contours of your design.
How can I create a belt loop on my denim design?
To create a belt loop on your denim design, use the pen tool to draw the shape of the loop. Then, use the brush tool to add details such as the stitching and the shadow. You can also use the warp tool to adjust the shape of the loop to match the contours of your design.
How can I create a seam on my denim design?
To create a seam on your denim design, use the pen tool to draw the shape of the seam. Then, use the brush tool to add details such as the stitching and the shadow. You can also use the warp tool to adjust the shape of the seam to match the contours of your design.
How can I create a rivet on my denim design?
To create a rivet on your denim design, use the ellipse tool to draw the shape of the rivet. Then, use the brush tool to add details such as the rim and the shadow. You can also use layer styles to give the rivet a metallic look.
 Anum Khan
Anum is Web and Graphic designer. Addicted to Photoshop and crazy for pixel perfection. She is also an active blogger, sharing her passions, skills and creative details on her blog Websoulz. She loves to connect with the community, sharing the latest design gossips and rolling her eyes on boring trends.


