
I'm learning Laravel for my full-time job, and I've found that the best way I retain things is by building something real while I'm still figuring it out. Not a polished side project. Not a "look what I made" showcase. Just me, a terminal, and a lot of "wait, why did that work?"
This is one of those articles.
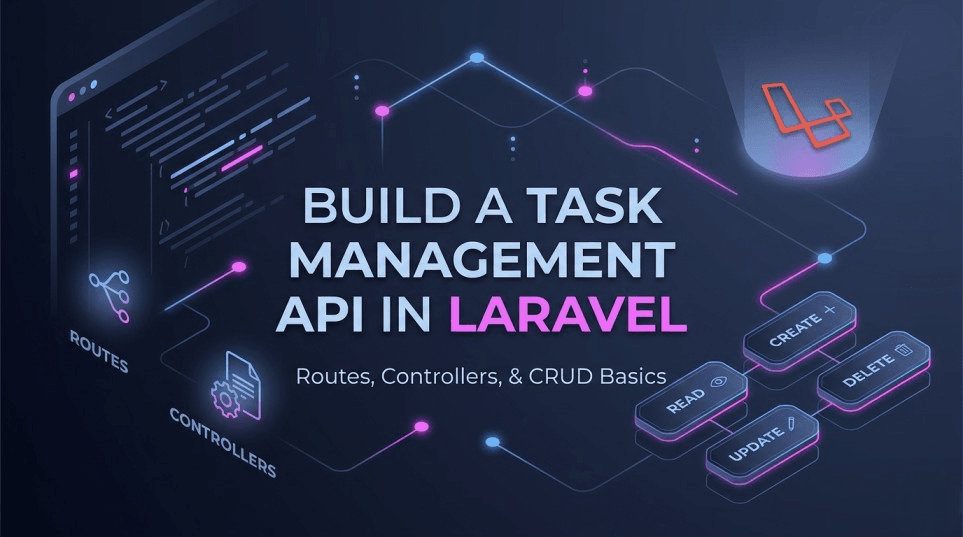
The project is a Task Management API, a simple backend that can create, read, update, and delete tasks. No frontend. No authentication (yet). Just a clean JSON API that taught me more about Laravel's core concepts than any documentation page ever could.
If you're learning Laravel and wondering where to start after "Hello World," this might be exactly what you need.
Why a Task API?
When I started digging into Laravel, I kept running into the same concepts over and over: routes, controllers, models, migrations, CRUD. Every tutorial, every course, every job description mentioned them. So instead of learning each one in isolation, I decided to build something that forced me to use all of them together.
A Task Management API is perfect for this. It's simple enough that you're not drowning in business logic, but real enough that you're touching every fundamental concept Laravel has to offer.
Here's what the API does:
GET /api/tasks— fetch all tasksPOST /api/tasks— create a new taskGET /api/tasks/{id}— fetch a single taskPUT /api/tasks/{id}— update a taskDELETE /api/tasks/{id}— delete a task
Five endpoints. Full CRUD. Let's build it.
What You'll Need
- PHP installed locally
- Laravel project set up (I'm using XAMPP)
- Postman for testing the endpoints
- A code editor (I'm using VS Code)
If you're on XAMPP, make sure Apache and MySQL are both running in the XAMPP Control Panel before you start.
Step 1: Navigate to Your Project
Open Command Prompt. On Windows, press Windows + R, type cmd, and hit Enter.
Then navigate to your Laravel project folder:
cd C:\xampp\htdocs\your-project-name
In my case it was:
cd C:\Users\your-username\task-manager
Once you're inside your project directory, you're ready to start using php artisan, Laravel's command-line tool that does a lot of the heavy lifting for you.
Step 2: Create the Task Model and Migration
This was the moment things started clicking for me. One command, two files created:
php artisan make:model Task --migration
The terminal output:
Model [app\Models\Task.php] created successfully.
INFO  Migration [database\migrations\2026_06_03_143244_create_tasks_table.php] created successfully.
Here's how I understood it:
- The Model (
Task.php) is Laravel's messenger. Instead of writing raw SQL likeSELECT * FROM tasks, you just callTask::all()and Laravel handles the rest. - The Migration is the blueprint. It describes what your
taskstable should look like. The table doesn't exist in the database yet. This file just defines it.
Think of it in three layers:
MySQL Database -> tasks table -> Task model talks to it
The model isn't the database. It's more like the translator between your Laravel code and the data sitting in MySQL.
Step 3: Define the Table Structure
Open the migration file that was just created. It lives in database/migrations/ and its name starts with a timestamp. Inside, you'll see this:
public function up(): void
{
    Schema::create('tasks', function (Blueprint $table) {
        $table->id();
        $table->timestamps();
    });
}
By default, Laravel only gives you an id and timestamps. I needed to add columns for the actual task data, so I updated it to this:
Schema::create('tasks', function (Blueprint $table) {
    $table->id();
    $table->string('title');
    $table->text('description')->nullable();
    $table->boolean('completed')->default(false);
    $table->timestamps();
});
title: required, stores the task namedescription: optional, longer text about the taskcompleted: a true/false flag, defaults to false when a task is created
Save the file, then run the migration to actually create the table in MySQL:
php artisan migrate
INFO  Running migrations.
2026_06_03_143244_create_tasks_table ..... 399.03ms DONE
The tasks table now exists in your database.
Step 4: Create the Controller
The controller is where the logic lives. When someone sends a request to GET /api/tasks, the controller decides what to do. In this case, fetch all tasks and return them as JSON.
php artisan make:controller TaskController --api
The --api flag tells Laravel to generate a controller already structured for API use. Open the file at app/Http/Controllers/TaskController.php and you'll see five empty methods waiting for you:
public function index()    // GET all tasks
public function store()    // POST create a task
public function show()     // GET one task
public function update()   // PUT update a task
public function destroy()  // DELETE a task
Laravel generated the scaffolding. Now we fill in the logic.
Step 5: Fill In the Controller Methods
First, add the Task model import at the top of the file:
use App\Models\Task;
Then fill in each method one by one.
index() - Get all tasks
public function index()
{
    $tasks = Task::all();
    return response()->json($tasks);
}
Simple. Fetch everything, return it as JSON.
store() - Create a task
public function store(Request $request)
{
    $request->validate([
        'title' => 'required|string|max:255',
        'description' => 'nullable|string',
        'completed' => 'boolean',
    ]);

    $task = Task::create($request->all());
    return response()->json($task, 201);
}
validate() checks the incoming data before touching the database. 201 is the HTTP status code for "created," which is more accurate than the default 200.
show() - Get one task
public function show(string $id)
{
    $task = Task::find($id);

    if (!$task) {
        return response()->json(['message' => 'Task not found'], 404);
    }

    return response()->json($task);
}
If the task doesn't exist, we return a 404. Otherwise, return the task.
update() - Update a task
public function update(Request $request, string $id)
{
    $task = Task::find($id);

    if (!$task) {
        return response()->json(['message' => 'Task not found'], 404);
    }

    $request->validate([
        'title' => 'sometimes|string|max:255',
        'description' => 'nullable|string',
        'completed' => 'boolean',
    ]);

    $task->update($request->all());
    return response()->json($task);
}
Notice sometimes in the validation rules. It means "only validate this field if it's present in the request." That way you can update just the completed status without sending the title and description every time.
destroy() - Delete a task
public function destroy(string $id)
{
    $task = Task::find($id);

    if (!$task) {
        return response()->json(['message' => 'Task not found'], 404);
    }

    $task->delete();
    return response()->json(['message' => 'Task deleted successfully']);
}
Find it. Delete it. Confirm it.
Step 6: Set Up the API Routes
In Laravel 11, api.php doesn't exist by default. You need to create it with:
php artisan install:api
This installs Laravel Sanctum (an authentication package you'll use later) and creates the routes/api.php file. Don't worry about Sanctum for now. It's there but we're not using it yet.
Open routes/api.php and add your Task routes:
use App\Http\Controllers\TaskController;

Route::apiResource('tasks', TaskController::class);
That's one line. One line that registers all five routes automatically.
To verify, run:
php artisan route:list
You should see all five routes registered and mapped to the right controller methods:
GET /api/tasks→TaskController@indexPOST /api/tasks→TaskController@storeGET /api/tasks/{task}→TaskController@showPUT/PATCH /api/tasks/{task}→TaskController@updateDELETE /api/tasks/{task}→TaskController@destroy
Five routes. One line of code. That's Route::apiResource doing its job.
Step 7: Allow Mass Assignment
Before we can test, there's one more thing. Open app/Models/Task.php and add a $fillable property:
class Task extends Model
{
    protected $fillable = [
        'title',
        'description',
        'completed',
    ];
}
Without this, Laravel blocks Task::create() for security reasons. It's a protection against mass assignment vulnerabilities. Adding $fillable tells Laravel exactly which fields are allowed to be filled this way.
Step 8: Test Everything in Postman
Start the development server:
php artisan serve
Then open Postman and test each endpoint.
Create a task (POST)
- Method: POST
- URL:
http://127.0.0.1:8000/api/tasks - Body (raw JSON):
{
    "title": "My first task",
    "description": "Testing the API"
}
Response:
{
    "title": "My first task",
    "description": "Testing the API",
    "updated_at": "2026-06-04T10:37:20.000000Z",
    "created_at": "2026-06-04T10:37:20.000000Z",
    "id": 1
}
Laravel assigned an ID and filled in the timestamps automatically. That was a good moment.
Get all tasks (GET)
- Method: GET
- URL:
http://127.0.0.1:8000/api/tasks
A moment ago this returned []. Now:
[
    {
        "id": 1,
        "title": "My first task",
        "description": "Testing the API",
        "completed": 0,
        "created_at": "2026-06-04T10:37:20.000000Z",
        "updated_at": "2026-06-04T10:37:20.000000Z"
    }
]
"completed": 0 is the default we set in the migration. false in PHP becomes 0 in MySQL.
Update a task (PUT)
- Method: PUT
- URL:
http://127.0.0.1:8000/api/tasks/1 - Body:
{
    "completed": true
}
Response:
{
    "id": 1,
    "title": "My first task",
    "description": "Testing the API",
    "completed": true,
    "created_at": "2026-06-04T10:37:20.000000Z",
    "updated_at": "2026-06-04T10:55:23.000000Z"
}
completed is now true and updated_at changed automatically. I didn't touch the timestamp. Laravel just handled it.
Delete a task (DELETE)
- Method: DELETE
- URL:
http://127.0.0.1:8000/api/tasks/1
{
    "message": "Task deleted successfully"
}
What I Actually Learned
Building this taught me things I couldn't get from reading alone.
- MVC finally made sense. I've seen "Model-View-Controller" in documentation a hundred times. But when I had to think about where to put the logic (the route just connects, the controller decides, the model talks to the database) the pattern clicked in a way it never had before.
- Migrations are just blueprints until you run them. I kept confusing the migration file with the actual database table. They're not the same thing. The file describes what the table should look like.
php artisan migrateis what actually builds it. Route::apiResource** is genuinely impressive.** One line replacing five manual route definitions, each correctly mapped to the right controller method and HTTP verb. That's the kind of thing that makes you understand why developers love Laravel.- Validation is built in and easy. I expected to write a bunch of manual checks. Instead,
$request->validate()handled everything: required fields, types, max lengths, and it automatically returns a proper error response if something fails. $fillable** exists for a reason.** It felt like an extra step at first. But understanding why it exists (to prevent mass assignment attacks) made me appreciate that Laravel is thinking about security by default, even in the basics.
Next Steps
This is just the beginning. From here, the natural progression is:
- Authentication with Laravel Sanctum (already installed!)
- API Resources for transforming how your JSON responses look
- Query parameters for filtering and sorting tasks
- Relationships: what if tasks belonged to users?
But for now, I have a working API. Built from scratch. And I understand every line of it.
That's the goal at this stage. Not to build something perfect, but to build something that makes you understand the foundations. Routes, controllers, models, migrations. They're not separate concepts anymore. They're a system. And once you see them as a system, everything else in Laravel starts to make sense.
I'm learning Laravel in public as part of my journey into full-stack development. If you're on a similar path, follow along. I'll be sharing every step, including the parts where I had no idea what I was doing.