SMS is an integral part of mobile devices and mobile applications. An overwhelming majority of mobile users use the SMS service on their mobiles; some use it dozens of times per day. Android provides a very good API so that developers can integrate SMS technology into their apps, increasing the utility and appeal of their applications. In this article we are going to examine several apps that use SMS technology via the APIs provided by Android.
How to Launch the SMS Application From Your Program.
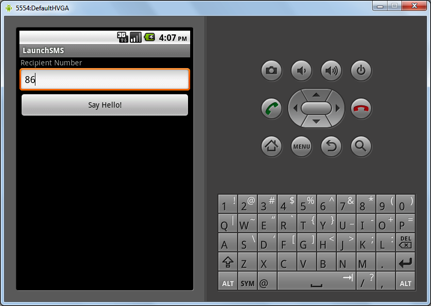
We are now going to create a small app which will say “hello” to our friends by sending an SMS message. This app will take the friend’s number from the user, then the application will launch the SMS application of the mobile phones with the number the user entered, and finally it will send a “hello” message.Step 1: Creating the UI and layout
First, create a simple activity called as LaunchSMS , then we will create the lay out as follows:<LinearLayout xmlns:android="http://schemas.android.com/apk/res/android"
android:orientation="vertical"
android:layout_width="fill_parent"
android:layout_height="fill_parent"
>
<TextView
android:layout_width="wrap_content"
android:layout_height="wrap_content"
android:paddingLeft="2dip"
android:paddingRight="4dip"
android:text="Recipient Number"
/>
<EditText android:id="@+id/messageNumber"
android:layout_width="fill_parent"
android:layout_height="wrap_content"
android:cursorVisible="true"
android:editable="true"
android:singleLine="true"
/>
<Button android:id="@+id/sayhello"
android:layout_width="fill_parent"
android:layout_height="wrap_content"
android:text="Say Hello!"
android:onClick="sayHello"
/>
</LinearLayout>package launchSMS.com;
import android.app.Activity;
import android.content.Intent;
import android.net.Uri;
import android.os.Bundle;
import android.view.View;
import android.widget.EditText;
public class LaunchSMS extends Activity {
/** Called when the activity is first created. */
private EditText messageNumber;
@Override
public void onCreate(Bundle savedInstanceState) {
        super.onCreate(savedInstanceState);
        setContentView(R.layout.main);
        messageNumber=(EditText)findViewById(R.id.messageNumber);
    }
public void sayHello(View v) {

		String _messageNumber=messageNumber.getText().toString();
		String messageText = "Hi , Just SMSed to say hello";

		Intent sendIntent = new Intent(Intent.ACTION_VIEW);
		sendIntent.setData(Uri.parse("sms:"+_messageNumber));
        sendIntent.putExtra("sms_body", messageText);
        startActivity(sendIntent);
	}
}Step 2: Initializing the Activity
Using the onCreate method, we will set main layout we created as the content view. Then, I have created a private member to hold the EditBox for the message number.public void onCreate(Bundle savedInstanceState) {
super.onCreate(savedInstanceState);
setContentView(R.layout.main);
messageNumber=(EditText)findViewById(R.id.messageNumber);
}
Step 3: Launching the SMS App
public void sayHello(View v) {
String _messageNumber=messageNumber.getText().toString();
String messageText = "Hi , Just SMSed to say hello";
Intent sendIntent = new Intent(Intent.ACTION_VIEW);
sendIntent.setData(Uri.parse("sms:"+_messageNumber));
sendIntent.putExtra("sms_body", messageText);
startActivity(sendIntent);
}Intent sendIntent = new Intent(Intent.ACTION_VIEW);sendIntent.setData(Uri.parse("sms:"+_messageNumber));sendIntent.putExtra("sms_body", messageText);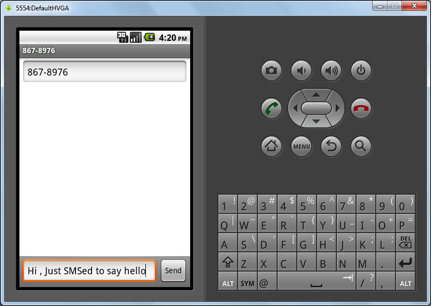 So, using the intents, we can launch the SMS app from within our program.
How to Send SMS Directly Via the API Provided by Android
Now, we are going to create an app where DirectSendSMS will be the enhanced version of the previous app. This app will directly send the “hello” message to the user using the Android SMS API.Step 1: Creating the UI and Layout
First we need to create a new activity, DirectSendSMS. The UI of this app is going to be the same as the one described above, so for this also we will create a linear lay out and add one Textiew, one EditText, and one button. The layout is as follows:<LinearLayout xmlns:android="http://schemas.android.com/apk/res/android"
android:orientation="vertical"
android:layout_width="fill_parent"
android:layout_height="fill_parent"
>
<TextView
android:layout_width="wrap_content"
android:layout_height="wrap_content"
android:paddingLeft="2dip"
android:paddingRight="4dip"
android:text="Recipient Number"
/>
<EditText android:id="@+id/messageNumber"
android:layout_width="fill_parent"
android:layout_height="wrap_content"
android:cursorVisible="true"
android:editable="true"
android:singleLine="true"
/>
<Button android:id="@+id/sayhello"
android:layout_width="fill_parent"
android:layout_height="wrap_content"
android:text="Say Hello!"
android:onClick="sayHello"
/>
</LinearLayout>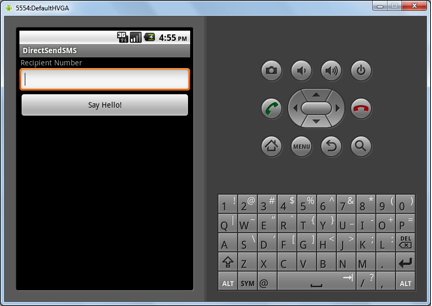
Step 2: Initializing the Activity
The initializing of the activity is also same as described in the previous app. Within the onCreate function, we set the main layout as the content view and take the EditBox in a private variable.public void onCreate(Bundle savedInstanceState) {
super.onCreate(savedInstanceState);
setContentView(R.layout.main);
messageNumber=(EditText)findViewById(R.id.messageNumber);
}Step 3: Specifying the Permission for Sending the SMS
In Android, one has to specify all of the permissions needed by the app in the AndroidManifest.xml. By doing so while installing the app, all the permissions required by the app will be shown to the user. For the ability in our app to send messages, we need to add the android.permission.SEND_SMS permission into AndroidManifest.xml as follows:<manifest xmlns:android="http://schemas.android.com/apk/res/android"
package="directSendSMS.com"
android:versionCode="1"
android:versionName="1.0">
<application android:icon="@drawable/icon" android:label="@string/app_name">
<activity android:name=".DirectSendSMS"
android:label="@string/app_name">
<intent-filter>
<action android:name="android.intent.action.MAIN" />
<category android:name="android.intent.category.LAUNCHER" />
</intent-filter>
</activity>
</application>
<uses-permission android:name="android.permission.SEND_SMS">
</uses-permission>
</manifest>Step 4: Sending the SMS
public void sayHello(View v) {

    String _messageNumber=messageNumber.getText().toString();
    String messageText = "Hi , Just SMSed to say hello";

    SmsManager sms = SmsManager.getDefault();
    sms.sendTextMessage(_messageNumber, null, messageText, null, null);

}SmsManager sms = SmsManager.getDefault();Step 5: Displaying a Toast When the Message is Successfully Sent
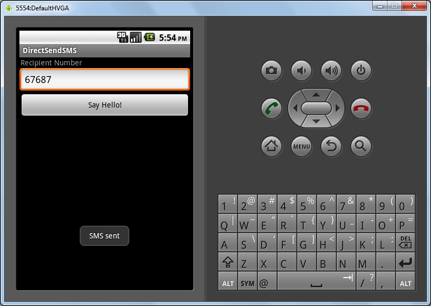
public void sayHello(View v) {

    	String _messageNumber=messageNumber.getText().toString();
		String messageText = "Hi , Just SMSed to say hello";
		String sent = "SMS_SENT";

        PendingIntent sentPI = PendingIntent.getBroadcast(this, 0,
            new Intent(sent), 0);

        //---when the SMS has been sent---
        registerReceiver(new BroadcastReceiver(){
            @Override
            public void onReceive(Context arg0, Intent arg1) {
            	if(getResultCode() == Activity.RESULT_OK)
                {
                  Toast.makeText(getBaseContext(), "SMS sent",
                                Toast.LENGTH_SHORT).show();
                }
                else
                {
                	Toast.makeText(getBaseContext(), "SMS could not sent",
                            Toast.LENGTH_SHORT).show();
                }
            }
        }, new IntentFilter(sent));

        SmsManager sms = SmsManager.getDefault();
        sms.sendTextMessage(_messageNumber, null, messageText, sentPI, null);

	}
How To Make Your App Respond to SMS Messages
Now, we are going to create an app that will respond when an SMS is received. This app is going to only display the incoming message on a Toast.Step 1: Create a New App
For this app, we are going to create a BroadcastReciever to catch the in coming SMS message. Though we are not creating an activity for this, generally such apps can create an activity for the settings page of such apps. The following is the AndroidManifest.xml for this app:<manifest xmlns:android="http://schemas.android.com/apk/res/android"
package="recieveSMS.com"
android:versionCode="1"
android:versionName="1.0">
<application android:icon="@drawable/icon" android:label="@string/app_name">
</application>
<uses-permission android:name="android.permission.RECEIVE_SMS"></uses-permission>
</manifest>Step 2: Creating the SMS Receiver
The code for the SMS receiver is as follows:package recieveSMS.com;
import android.content.BroadcastReceiver;
import android.content.Context;
import android.content.Intent;
import android.os.Bundle;
import android.telephony.SmsMessage;
import android.widget.Toast;
public class RecieveSMS extends BroadcastReceiver
{
@Override
public void onReceive(Context context, Intent intent)
{
Bundle bundle = intent.getExtras();
SmsMessage[] recievedMsgs = null;
String str = "";
if (bundle != null)
{
Object[] pdus = (Object[]) bundle.get("pdus");
recievedMsgs = new SmsMessage[pdus.length];
for (int i=0; i recievedMsgs[i] = SmsMessage.createFromPdu((byte[])pdus[i]);
str += "SMS from " + recievedMsgs[i].getOriginatingAddress()+ " :" + recievedMsgs[i].getMessageBody().toString();
}
Toast.makeText(context, str, Toast.LENGTH_SHORT).show();
}
}
}Step 3: Running the App
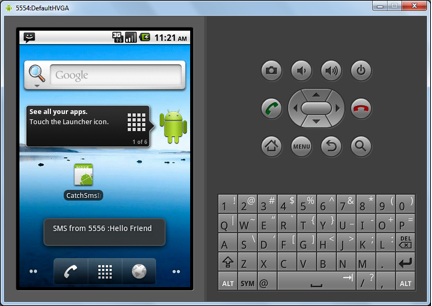
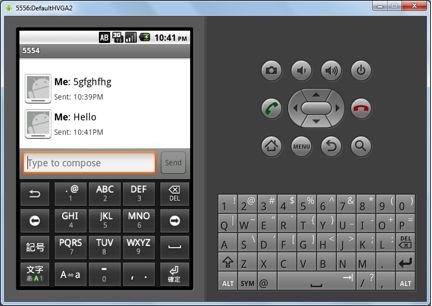
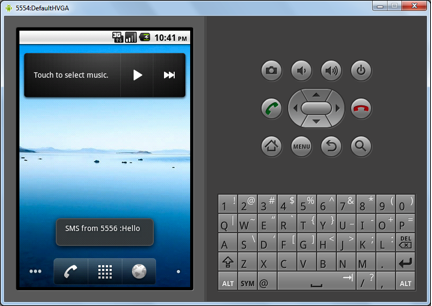
To test this, you will need two Android emulator instances. We will send the SMS using an SMS app from one instance to the other. You will be able to see the Instance number on the top. As seen below, the numbers that I have are 5554 and 5556. So from the second Instance, I will send an SMS to the first instance as shown below: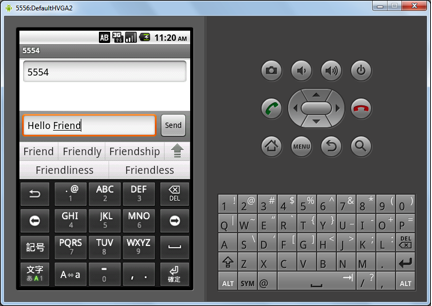 Once the first instance receives an SMS, the information will be displayed as a Toast, as shown below:
Conclusion
SMS is become such an integral and important part of our mobiles today that there could be numerous different ways in which SMS can be integrated in your next killer Android app. The usability as well as the capabilities of you Android apps can be increased tremendously if SMS is properly integrated. As seen above, Android as a platform provides very good support to integrate SMS in your applications. So, go out there and integrate SMS into you next awesome Android app!Frequently Asked Questions (FAQs) about Handling SMS in Android
How can I send an SMS using Android’s SmsManager?
Android’s SmsManager is a built-in class that allows you to send SMS messages directly from your application. To use it, you first need to get an instance of SmsManager using the getDefault() method. Then, you can use the sendTextMessage() method to send the SMS. This method requires five parameters: the destination address, the sender address (usually null), the message text, a PendingIntent for successful sending, and a PendingIntent for delivery. Remember to add the SEND_SMS permission in your AndroidManifest.xml file.
What is the SMS Retriever API and how can I use it?
The SMS Retriever API is a part of Google Play Services that allows your app to automatically retrieve verification codes sent via SMS, without needing to request SMS read permissions. To use it, you need to create an app hash, which is a unique identifier for your app. Then, you can start the SMS retriever in your app, and register a BroadcastReceiver to listen for the SMS messages. The API will automatically extract the verification code from the SMS message.
How can I send an SMS from Android using Twilio?
Twilio is a cloud communications platform that allows you to send SMS messages from your app. To use it, you need to sign up for a Twilio account and get a Twilio phone number. Then, you can use the Twilio REST API to send SMS messages. You need to create a new MessageCreator object, set the to, from, and body parameters, and then call the create() method. Remember to handle any exceptions that may occur.
How can I handle incoming SMS messages in Android?
To handle incoming SMS messages, you need to create a BroadcastReceiver that listens for the SMS_RECEIVED action. In the onReceive() method, you can extract the SMS message data from the Intent. The data is stored as an array of SmsMessage objects, which you can retrieve using the getMessagesFromIntent() method. Each SmsMessage object contains the message text, the sender address, and other information.
How can I test SMS sending and receiving in the Android emulator?
The Android emulator allows you to simulate sending and receiving SMS messages. To send an SMS to the emulator, you can use the emulator console, which you can access via telnet. You can use the “sms send” command followed by the sender phone number and the message text. To receive SMS messages, you need to create a BroadcastReceiver in your app as described in the previous question.
How can I handle MMS messages in Android?
Handling MMS messages is similar to handling SMS messages, but it requires additional permissions and the data is structured differently. You need to create a BroadcastReceiver that listens for the WAP_PUSH_RECEIVED action and the “application/vnd.wap.mms-message” MIME type. In the onReceive() method, you can extract the MMS data from the Intent. The data is stored as a byte array, which you can parse to extract the MMS content.
How can I handle SMS delivery reports in Android?
To handle SMS delivery reports, you need to create a PendingIntent for the delivery report when sending the SMS. Then, you can create a BroadcastReceiver that listens for this PendingIntent. In the onReceive() method, you can check the result code to determine whether the SMS was delivered successfully.
How can I handle long SMS messages in Android?
Long SMS messages are automatically split into multiple parts by the Android system. When sending a long SMS, you can use the sendMultipartTextMessage() method of SmsManager, which takes a list of Strings as the message text. When receiving a long SMS, you can use the getDisplayMessageBody() method of SmsMessage, which automatically concatenates the parts of the message.
How can I handle SMS in different languages in Android?
SMS messages can contain text in any language that is supported by the GSM character set or the Unicode character set. When sending an SMS, you can use the sendTextMessage() or sendMultipartTextMessage() method of SmsManager, which automatically encodes the message text in the appropriate character set. When receiving an SMS, you can use the getDisplayMessageBody() method of SmsMessage, which automatically decodes the message text.
How can I handle SMS errors in Android?
When sending an SMS, errors can occur due to various reasons, such as network problems or insufficient balance. To handle these errors, you can create a PendingIntent for the sending operation, and register a BroadcastReceiver that listens for this PendingIntent. In the onReceive() method, you can check the result code to determine the error type. Some common error types are RESULT_ERROR_GENERIC_FAILURE, RESULT_ERROR_NO_SERVICE, and RESULT_ERROR_NULL_PDU.
Abbas is a software engineer by profession and a passionate coder who lives every moment to the fullest. He loves open source projects and WordPress. When not chilling around with friends he's occupied with one of the following open source projects he's built: Choomantar, The Browser Counter WordPress plugin, and Google Buzz From Admin.


