How To Crop An Image Using The Rule Of Thirds
The “rule of thirds” is a guideline that can help you create interesting photographs when you’re the photographer or to create a more compelling composition if you’re using someone else’s picture in your design. The rule is one of the most fundamental in creating appealing compositions in photography, art and design.
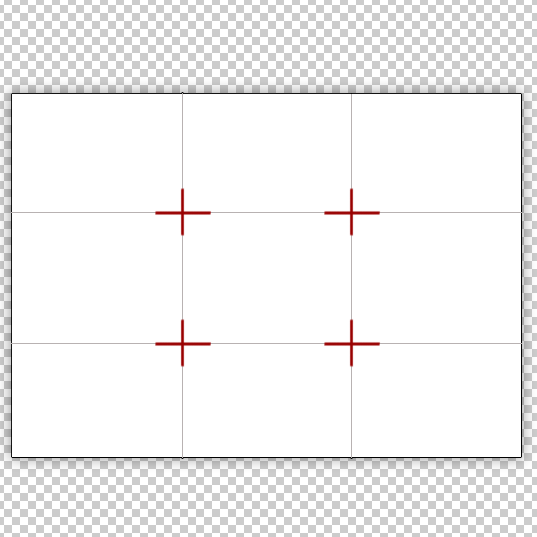
The main concept behind the rule of thirds is to imagine two horizontal lines and two vertical lines breaking an image into thirds so that you have 9 parts, as shown below. Generally (and remember all rules are made to be broken, but most of the time), you can achieve more appealing compositions if you position a focal point or subject at one of the “thirds” where the horizontal and vertical lines meet.
If you’re taking the photograph yourself, you need to imagine the horizontal and vertical lines as you look through the viewfinder. You’ll find that many of your shots will become more compelling when you keep this rule in mind.
If the photograph has already been taken, you can crop the image using the rule of thirds before sending it for print or adding it to your design. I’ll show you how to do it in Photoshop using a little trick with gridlines, but the concept is the same with any image editing software that allows you to use gridlines or guidelines.
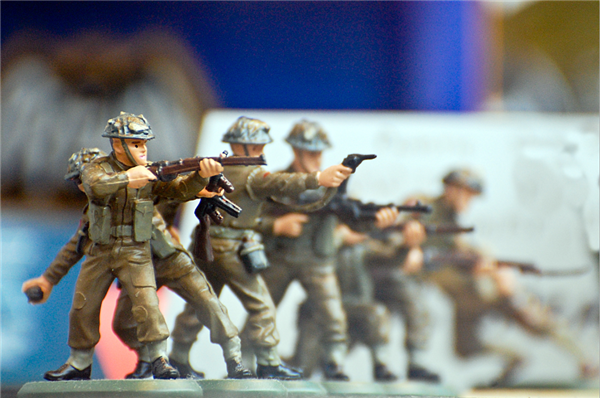
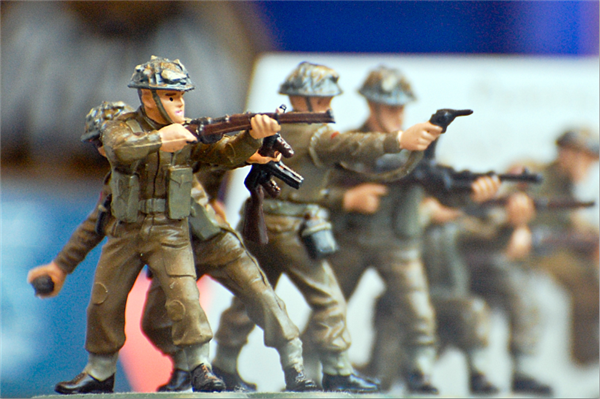
1. Open up the image you want to apply the rule of thirds to. We’re going to crop our original image in order to improve it. Obviously cropping makes the image smaller so that’s a little bit of a downside. Below you can see a photograph of some toy soldiers. I took this in the window of a toy shop and I’d like to get rid of some of the messy background and have more of a focus on the soldier on the left hand side.
2. My original photograph had dimensions of 30 x 20 cm with a resolution of 240 ppi. If you’re not sure how to find out this information, just click Image > Image Size and the Image size dialog box opens, displaying your image info. Create a new document that is a bit smaller than your original photograph but make sure that you are using the same color mode and resolution. I set my new document size to be 24cm x 16cm.
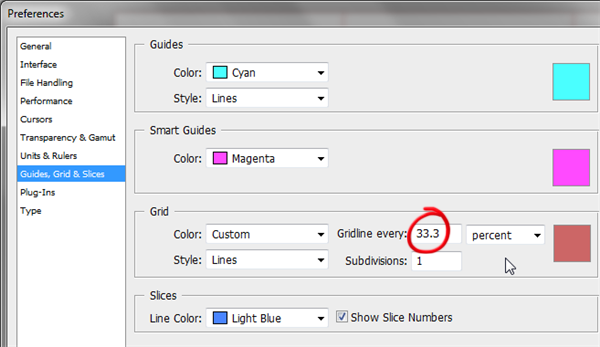
With your new document active choose Edit > Preferences (PC) or Preferences (Mac) and choose Guides, Grid & Slices. A dialog box opens giving you options for setting up how your guides and gridlines will look. Note: The screen grab below is from CS4, there are slight differences in previous versions of Photoshop but the option we’re interested in is the same in all CS versions.
Set the “Gridline every” option to 33.3 percent and “Subdivisions” to 1. You can change the color of the lines by clicking on the square color swatch on the right if you want. Click OK.
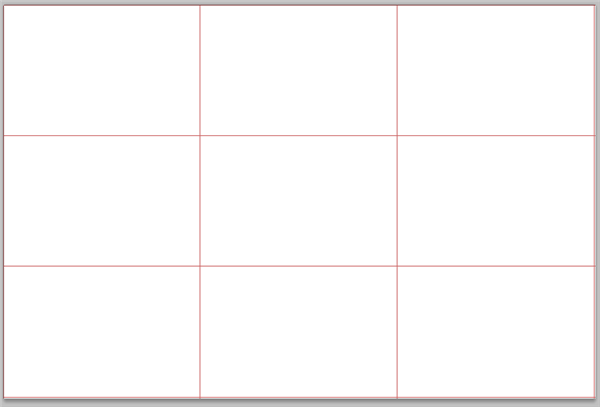
4. In order to see the preferences you’ve just set, choose View > Show > Grid. Once you do that, the non-printing grid will appear on your document. This is what you’ll use as a visual aid to cropping.
5. Go back to your original document. Press Ctrl + A / Cmd + A to select the whole image. Press Ctrl + C / Cmd + C to copy the selection, then return to your new blank document. Press Ctrl + V / Cmd + V to paste the image in.
Select the Move tool (V) and drag the image so that the focal point falls onto one of the intersecting points. In this case I’ve dragged the image so that the focal point is around the little soldier’s finger on the trigger at the top left intersection.
6. Once you’re happy with the composition you can crop away. Hit C to select the Crop tool, then click and drag around the whole image. Press Enter / Return to complete the crop. To hide the grid lines choose View > Show > Grid or press Ctrl + ‘ / Cmd + ‘
You should now have a nicely cropped, visually more appealing image thanks to the rule of thirds.
Frequently Asked Questions (FAQs) on Cropping Images Using the Rule of Thirds
What is the Rule of Thirds in Image Cropping?
The Rule of Thirds is a fundamental composition principle in photography and graphic design. It involves dividing an image into nine equal parts by two equally spaced horizontal lines and two equally spaced vertical lines. The theory is that if you place points of interest along these lines, or at the intersections, your photo becomes more balanced and will enable a viewer to interact with it more naturally.
How does the Rule of Thirds improve my image quality?
The Rule of Thirds helps to create a more engaging composition. By positioning the most important elements of your image along the lines or at their intersections, you can create a balance between the subject and the background, leading to a more aesthetically pleasing and professional-looking image.
Can I apply the Rule of Thirds to all types of images?
Yes, the Rule of Thirds can be applied to any type of image, regardless of its content or style. It’s a versatile rule that works well with landscapes, portraits, and even abstract images. However, like any rule in art or design, it can be broken or adapted to suit your creative vision.
How can I use the Rule of Thirds in Photoshop?
In Photoshop, you can use the crop tool to apply the Rule of Thirds. When you select the crop tool, a grid will appear over your image, divided into nine equal parts. You can then adjust the crop area so that the main elements of your image align with the grid lines.
What if my image doesn’t fit the Rule of Thirds?
The Rule of Thirds is a guideline, not a strict rule. There are many successful photos that don’t follow it. If your image doesn’t naturally fit into the Rule of Thirds, consider whether it might be more effective with a different composition. The most important thing is that the composition works for your specific image and your artistic intent.
Can I use the Rule of Thirds when shooting photos?
Absolutely. Many photographers keep the Rule of Thirds in mind when framing their shots. Some cameras even offer a Rule of Thirds grid overlay in the viewfinder or on the live view screen to help you compose your shots.
How does the Rule of Thirds relate to the Golden Ratio?
Both the Rule of Thirds and the Golden Ratio are compositional rules in photography and design that aim to create balanced and aesthetically pleasing images. While the Rule of Thirds divides the image into nine equal parts, the Golden Ratio divides it into sections based on the mathematical golden ratio (approximately 1:1.618).
Can I apply the Rule of Thirds in post-production?
Yes, you can apply the Rule of Thirds during post-production. Many photo editing software, like Photoshop and Lightroom, have crop tools with a Rule of Thirds grid overlay. This allows you to crop your images according to the rule even after you’ve taken the photo.
Is the Rule of Thirds applicable to video composition?
Yes, the Rule of Thirds can also be applied to video composition. It can help create a balanced and engaging scene, guide the viewer’s eye, and add depth and interest to your shots.
Are there any exceptions to the Rule of Thirds?
Yes, there are exceptions to the Rule of Thirds. While it’s a useful guideline for creating balanced and engaging compositions, it’s not a hard and fast rule. There are many instances where breaking the rule can result in a more compelling image. It’s all about understanding the rule and knowing when to use it and when to break it for the sake of your creative vision.
Jennifer Farley is a designer, illustrator and design instructor based in Ireland. She writes about design and illustration on her blog at Laughing Lion Design.
