A Beginner’s Guide to Feathers.js


Key Takeaways
- Feathers.js simplifies the creation of RESTful API servers by handling much of the repetitive backend work, allowing developers to focus on customizing and configuring their code.
- The framework is built on top of Express and supports both SQL and NoSQL databases, with a straightforward setup for CRUD operations using services that automatically generate necessary code.
- Authentication in Feathers.js can be set up using JSON Web Tokens (JWT) to secure API endpoints, ensuring that only authorized users can access or modify data.
- Hooks in Feathers.js serve as middleware functions that can manipulate data before or after it hits the database, useful for tasks like validation, authorization, and adding fields dynamically.
- Feathers.js is designed for ease of use and scalability, supporting real-time updates through WebSockets and offering a flexible architecture suitable for various front-end frameworks.
In this article, you’ll learn how to build a RESTful API server in Node.js using Feathers.js.
An API server, also known as an Application Server, is a program that provides data to front-end applications. It also handles business logic in the back end and provides restricted access to an organization’s database. It doesn’t just prevent unauthorized persons from accessing the data; it can also restrict logged-in users from accessing or altering data if they don’t have permission to do so.
Every application you build will need to provide a service to its end users. For that, your application will need data to process. You can use remote APIs to create a new service. For most applications, though, you’ll need to manage your own data store. A popular option is to use online data storage services such as Firebase. This way, you don’t have to deal with the nitty gritty details of running a distributed database server. However, your project needs may require the use of a full-fledged, in-house database management system such as MongoDB or Oracle. For your front-end application to access the data stored in the database, you’ll need a server application that sits between the database and the front-end application.
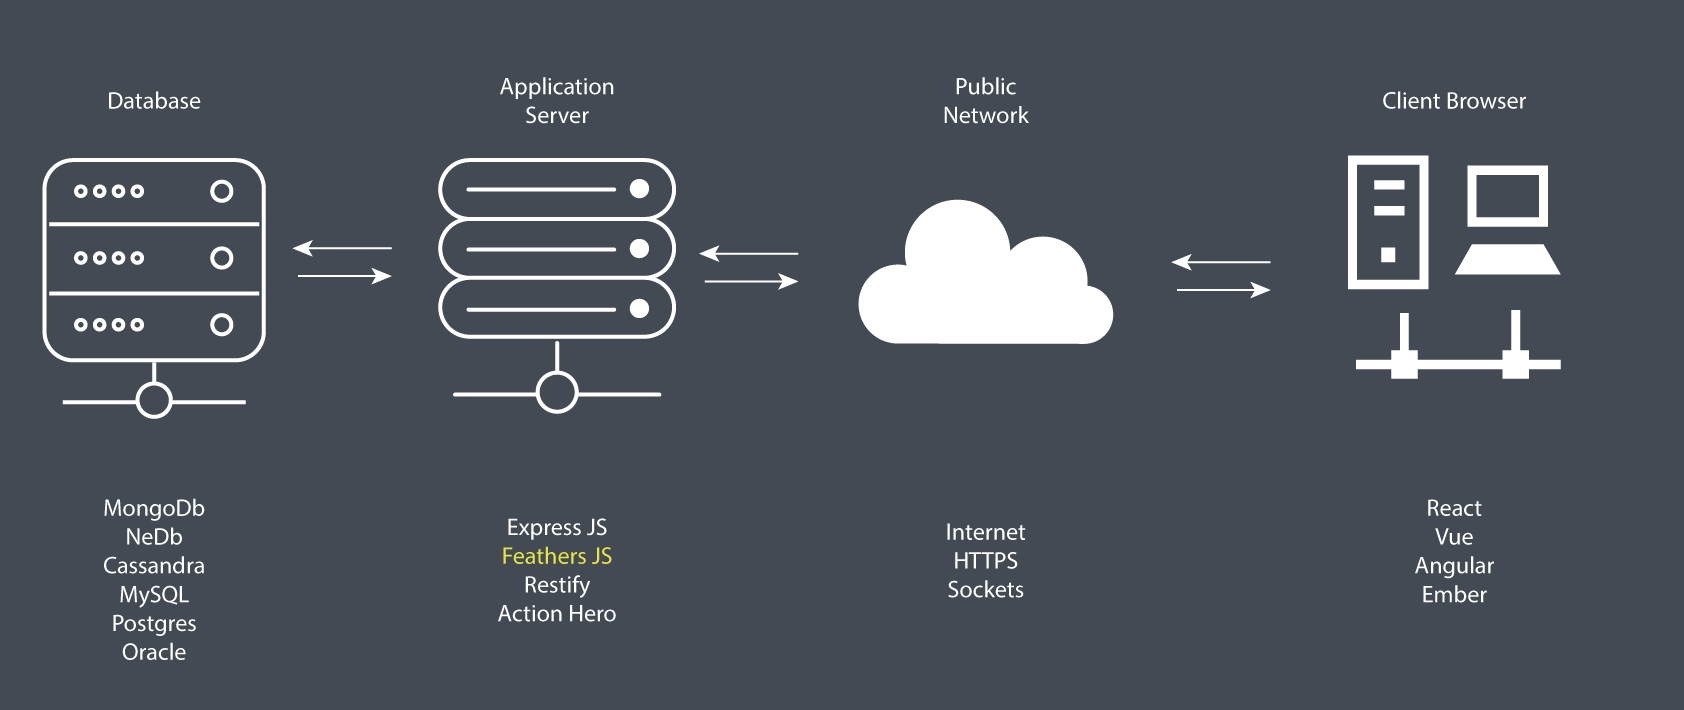
As illustrated in the diagram above, the work of an application server is to access data from a database using SQL or NoSQL commands and convert into a format that front-end applications (client browser) can understand — such as JSON. In addition, the application server can use various security protocols — such as HTTPS encryption and token authorization — to ensure that communication between the database and the client application is safe and secure. One main advantage of using such an architecture is that you can deploy applications that target different platforms — desktop, mobile, web, and so on — using the same application server. It’s also very easy to scale your application horizontally in order to serve more users efficiently with fast response times.
We’re going to build a simple API server and demonstrate the various features that Feathers provides.
Prerequisites
Before you begin following this tutorial, you’ll need to have a good foundation in the following topics:
Feathers is built on top of Express, a minimalist web framework for Node.js. If you’ve completed the tutorials demonstrated in the links, you’ll realize that it’s quite tiring building RESTful APIs using just Express. With Feathers, most of the repetitive work is already done for you. You only need to focus on configuring and customizing code. Let’s dive into the code and learn how this web framework works.
Project Creation
To get started with Feathers, you’ll need to install its command line application globally:
npm install -g @feathersjs/cli
Next, create a new API project using the commands below:
mkdir contacts-api
cd contacts-api
feathers generate app
Below are the options I chose. Feel free to choose any testing framework. Unfortunately, testing is beyond the focus of this article, so it won’t be covered here. Personally, I like simplicity, and that’s why I went with Jest.
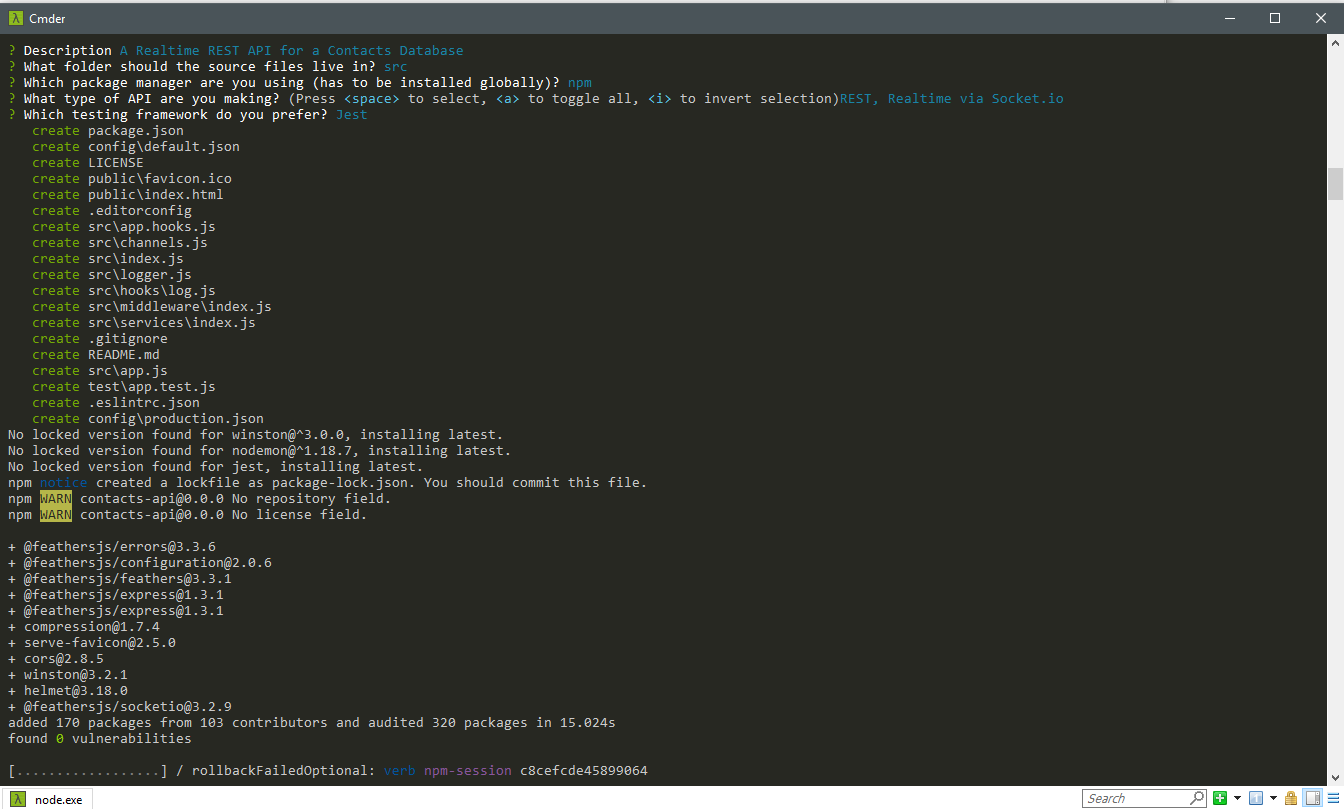
Once the installation is complete, you can open you favorite code editor to look at the project files.
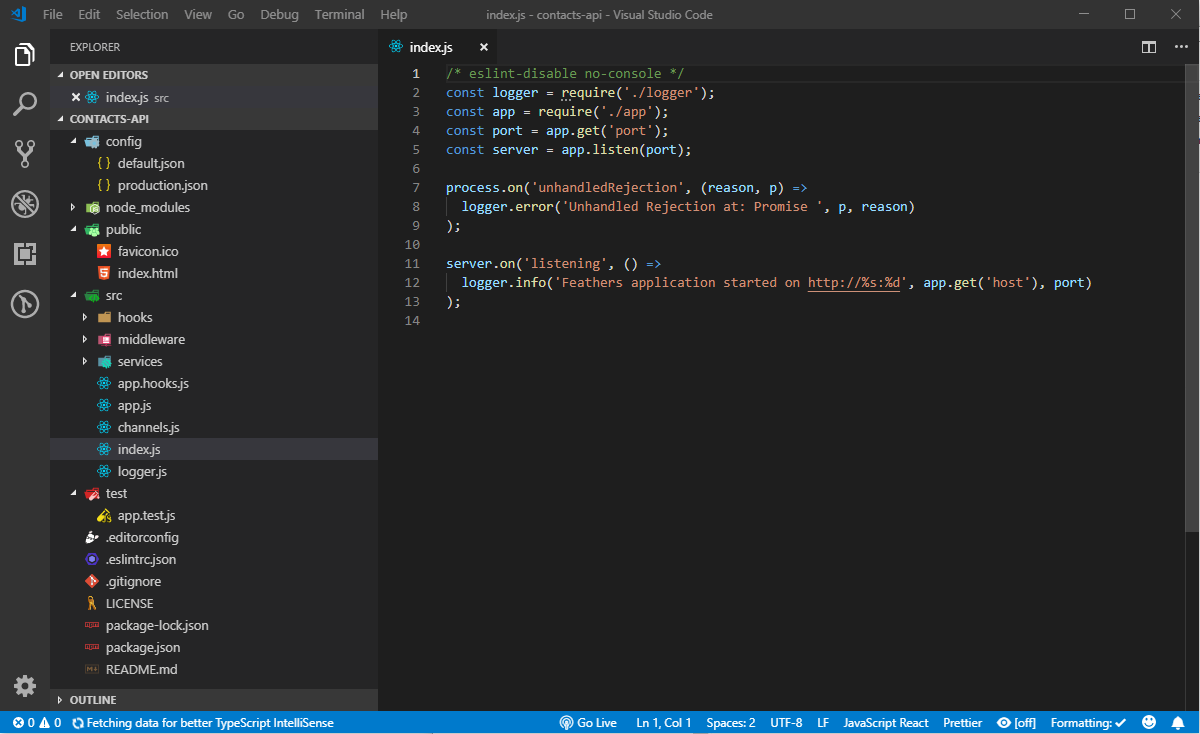
If you’ve completed the Express tutorials I listed in the prerequisites section, you shouldn’t be intimidated by the generated code. Here’s a brief summary that describes the folders and files.
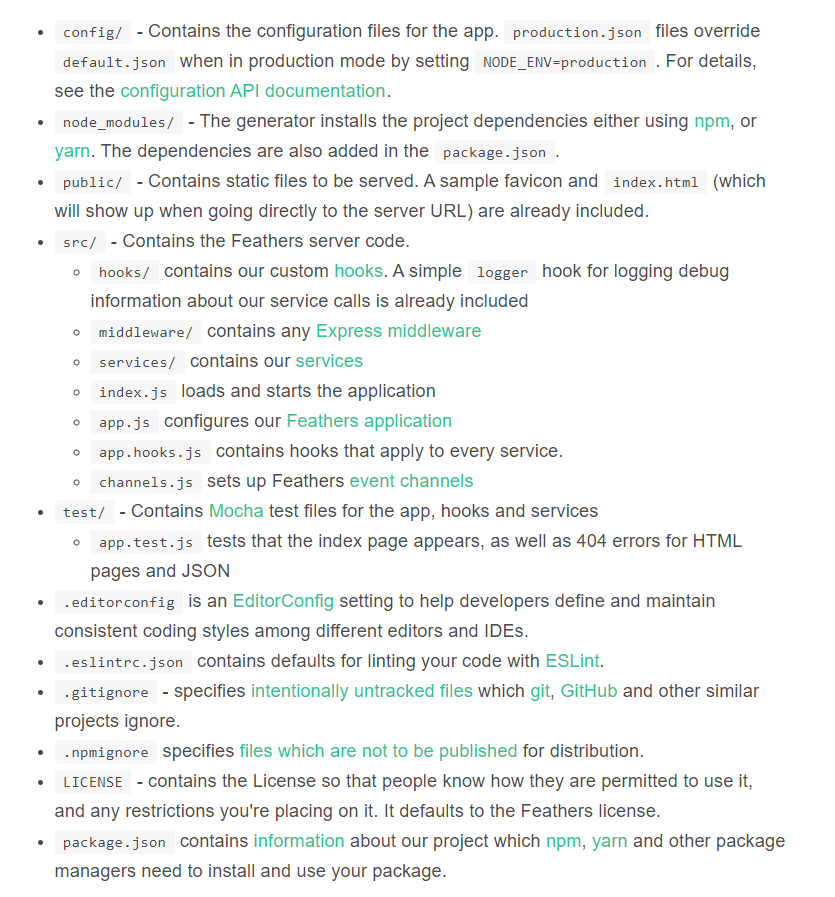
Don’t be too concerned with what each file does right now. You’ll come to understand how they work in the course in this tutorial. For now, let’s confirm that the tests are working.
Linting
To ensure our project is compliant with the defined ESLint rules, just run the command npm test. If you’re on a Unix or Linux platform, this should run fine. If you’re on Windows, there are few things you need to adjust for the tests to run successfully.
First, go to package.json and look at the scripts section. Change the test line to this:
"scripts": {
  "test": "npm run eslint && SET NODE_ENV= npm run jest",
},
Next, if you’ve installed Prettier in Visual Studio Code, you’ll need to change the single quote setting to true in the Workspace settings tab:
{
  "prettier.singleQuote": true
}
Finally, make sure that, when you create or edit any file, the line ending is LF. If you’re using Visual Studio Code or a similar editor, you can check the current line ending style at the status bar. If it says CRLF, change to LF. Making those changes will help you pass the lint tests. Unfortunately, to make the tests pass will require a bit more work, which won’t be covered here.
Let’s look at how we can generate a CRUD RESTful interface.
Generate Service
Building a Restful CRUD API interface in Express requires a bit of work. In Feathers, all you have to do is execute a single command, answer a few questions and have the code generated for you:
$ feathers generate service
? What kind of service is it? NeDB
? What is the name of the service? contacts
? Which path should the service be registered on? /contacts
? What is the database connection string? nedb://../data
    force config\default.json
   create src\services\contacts\contacts.service.js
    force src\services\index.js
   create src\models\contacts.model.js
   create src\services\contacts\contacts.hooks.js
   create test\services\contacts.test.js
We’ll be using NeDB database for this tutorial. Feathers does support both SQL databases such as MySQL and NoSQL databases such as MongoDB. However, installing a database system — whether on your machine or on a cloud server — requires a certain amount of time configuring it. NeDB, on the other hand, is an in-memory database that’s 100% JavaScript and supports a subset of MongoDB API. There’s no configuration needed; you just install it. It’s a great database for prototyping and testing new applications. This is what we’ll use in this tutorial.
Let’s briefly look at some of the files that have been generated using this command:
-
services/contacts/contact.service.js. This is a Feathers service that provides the CRUD API endpoints for/contacts. Pretty small, isn’t it? This is because Feathers does the heavy lifting for us. It saves us from writing boilerplate CRUD code. -
services/contacts/contact.hooks.js. This is where we customize how the CRUD logic behaves. We have thebeforesection, where we can check or change data before Feathers reads or writes to the database. We also have anaftersection, where we can check or change the results from the database before it’s sent to the client application. We can do things like restricting access, data validation, performing join operations and calculating values for additional fields or columns. -
models/contacts.model.js. This where we define a model and attach it to a database table. This is also where we define a schema which can be used to validate fields when a new record is inserted or updated. Unfortunately, NeDB doesn’t support schemas. However, I’ve provided an example of a model that’s connected to MongoDB, which supports the schema feature via themongooseadapter:
"use strict";

const mongoose = require("mongoose");
const Schema = mongoose.Schema;
require("mongoose-type-email");

const contactsSchema = new Schema({
  name: {
    first: { type: String, required: [true, "First Name is required"] },
    last: { type: String, required: false }
  },
  email: {
    type: mongoose.SchemaTypes.Email,
    required: [true, "Email is required"]
  },
  phone: {
    type: String,
    required: [true, "Phone is required"],
    validate: {
      validator: function(v) {
        return /^\+(?:[0-9] ?){6,14}[0-9]$/.test(v);
      },
      message: "{VALUE} is not a valid international phone number!"
    }
  },
  createdAt: { type: Date, default: Date.now },
  updatedAt: { type: Date, default: Date.now }
});

const contactsModel = mongoose.model("contacts", contactsSchema);

module.exports = contactsModel;
Despite the limitations of using NeDB, it’s still a great database for prototyping. Most NoSQL databases will allow you to submit data using any structure without having to define a schema first. It’s wiser to implement a schema once the project requirements have been realized. With a schema in place, Feathers will perform field validation for you using the rules you’ve defined. You’ll need a production-ready database such as MongoDB to be able to define a schema. Do note the configuration for the development database is defined at config/default.json:
"nedb": "../data"
This is where database credentials are provided. We also have another config file called config/production.json. This is the production database configuration that’s used when you deploy your Feathers app. It’s important to use a separate database during development. Otherwise, you run the risk of deleting or corrupting business operational data on the production database.
Now that we have our CRUD service for contacts set up, it’s time to take it for a spin. You can start the Feather server using the command npm start. Do note that this server doesn’t support hot reloading. So you’ll need to restart it every time you make a change to the code. In order to interact with our Feathers app, we’ll need an API browser tool such as Postman or Insomnia. I’ll be using Insomnia in this tutorial, but you can follow along easily with Postman or any other tool.
Create a new GET request (press Ctrl + N) and give it the title “List Contacts”. In the URL section, enter http://localhost:3030/contacts. When you hit the Send button, you should have the following view:

Nothing! Our database is currently empty, so we need to create some new contacts. Create a new request called Create Contact. Fill in the rest of the fields as shown below:
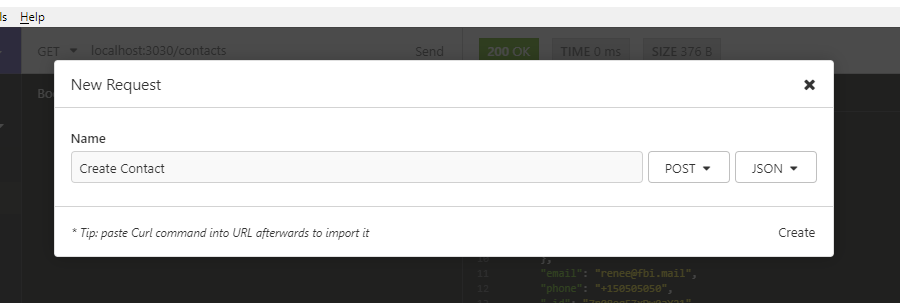
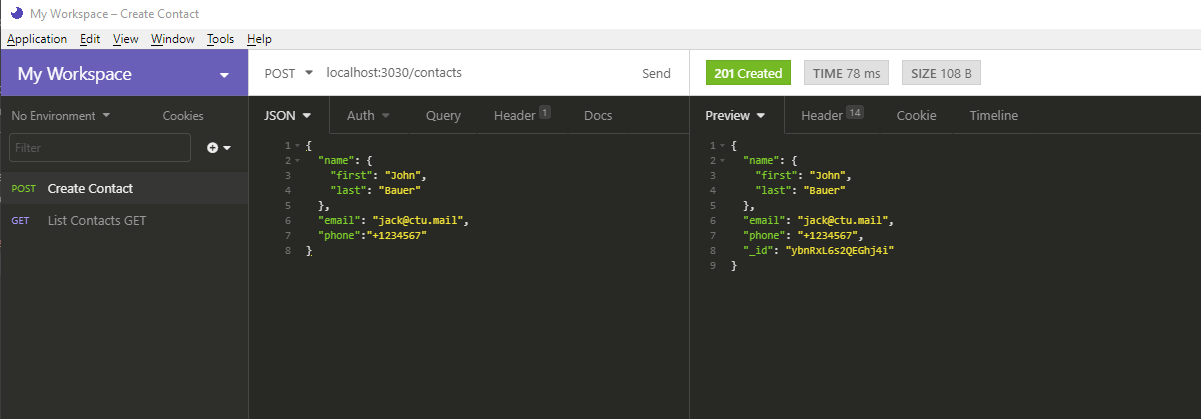
In case you forgot to change the METHOD to POST in the above form, you can do so later. Change the method to POST and change the Body tab to JSON. Copy the following data in the JSON tab:
{
  "name": {
    "first": "Jack",
    "last": "Bauer"
  },
  "email": "jack@ctu.mail",
  "phone": "+1234567"
}
When you hit the Send button, you should get the following response. Notice that an _id has been generated for your new contact.
Go back to List Contacts and hit the Send button again. You should get the following result:
{
  "total": 1,
  "limit": 10,
  "skip": 0,
  "data": [
    {
      "name": {
        "first": "Jack",
        "last": "Bauer"
      },
      "email": "jack@ctu.mail",
      "phone": "+1234567",
      "_id": "ybnRxL6s2QEGhj4i"
    }
  ]
}
Go back to Create Contact and post a couple of new records:
{
  "name": {
    "first": "Chloe",
    "last": "O'Brian"
  },
  "email": "chloe@ctu.mail",
  "phone": "+1987654"
}
{
  "name": {
    "first": "Renee",
    "last": "Walker"
  },
  "email": "renee@fbi.mail",
  "phone": "+150505050"
}
Let’s now perform an update. For this, we won’t use the UPDATE HTTP method. This method will completely overwrite a record. What we want to do is just overwrite a single field, not the the whole record. For that, we’ll use PATCH. Create a new request, Update Contact as illustrated below:
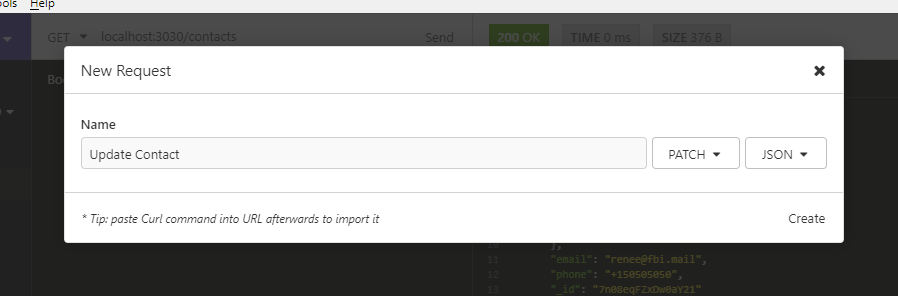
In the URL field, put http://localhost:3030/contacts/{_id}. Replace {_id} with the ID of the first record. Place the following data into the JSON tab:
{
  "email": "jack.bauer@gmail.com"
}
Hit the Send button. You should get the following result:
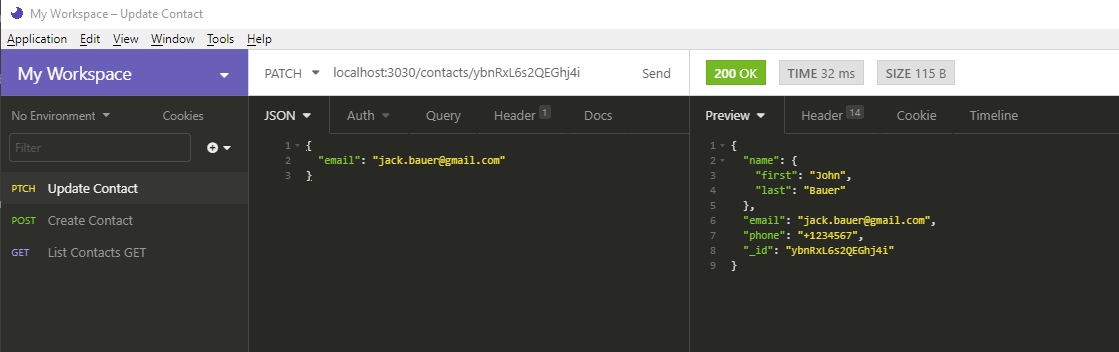
Notice how the the rest of the fields remain intact. Next, we’re going to delete a record. This one is easy. Just create a new DELETE request and name it Delete Contact. In the URL field, use the format http://localhost:3030/contacts/{_id}. Just like before, replace {_id} with the ID of the record you want to delete. Hitting Send will delete that record for you. You can confirm by running the List Contact request again.
We’ve just verified that all CRUD operations are running okay. In the next section, we’ll learn how to set up authentication.
Authentication
Right now, our /contacts API endpoint is unprotected. If we were to deploy our app to a cloud server, anyone with the URL can access and manipulate our records. To restrict access, we need to set up authentication. We’ll use the JSON Web Token to implement authentication to our API application. Run the following command to set it up:
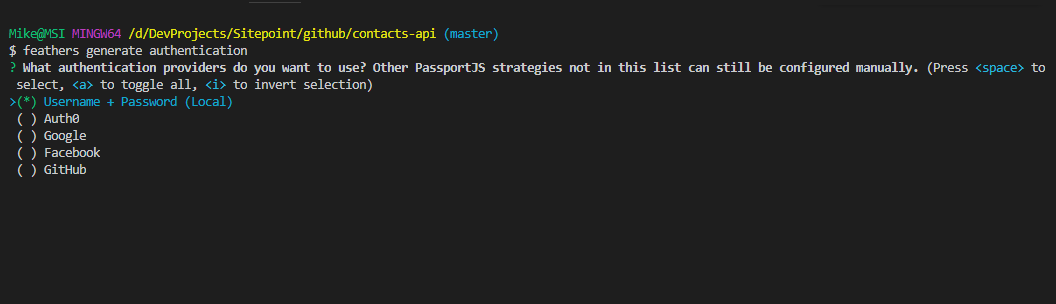
feathers generate authentication
As you can see below, Feathers does support different ways of authenticating users. The easiest one to set up is the “Local Username + Password” option.
Pick the following options for the rest of the questions.
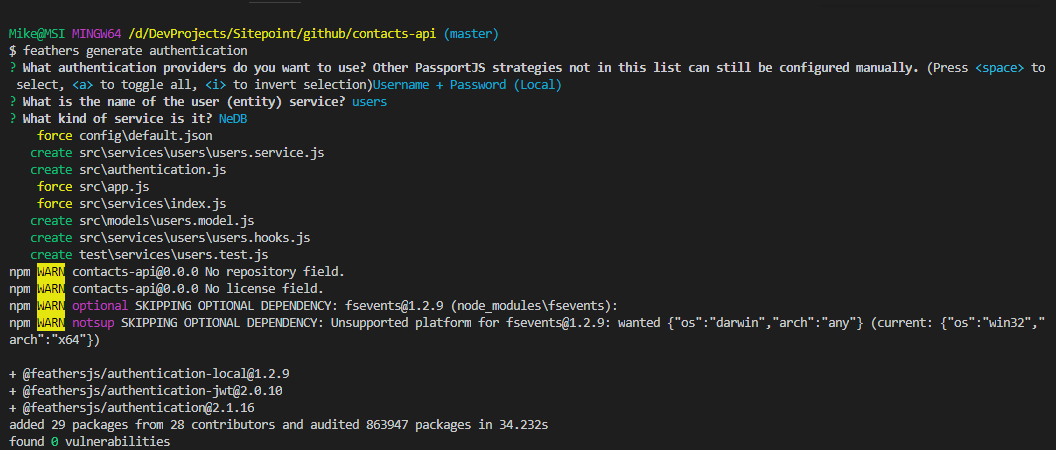
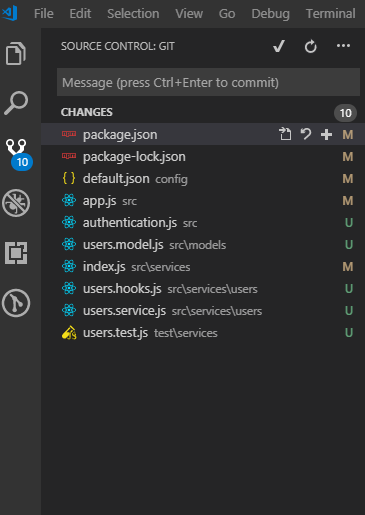
You can review the files that have been generated by the command you just executed:
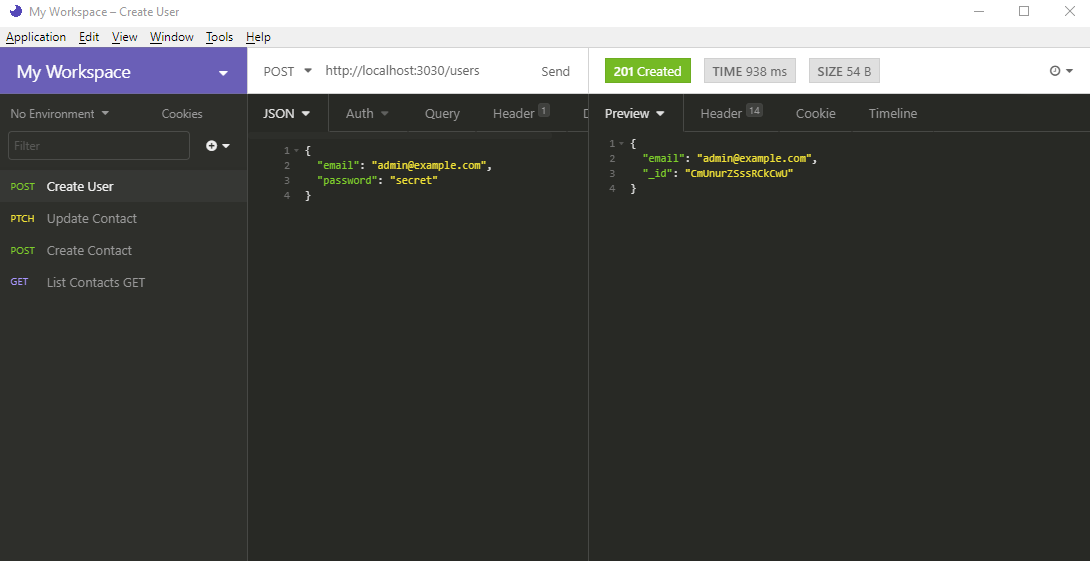
The next step is to create a new user. We can do this using Insomnia or any other API browser tool. Create a new request and call it Create User:
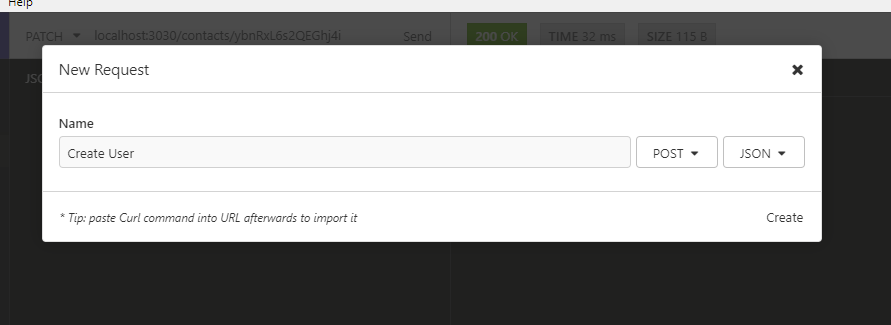
In the JSON tab, send the following data:
{
  "email": "admin@example.com",
  "password": "secret"
}
You should get a similar response as below:
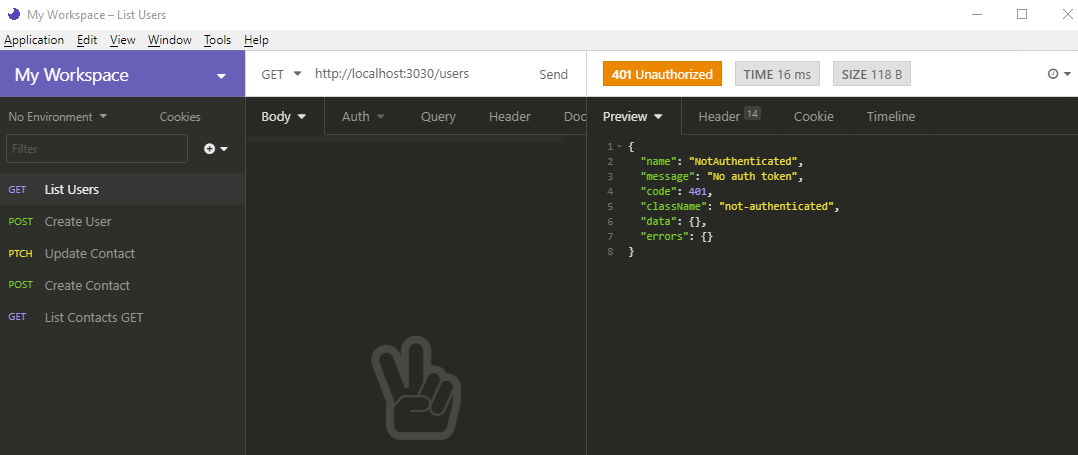
We now have a user. Let’s confirm this by creating a new request List Users and sending the URL http://localhost:3030/users. Unfortunately, you’ll get the following response:
We need to get authenticated in order to access this data. Since we haven’t developed a front-end application that we can use to log in, we’re going to continue using the API browser. Create a new request and call it “Get JWT Token”. Fill in the form as illustrated below:
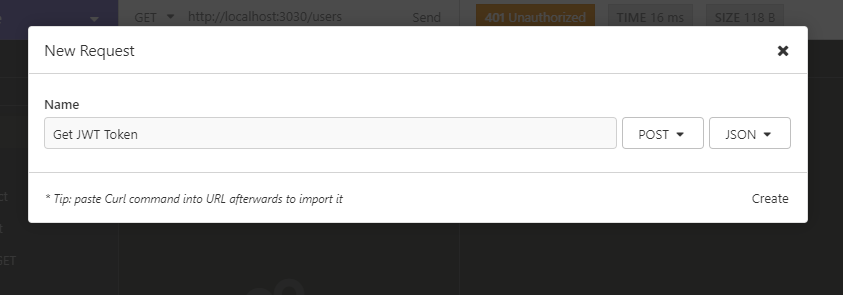
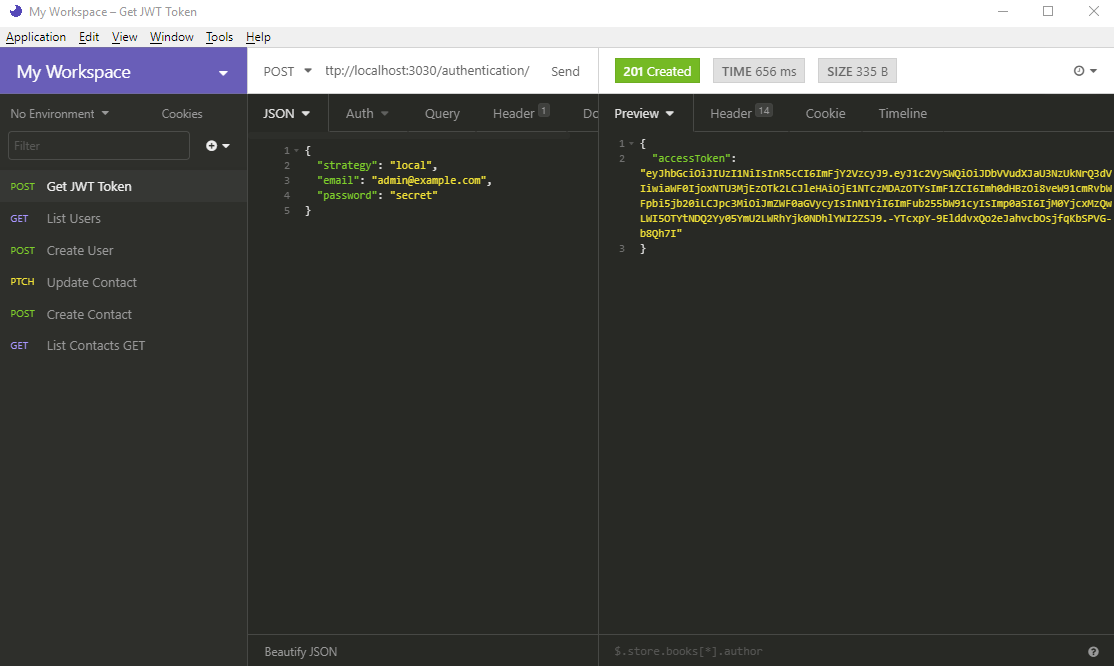
This request uses the POST method. Perhaps you can rename the request “Login” for better clarity. In the JSON tab, copy the following data:
{
  "strategy": "local",
  "email": "admin@example.com",
  "password": "secret"
}
You should get the following response after you hit the send button:
Copy the token code (without the double quotation marks). Go to List Users request page, select the Auth tab and pick Bearer. Paste this token code in the TOKEN field.
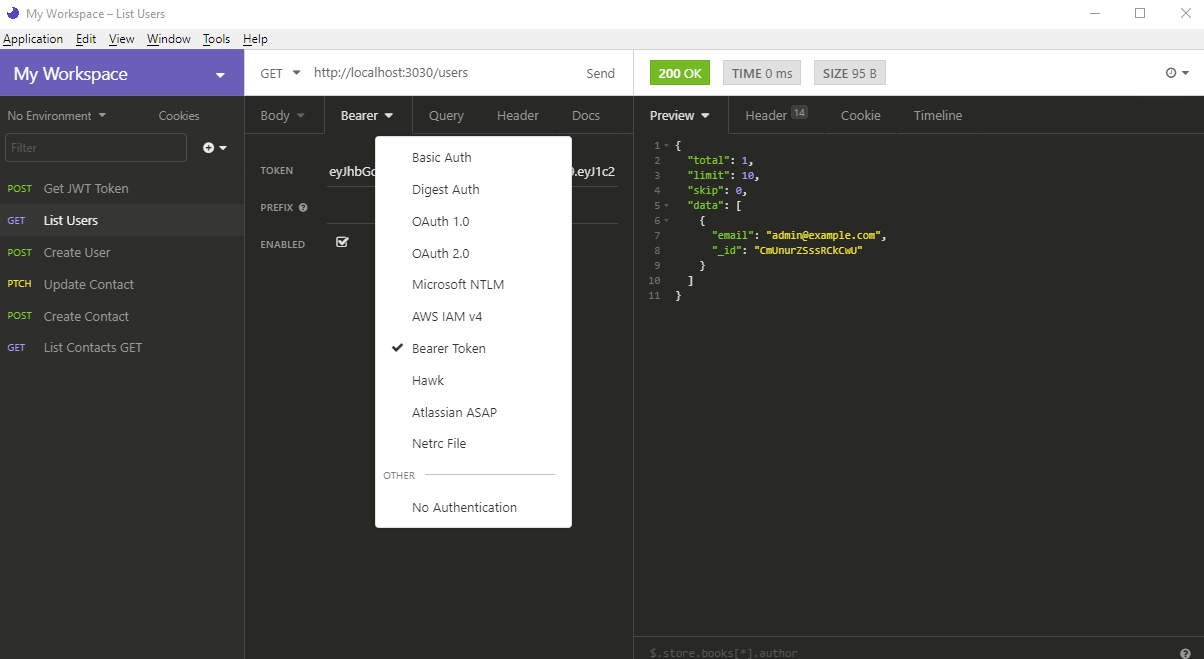
When you hit the Send button, you should get a list of users. Do note that our authentication system is not completely secure. Anyone with the /users URL endpoint can create a new account and gain access to our system. To prevent unauthorized creation of new accounts, we need to restrict that endpoint as well. Open the file services/users/users.hooks.js and update the following piece of code:
module.exports = {
  before: {
    //...
    create: [ hashPassword(), authenticate('jwt') ],
    //...
This will ensure only authenticated users can create new accounts. The next step is to protect the /contacts endpoint as well. Simply open the file services/contacts/contacts.hooks.js and update accordingly:
const { authenticate } = require('@feathersjs/authentication').hooks;

module.exports = {
  before: {
    all: [authenticate('jwt')],
    //...
  },
Restart the Feathers server for the code changes to take effect. If you try running the List Contacts request, you’ll get the following response:
{
  "name": "NotAuthenticated",
  "message": "No auth token",
  "code": 401,
  "className": "not-authenticated",
  "data": {},
  "errors": {}
}
To get authenticated, you’ll need to set the Bearer token just like you did before. Once you’ve done this, you can send your request and you should receive your list of contacts. Do note that the token you acquired earlier will expire after a day. For efficiency’s sake, it’s better to use environment variables so that it becomes easier to update all your API request parameters at once. When building a front-end application, you’ll need to store this token inside local storage. Don’t use cookies. Otherwise, your app will be susceptible to CSRF attacks. Check out the Feathers documentation on security to learn more about other security risks you should be aware of.
Now that you’ve set up authentication, any new service you create after this will give you the option of protecting your new endpoint. Let’s now look at the final topic for this tutorial in the next section.
Hooks
Hooks are middleware functions that are attached to before, after or on errors of a service method. They are commonly used to handle things like logging, restricting access, protecting fields, populating related entities, sending notifications, and so on. If you look at services/users/users.hooks.js, you can see some built-in Feathers hooks in use. We’re going to create our own custom hook. First, stop the server and delete the data/contacts.db database table. Next, create a new hook by generating it using this command:
feathers generate hooks
Use the following options to create the custom hook process-contact:
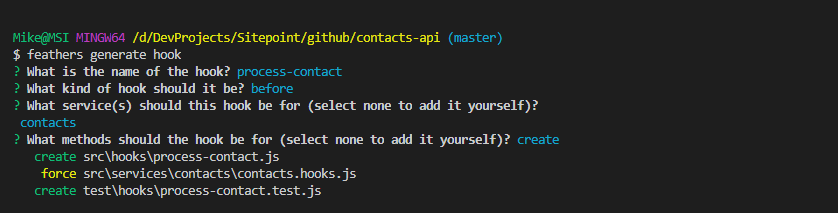
What we want to do in this hook is to inject two new fields right before the Create Contact request is processed.
createdBy: link to currently logged in user by _idcreatedOn: add creation date
Open the file hooks/process-contact.js and update the file as follows:
module.exports = function(options = {}) {
  return async context => {
    return context;
  };
};
module.exports = function(options = {}) {
  return async context => {
    // Get authenticated user
    const user = context.params.user;

    //Extract Submitted Data
    const { data } = context;

    // Add new Fields
    context.data = {
      ...data, // Preserve submitted data
      createdBy: user._id,
      createdOn: new Date()
    };
    return context;
  };
};
Next, create another hook, populate-user, that will attach a user object to each contact record when requested. Follow the instructions as per the below screenshot:
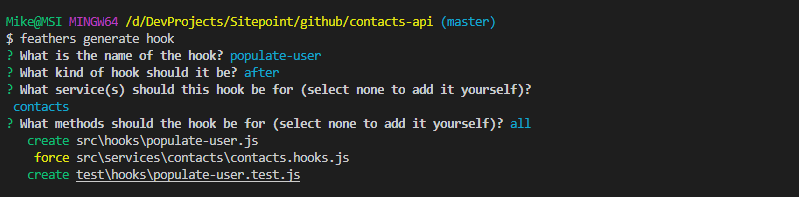
Open the file hooks/populate-user and insert the following code:
// eslint-disable-next-line no-unused-vars
module.exports = function(options = {}) {
  return async context => {
    const { app, method, result, params } = context;

    // Ensure contacts is an array. If it's a single contact, wrap it into an array
    const contacts = method === "find" ? result.data : [result];

    // Fetch user object from each contact's createdBy
    await Promise.all(
      contacts.map(async contact => {
        contact.user = await app
          .service("users")
          .get(contact.createdBy, params);
      })
    );

    return context;
  };
};
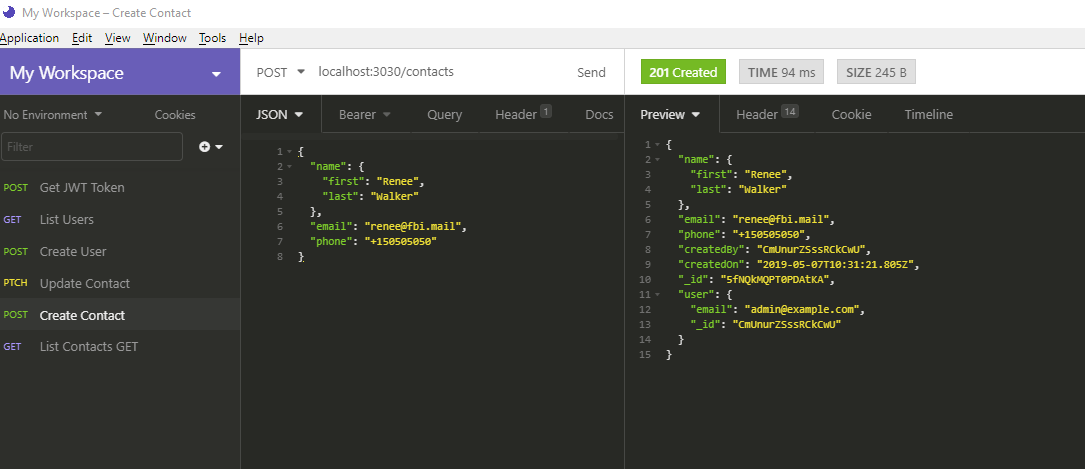
Read the comments to understand how it works. You can now start the server. Create the three contacts again using the Create Contact request. Set the bearer token, if you haven’t already. Otherwise, you’ll receive an authorization error. This is the kind of response you should be getting when you create a new contact:
Summary
I hope you’ve now learned how to quickly build your own RESTful API server. We’ve only touched the basics and you should go through the full guide to discover more features that Feathers can provide in helping you implement advanced features with minimal effort. You should also check out the Awesome Feathers page, which contains a treasure trove of resources. Whether you need a plugin, project example or a tutorial, you’ll probably find a link there. You should also check out Feathers-plus CLI, which is Feathers on steroids. It adds new features on top of what the Feathers CLI already provides, such as generating code for seeding and GraphQL support.
If you’d like to further advance the contacts-api project, I’d encourage you to create a new front-end application using a framework of your choice. Build a log-in screen and CRUD pages for the /contacts and /users endpoints. Have fun implementing the challenge.
FAQs About Feathers.js
Feathers.js is a web framework for building real-time applications. It is designed to be lightweight, flexible, and easy to use, providing a set of tools and patterns for building scalable and maintainable server-side applications.
Feathers.js primarily uses JavaScript, both on the server and client sides. It can be used with Node.js on the server and supports various JavaScript frameworks on the client, including frameworks like React, Angular, and Vue.js.
Feathers.js includes features such as real-time functionality through WebSocket and RESTful APIs, a service-oriented architecture, support for various databases (MongoDB, PostgreSQL, etc.), authentication and authorization mechanisms, and a plugin system for extensibility.
Feathers.js leverages the power of WebSockets to enable real-time communication. It provides a real-time API out of the box, allowing clients to receive real-time updates whenever data changes on the server.
While Feathers.js is primarily designed for building APIs and real-time applications, it can be used in conjunction with other frameworks like Next.js or Nuxt.js to achieve server-side rendering (SSR) for web applications.
I write clean, readable and modular code. I love learning new technologies that bring efficiencies and increased productivity to my workflow.