- Prerequisites
- Step 1: Set Up Test Server
- Step 2: Generating Auth Token
- Step 3: Define Permissions and Add Bot to Server
- Step 4: Project Setup
- Step 5: Exploring Discord.js
- Look for Tagged Users
- Step 6: The Problem with the else … if Chain
- Wrapping Up
- Frequently Asked Questions (FAQs) about Building a Discord Bot with Node.js
Nowadays, bots are being used for automating various tasks. Since the release of Amazon’s Alexa devices, the hype surrounding automation bots has only started to grow. Besides Alexa, other communication tools like Discord and Telegram offer APIs to develop custom bots.
This article will solely focus on creating your first bot with the exposed Discord API. Maybe the most well-known Discord bot is the Music Bot. The music bot lets you type a song name and the bot will attach a new user to your channel who plays the requested song. It’s a commonly used bot among younger people on gaming or streaming servers.
Let’s get started with creating a custom Discord bot.
This article was updated for 2020. To learn more Node, check out Node.js Web Development.Prerequisites
- Node.js v10 or higher installed (basic knowledge)
- a Discord account and Discord client
- basic knowledge of using a terminal
Step 1: Set Up Test Server
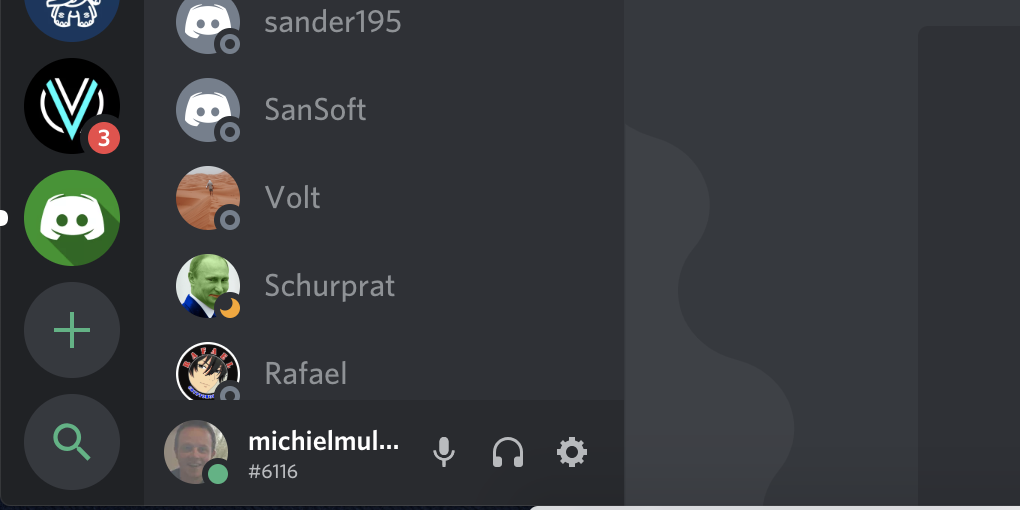
First of all, we need a test server on which we can later test our Discord bot. We can create a new server by clicking the plus icon on the left of the screen.
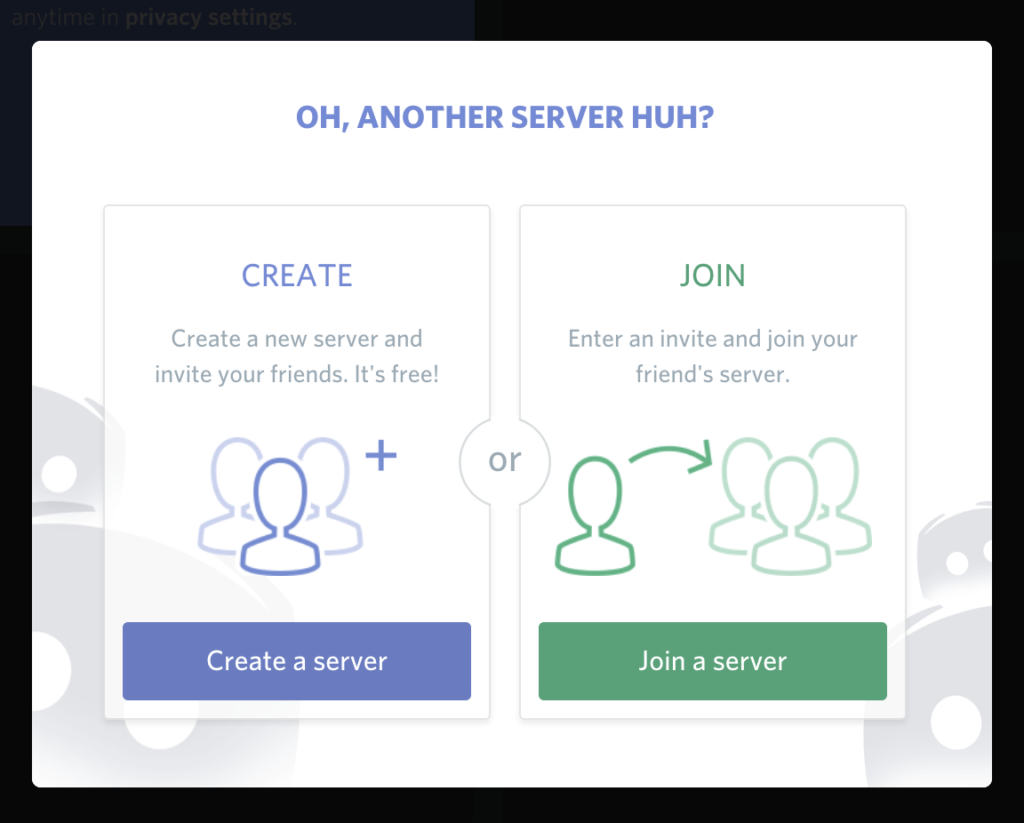
A pop-up will be displayed that asks you if you want to join a server or create a new one. Of course, we want to create a new server.
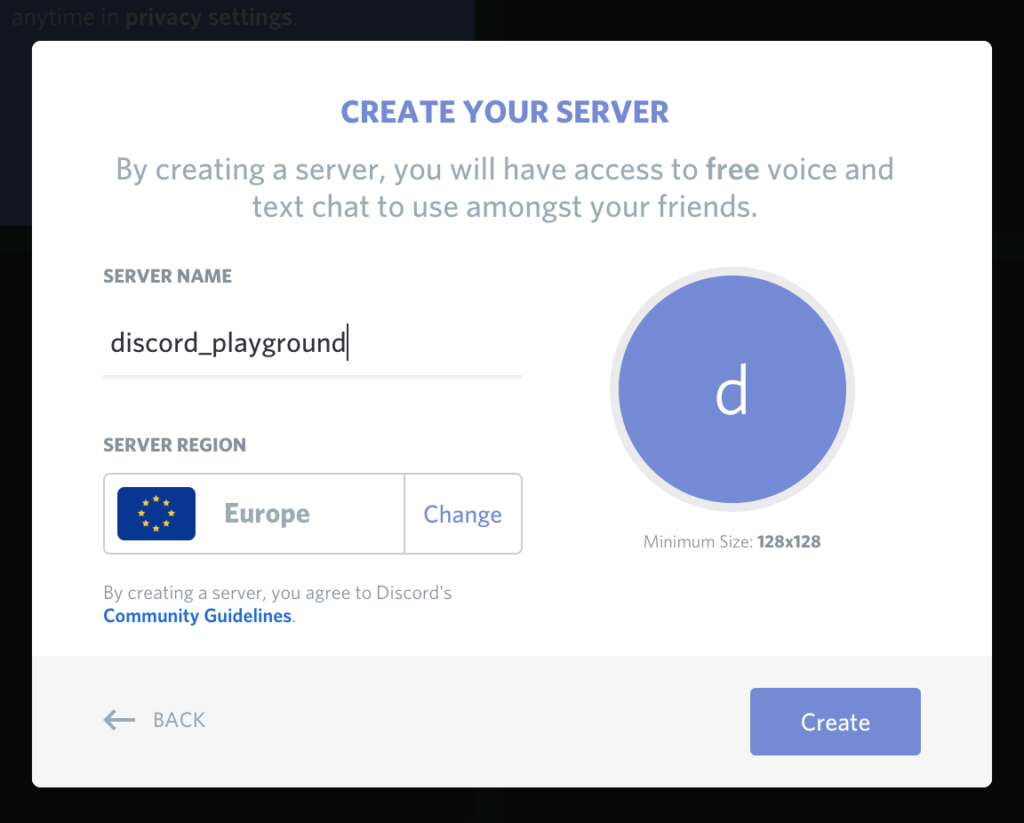
Next, we need to input the name for our server. To keep things simple, I’ve named the server discord_playground. If you want, you can change the server location depending on where you’re located to get a better ping.
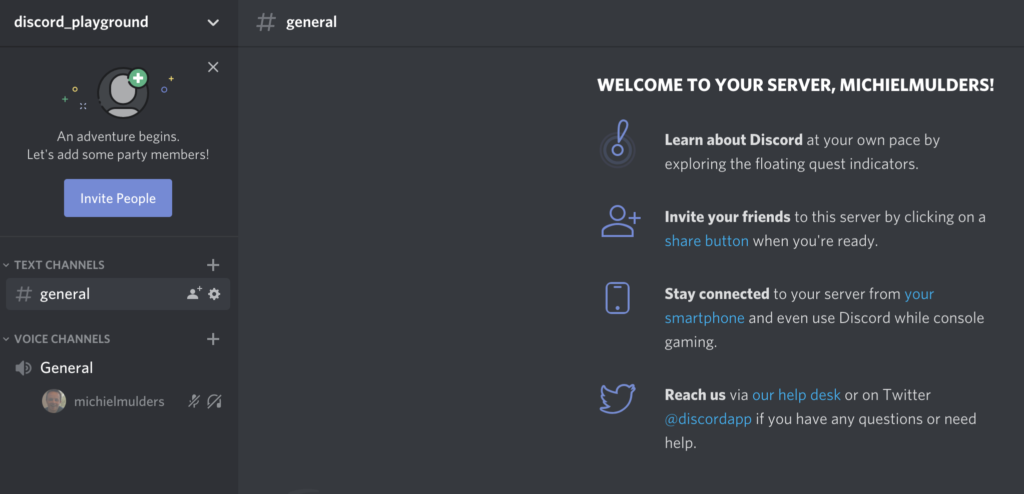
If everything went well, you should see your newly created server.
Step 2: Generating Auth Token
When we want to control our bot via code, we need to register the bot first under our Discord account.
To register the bot, go to the Discord Developers Portal and log in with your account.
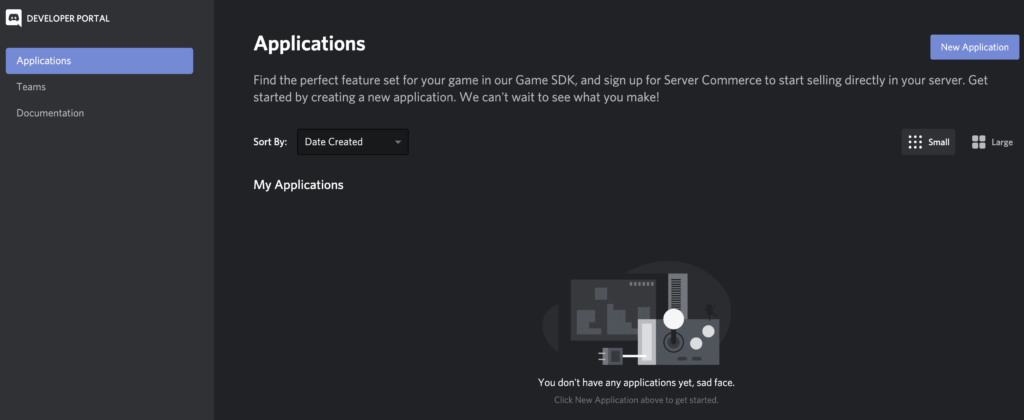
After logging in, you should be able to see the dashboard. Let’s create a new application by clicking the New Application button.
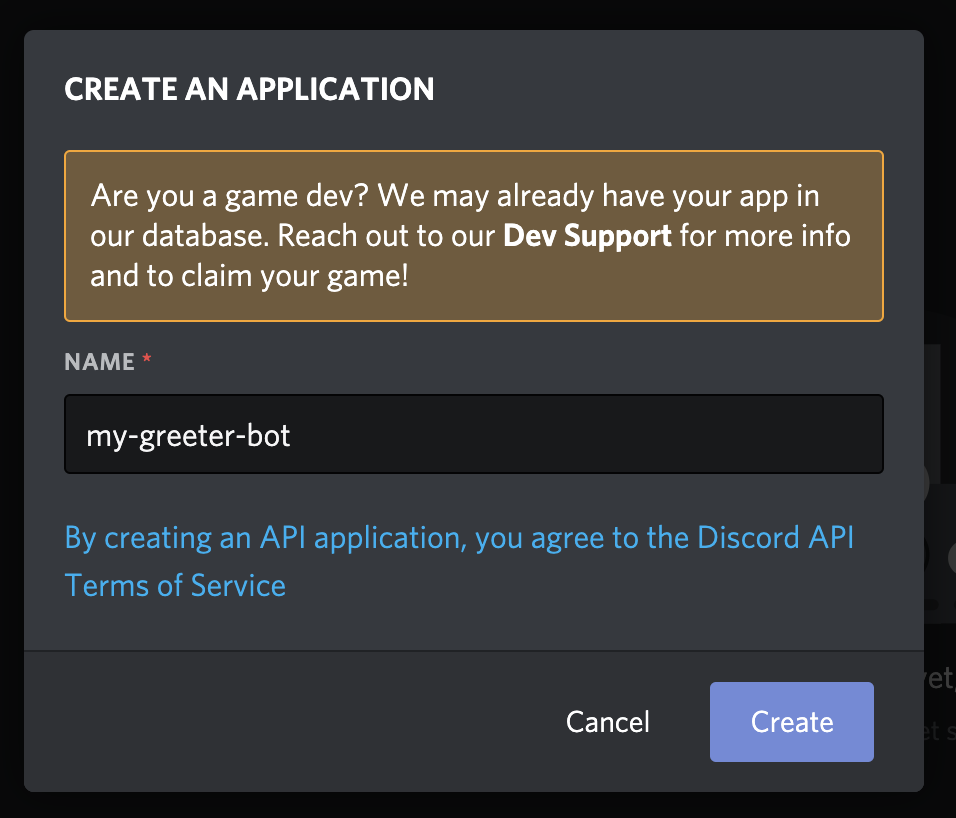
Next, you’ll see a pop-up that asks you to input a name for your application. Let’s call our bot my-greeter-bot. By clicking the Create button, Discord will create an API application.
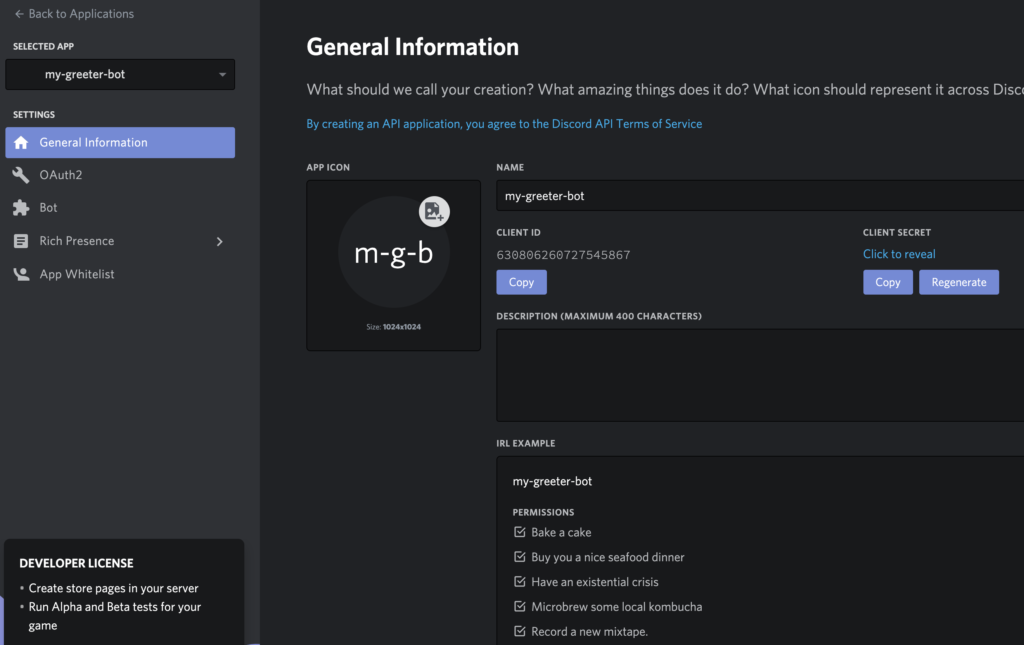
When the application has been created, you’ll see the overview of the newly created my-greeter-bot application. You’ll see information like a client ID and client secret. This secret will be used later as the authorization token.
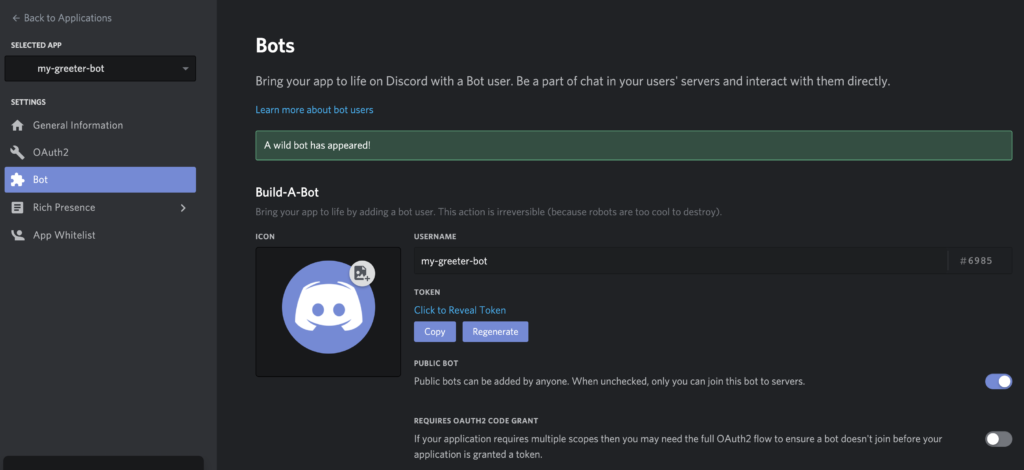
Now, click on the Bot menu option in the Settings menu. Discord will build our my-greeter-bot application and add a bot user to it.

When the bot has been built, you get an overview of your custom bot. Take a look at the Token section. Copy this authorization token and write it down somewhere, as we’ll need it later to connect to our bot user.
Step 3: Define Permissions and Add Bot to Server
Thirdly, we want to define the permissions for the bot and add it to our Discord server.
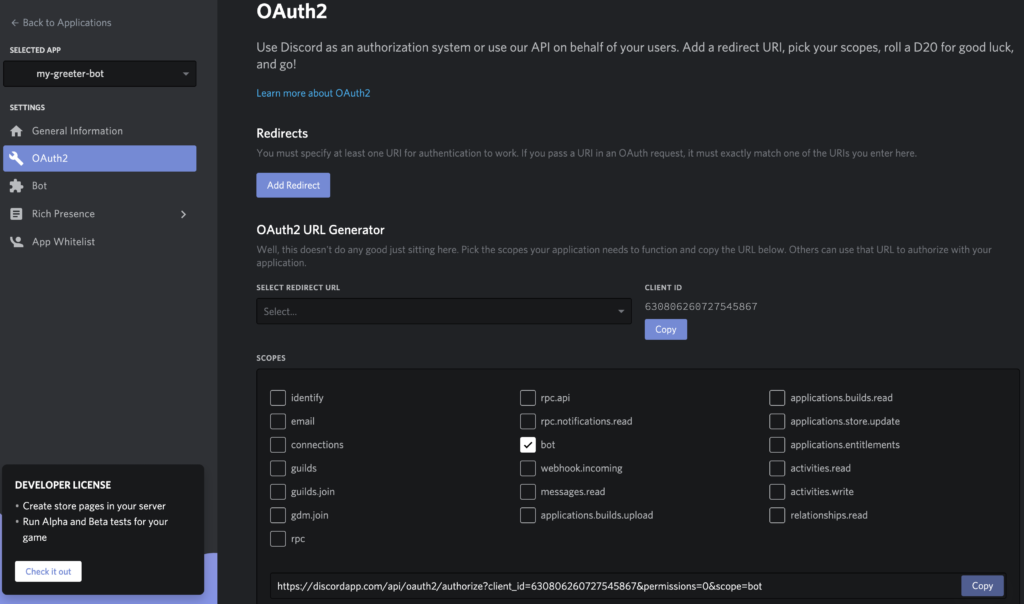
Navigate to the OAuth2 section under the Settings menu. Here we can define the scope for our bot. As we just want to enable a simple bot, we pick the bot option.
You might notice that the authorization URL below has changed now. However, the permissions=0 section indicates that we haven’t set permissions yet.
If we scroll further down, you’ll find the bot permissions section. We want the bot to be able to Send Messages and Read Message History. We need the permission to read message history so we can detect users’ requests.
When you select both options, notice the number has changed for the permissions parameter in the authorization URL.
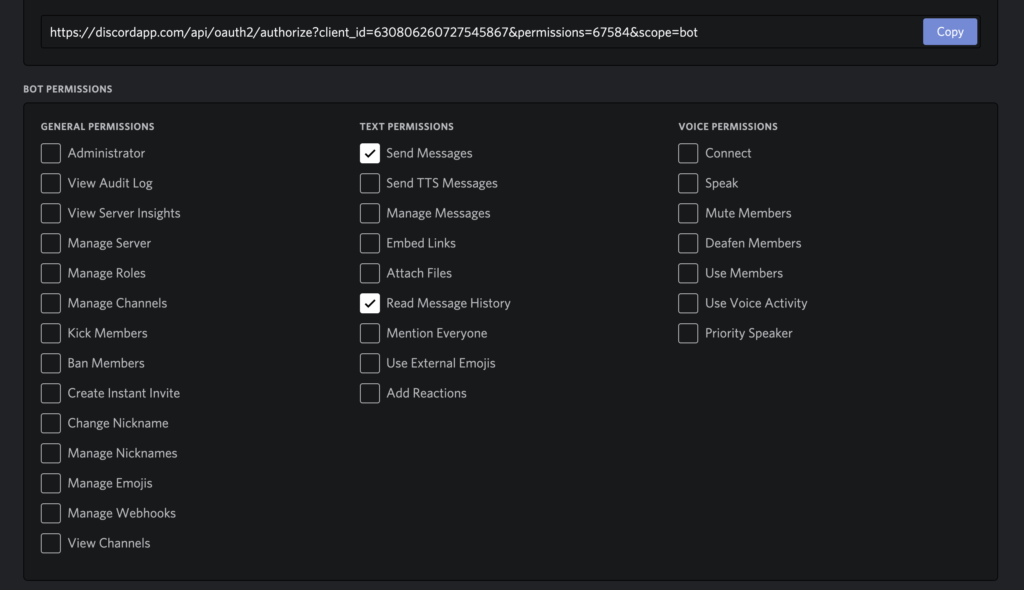
Lastly, copy this URL and paste it in your favorite web browser. You’ll find an overview that asks you which server you want to add the bot to. Let’s select our newly created discord_playground.
Click the Authorize button to add the bot to our server.
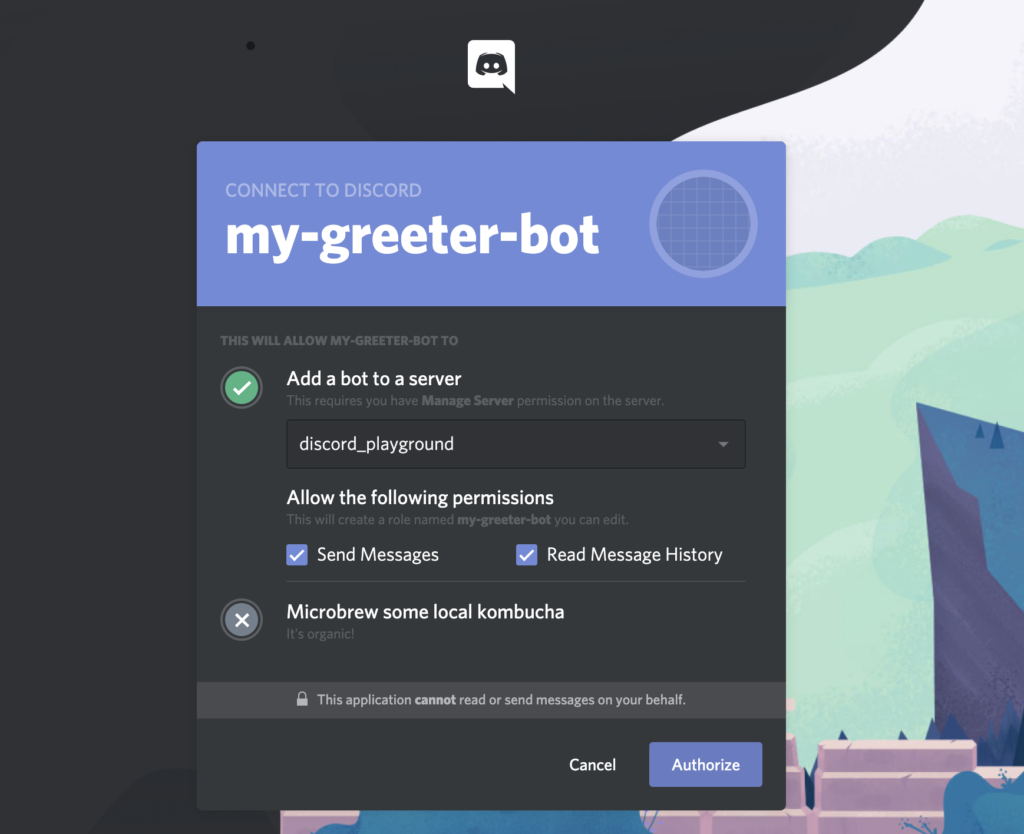
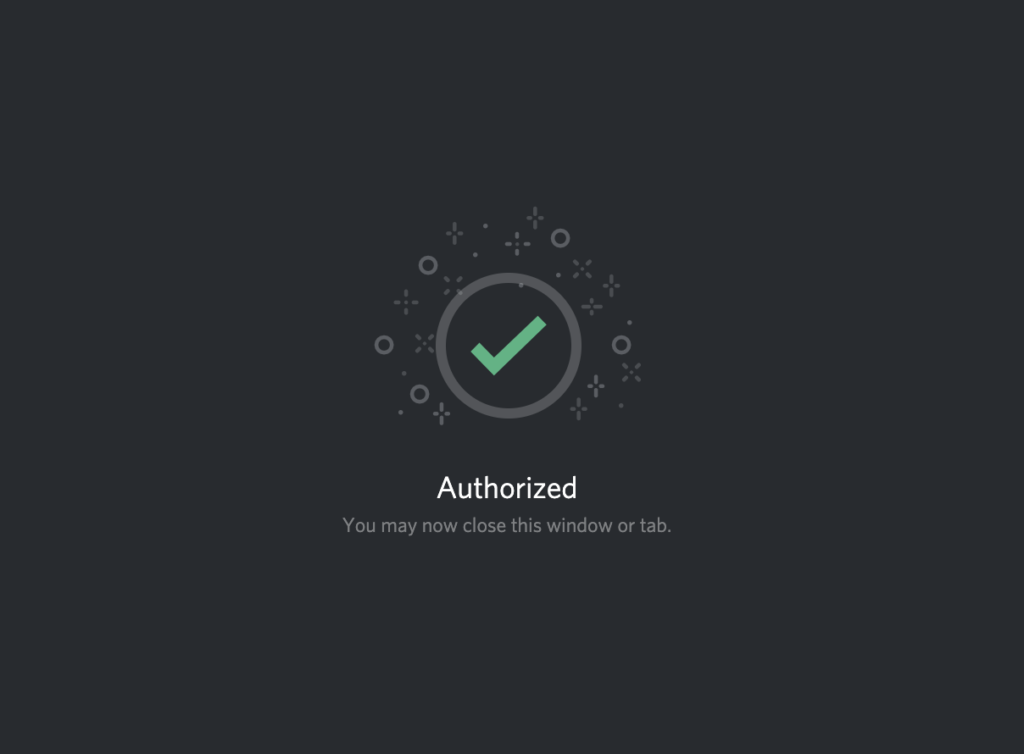
If you’re able to successfully add the bot to your server, you should see the following success screen.
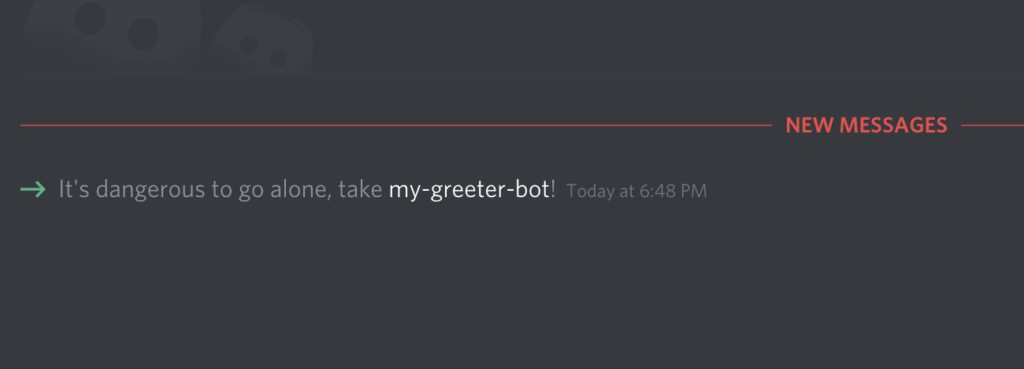
If you want to double-check that your bot got added, go to the General channel. You should see a similar message that indicates that the bot has joined the channel.
Success!
Step 4: Project Setup
Finally, let’s set up the project. You can find the base project on GitHub. Please clone the repository locally on your machine using git clone https://github.com/sitepoint-editors/discord-bot-sitepoint.
The project depends on two dependencies, dotenv and discord.js. The first dependency allows us to use a .env file that holds the bot token we have written down. It’s obvious we need the second dependency, discord.js, for developing the Discord bot.
In order to install both dependencies, please execute npm install inside the project folder.
Lastly, to complete the installation, create a .env file in the root of the project. Add one environment variable called TOKEN to the file like this:
TOKEN=my-unique-bot-token
Step 5: Exploring Discord.js
Let’s take a look at the index.js file located in the root of the project:
require('dotenv').config();
const Discord = require('discord.js');
const bot = new Discord.Client();

const TOKEN = process.env.TOKEN;

bot.login(TOKEN);
We first load the environment variables we’ve defined through requiring the config from the environment .env file. This allows us to use the TOKEN variable we’ve defined through process.env.ToKEN. The last line of the above snippet shows how we pass the token to the login function in order to get access to the bot we’ve created.
The bot variable is actually our Discord client through which we’ll interact.
Listen for “ready” Event
Next, we can listen for events. First of all, we’re listening to a ready event. The ready event is fired once we’re connected to the bot:
bot.on('ready', () => {
  console.info(`Logged in as ${bot.user.tag}!`);
});
If you’ve used the right TOKEN to log in to the bot, your terminal should print the name of your bot bot.user.tag.
You can start the bot by simply executing node index.js in you terminal. Make sure you’re executing this command in the root of your project.
If the bot is connected successfully, you should see the name of your bot being printed in the terminal.

Listen for “message” Event
Besides the ready event, the Discord client allows you to listen for a message event. This means the bot can read any message that is sent to a channel. To tie back to the permissions section, this is the exact reason why we need to give the bot permission to read the message history.
bot.on('message', msg => {
  if (msg.content === 'ping') {
    msg.reply('pong');
    msg.channel.send('pong');
  }
});
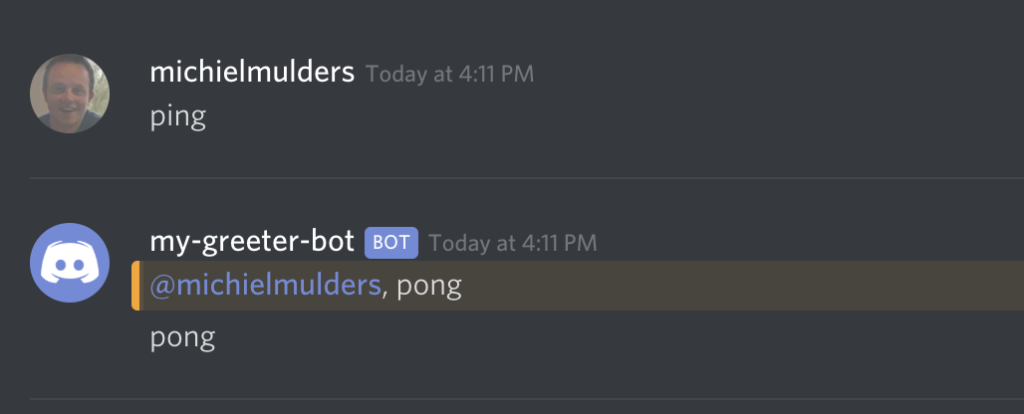
If we explore the code a bit further, you see we’re looking for a message with contents ping. If we receive a message that just contains ping, the bot replies with pong. After that, we use msg.channel.send to send again pong to the channel.
Notice the difference between both commands:
msg.reply: tags the initial user who has sent the messagemsg.channel.send: sends a message to the channel without tagging anyone
Try to run the bot with node index.js and send a message ping to the general channel. Verify if you see the same result.
Look for Tagged Users
In order to add a new command, we have to extend the if clause we have with an else … if:
if (msg.content === 'ping') {
  msg.reply('pong');
  msg.channel.send('pong');

} else if (msg.content.startsWith('!kick')) {
  if (msg.mentions.users.size) {
    const taggedUser = msg.mentions.users.first();
    msg.channel.send(`You wanted to kick: ${taggedUser.username}`);
  } else {
    msg.reply('Please tag a valid user!');
  }
}
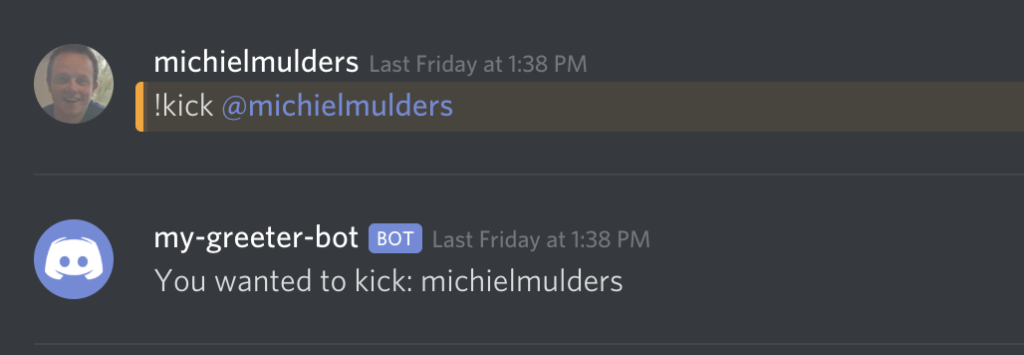
Let’s say we want to kick someone by sending a message like !kick @username. So, first we look for !kick in the message’s content. If we find a message that starts with !kick, we can check if users were tagged in the message with the msg.mentions.users property.
If there are users tagged, we can select the first mentioned user with msg.mentions.users.first(). Next, we reply to the channel with the user’s username in the message.
Step 6: The Problem with the else … if Chain
Next, let’s discuss the problem with all these else … if statements. If you have only a few commands defined to listen for in the message event, the code is quite readable.
However, when we decide to build an extensive project this way, we end up with a chain of else … if statements. Here’s a small list of reasons why you shouldn’t use else … if chains for anything that’s not a small project:
- it’s easier to fall victim to spaghetti code
- the code is hard to read
- it’s not easy to debug
- it’s difficult to organize code
- it’s not easy to maintain as the code grows
Therefore, let’s take a look at the command pattern we can use.
Implementing a Command Handler
A command handler is an approach that’s supported by the discord.js package. Before we continue, check out the advanced branch with git checkout advanced. This branch holds the command handler implementation.
Command Folder
First, let’s explore the command folder. This folder holds an index.js file that exports all commands we’ll define. To keep things simple, we’ll only define one command, ping:
module.exports = {
  Ping: require('./ping'),
};
Next, let’s look at the implementation of the ping command, which basically exports an object which contains the following:
name: a command name.description: it’s best practice to add a description for each command.execute: a function that acceptsmsgandargsinputs. This function holds the same logic as we had in ourelse … ifchain.
module.exports = {
  name: 'ping',
  description: 'Ping!',
  execute(msg, args) {
    msg.reply('pong');
    msg.channel.send('pong');
  },
};
Importing Commands
Continuing, let’s import the commands into the index.js file. Notice we define a commands collection on the Discord bot. We loop over all the commands and add them one by one to the commands collection.
The bot.commands.set function accepts the name of the command and the whole command object:
const Discord = require('discord.js');
const bot = new Discord.Client();
bot.commands = new Discord.Collection();
const botCommands = require('./commands');

Object.keys(botCommands).map(key => {
  bot.commands.set(botCommands[key].name, botCommands[key]);
});
After that, we have to remove our else … if chain and replace it with some dynamic code to find the right command we want to call:
bot.on('message', msg => {
  const args = msg.content.split(/ +/);
  const command = args.shift().toLowerCase();
  console.info(`Called command: ${command}`);

  if (!bot.commands.has(command)) return;

  try {
    bot.commands.get(command).execute(msg, args);
  } catch (error) {
    console.error(error);
    msg.reply('there was an error trying to execute that command!');
  }
});
We first try to split the content of the message by whitespaces using .split(/ +/). We assume the first item in this args array is our command. To check if the command exists in our collection, the collection exposes a has() function, which simply returns true or false. If the command doesn’t exist, we return an empty response.
However, if the command exists, we use the get() function to retrieve the correct command and execute it with the input parameters msg and args.
It’s an easy-to-read, dynamic way of calling commands without writing spaghetti code. This allows you to scale your project to many hundreds of commands if needed.
Again, if you want to test the new version of our code, make sure you check out the advanced branch with git checkout advanced. Next, install all dependencies with npm install and start the bot with node index.js.
Wrapping Up
Installing and setting up a new Discord bot might feel overwhelming at first. However, the API offered by the discord.js package is straightforward, and the Discord website provides great examples.
As this tutorial only covered two permissions, there’s much more to be found. You can learn more about permissions on the Discordjs.guide website.
Good luck with building your first Discord bot!
By the way, you can join SitePoint’s Discord community with this link. Come talk tech with us.
Frequently Asked Questions (FAQs) about Building a Discord Bot with Node.js
How can I add more functionalities to my Discord bot?
Adding more functionalities to your Discord bot involves understanding the Discord.js library and the Discord API. You can add functionalities like sending messages, replying to messages, joining a voice channel, playing audio, and more. To add these, you need to listen to events and then perform actions based on these events. For example, to make your bot send a message, you can use the ‘message’ event and the ‘message.channel.send’ method.
How can I debug my Discord bot?
Debugging your Discord bot involves using console.log statements to print out information about the bot’s state and actions. You can also use Node.js debugging tools like the built-in debugger or external tools like Visual Studio Code’s debugger. Additionally, the Discord.js library provides events like ‘debug’ and ‘warn’ that you can listen to for more information about what the bot is doing.
How can I make my Discord bot interact with other APIs?
Making your Discord bot interact with other APIs involves using the ‘fetch’ or ‘axios’ libraries to send HTTP requests. You can use these libraries to get data from other APIs and then use that data in your bot. For example, you could make a bot that fetches weather data and sends it as a message in a Discord channel.
How can I host my Discord bot?
Hosting your Discord bot involves running it on a server instead of your local machine. You can use cloud hosting providers like Heroku, AWS, or Google Cloud for this. These providers allow you to run your bot 24/7, and they often provide databases and other services that you can use with your bot.
How can I make my Discord bot respond to specific commands?
Making your Discord bot respond to specific commands involves listening to the ‘message’ event and then checking if the message content starts with a specific command. You can use the ‘startsWith’ method for this. If the message starts with a command, you can then perform a specific action.
How can I make my Discord bot play audio in a voice channel?
Making your Discord bot play audio in a voice channel involves using the ‘voice’ part of the Discord.js library. You can use the ‘joinVoiceChannel’ method to make the bot join a voice channel, and then use the ‘play’ method to play audio. The audio can be a local file, a stream, or a URL.
How can I make my Discord bot send images or embeds?
Making your Discord bot send images or embeds involves using the ‘MessageEmbed’ class in the Discord.js library. You can create a new embed, set its title, description, color, image, and other properties, and then send it using the ‘message.channel.send’ method.
How can I make my Discord bot react to messages?
Making your Discord bot react to messages involves using the ‘message.react’ method. You can pass an emoji to this method, and the bot will react to the message with that emoji. You can use custom emojis by passing their ID, or use default emojis by passing their Unicode character.
How can I make my Discord bot handle errors?
Handling errors in your Discord bot involves using try/catch blocks and listening to the ‘error’ event. If an error occurs in a try block, the catch block will be executed. The ‘error’ event will be emitted whenever an error occurs in the Discord.js library.
How can I make my Discord bot use a database?
Making your Discord bot use a database involves using a database library like ‘mongoose’ for MongoDB or ‘sequelize’ for SQL databases. You can use these libraries to connect to a database, define models, and then create, read, update, and delete data.
Fullstack Blockchain Developer at TheLedger.be with a passion for the crypto atmosphere.
