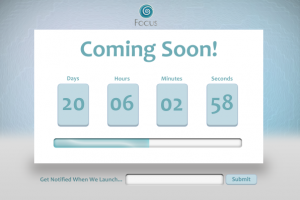
Sometimes we can’t launch our sites as quickly as we’d like due to bugs, delays, redesigns, or other setbacks. But, that doesn’t mean that we have to forgo a website altogether. “Coming Soon” pages, if designed well, are a great way to build anticipation and get a head-start on growing a following online. These pages come in many forms and feature various information. Some will inform the visitor of the details of the project, when to expect the site to be up, and other useful information. Others are more abstract, mysterious, and intriguing, which is an effective way to promise more information via email and grow a list of interested email subscribers.
In any case, if you have a “Coming Soon” page, you want to make sure that it’s appealing, memorable, and worth a revisit later. For today’s tutorial, I will show you how to design your own “Coming Soon” design in Photoshop. Let’s get started!
What You’ll Need:
Candy Blur Wallpaper
Logo
Step 1: New Canvas
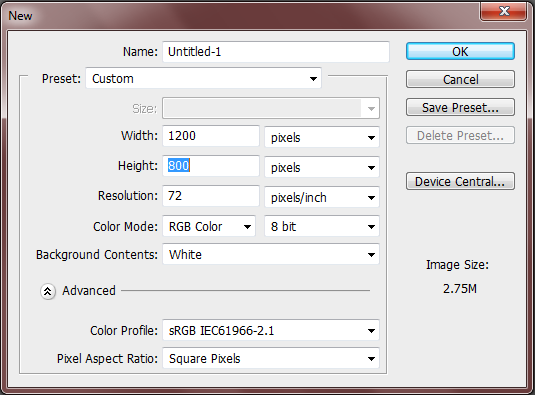
To begin our page design, we need to first create a new document. Go to “File” > “New” or simply press Ctrl + “N” and give your canvas the dimensions of 1200px by 800px.
Step 2: Fill Background
Create a new layer to add your background color. Change your foreground color to #d2d2d2 and fill in your newly-created empty layer.

Step 3: Gradient
Keep your foreground color the same as it was in Step 2 and set the background color to #ffffff. Next, go to your newly-filled layer and open the “Blending Options”. Check the “Gradient Overlay” box and change the color in the gradient box so that it reflects your foreground and background colors. Press “OK”.
Step 4: Wallpaper
Open up your Candy Blur Wallpaper and paste the image onto your canvas. You will need to resize it a bit so that it fits the width and height of your canvas. Once that is done, erase about a third of the wallpaper with a soft round brush towards the bottom.

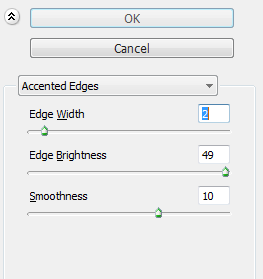
Step 5: Accented Edges
We’ll now want to add an effect to our wallpaper. Stay on the same layer and go to “Filter” > “Brush Strokes” > “Accented Edges”. Change the settings to match those shown in the image below.
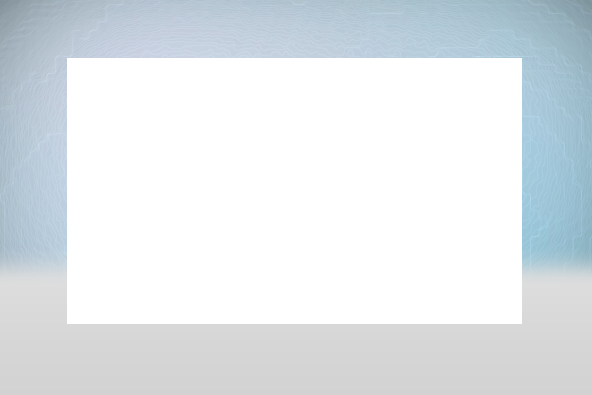
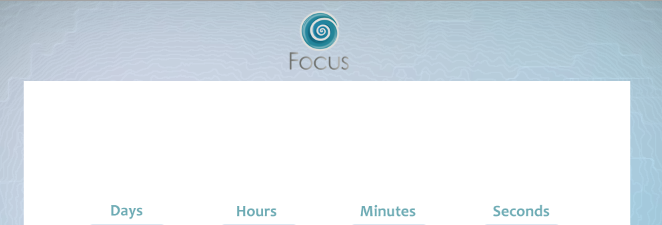
Step 6: Content Box
To keep our design organized, we will create an area for all of the actual content. Change your background color to #ffffff and use the rectangle tool to create a sizeable rectangle in the middle of your canvas. Look below for clarity.
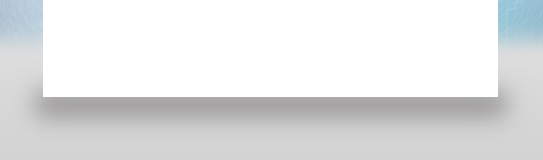
Step 7: Content Box Shadow
To add depth to our box, we need to create a layer under it. Change your foreground color to #adabaa and, using the rectangular marquee tool, create a skinny rectangle just a bit longer than your content box.

Then, Gaussian Blur the shadow by about 23.3px and change the layer mode to “Multiply”.
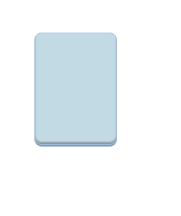
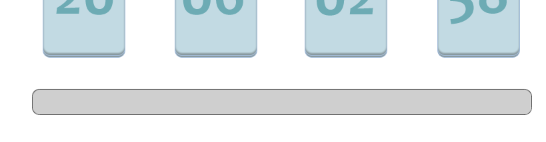
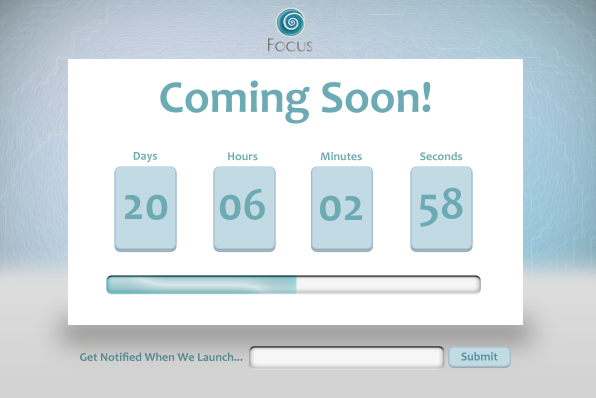
Step 8: Countdown Box
We are going to work on the countdown box next. Set your foreground color to #c2dae3 and choose the rounded rectangle tool once again. Set the radius to 10px and draw your shape as I have done below.

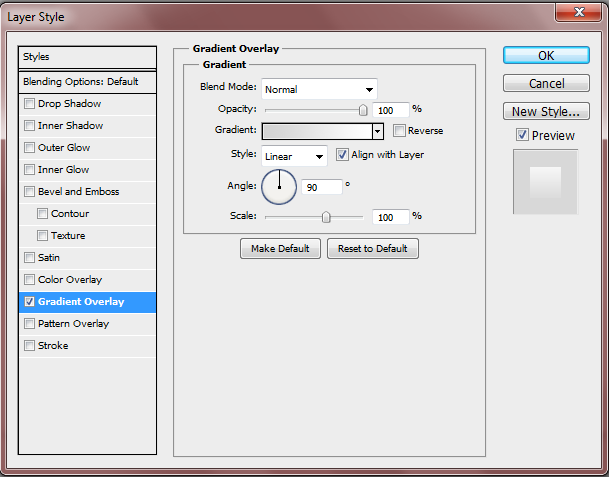
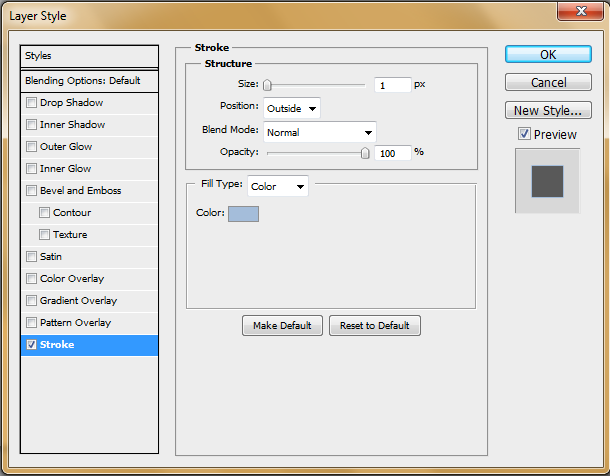
Step 9: Countdown Box Style
To make the box stand out, we will add some effects to it. Open the “Blending Options” and check the “Stroke” box. Change the color to #a4bdda and set the size to 1px.
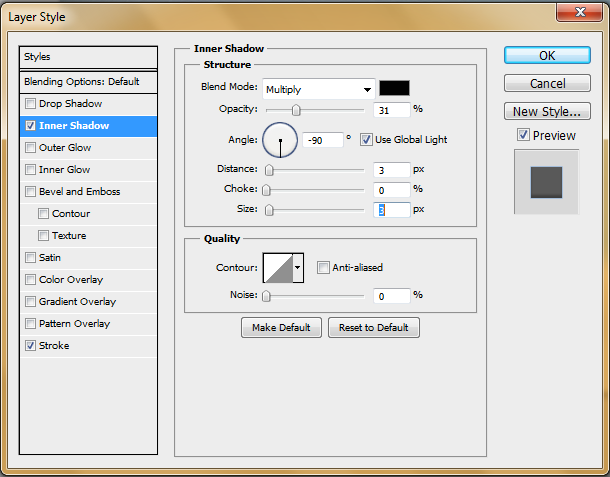
Now, check the “Inner Shadow” box and change the settings to match those below.
Duplicate the layer and move it beneath the original box. Move it down slightly so that you can see some of the shape.
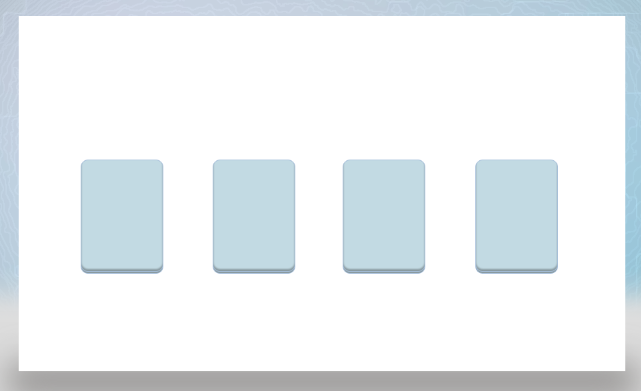
Step 10: Group and Duplicate
There needs to be three more countdown boxes to finish our countdown timer. To accomplish this, group the two layers together and then duplicate the folder three times. Rename each folder so that you know which folder holds which box. Afterwards, position the boxes equally apart.
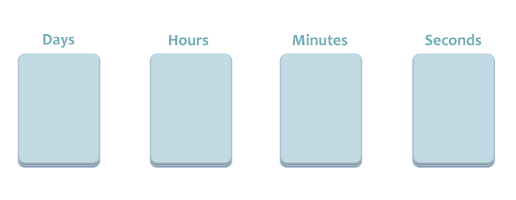
Step 11: Countdown Text
Select the text tool and change your color to #6dabb4. Pick Candara as your font and, with 24pt size font, write your chosen countdown box titles.
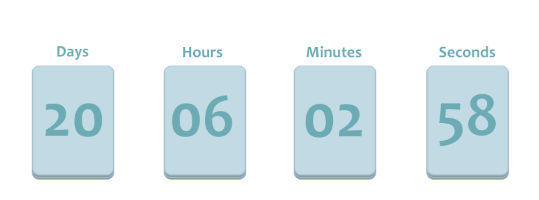
Step 12: Countdown Time
With our text now in place, we can add in our numbers. Use the same color employed in Step 11 but set your font to 92pts.
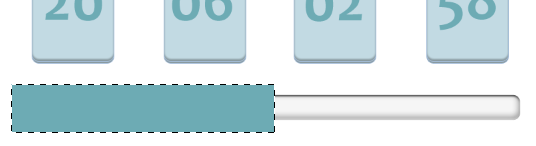
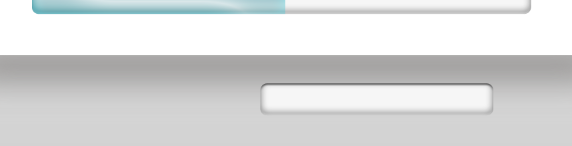
Step 13: Progress Bar
Use the rounded rectangle tool to create your progress bar. Make the color #cfcfcf and make sure the progress bar is positioned beneath your countdown timer.
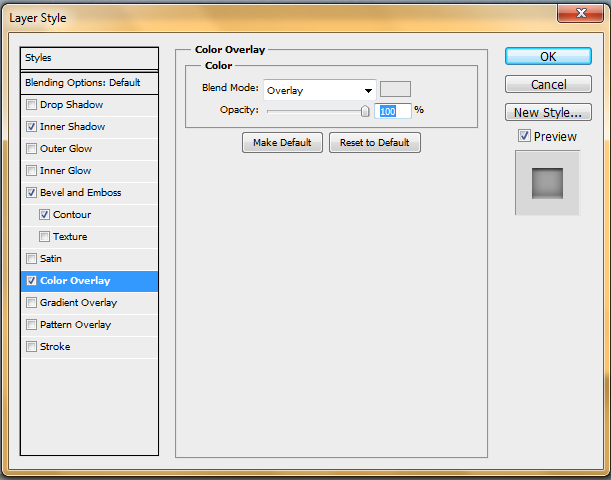
Step 14: Progress Bar Effects
We need to style our progress bar by adding “Blending Options” once again. Check the “Color Overlay” box and change the color to #e8e8e8.
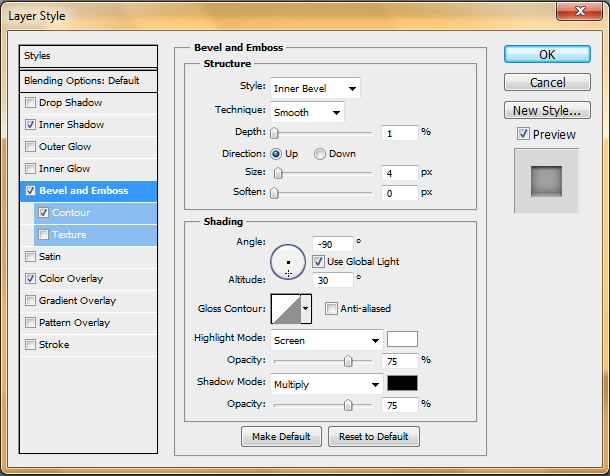
Check the “Bevel & Emboss” box as well as “Contour”. Leave the contour effect with its default settings, but change the bevel as shown below.
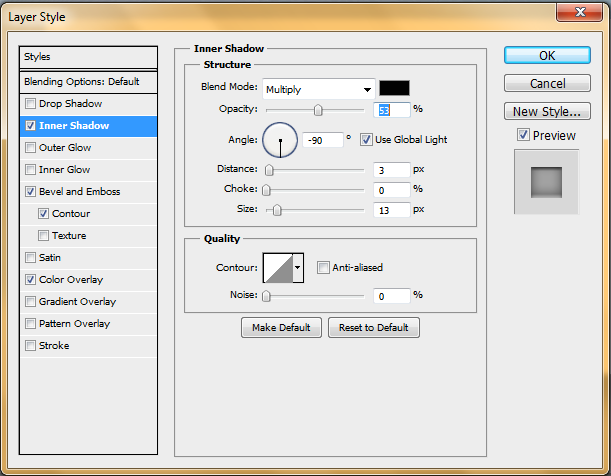
Now, select the “Inner Shadow” box and adjust those settings as well. Press “OK” when finished.
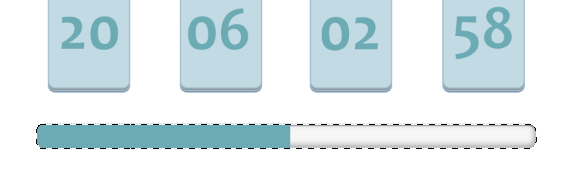
Step 15: Progress Bar Color
Create a new layer for the progress bar’s progress color. Change your foreground color to #6dabb4 and use the rectangular marquee tool and make a selection on the progress bar. Fill your selection with the chosen color.
Now, go to the progress bar layer and hold Ctrl before clicking on the vector mask thumbnail. Next, go to “Select” > “Inverse” and press delete on the progress bar color layer.
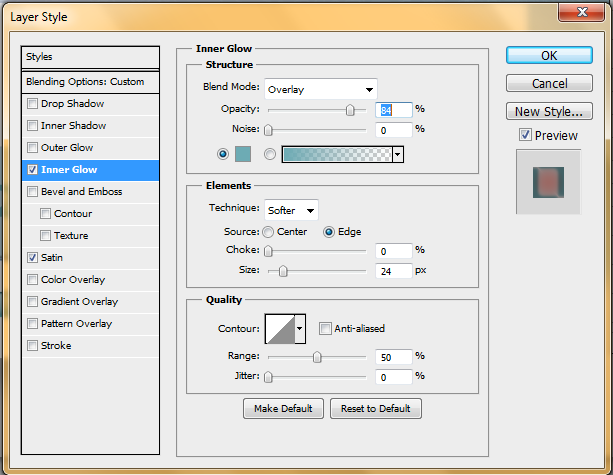
Step 16: Progress Bar Color Effects
Change the layer mode to “Multiply” and then open up the “Blending Options” panel. Check the “Inner Glow” box and set the color to #6dabb4. Then, change the rest of the settings in accordance with the image below.
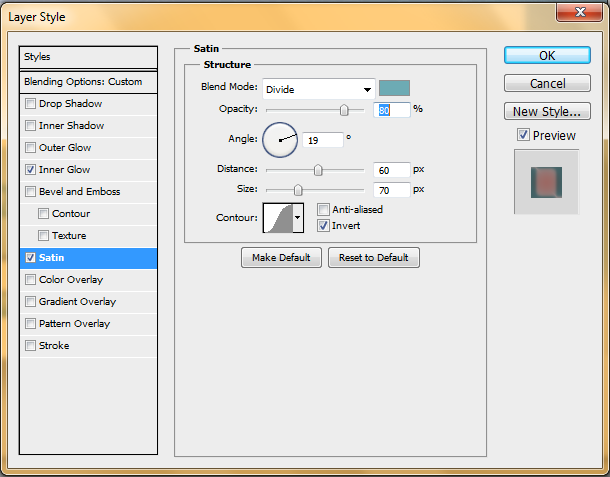
Check the “Satin” box and make the color #6dabb4 as well. Adjust the rest of the settings to match the following image.
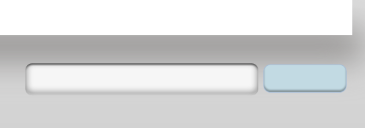
Step 17: Subscription Box
Make a rectangular box under the content box to serve as a form input for visitor emails. Use the rounded rectangle tool and the color #cfcfcf to do it. Copy the layer style of the progress bar and paste it onto this newly-created layer.
Step 18: Submit Button
Use the rounded rectangle tool once more with the color #c2dae3 to create the submit button.
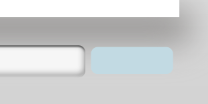
Copy the layer style of the countdown boxes and paste it onto your submit button layer.
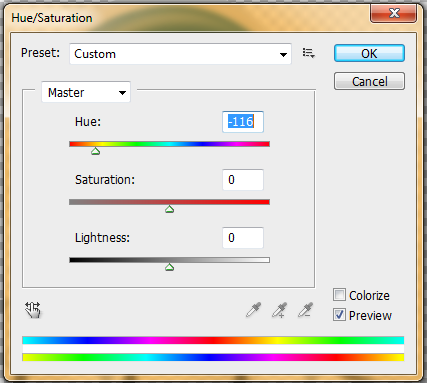
Step 19: Logo
Open up your logo image in Illustrator and export it as a PNG file. In Photoshop, change the color by going to “Image” > “Adjustments” > “Hue/Saturation”. Make the settings match the image below.
Once that is done, paste the logo onto your design and resize it so that it fits sensibly above the content box.
Step 20: Finish
Finish your page design by adding your text as I have done. Remember that you can add as much or as little information as you want. Just make sure not to overcrowd your limited content area.
Download the PSD File
That’s all. I hope you’ve enjoyed the tutorial and found it useful. Happy designing!
 Gabrielle Gosha
Gabrielle is a creative type who specializes in graphic design, animation and photography.


