Step 1
Create a new document in Photoshop with a 900px width and a 700px height.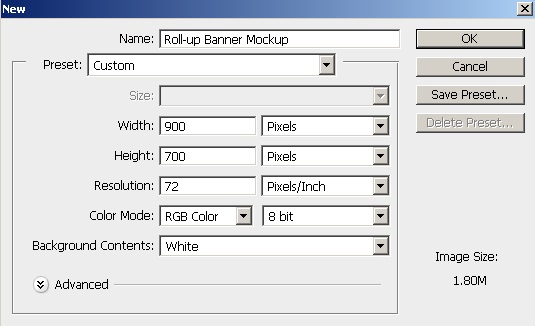
Step 2
Pick #e5dccc as your foreground color and paint the canvas using the paint bucket tool (“G”).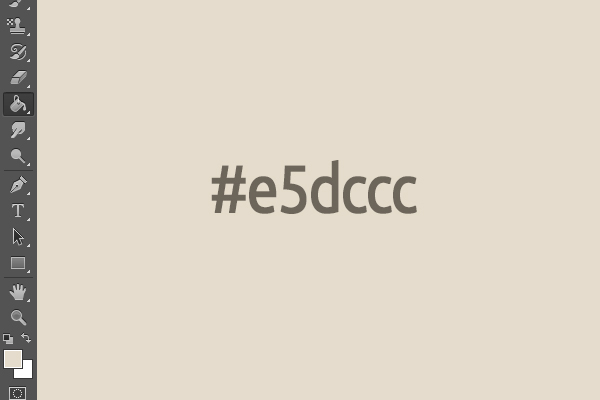
Step 3
Now go to “File” > “Place” and choose the “wall texture.” Change its blending mode to “Overlay” and reduce its opacity to 40%.
Step 4
Next, we’ll make the wooden floor. Go to “File” > “Place” and choose the “wooden texture” file. Now press Ctrl + “T” to activate the free transform tool and decrease the texture’s size vertically.
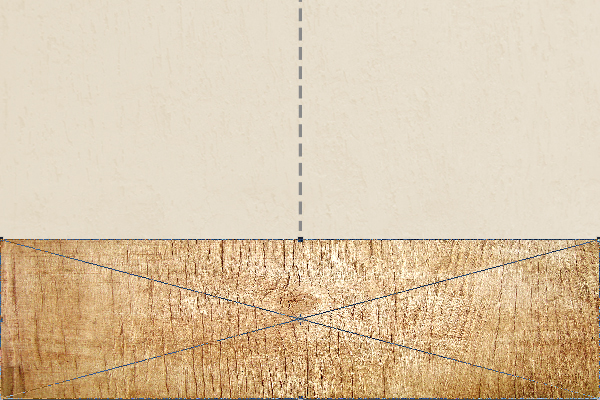
Step 5
To give the floor proper perspective, go to “Edit” > “Transform” > “Perspective” and drag one of the bottom corners of wood texture outwards as shown below.
Step 6
We’ll adjust the wood color now, press Crtl + <click on the wood texture layer> to make selection around it. Now, click on the icon to “Create new fill or adjustment layer” present at the bottom of layers panel and choose “Color Balance.” Apply the provided “Midtones” settings here.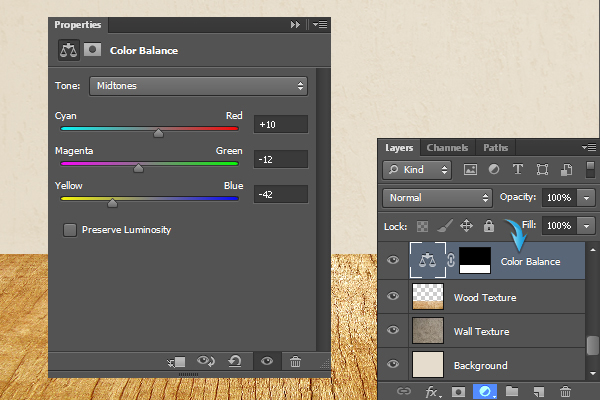
Step 7
To make a border at the junction of the wall and the floor, draw a rectangle using the rectangle tool with #e8e8e8 as your selected color.


Step 8
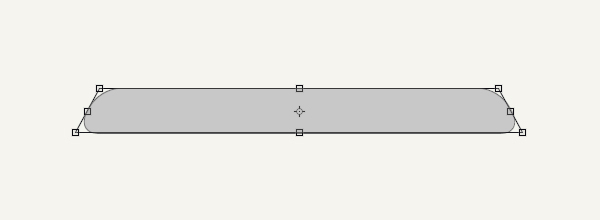
Next, we’ll make the roll-up stand. Collect all of the background layers into a group and hide it. Now, select the rounded rectangle tool and click on the canvas to open the rounded rectangle window. Enter the following values here and hit “OK”. Apply the perspective tool by going to “Edit” > “Transform” > “Perspective” and drag one of the bottom corners of rectangle outward to shape it as shown below.
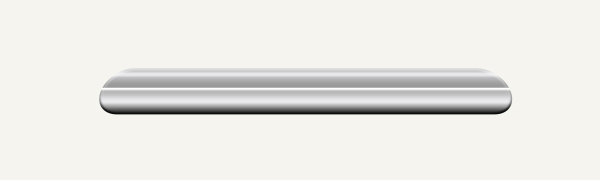
Step 9
Double-click the stand layer to open the “Layer style” window and apply the given settings for “Gradient Overlay” and “Bevel and Emboss” to give it some character.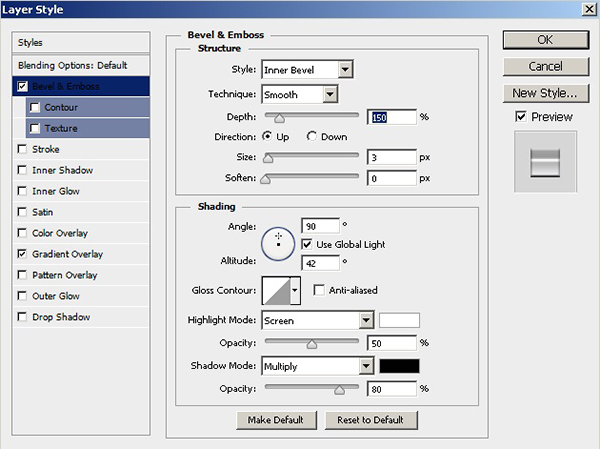

Step 10
Select the pen tool (Tool mode: Shape) to draw the shape shown below at the left side of stand. You can use any color for now.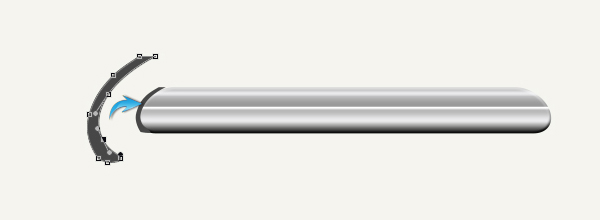
Step 11
Double-click on this new shape layer and apply the following settings for “Gradient Overlay.”

Step 12
Duplicate this shape layer by going to “Layer” > “Duplicate Layer” and flip it by going to “Edit” > “Transform” > “Flip Horizontal.” Position it at the stand’s right side.
Step 13
Next, we’ll make stand’s feet. Draw a rounded rectangle with the settings shown below.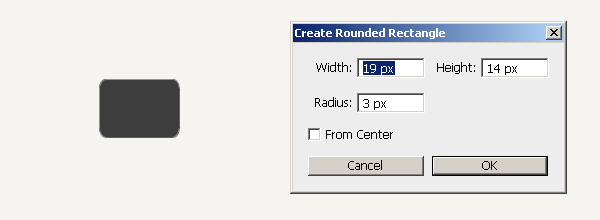 Draw another rounded rectangle with following values and position it as shown below over the previous rectangle. Now, select both the rectangles and press Ctrl + “E” to merge them.

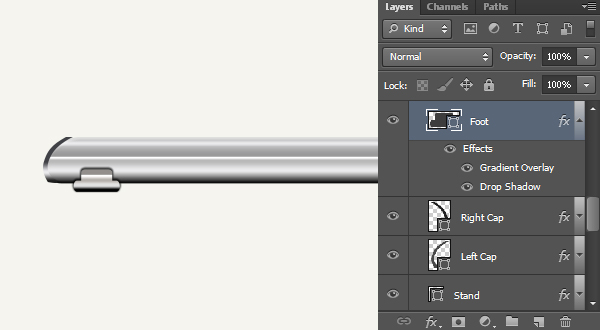
Step 14
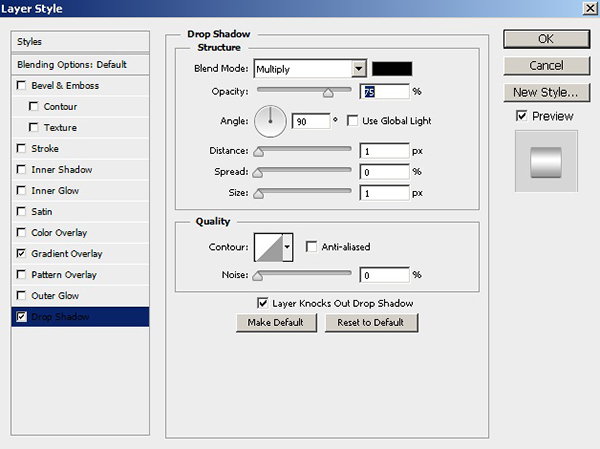
Double-click on the foot layer and apply the following settings for “Gradient Overlay” and “Drop Shadow.”

Step 15
Duplicate the foot layer and position it towards the right side of the stand.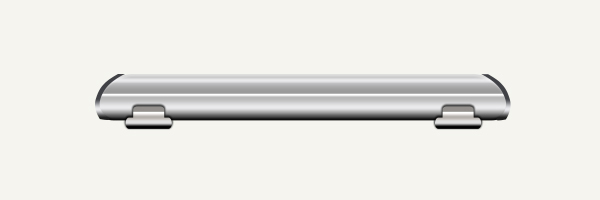
Step 16
To make stand’s shadow, draw a thin rounded rectangle in black color. Now, go to “Filter” > “Blur” > “Gaussian Blur” and apply a 3px Gaussian blur filter to it. After that, go to “Filter” > “Blur” > “Motion Blur” and enter 30px for Distance and 0⁰ for your angle to get the effect shown below. Finally, position the shadow below the stand. Look below for clarity.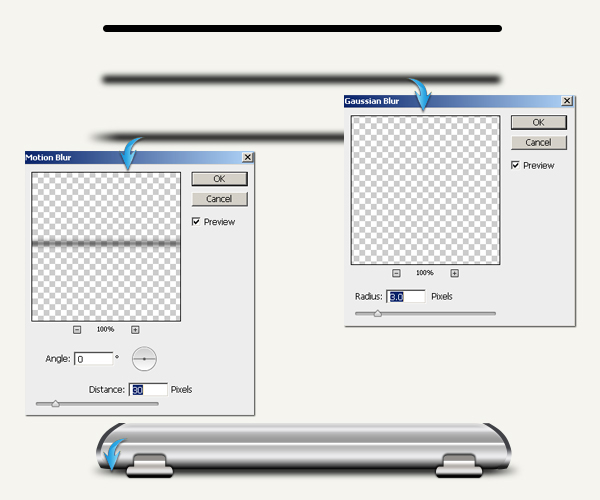
Step 17
Next, make a rectangle to define the location to paste your banner.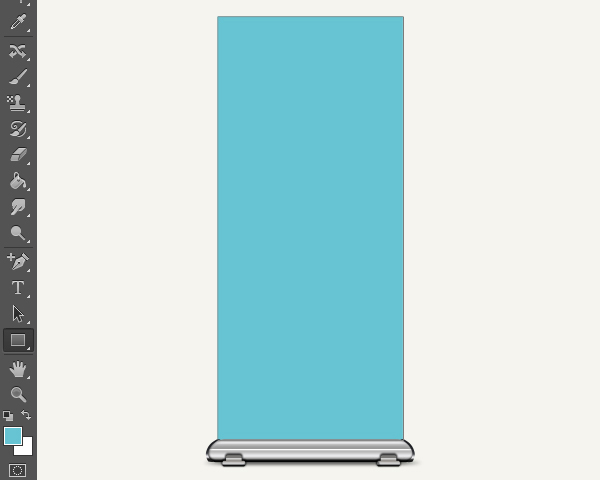
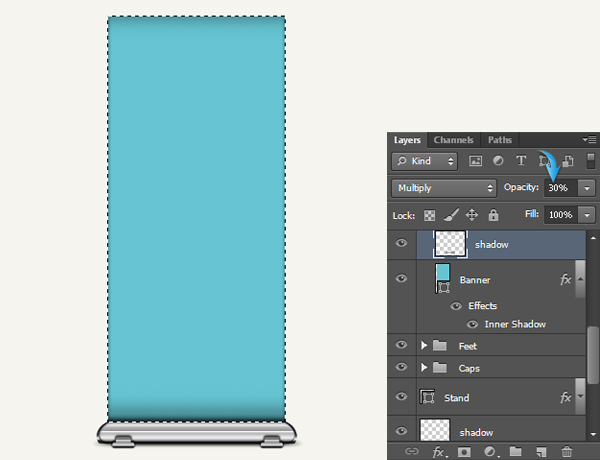
Step 18
Press Ctrl + <click on the banner rectangle> to make selection around it. Now, create a new layer above the banner and apply a soft round brush in black color at the top and bottom borders to form a shadow. Change the blending mode of shadow layer to “Multiply” and reduce its opacity to 30%.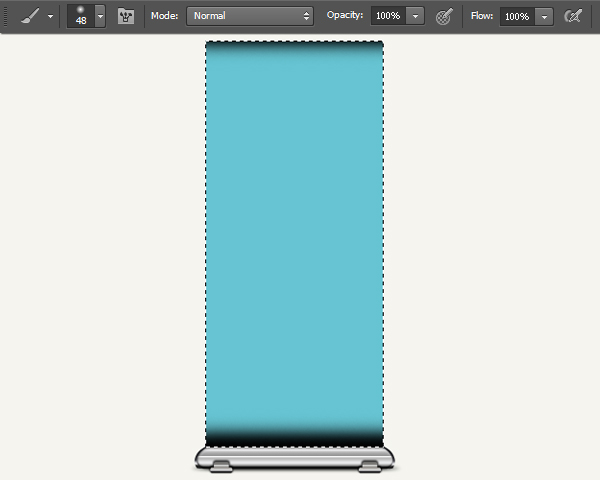
Step 19
To make the top portion of the stand, make a rectangle using the rounded rectangle tool.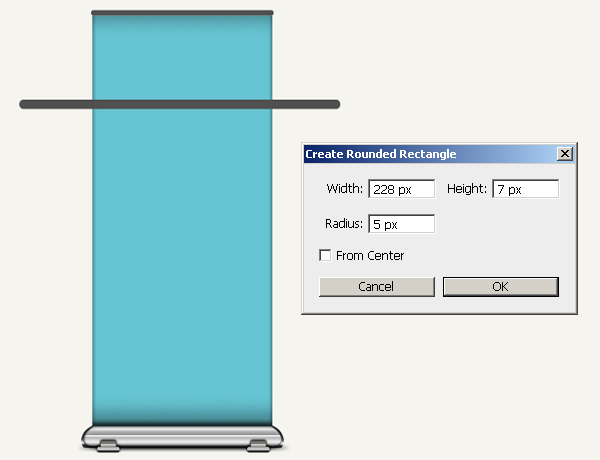 Double-click on the rectangle and apply the following settings for “Gradient Overlay” and “Drop Shadow.”


Step 20
Next, to make caps on the top portion, draw a small rounded rectangle and apply a “black-white-black” gradient on it at 90⁰ using the “Gradient Overlay” option. Duplicate the rectangle and position the new copy at the other end.

Step 21
Our roll-up banner stand is ready. It’s just the matter of pasting your banner design within the stand now. Collect all of the banner layers into a single group and label it as “Stand1”. Duplicate the stand1 group, label the new duplicate as “Stand2”, and slightly decrease its size using the free transform tool (Ctrl + “T”). Place stand2 group below the stand1. Create a new layer (“Layer” > “New Layer”) above it and roughly make shadow using a soft round brush as shown below. You can erase any unwanted parts of the shadow using the eraser tool. Change the blending mode of shadow layer to “Multiply” and reduce its opacity to 50%.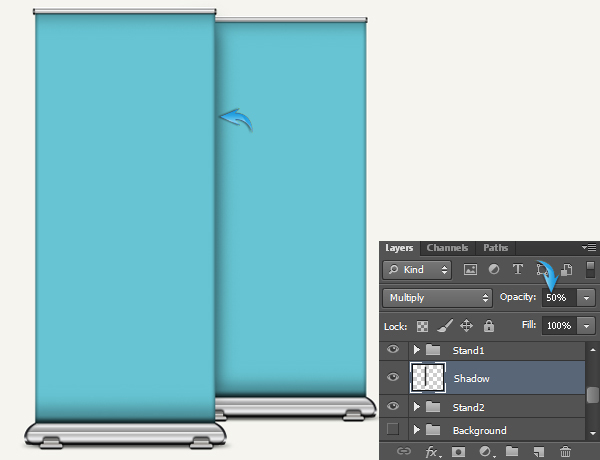
Step 22
Duplicate the stand2 layer, label it as “Stand3”, and reduce its size and place it below the stand2 layer. Make a shadow over it using the same technique use for stand1 and 2.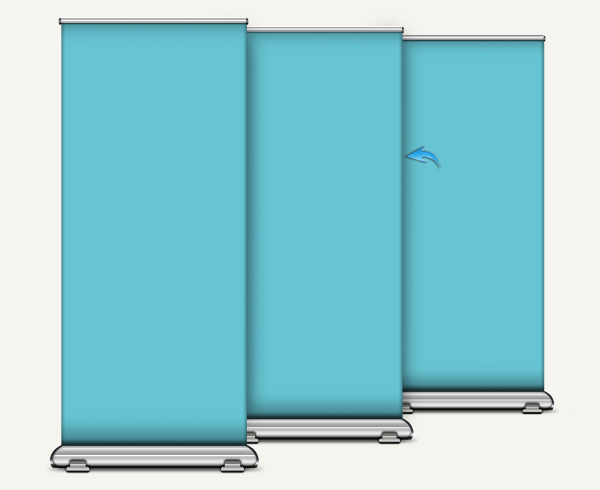
Step 23
Make the background group visible now. I’ve displayed a sample image to show you the finished look. Lastly, apply a soft round brush in white and black color on a new layer just above the background group as shown below.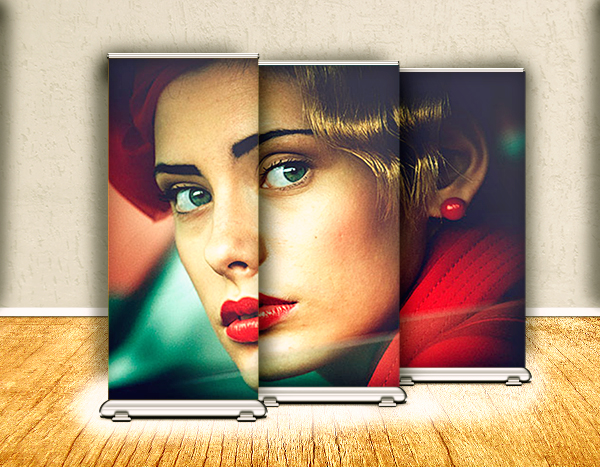 Now, apply a 15px Gaussian blur filter (“Filter” > “Blur” > “Gaussian Blur”) on the shading layer and reduce its opacity to 20-30%.
Final result:
That’s it! I Hope you enjoyed the tutorial and learned something useful. Enjoy thrilling your visitors who couldn’t make it to you in person.
Now, apply a 15px Gaussian blur filter (“Filter” > “Blur” > “Gaussian Blur”) on the shading layer and reduce its opacity to 20-30%.
Final result:
That’s it! I Hope you enjoyed the tutorial and learned something useful. Enjoy thrilling your visitors who couldn’t make it to you in person.
Frequently Asked Questions about Designing a Roll-Up Banner Stand in Photoshop
What is the ideal size for a roll-up banner stand design in Photoshop?
The standard size for a roll-up banner stand design is 33″ x 81″. However, the size can vary depending on the specific requirements of the event or the space where it will be displayed. When designing in Photoshop, ensure that you set the correct dimensions before starting your design. Also, remember to set the resolution to 300 dpi for high-quality print output.
What is the recommended color mode for designing a roll-up banner stand in Photoshop?
The recommended color mode for designing a roll-up banner stand in Photoshop is CMYK. This color mode is used for printing purposes and it ensures that the colors in your design will print accurately.
How can I ensure that my design is not cut off during printing?
To ensure that your design is not cut off during printing, it’s important to include a bleed area in your design. This is an extra space that extends beyond the actual size of your design. It’s typically about 0.125 inches on each side.
What type of file should I save my design as for printing?
It’s recommended to save your design as a PDF file for printing. This file type preserves the quality of your design and ensures that it prints correctly.
How can I make my text stand out in my roll-up banner stand design?
To make your text stand out in your roll-up banner stand design, consider using bold, large fonts. Also, ensure that there is enough contrast between the text color and the background color.
What elements should I include in my roll-up banner stand design?
Your roll-up banner stand design should include your company logo, a headline, a call to action, and any relevant images or graphics. Remember to keep the design simple and not overcrowd it with too many elements.
How can I ensure that my images print clearly on my roll-up banner stand?
To ensure that your images print clearly on your roll-up banner stand, use high-resolution images in your design. Also, avoid stretching or distorting the images as this can reduce their quality.
Can I use any font in my roll-up banner stand design?
While you can technically use any font in your roll-up banner stand design, it’s best to stick with fonts that are easy to read from a distance. Avoid using script or decorative fonts for large blocks of text.
How can I create a balanced design for my roll-up banner stand?
To create a balanced design for your roll-up banner stand, use the rule of thirds. Divide your design into three horizontal and three vertical sections and place the most important elements at the intersections of these lines.
What is the best way to proofread my roll-up banner stand design before printing?
The best way to proofread your roll-up banner stand design before printing is to print a small-scale version of your design. This allows you to check for any errors or issues that may not be visible on your computer screen.
Anum is Web and Graphic designer. Addicted to Photoshop and crazy for pixel perfection. She is also an active blogger, sharing her passions, skills and creative details on her blog Websoulz. She loves to connect with the community, sharing the latest design gossips and rolling her eyes on boring trends.


Published in
·automation·Debugging & Deployment·Miscellaneous·Patterns & Practices·PHP·Testing·July 20, 2017