Setup
Before we start on our journey, you’ll need an account on CenturyLink in order to follow along. There are free trials (they do require a payment method, FYI). So, head over to the CenturyLink site and click “Free Trial”. Follow the sign up procedure and you’re ready to go.Provision a Bare Metal Server
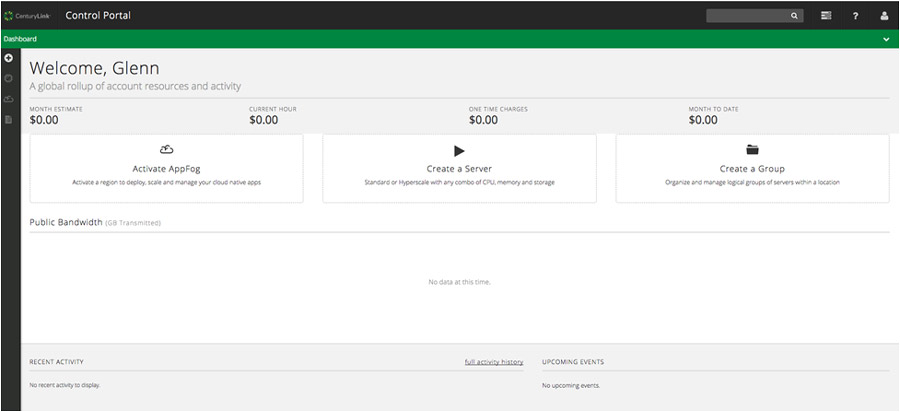
After logging into the CenturyLink Control Portal, the dashboard is presented: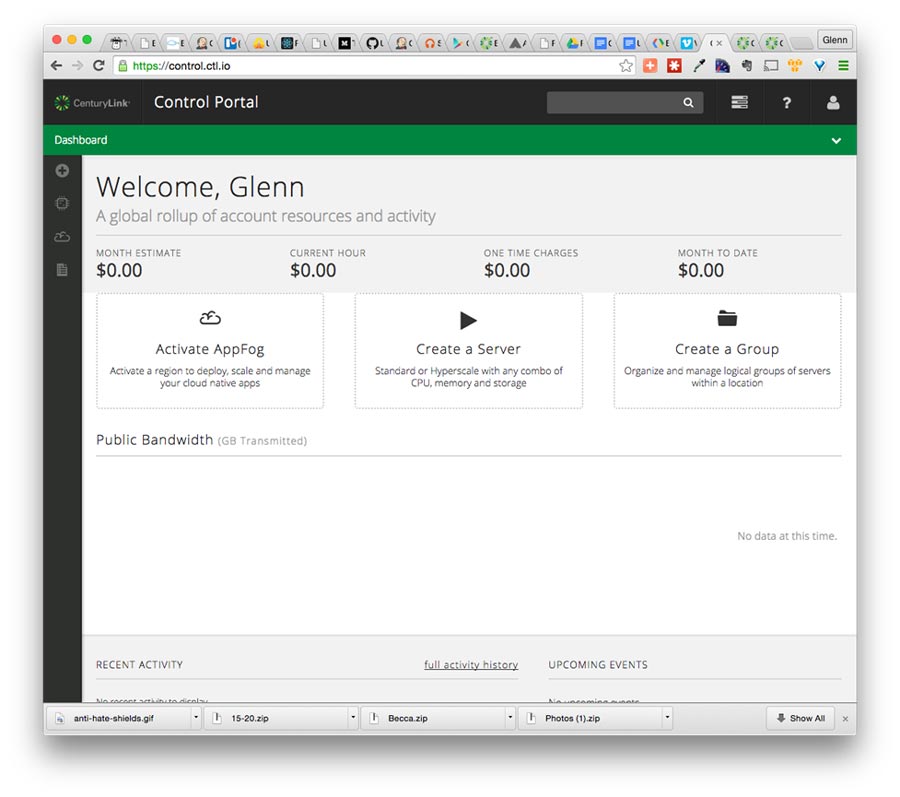 To start the process of creating a server, click on the large “Create a Server” or the “+” on the sidebar and choose “Server”.
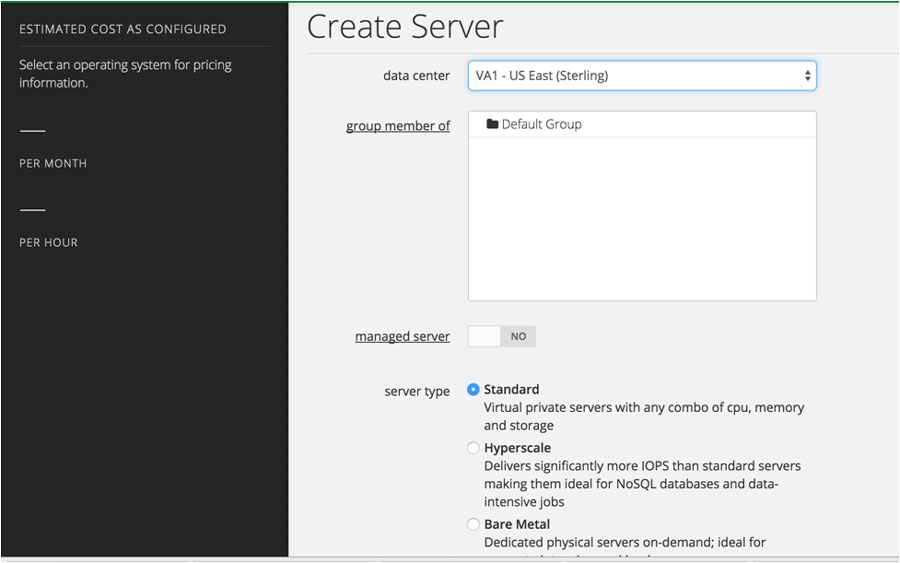
 Bare Metal servers are not available in all Data Centers. I had to choose “VA1 – US East (Sterling)” from the “data center” drop down in order to have ‘Bare Metal’ as an option for “server type”. If you’re in a data center where Bare Metal servers should be available, but you can’t see them as an option, contact Customer Care to make sure they’re enabled for your account.
 CenturyLink has some great documentation on how to provision a server, which you can follow here. I used the following options:
- group member of: Default Group
- server type: Bare Metal
- configuration: 4 cores (the smallest option)
- operating system: Ubuntu 14 64-bit
- server name: sprail
- primary dns: 8.8.8.8 (Google DNS)
- secondary dns: 8.8.4.4 (Google DNS)
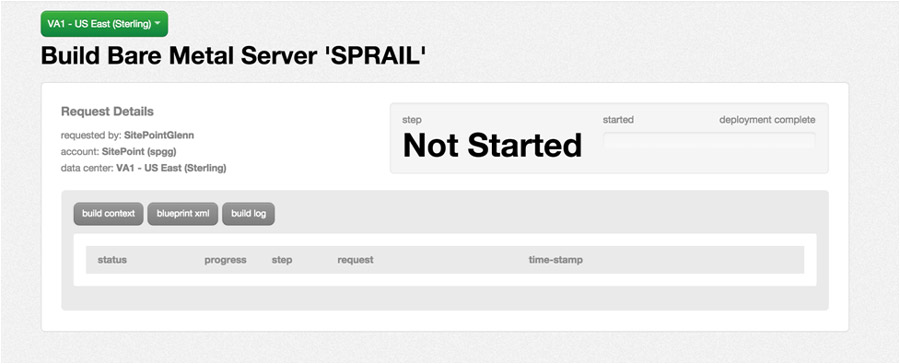 If you stay on this page, the server will go through 3 steps of provisioning where it is validated, the resources are requested, and it is started.
When we provisioned our server, the configuration requires that a group is selected. In our example, we chose ‘Default Group’. I bet you were wondering what a “group” is, weren’t you? On CenturyLink Cloud, groups allow you to manage multiple servers in bulk. Examples of what can be done in groups are:
If you stay on this page, the server will go through 3 steps of provisioning where it is validated, the resources are requested, and it is started.
When we provisioned our server, the configuration requires that a group is selected. In our example, we chose ‘Default Group’. I bet you were wondering what a “group” is, weren’t you? On CenturyLink Cloud, groups allow you to manage multiple servers in bulk. Examples of what can be done in groups are:
- Bulk Operations, such as power up/down, etc.
- Group your servers and resources by project, or any other logical reason.
- Create parent-child relationships between servers, with cascading tasks, etc.
- Support for complex billing, where you might charge a client for their usage.
Deploying a Rails Application
When I return to the dashboard, my data center is now listed: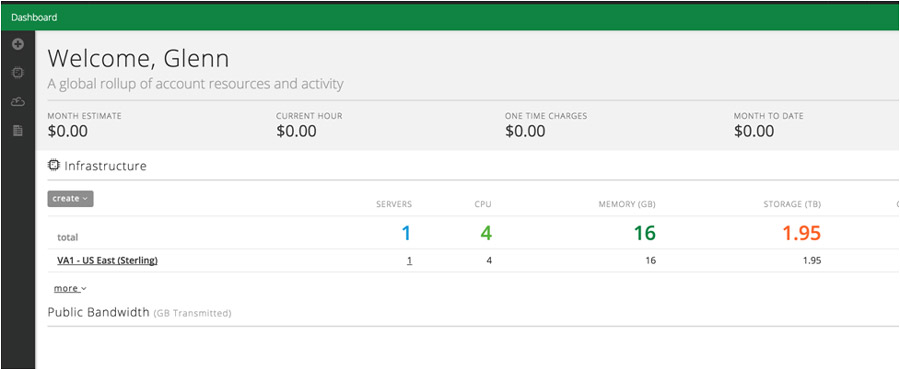 Clicking through on that data center leads to a data center specific view, which isn’t very interesting yet. To get to the server, expand the “Default Group” folder in the left-hand list of Data Centers and select your server:
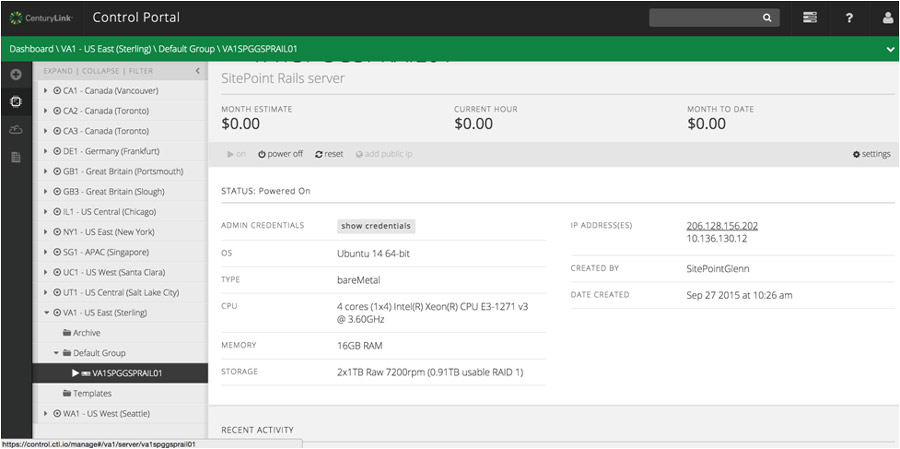 Here, you can retrieve the admin credentials (setup during provisioning) and see the configuration of the server, including the IP address of the server to connect to. Make sure you are connected to the VPN that is provided for you when you create the server. (See the instructions at “How To Configure Client VPN”.).
Now you will be able to SSH into the box using ssh root@. When you’re prompted for a password, use the password that you specified during provisioning.
As I mentioned, Bare Metal servers act like VMs, but they are not shared. As such, deploying Rails to a Bare Metal Server is exactly the same as setting up any POSIX box as a Rails server. The steps are:
Here, you can retrieve the admin credentials (setup during provisioning) and see the configuration of the server, including the IP address of the server to connect to. Make sure you are connected to the VPN that is provided for you when you create the server. (See the instructions at “How To Configure Client VPN”.).
Now you will be able to SSH into the box using ssh root@. When you’re prompted for a password, use the password that you specified during provisioning.
As I mentioned, Bare Metal servers act like VMs, but they are not shared. As such, deploying Rails to a Bare Metal Server is exactly the same as setting up any POSIX box as a Rails server. The steps are:
- Create a deploy user.
- Install a web server (Nginx, in our case).
- Capify your Rails app
- Add the Rails app to source control.
- Push your changes.
- Run the deploy task.
Server-Side Setup
For these tasks, you need to be SSH’d into the Bare Metal Server.Create a Deploy User
If you aren’t familiar with basic Unix tasks, like creating a user, it’s not too hard. Type the following on the server:$ adduser deploy
...Answer the prompts, give the user a good password...
$ gpasswd -a demo sudoCreate/Use Public Key
Your deployments will go much more smoothly if you use Public Key Authentication to SSH into the box as the deploy user. If you have a key pair on your LOCAL machine, you can use it, otherwise use ssh-keygen to create one. Again, this is on your local/development machine:$ ssh-keygen
...ssh-keygen output...
Generating public/private rsa key pair.
Enter file in which to save the key (/Users/your-user-name/.ssh/id_rsa):ssh-copy-id command, which was made for just this purpose. On your LOCAL machine:
$ ssh-copy-id deploy@SERVER-IP-ADDRESSssh deploy@SERVER-IP should “just work” without prompting for a password.
Install Nginx
Let’s get Nginx installed. Packages managers make this simple. As root on the server, type:$ apt-get install nginx git-core nodejs -y
... All kinds of output..Install Ruby (RVM) and Friends
I love RVM. It makes life easier. Let’s install it on the server so we easily upgrade Ruby as our incredible app grows and lives forever. SSH into the box as the deploy user.$ gpg --keyserver hkp://keys.gnupg.net --recv-keys
409B6B1796C275462A1703113804BB82D39DC0E3
...output..
gpg: Total number processed: 1
gpg: imported: 1 (RSA: 1)
$ \curl -sSL https://get.rvm.io | bash -s stable --ruby
...this will prompt for the deploy user password...
...then install ruby 2.2.1...
Creating alias default for ruby-2.2.1...
* To start using RVM you need to run `source /home/deploy/.rvm/scripts/rvm`
in all your open shell windows, in rare cases you need to reopen all shell windows.
$ source /home/deploy/.rvm/scripts/rvm
$ ruby -v
ruby 2.2.1p85 (2015-02-26 revision 49769) [x86_64-linux]$ gem install bundler --no-ri --no-rdoc
Successfully installed bundler-1.10.6
1 gem installedGit
Our deploy will pull the latest code from source control. For this app, I am going to use Github. Remember, we installed git in a previous apt-get install step when we installed nginx. The deployment process will need to be able to access our git repository without logging in, so here’s another public key authentication scenario. The deploy user doesn’t have a key file yet, so generate one:# AS THE DEPLOY USER ON THE SERVER
$ ssh-keygen -t rsa
Generating public/private rsa key pair.
Enter file in which to save the key (/home/deploy/.ssh/id_rsa):
Enter passphrase (empty for no passphrase):
Enter same passphrase again:
Your identification has been saved in /home/deploy/.ssh/id_rsa.
Your public key has been saved in /home/deploy/.ssh/id_rsa.pub.
The key fingerprint is:
90:4d:56:9c:50:7d:b3:05:26:ad:61:64:4b:84:05:26 deploy@VA1SPGGSPRAIL01
The key's randomart image is:
...a really weird piece of ASCII art...ssh -T git@github.com yields:
$ ssh -T git@github.com
Warning: Permanently added the RSA host key for IP address '192.0.2.0' to the list of known hosts.
Hi! You've successfully authenticated, but GitHub does not provide shell access.
The Rails App
Since the focus of this article is deployment, the Rails app will be relatively simple. We’ll create a single controller and view, and change/add some gems to represent a somewhat “real” deployment. I am using Ruby 2.2 and Rails 4.2.4, and I am back on my local machine. After typing rails new, it’s time to modify the Gemfile. I simply added Puma and the various Capistrano gems. It looks something like this:
...other gems...
gem 'puma'

group :development do
  gem 'web-console', '~> 2.0'  # this was already here
  gem 'pry-rails' # I love Pry

  gem 'spring'

  gem 'capistrano',         require: false
  gem 'capistrano-rvm',     require: false
  gem 'capistrano-rails',   require: false
  gem 'capistrano-bundler', require: false
  gem 'capistrano3-puma',   require: false
end
Home scaffold:
$ rails g scaffold Thing names:string purpose:string
...lots of output...
$ rake db:migrate
...more output...# config/routes.rb
Rails.application.routes.draw do
resources :things
root to: 'things#index'
end(rails s) and opening http://localhost:3000 will allow you to see our progress and make things to your heart’s content.
Stop your local server (CTRL-C) and let’s get this Things app under source control.
Git
In the root of your application, type:git init .
git add .
gc -m "Initial commit"Capistrano
Return to your application root on your local machine and type:$ cap install
mkdir -p config/deploy
create config/deploy.rb
create config/deploy/staging.rb
create config/deploy/production.rb
mkdir -p lib/capistrano/tasks
create Capfile
Capified# Capfile
require 'capistrano/setup'
# Include default deployment tasks
require 'capistrano/deploy'
require 'capistrano/rails'
require 'capistrano/bundler'
require 'capistrano/rvm'
require 'capistrano/puma'
# Load custom tasks from `lib/capistrano/tasks` if you have any defined
Dir.glob('lib/capistrano/tasks/*.rake').each { |r| import r }cap install also creates a config/deploy.rb file and a config/deploy directory. Change the config/deploy.rb file to look like:
# config valid only for current version of Capistrano
lock '3.4.0'

set :application,     'Bare Metal Things'
set :repo_url,        'git@github.com:sitepoint-editors/bare-metal-fun.git'
set :server           '206.128.156.201', roles: [:web, :app, :db], primary: true

set :user             'deploy'
set :puma_threads,    [4, 16]
set :puma_workers,    0

# Default branch is :master
# ask :branch, `git rev-parse --abbrev-ref HEAD`.chomp

# Default deploy_to directory is /var/www/my_app_name
set :deploy_to,     "/home/#{fetch(:user)}/apps/#{fetch(:application)}"
set :use_sudo,      false
set :deploy_via,    :remote_cache

# Puma
set :puma_bind,       "unix://#{shared_path}/tmp/sockets/#{fetch(:application)}-puma.sock"
set :puma_state,      "#{shared_path}/tmp/pids/puma.state"
set :puma_pid,        "#{shared_path}/tmp/pids/puma.pid"
set :puma_access_log, "#{release_path}/log/puma.error.log"
set :puma_error_log,  "#{release_path}/log/puma.access.log"
set :puma_preload_app, true
set :puma_worker_timeout, nil
set :puma_init_active_record, true
set :ssh_options,     { forward_agent: true, user: fetch(:user) }

# Default value for :scm is :git
# set :scm, :git

# Default value for :format is :pretty
# set :format, :pretty

# Default value for :log_level is :debug
# set :log_level, :debug

# Default value for :pty is false
# set :pty, true

# Default value for :linked_files is []
# set :linked_files, fetch(:linked_files, []).push('config/database.yml', 'config/secrets.yml')

# Default value for linked_dirs is []
# set :linked_dirs, fetch(:linked_dirs, []).push('log', 'tmp/pids', 'tmp/cache', 'tmp/sockets', 'vendor/bundle', 'public/system')

# Default value for default_env is {}
# set :default_env, { path: "/opt/ruby/bin:$PATH" }

# Default value for keep_releases is 5
set :keep_releases,   5

namespace :deploy do
  after :restart, :clear_cache do
    on roles(:web), in: :groups, limit: 3, wait: 10 do
      # Here we can do anything such as:
      # within release_path do
      #   execute :rake, 'cache:clear'
      # end
    end
  end
end$ cap production deploy
...loads of output...
DEBUG [29269dca] Command: cd /home/deploy/apps/bare_metal/current && ( RACK_ENV=production ~/.rvm/bin/rvm default do bundle exec puma -C /home/deploy/apps/bare_metal/shared/puma.rb --daemon )
DEBUG [29269dca] Puma starting in single mode...
DEBUG [29269dca] * Version 2.14.0 (ruby 2.2.1-p85), codename: Fuchsia Friday
DEBUG [29269dca] * Min threads: 4, max threads: 16
DEBUG [29269dca] * Environment: production
DEBUG [29269dca] * Daemonizing...
INFO [29269dca] Finished in 0.480 seconds with exit status 0 (successful)$ mkdir apps/bare_metal/shared/tmp/sockets -p
$ mkdir apps/bare_metal/shared/tmp/pids -p
$ mkdir apps/bare_metal/shared/config -pSecrets
Handling secrets in Rails has always been, well, fun. For our simple app, we just need to have a local value forSECRET_KEY_BASE, so I recommend we put a copy of config/secrets.yml on the server and then symlink it on deployment. So, open up that file locally, and put a real token value in for production. Change:production:
secret_key_base: production:
secret_key_base: 0c2e91d623cd62510e1ba6fc9ed7313461dc13b2068ff692f3a1803891870e6bb77c05bcfe27f7065e4fb1c380bd7fc720a336ea0ae231bf3bd32ecc34f8282bscp config/secrets.yml deploy@SERVER-IP:/home/deploy/apps/bare_metal/shared/config## config/deploy.rb
namespace :deploy do
...other tasks...
desc "Link shared files"
task :symlink_config_files do
on roles(:web) do
symlinks = {
#"#{shared_path}/config/database.yml" => "#{release_path}/config/database.yml",
"#{shared_path}/config/secrets.yml" => "#{release_path}/config/secrets.yml"
}
execute symlinks.map{|from, to| "ln -nfs #{from} #{to}"}.join(" && ")
end
end
before 'deploy:assets:precompile', :symlink_config_filesgit rm secrets.ymlcap production deploy should get it done.
Nginx Configuration
SSH into the server as root and typevi /etc/nginx/sites-enabled/default
upstream puma {
  server unix:///home/deploy/apps/bare_metal/shared/tmp/sockets/bare_metal-puma.sock;
}

server {
  listen 80 default_server deferred;
  # server_name example.com;

  root /home/deploy/apps/bare_metal/current/public;
  access_log /home/deploy/apps/bare_metal/current/log/nginx.access.log;
  error_log /home/deploy/apps/bare_metal/current/log/nginx.error.log info;

  location ^~ /assets/ {
    gzip_static on;
    expires max;
    add_header Cache-Control public;
  }

  try_files $uri/index.html $uri @puma;
  location @puma {
    proxy_set_header X-Forwarded-For $proxy_add_x_forwarded_for;
    proxy_set_header Host $http_host;
    proxy_redirect off;

    proxy_pass http://puma;
  }

  error_page 500 502 503 504 /500.html;
  client_max_body_size 10M;
  keepalive_timeout 10;
}
nginx -s stop
nginx- Make changes
- Commit changes to git and push to Github.
cap production deploy
Conclusion
This tutorial walked through deploying a Rails application to a CenturyLink Bare Metal server. The process of deploying the application really wasn’t much different than a regular server, once the Bare Metal server was provisioned. The advantages of using a Bare Metal server make this environment superior to a vanilla, cloud-based virtual machine. There is no worrying about shared resources, as Bare Metal servers are isolated like a physical machine. Bare Metal servers deploy faster, so you’ll be able to scale up when needed. Add in all the services that CenturyLink offers, and your entire DevOps needs can be completely met with a single provider.Frequently Asked Questions (FAQs) about Deploying Ruby Apps
What are the benefits of deploying Ruby apps on bare metal over other methods?
Deploying Ruby apps on bare metal provides several advantages. Firstly, it offers superior performance as there is no virtualization layer, which can often cause a slowdown. Secondly, it provides more control over the hardware and software environment, allowing for better customization and optimization. Lastly, it can be more cost-effective in the long run, especially for larger applications that require significant resources.
How does self-sufficient containers deployment work for Ruby apps?
Self-sufficient containers deployment involves packaging the application and all its dependencies into a single, standalone unit. This container can then be run on any system that supports the containerization technology, such as Docker. This approach simplifies deployment and reduces the risk of compatibility issues, as the application environment is consistent across all systems.
What are the key considerations when choosing a deployment method for Ruby apps?
When choosing a deployment method for Ruby apps, you should consider factors such as the complexity of the application, the resources available, the expected load, and the team’s expertise. For instance, bare metal deployment might be suitable for high-performance applications with a large user base, while containerization might be a better choice for smaller, more modular applications.
How can I ensure the security of my Ruby app during deployment?
Ensuring the security of your Ruby app during deployment involves several steps. Firstly, you should always use secure, up-to-date versions of Ruby and any dependencies. Secondly, you should implement secure coding practices to minimize vulnerabilities in your code. Lastly, you should use secure deployment methods, such as encrypted connections and secure servers.
What are the common challenges in deploying Ruby apps and how can they be addressed?
Common challenges in deploying Ruby apps include managing dependencies, ensuring performance, and maintaining security. These can be addressed by using tools like Bundler for dependency management, performance monitoring tools for identifying bottlenecks, and secure coding and deployment practices for security.
How can I optimize the performance of my Ruby app during deployment?
Optimizing the performance of your Ruby app during deployment can involve several strategies. These include precompiling assets, using a suitable web server, optimizing database queries, and implementing caching. Additionally, you should regularly monitor your app’s performance and make adjustments as necessary.
What tools can I use to deploy Ruby apps?
There are several tools available for deploying Ruby apps, including Capistrano for automation, Docker for containerization, and various cloud platforms like Heroku and AWS. The choice of tool depends on your specific needs and the complexity of your application.
How can I handle database migrations when deploying Ruby apps?
Database migrations can be handled using Rails’ built-in migrations feature. This allows you to define changes to your database schema in a way that can be easily applied and rolled back. You should always test your migrations thoroughly before deploying them to ensure they work as expected.
How can I roll back a deployment if something goes wrong?
Rolling back a deployment can be done using the deployment tool you’re using. For instance, Capistrano provides a rollback command that reverts the application to its previous state. However, you should always have a backup plan in case the rollback fails, such as restoring from a backup or manually reverting changes.
How can I automate the deployment process for my Ruby app?
Automating the deployment process for your Ruby app can be achieved using tools like Capistrano or Docker. These tools allow you to define a series of steps that are executed automatically each time you deploy your app. This not only saves time but also reduces the risk of human error.
 Glenn Goodrich
Glenn works for Skookum Digital Works by day and manages the SitePoint Ruby channel at night. He likes to pretend he has a secret identity, but can't come up with a good superhero name. He's settling for "Roob", for now.